
How to Automate and Schedule CSV Report Delivery via Email from Power BI using Power Automate

Regularly, I encounter requests from users expressing a need for customised, scheduled reports from Power BI, rather than mere screenshots of specific dashboards. While this isn’t a straightforward task in Power BI, it can be done easily in Power Automate. In this blog post, we will delve into how to effectively send and schedule tailored reports from Power BI datasets to any user within your organisation via email
🎯Objective
Send a scheduled report from a Power BI Dataset/Semantic Model that was pre-built
🔨Tools Required
- Power Automate
- Power BI Desktop
- Power BI Workspace
🪄 Potential Use Cases
- Send scheduled reports to users via Email/Teams
- Upload the report to OneDrive/SharePoint
✨ Solution Overview
1. Extract data from the Semantic Model using Power BI Desktop
2. Integrate this query into a Power Automate action
3. Set up and execute the Power Automate flow on a schedule
4. Distribute the resulting CSV File via Outlook Email
📝 Step By Step Guide
Power BI Steps
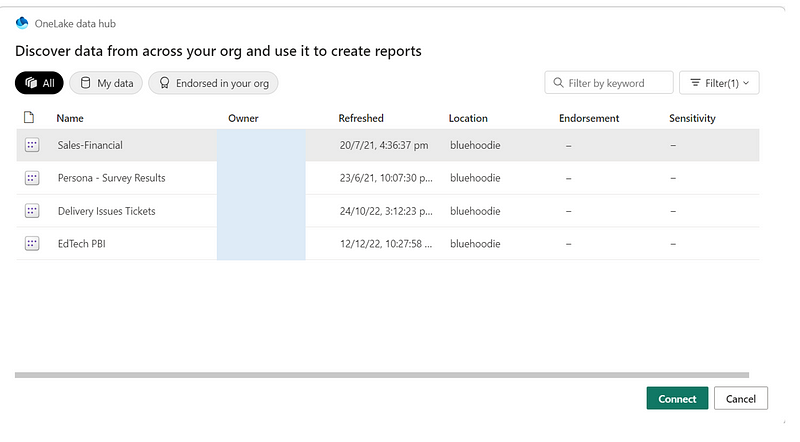
- Open Power BI Desktop, Get Data and select Power BI Datasets/Semantic Model

2. Choose your desired dataset from the Semantic Model
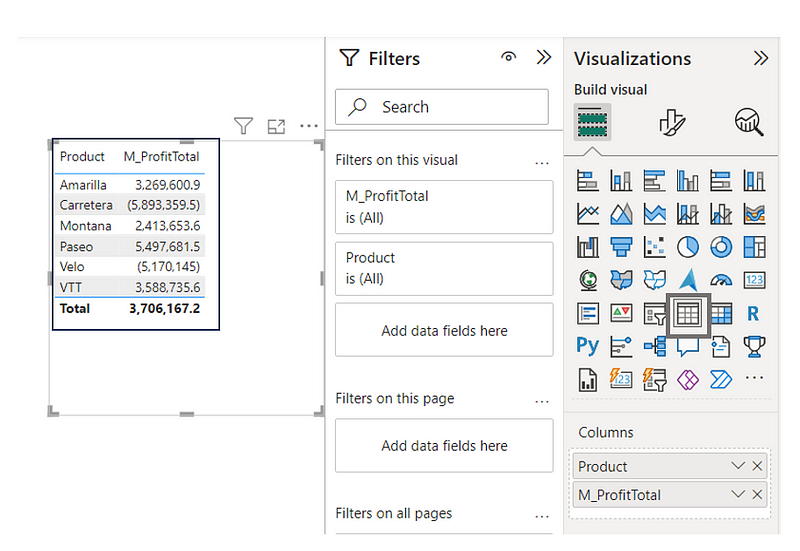
3. In the Visualizations Panel. Select Table, and drag and drop the columns to create your table
4. Navigate to View-> Performance Analyzer and Start Recording

5. Refresh the visual and then stop recording
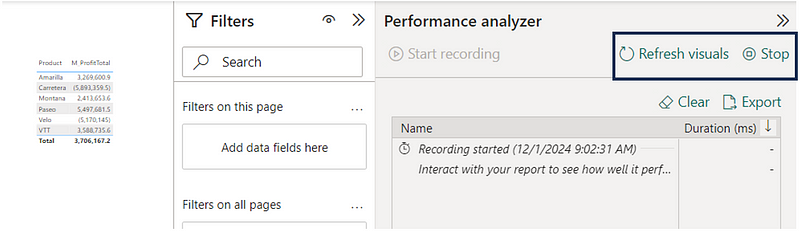

6. Copy the query (to be used later in Power Automate)

Power Automate Steps

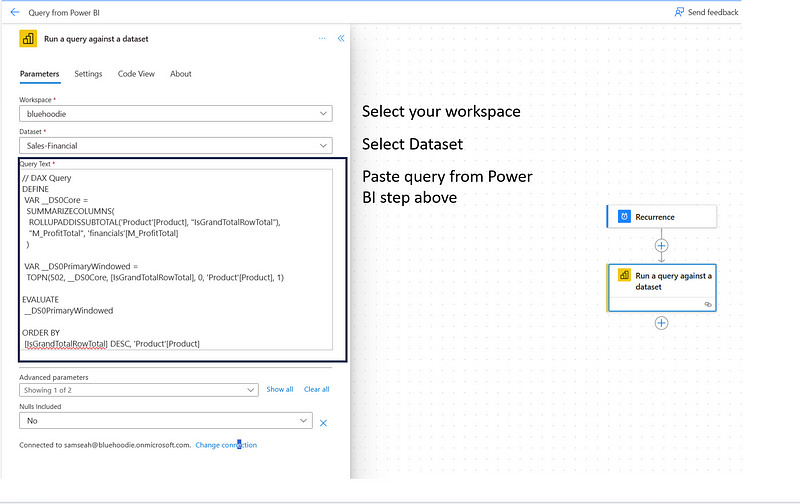
- Set a trigger for ‘Recurrence’ (e.g., once a month).

2. Add a ‘Power BI Action’ to run the query against your dataset/semantic model.
- Workspace: Select PBI Workspace
- Dataset: Select dataset/semantic model
- Query Text: Paste the copied query text from Step 6 in Power BI Steps
3. Add a “Condition” action to check if there are no records returned from Power BI Dataset query
empty(outputs('Run_a_query_against_a_dataset')?['body/firstTableRows'])
4. Add an action to ‘Create CSV Table’. Select the first table rows from the dynamic content

5. Add an ‘Outlook — Send an email’ action
- Fill in the Subject and Body Message
- Under Advanced Parameters, select Attachments
- Under Attachment Name, Input Name
- Under Attachment Content, select Output from Create CSV Table dynamic content

6. Test this flow manually to ensure you receive the scheduled report via email


