
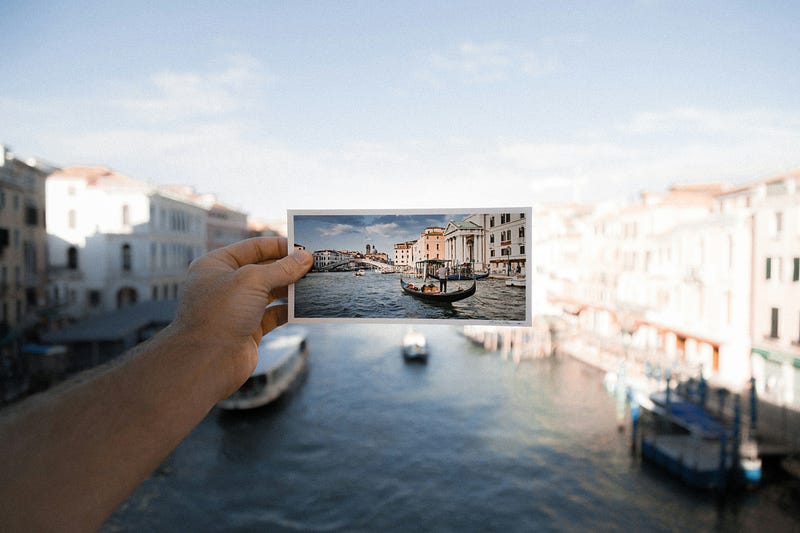
How to Add and Caption Pictures On Medium
A Step-By-Step Guide for the Writing Lovers’ Cabin Publication
Thank you for taking the time to improve your picture game!
If you are already one of our writers: you’re amazing and we love you, keep up the good work!
If you are reading this and are not one of our writers… would you like to join us?
In our cozy cabins, we only accept human-created, copyright-free, and watermark-free fully credited pictures.
Here are three ways to include such pictures in your medium drafts: via the Unsplash built-in tool, from your private collection, or from a trusted website in this example I’m using Pexels.
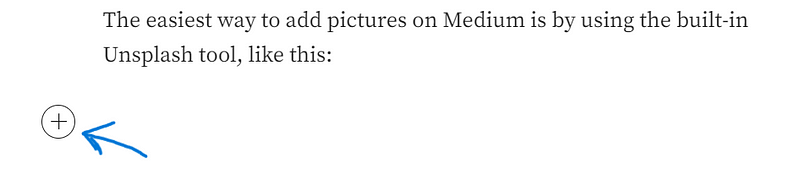
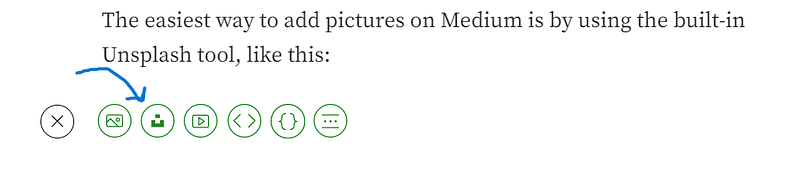
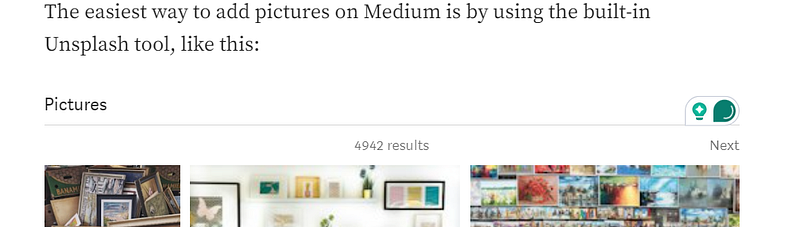
The easiest way to add pictures on Medium is by using the built-in Unsplash tool, like this:
- Hit enter for a new line and a “+” icon will appear on the left side. Click on it.
2. From the menu that pops up, select the second icon, as shown in the picture.
3. This will bring up a prompt asking you to type a keyword to search Unsplash.
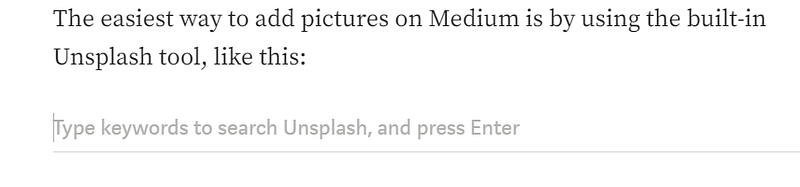
4. Type the keyword for the picture you’d like to find, and then hit “Enter”. I have used “Pictures” as an example. This will show you all available results in the Unsplash archive fitting with the chosen keyword. Find and select your picture.
5. Let the built-in tool do the rest!
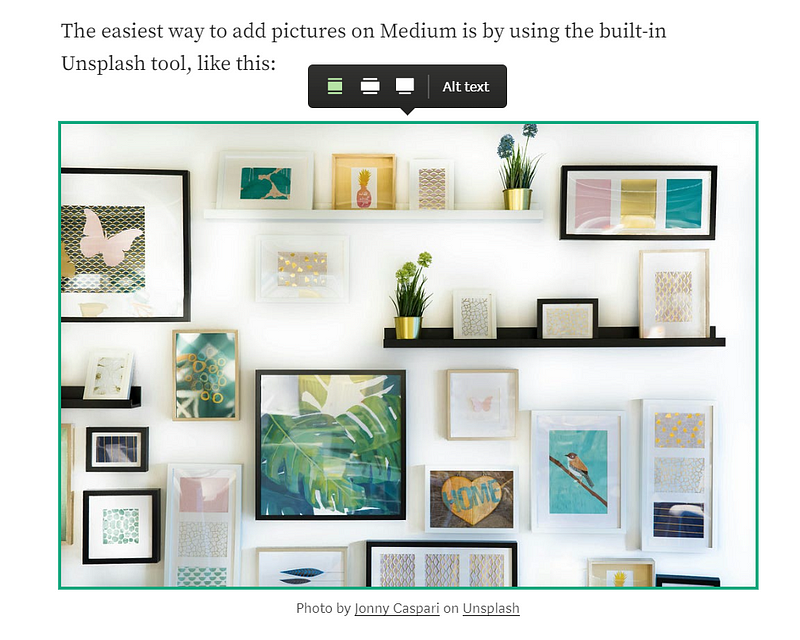
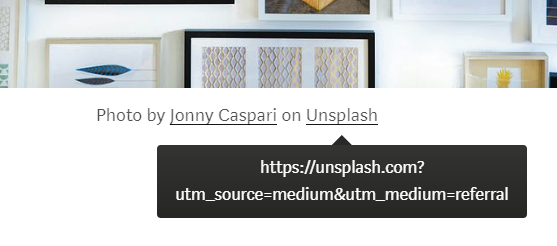
6. You’ll see that there are underlined words in the caption now. This is very important: leave them as they are. They show the link to the credited artist and their picture…
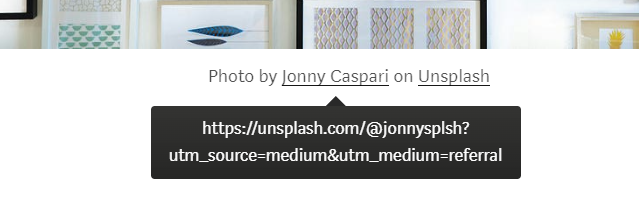
…and the source where the picture was taken from.
We know that Medium says Captions are not mandatory, because you are assuming the legal responsibility in case of copyright infringement and are liable to lawsuits.
At the cozy cabin, we don’t want these vibes and ask you to credit all of your pictures.
By leaving the links crediting your sources, you are confirming to all your readers and the editors of the publication that your pictures are not infringing copyright.
But what if you want to add a picture you have taken yourself or one that you bought through a stock service?
Here is how to upload a picture from your computer:
- Hit enter for a clean line in your Medium draft. Then click on the “+” icon on the left side of the screen.

2. From the horizontal menu, choose the first icon, to upload a picture from your computer.

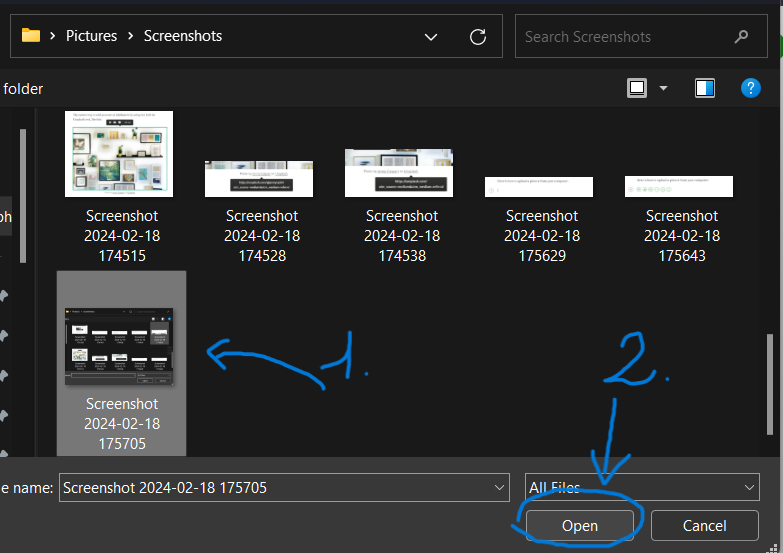
3. In the right folder, select the picture you want to upload and hit “Open”.
3. Medium will now show your picture without a Caption. Click underneath the picture to start typing your caption.

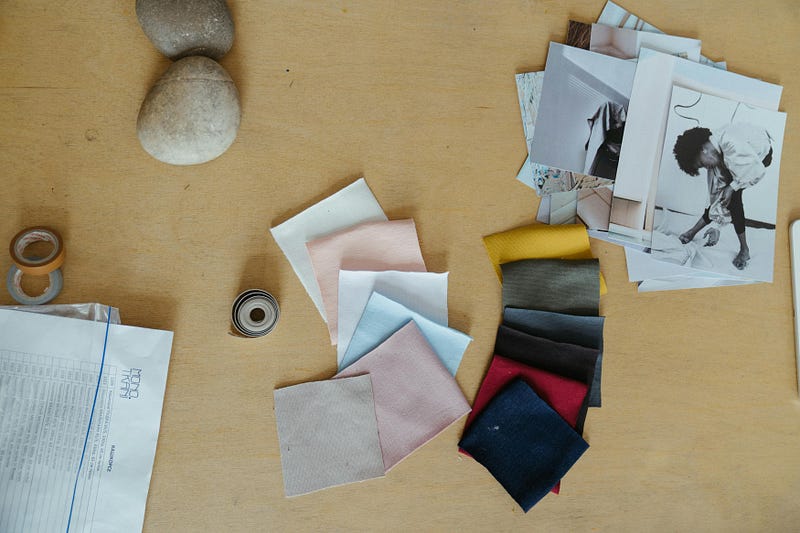
4. Describe the picture in the most fitting way. If it is a picture taken by you, make sure to include this information. Here’s my example:

But what if you couldn’t find the right picture on Unsplash but don’t have one of your own? You can use a trusted source. Make sure the website you choose from offers watermark-free pictures that provide credit to the photographer. I’m a big fan of Pexels.com and will use it for the following example.
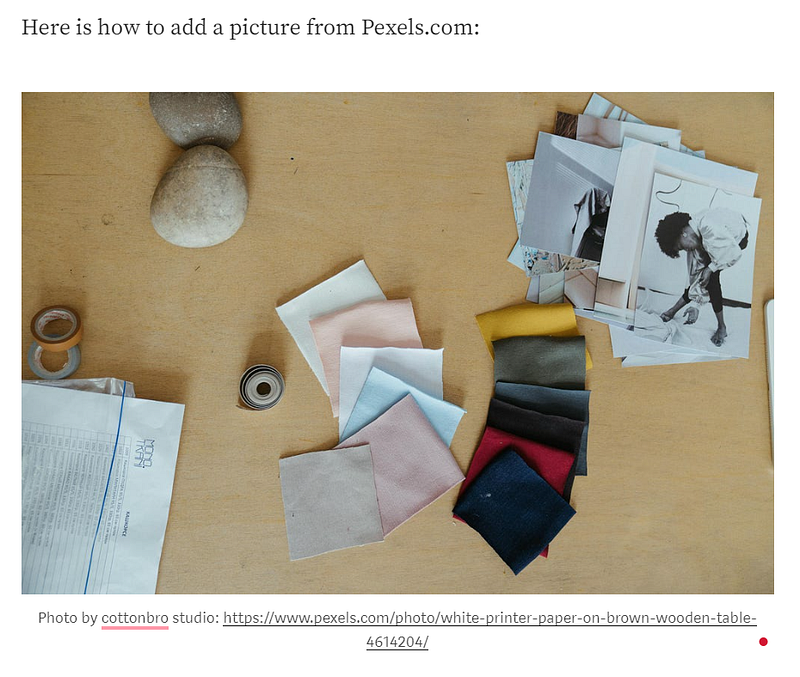
Here is how to add a picture from Pexels.com.
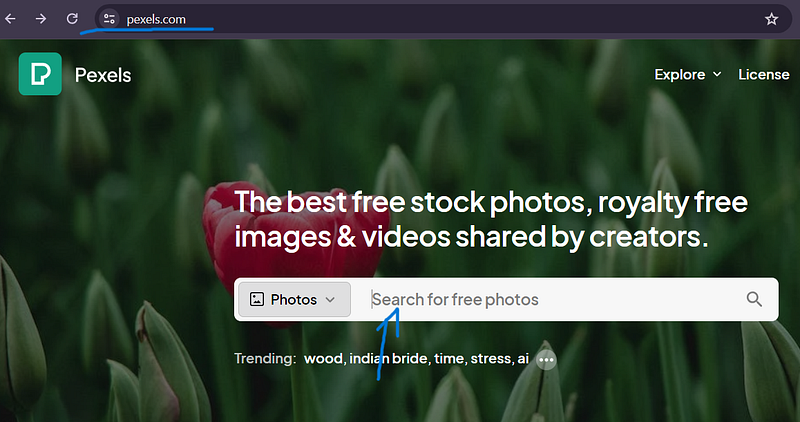
- Open a new tab and go to Pexels.com and locate the search bar in the middle of the website.
2. Type your keyword in the search bar and hit enter.

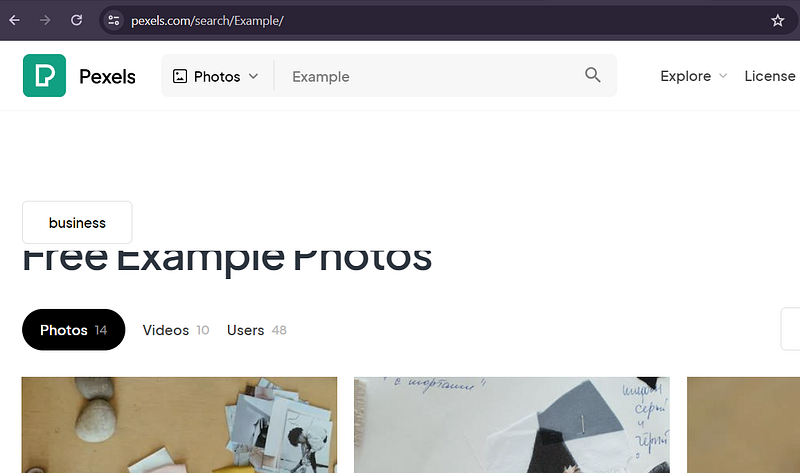
3. You will be directed to a result page that will look like this.
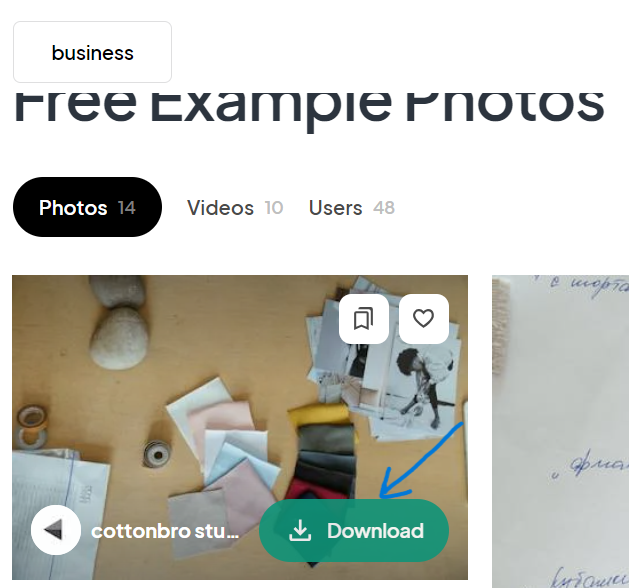
4. Choose the picture you like and hit the green download button
5. After your download starts, you’ll be directed to the credits page. DO NOT close this page. It contains the information for the caption.
6. Back in your Medium draft, hit enter to bring in the new line menu. Click on the “+” icon on the left side of the text.

7. From the horizontal menu, click on the first icon.
8. Select the correct folder (Where you downloaded the picture from Pexels.com), select the picture, and hit “Open” just like we did when learning to upload pictures from your computer.

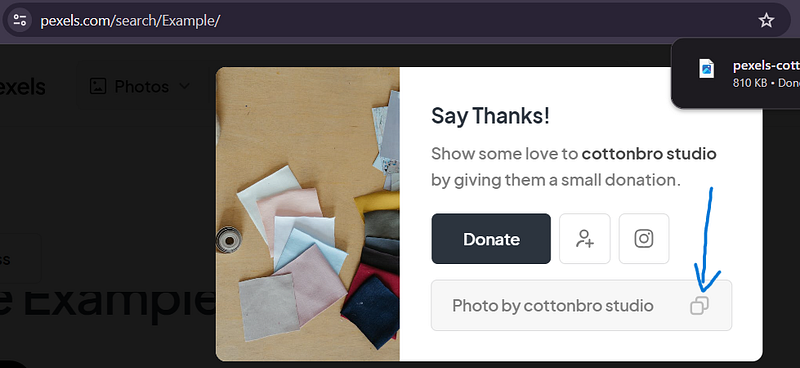
9. Your picture will be added to your draft without a Caption. Go back to the Pexels.com tab, and click the Copy icon, to copy the credits of the picture, as shown in the screenshot.
10. Back to your Medium Draft, add the copied text inside the caption underneath your image. You may need to click once on your image to bring back the line.

11. Now your picture will have a long link as its caption. If you want you can stop here. But if you want your picture’s caption to look more professional, check out the following steps as well.
12. Select the whole link that shows up after the “:” and cut it (Ctrl + X, if you’d like a shortcut)

13. Select the whole name of the artist (it’s everything included between the “Photo by” and the “:”), and wait for the black menu to pop up. Then click on the third icon, the one shaped like a chain.

14. This will bring up a black bubble for you to paste the link inside of it.

15. Paste the whole link inside this bubble (Ctrl+V if you’d like a shortcut).

16. Now your artist is credited and if you hover your mouse on their name, you will see the link inside. It’s time to credit the source.

17. Write where you took the picture from. In our case Pexels.

18. Grab the link of where you took the picture from and copy it in its entirety.

19. Repeat the same steps as you just did for the artist. Select the word Pexels, wait for the bubble menu to show up, and click on the third icon.

20. Paste the whole link inside the bubble and hit enter.

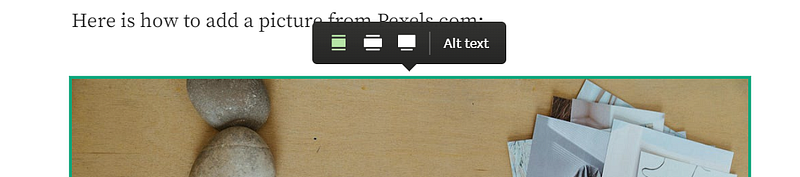
Bonus: What is this menu that appears above the picture when I left-click on it? The first three icons let you choose the size of the picture in comparison to the text of your post.
- The first icon will make the picture as big as the external margins of your text:
- The second icon will make the picture slightly bigger than your text

- The third icon will make the picture fill the screen of any device no matter the resolution, becoming much much bigger than the text.

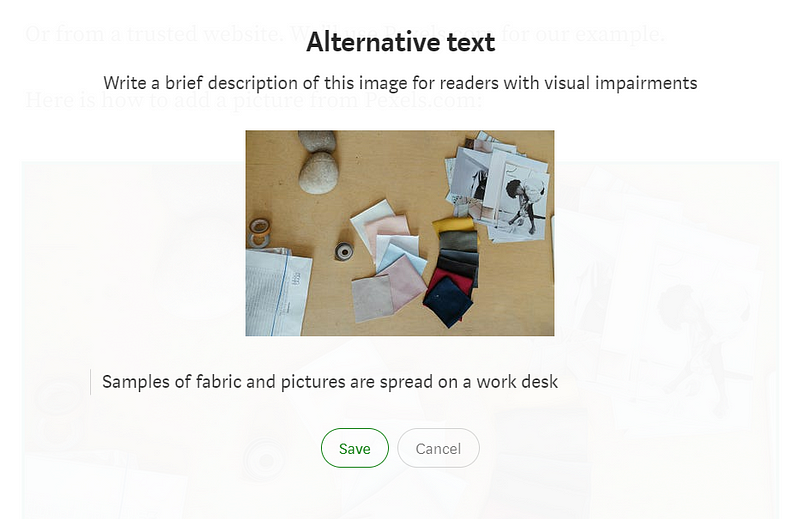
- The fourth icon allows you to provide the “Alt text”, the textual description of the picture for readers with visual impairments. Your Alt text will be read out loud by the player for those who listen to stories.
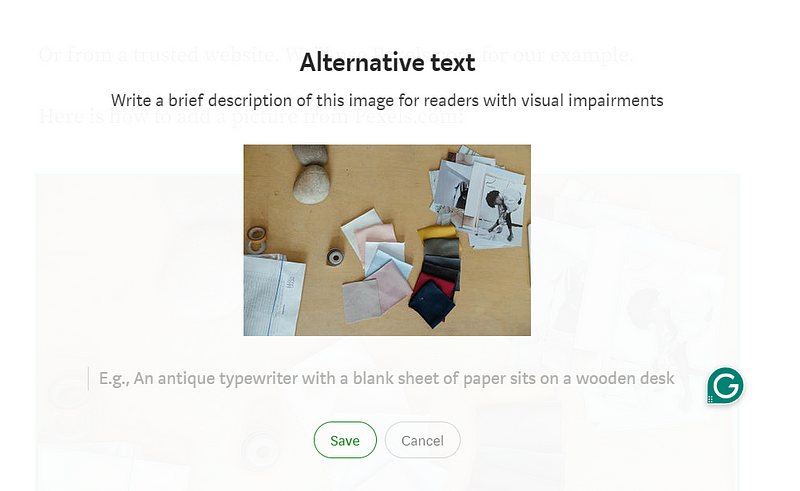
Just write your description and hit enter:
Once your picture has been fully credited it will look like this:
Thank you for reading and I hope this proves useful. If anything is unclear or you have any related questions, please leave them in the comments: I’ll be happy to help!