
DIY
How I Created and Photographed This Napkin Decoupaged Utility Step Project
DIY and Photo Project
This week’s article is slightly different from what I typically write. It’s still photography-related but with an added DIY decoupage project.
Here are the materials I used and where I bought them; however, you can find all of these materials at your local retail megastore or hardware store.
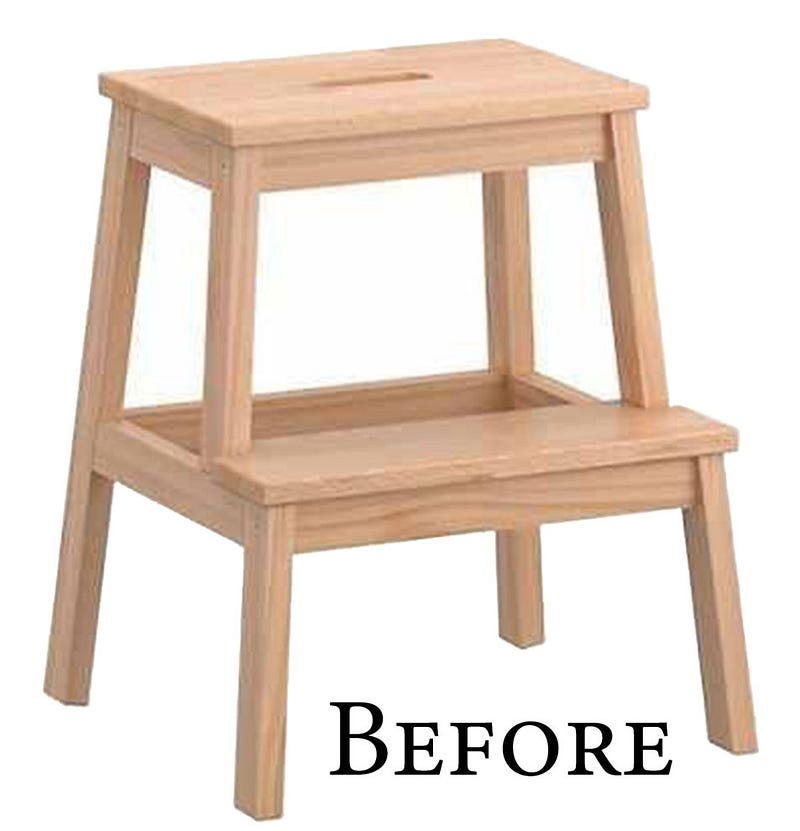
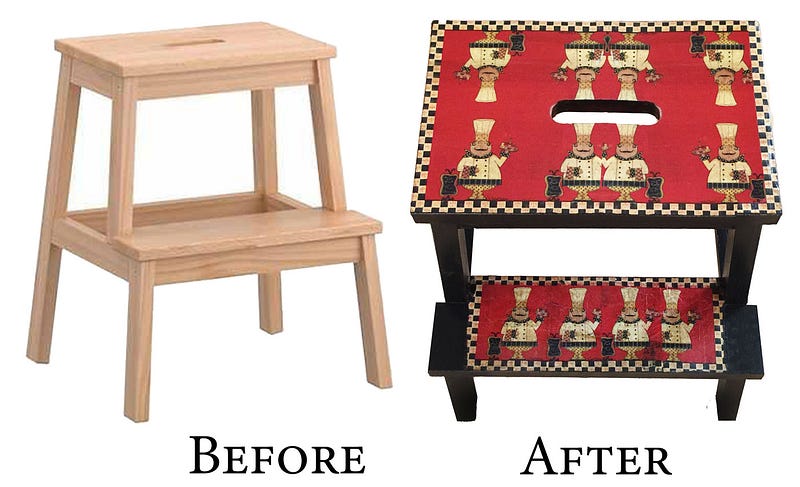
- Utility Step (Ikea)
- Black Paint for Wood (optional)(Home Depot)
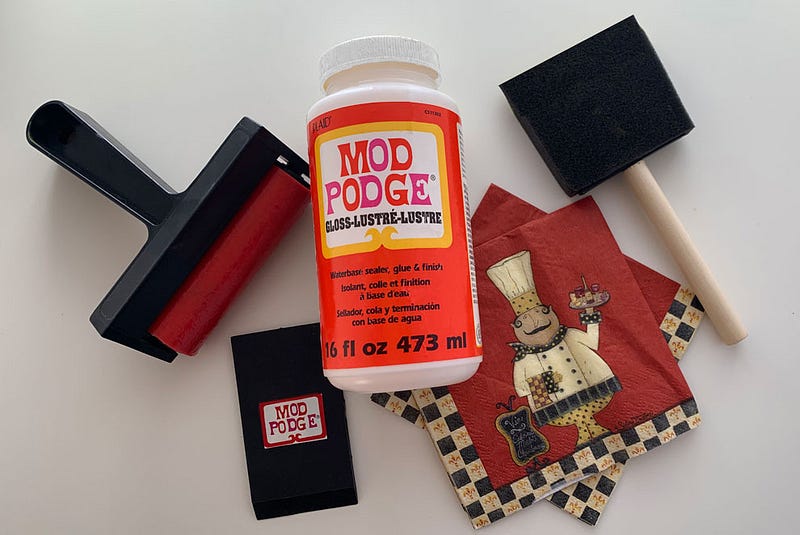
- Mod Podge (Michael’s)
- Mod Podge Roller or Squeegee (Michael’s)
- Foam Paintbrush (Michael’s)
- Decorative Napkins (Dollar Store)
- Iron and Cotton Cloth (optional)
Prepping Materials:
- Napkins: carefully separated decorative top ply layer (napkins had 2-ply).

2. Utility Step: Cleaned bench with soap and water to remove oils and dirt (let dry).
3. Iron (this part is optional). I ironed out the creases from the napkins. I placed a cotton cloth between the napkin and the iron to keep the iron from getting damaged by the ink on the napkins.
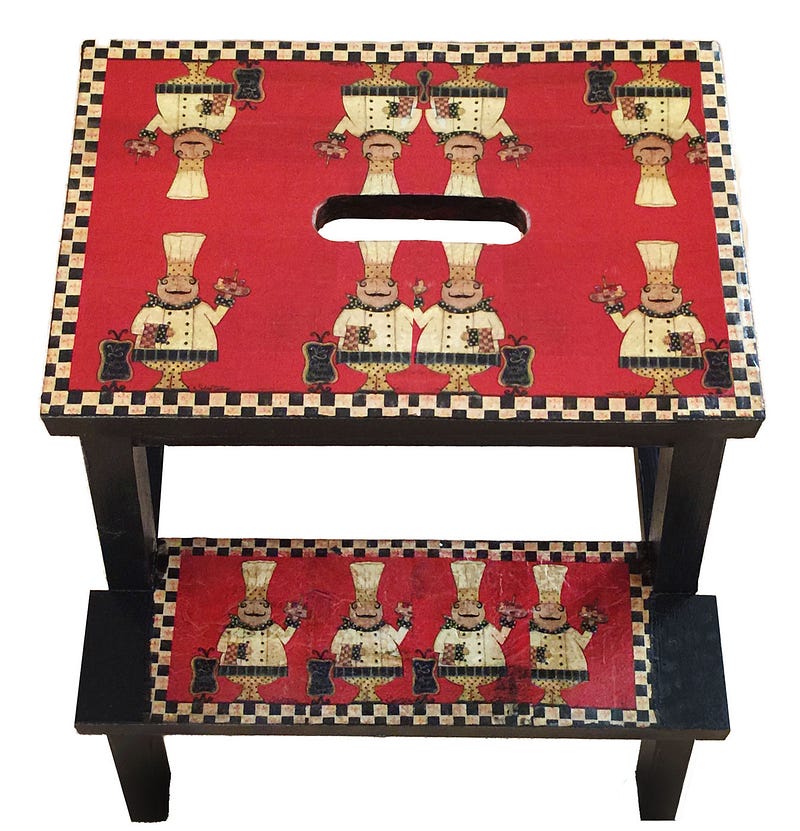
Steps to complete my decoupage project :
- Paint the bench (let dry).
- Apply Mod Podge and spread with the sponge brush on the section you want to place the napkin (for better control, I did one side at a time).
- Carefully lay the napkin on top of the Mod Podge.
- Carefully use the roller or the squeegee to remove any air bubbles; make sure not to tear the napkin.
- Repeat on the other side and let dry.
- Last, add Mod Podge over the napkin and gently brush with the sponge brush.
- Let dry, and it’s ready to be photographed.
Photographing Project:
You can use any camera to photograph your project. If you want to remove any distracting background, use a light tent, foam boards, or a wall.
For better picture results:
1. Crop the picture tightly. 2. In your photo program of choice, open the tent’s whites and remove all seams from the tent.
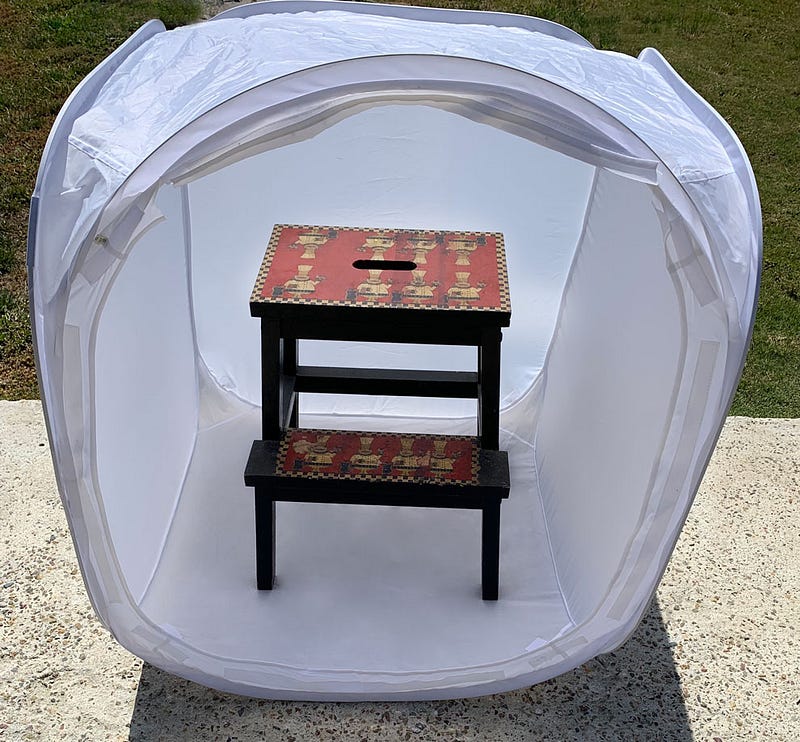
The light tent is excellent if you don’t have a studio or any other place indoors. The light tent also provides even lighting and removes any unwanted shadows caused by the sun or any other light source.
I hope this napkin decoupaged project has sparked some inspiration.
Thank you for stopping by and reading my post.