
How I Built My Next.js Blog Using Nextra and Tailwind CSS
I wanted to create a blog website, a place where I can share my knowledge, especially about coding and tech stuff.
The thing is, I wanted to build my blog using Next.js, not to use WordPress or any other CMS.
Actually, there are not a lot of templates for Next.js, and I’m not a great designer, so it was a bit tricky.
There are several options for Next.js blogs, like:
- Next.js Blog Starter Kit
- Headless CMS with Sanity (or similar headless CMS)
- Tailwind CSS Blog
But all of them are not exactly what I wanted, especially in terms of inserting code snippets and syntax highlighting.
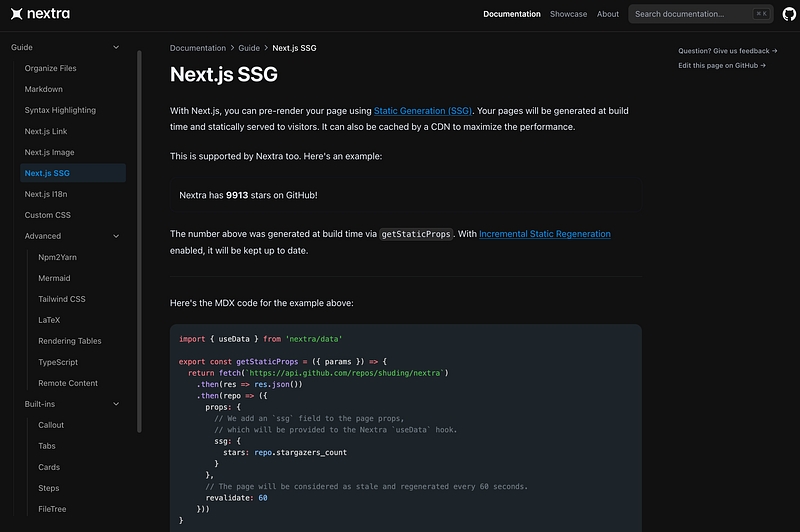
Then, I discovered something awesome called Nextra, which is mainly aimed at building documentation websites, but since I’m mostly writing tutorials and guides, it fits perfectly for my needs.

Each page is a markdown file, with great support for syntax highlighting.
It is even possible to insert React components into markdown files! Super cool!
There are other awesome features like dark mode, search, table of contents, and more.
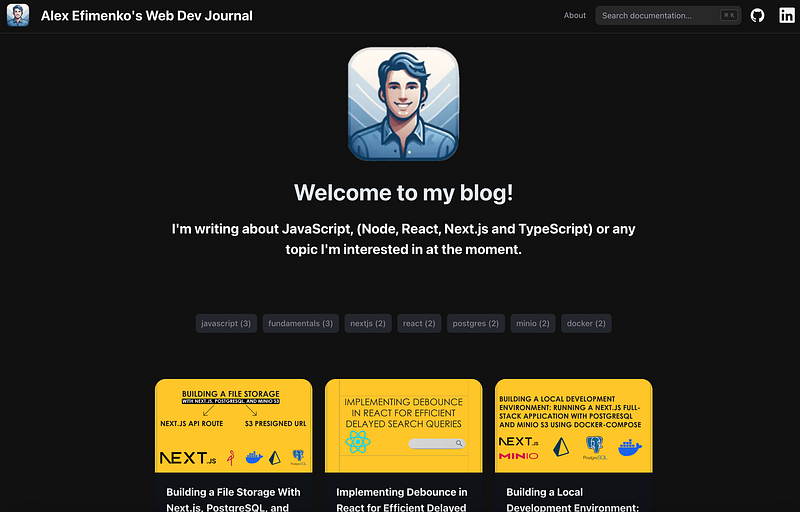
From my point of view, It looks professional and clean, and I’m happy with the result.
In my blog, I also used some components from The Guild to build the tags and post list.
Steps to Run Your Blog Using Next.js, Nextra, and Tailwind CSS
Step 1: Setting Up Your Project
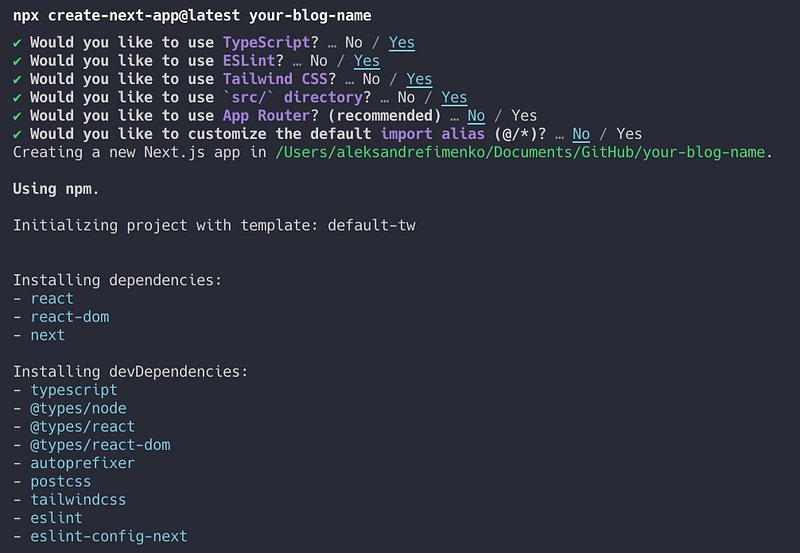
- Create a new Next.js app by running
npx create-next-app@latest your-blog-name. Make sure not to use App Router, Nextra does not support it for the moment. - Navigate into your project directory
cd your-blog-name.
Step 2: Installing Nextra
- Install Nextra and its dependencies by running
npm install nextra nextra-theme-docs. - Create
next.config.jsin your Next.js root directory
const withNextra = require('nextra')({
  theme: 'nextra-theme-docs',
  themeConfig: './theme.config.jsx'
})

module.exports = withNextra()

// If you have other Next.js configurations, you can pass them as the parameter:
// module.exports = withNextra({ /* other next.js config */ })
3. Create Docs Theme Config theme.config.jsx in your project’s root directory
export default {
  logo: <span>My Nextra Documentation</span>,
  project: {
    link: 'https://github.com/aleksandr-efimenko/your-blog-nextra'
  }
  // ... other theme options
}
More info about the setup is in the Nextra Documentation
Step 3: Configure Tailwind for Markdown files
Add .md and .mdx files to the content list in tailwind.config.js:
import type { Config } from "tailwindcss";

const config: Config = {
  content: [
    "./src/pages/**/*.{js,ts,jsx,tsx,md,mdx}",
    "./src/components/**/*.{js,ts,jsx,tsx,md,mdx}",
    "./src/app/**/*.{js,ts,jsx,tsx,md,mdx}",
  ],
  theme: {
    extend: {
      backgroundImage: {
        "gradient-radial": "radial-gradient(var(--tw-gradient-stops))",
        "gradient-conic":
          "conic-gradient(from 180deg at 50% 50%, var(--tw-gradient-stops))",
      },
    },
  },
  plugins: [],
};
export default config;
Step 4: Creating Your Blog Content
- Start writing your blog posts as markdown files in the
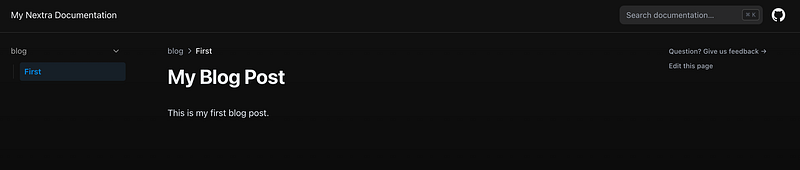
pagesdirectory. Create ablogfolder for a better structure insidepagesdirectory. - Create a file
first.mdin the pages/blog/ folder with the following content:
# My Blog Post

This is my first blog post.
3. Use the Front Matter in markdown files to define metadata such as title, date, and tags. For example:
---
title: 'My First Blog'
date: '2024-02-01'
---

# My Blog Post

This is my first blog post.
4. Delete existing index.tsx in the root folder and create index.md file for the main page.
Step 5: Customizing Your Blog
- Customize your layout and styles by editing the
_app.jsand using Tailwind CSS utilities. - Add additional features like tags, posts, and table of contents by leveraging Nextra’s plugins and configurations.
Step 6: Running Your Blog Locally
- Start your development server by running
npm run dev. Your blog will be available athttp://localhost:3000. - The first blog post will be at
http://localhost:3000/blog/first
Step 7: Deploying Your Blog
- Deploy your blog using Vercel, Netlify, or any other platform that supports Next.js.
- Follow the deployment instructions specific to your platform, typically involving pushing your code to a Git repository and connecting it with the deployment service.
The blog is available here — https://your-blog-nextra.vercel.app/
The complete code is available on GitHub. Feel free to fork it and use it as a starting point for your blog.
With these steps, you can customize your blog to fit your style and needs to share your insights and knowledge.
Cool, right? I hope you find this helpful and that you enjoy building your blog with Next.js, Nextra, and Tailwind CSS. Happy coding!
Enjoyed the read? Hit 👏 like it’s a high-five — to motivate me to bring more stories!
Stackademic
Thank you for reading until the end. Before you go:


