
How I Built a Stable Diffusion Prompt Optimizer Using OpenAI’s API and NextJS
There is very little that this API can’t do

When it comes to Stable Diffusion, the model is important, but the actual gold is on the prompt. The better you write your prompt the more control you have over the resulting image and, usually, the better the quality is.
This is why some UIs that work on top of Stable Diffusion try to simplify this by making it a lot easier for users to write their prompts, and then run lots of optimizations behind the curtain. Giving users better results with less effort from them.
In my case, I’ve been building VirtualSnap (a SD-powered product photography studio) for a couple of months now and I’ve noticed that the little prompt optimization I had done was not cutting it.
So I decided to add some “intelligence” to the mix, and here is how I did it.
The initial optimization
VirtualSnap is a NextJS app, you can actually see the full code here, it’s open source.
And the initial “prompt optimization” I added was meant to keep users from having to think about the actual prompt. Instead, I just wanted them to describe the product they were photographing.
You can see in the screenshot below, the user simply describes the product as “a silver ring with a sun embossed”. However, that’s not the prompt the SD model is receiving.
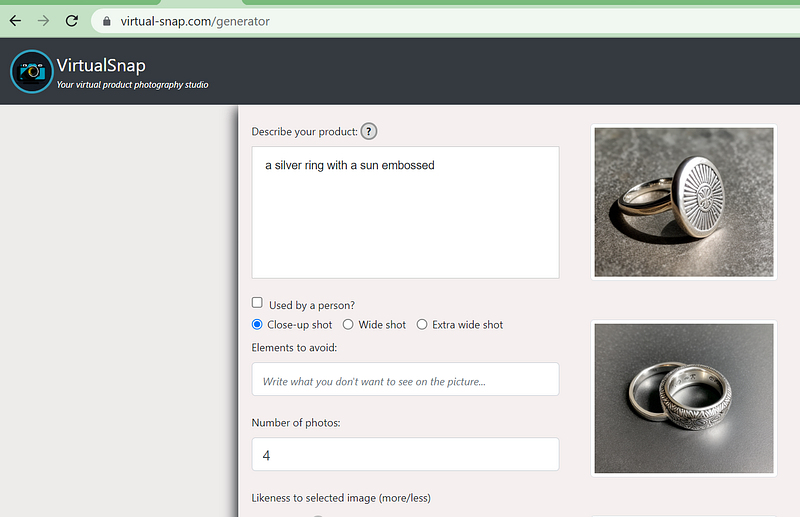
The actual prompt is something along the lines of:
“masterpiece, product photography of a silver ring with a sun embossed, , (closeup shot:1.8), centered:1.9 ,(in frame:1.9),bokeh, 8k uhd, dslr, soft lighting, (high quality:1.8), Fujifilm XT3”
Notice the bolded section, that’s what the user actually entered, the rest is added by the following code:
let PROMPT_TEMPLATES = {
    'normal': "masterpiece, product photography of [input], [environment], [shot_type], centered:1.9 ,(in frame:1.9),bokeh, 8k uhd, dslr, soft lighting, (high quality:1.8),  Fujifilm XT3",
    'normal_wide_shot': "masterpiece, high quality photo of [input], [environment], [shot_type], centered:1.9 ,(in frame:1.9),bokeh, 8k uhd, dslr, soft lighting, (high quality:1.8), Fujifilm XT3",
    'person': "masterpiece, detailed photo of (a person using [input]):1.8,[environment], product photography, [shot_type] , centered:1.9 ,(in frame:1.9), bokeh, 8k uhd, dslr, soft lighting, high quality, film grain, Fujifilm XT3",
}
const FIXED_NEGATIVES = "blur, haze, nsfw, naked, low quality"

function parseEnvRequirements(env) {
    const envMapping = {
        "random": "",
        "livingroom": "inside the livingroom of a house",
        "bedroom": "inside the bedroom of a house",
        "backyard": "in the backyard of a house, trees, fence",
        "nature": "out in the woods, trail in nature",
        "table": "on top of a table",
        "cube": "on top of a cube",
        "plain": "no environment, plain background",
    }

    if(envMapping[env]) {
        return envMapping[env]
    }
    return ""
}

function getShotType(shotType) {
    if(shotType == 'shot-type-wide') {
        return '(wide shot:1.8)'
    }
    if(shotType == 'shot-type-close') {
        return '(closeup shot:1.8)'
    }

    if(shotType == 'shot-type-extrawide') {
        return '(extra wide shot:1.8)'
    }

}

function getPromptTemplateIndex(usedByPerson, shotType) {
    if(usedByPerson) {
        return 'person'
    }
    if(!shotType) return 'normal';

    if(shotType.indexOf("wide") != -1) {
        return 'normal_wide_shot'
    }
    return 'normal'
}


async function getFinalPrompt({prompt, usedByPerson, shotType, env}, user_id) {
    const productNameRegExp = /\{([a-zA-Z 0-9]+)\}/g;
    let index = getPromptTemplateIndex(usedByPerson, shotType)
    let text = PROMPT_TEMPLATES[index]
            .replace("[input]", prompt)
            .replace("[environment]", parseEnvRequirements(env))
            .replace("[shot_type]", getShotType(shotType))

    let ret = {
        prompt: text,
        lora: []
    }
    let count = 1;
    let matches = null;
    while( (matches = productNameRegExp.exec(text)) !== null) {

        let lora_url = await getLoraURL(matches[1], user_id)
        ret.prompt = ret.prompt.replace(matches[0], `<${count}>`)
        ret.lora.push(lora_url)
        count++;
    }

    return ret;
}
There is a lot going on there, but essentially, I’m wrapping the user’s prompt with my own, more detailed one. I cover things like the type of shot, the type of photo, and the environment (if any) where the product is located.
But that’s not enough, this leaves the product at the mercy of the quality of the model I’m using. I’m already using a great SD model, but then again, models can be further fine-tuned with the help of LORAs.
But you have to pick the right now, so let’s see how we can do that.
What exactly are LORAs then?
Without going into a lot of details — because after all, I’m no expert here — , LORAs are small-ish files (compared to the GB-size files of the model, LORAs tend to be just a few KB), that have very specific information about either a person, an object or a style.
So you can use these LORAs to, for example, put yourself in the picture (if you train a LORA on your face for instance), or take an existing object and place it somewhere else, like I did with this toy car that suddenly is now parked in the middle of the highway surrounded by nature.

I want to try and use specific LORAs to improve the quality of the photos VirtualSnap generates by using specific style LORAs, like ones trained specifically on food pictures, others on jewelry, etc.
The problem here is to understand how to parse the input from the user to understand what they’re trying to show in a way that can adapt to the many different ways of saying the same thing.
Here is where the OpenAI API comes in very handy!
Generic prompt categorization with a few lines of code
I’m not going to lie, my first attempt was to try and use an NLP library for Node, something like Natural. But the results weren’t great out of the box, I needed to tweak it a lot, which was frustrating considering I could just give the prompt to ChatGPT and ask it to tell me what the prompt was about.
And that’s when it hit me. Why don’t I use ChatGPT for that! Or rather, the next best thing: one of the LLMs that OpenAI provides.
I had used the API in the past, and I knew how simple it was, so getting a quick sample code running was no issue.
All I had to do was:
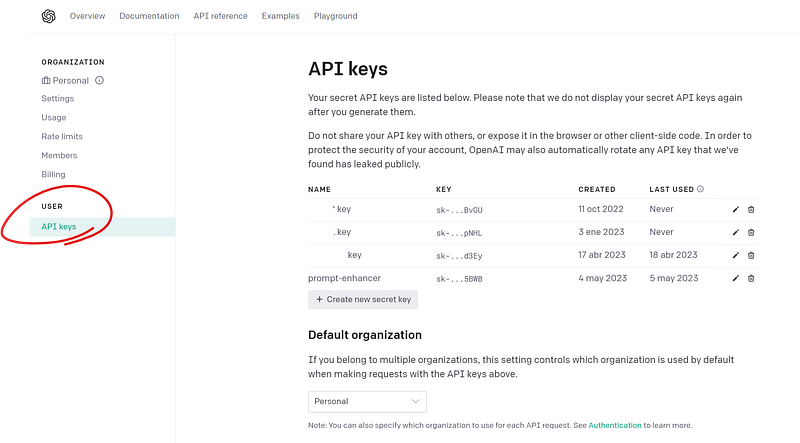
- Install OpenAI’s npm package with
npm i openai - Get a new API key from OpenAI’s “API Keys” section on the Account settings page:
- Use the following code with the API:
const { Configuration, OpenAIApi } = require("openai");

const configuration = new Configuration({
    apiKey: process.env.OPENAI_API_KEY,
});
const openai = new OpenAIApi(configuration);

async function analyzePrompt(prompt) {
    const response = await openai.createCompletion({
        model: "text-davinci-003",
        prompt: <the actual prompt for the API>
        temperature: 0,
        max_tokens: 60,
        top_p: 1.0,
        frequency_penalty: 0.5,
        presence_penalty: 0.0,
    });

    let resp = response.data.choices[0].text
    const topics = resp.split("\n")[2].replace("Topics: ", "").split(",").map( t => t.trim().toLowerCase())
    return topics;
}
That is essentially how you use the OpenAI API. I’ve saved by API Key on an env variable called OPENAI_API_KEY (which in Next.js can easily be saved inside the .env file that gets loaded automatically).
Then you use the createCompletion method, which is used to ask questions or request the model to complete your text.
The model selected is text-davinci-003 , which is a GPT3 type of model that is ideal for text completion.
Note that If you’re doing something like a chatbot, the
gpt-3.5-turbomodel is better and cheaper.
Out of all the other parameters (which have the default values), the one that we care about the most is temperature because by turning it to 0, we make the model as deterministic as possible. Meaning that for the same input, we’ll mostly get the same output. These models aren’t deterministic by nature, so getting 100% deterministic behavior is nearly impossible. However, we’re close enough with that 0.
Now the rest of the magic happens on the actual prompt we give it.
Remember what I said at the beginning, the prompt is the most important thing, and that also applies to LLMs.
Since I have a limited amount of LORAs I want to apply depending on the topic, I’m going to ask this model to try and select one of the potential topics based on the user’s input.
And I’m going to write it like this:
“Analyze the following prompt and try to match as many of the following categories as possible: animals, jewelry, furniture, food, portrait, abandoned and headshot. If you can’t figure it out, tell me that as well and use the following template for your response: \n Topics: [topic list here] \n Elements: [element list here] . \n Sentence: “ + prompt + “ “,
This is a large prompt, but essentially what I’m doing is:
- I’m controlling exactly what the model is giving me (because it’s only going to give me one of the known categories).
- I’m giving it a format for the response, so I can easily parse it later.
The output for this model, is something like this:
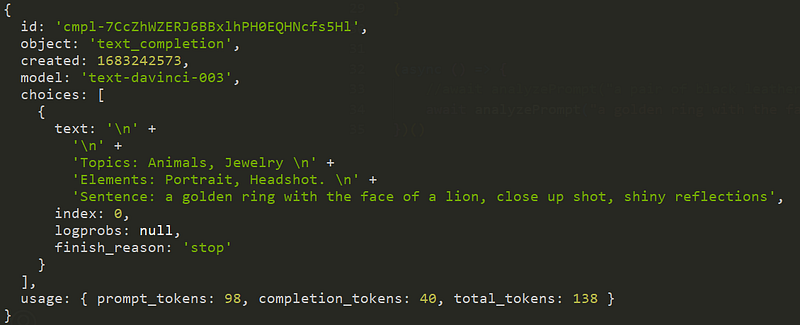
You can see the sentence there, my prompt was “a golden ring with the face of a lion, close up shot, shiny reflections”.
And it was able to match it with “jewelry” and “animals”. I can then use that to select the proper LORAs for the style.
If you go back to the analyzePrompt function, you’ll notice that the last few lines of it were parsing the text property. I’m essentially getting the string for the “Topics” and turning it into an array of topics.
With that array, I can then change the getFinalPrompt function that we already saw to look like this:
const _LORAS_ = {
    "jewelry": {
        url: "https://replicate.delivery/pbxt/k7QiKIESozpwOBeOSGS00sqlxmVzeuruvmlg8yfpx2ieE5hDB/tmpubksipo2training-jewelryzip.safetensors",
        //url: "https://civitai.com/api/download/models/32976",
        weight: 1.0
    },
    "abandoned": {
        url: "https://civitai.com/api/download/models/58490",
        weight: 1.0
    },
    "food": {
        url: "https://civitai.com/api/download/models/49946",
        weight: 1.0
    },
    "portrait": {
        url: "https://civitai.com/api/download/models/53221",
        weight: 1.0
    },
    "headshot": {
        url: "https://civitai.com/api/download/models/53221",
        weight: 1.0
    }
}

export async function getFinalPrompt({prompt, usedByPerson, shotType, env}, user_id) {
    const productNameRegExp = /\{([a-zA-Z 0-9]+)\}/g;
    let index = getPromptTemplateIndex(usedByPerson, shotType)
    let text = PROMPT_TEMPLATES[index]
    .replace("[input]", prompt)
    .replace("[environment]", parseEnvRequirements(env))
    .replace("[shot_type]", getShotType(shotType))


    let ret = {
        prompt: text,
        lora: []
    }
    let count = 1;
    let matches = null;
    while( (matches = productNameRegExp.exec(text)) !== null) {
        let lora_url = await getLoraURL(matches[1], user_id)
        ret.prompt = ret.prompt.replace(matches[0], `<${count}>`)
        ret.lora.push({url: lora_url, weight: DEFAULT_LORA_SCALE})
        count++;
    }


    //ADDED CODE HERE
    let promptTopics = await analyzePrompt(prompt)

    promptTopics.forEach( t => {
        if(_LORAS_[t]) {
            ret.prompt += `,in the style of <${count}>,`
            ret.lora.push({url: _LORAS_[t].url, weight: _LORAS_[t].weight})
            count++;
        }
    })


    return ret;
}
I’ve defined a _LORAS_ constant that contains all the information for the LORAs I want to use. And now the last few lines of the function will run through the topics detected, and if they’re defined inside this new constant, they’ll be added to the array of LORAs (the lora property of the ret object).
We’ll use those to later send the request to Replicate, so the model can run in their platform.
Note: the
weightparameter here is important because it will affect how much the new style overwrite the model’s default style. You’ll have to play with the number between 0.1 to 1 until you find the right combination.
Did you like what you read? Consider subscribing to my FREE newsletter where I share my 2 decades’ worth of wisdom in the IT industry with everyone. Join “The Rambling of an old developer” !
And that’s it.
The OpenAI API solved a problem that otherwise would’ve taken me longer than I was willing to spend, trying different NLP libraries and techniques until I found the perfect combination.
If you think about it, this type of interface is revolutionary in the sense that with a single endpoint they can do pretty much everything. Instead of providing a pre-defined set of endpoints well documented and limited in their scope, they provide a single endpoint that can understand any and all of your requests and do whatever you want it to do.
I look forward to seeing more APIs that behave this way in the future!
What about you?!


