How do I setup Nest.js server with MongoDB in 2024? Writing Back-end for registration form.
I am creating project on freelance(registration form) and need couple of endpoints to have on server. I started to create back-end using Next.js, but quickly realised that Next is too complicated for the small project like I am creating.
So, I was looking for the simple solution for that and Nest.js is the perfect one for its simplicity.
*Note: That is the second part of the article. In previous article I described the Front-end part which is “How to do Firebase user Authentication with React.js?”
During exporing Next.js, I found out chellanges with it: Next.js, designed mainly for building React applications, is robust and feature-packed. However, its strength in client-side rendering and static site generation might be excessive for smaller projects needing a straightforward back-end. I found out that the complexity of Next.js can be a drawback when simplicity is the main goal.
Why not Node.js? It’s evident that node.js backend applications often lack a defined structure, requiring significant time investment in architecting an efficient system. However, the good news is that NestJS streamlines this process, saving you valuable time. So, it looks like there are more advantages of using Nest.js for my project.
Module, Controller, Service, and Model are essential components in Nest.js:
- Module: Serving as the entry point for any component, the
app.module.tsfile acts as the entry point for any Nest application. - Controller: This component comprises application APIs responsible for managing incoming requests and providing corresponding responses.
- Service: The service file encompasses a database connection and facilitates communication with the database, primarily handling CRUD (Create, Read, Update, Delete) operations.
- Model: In the context of Nest.js, a model serves as a representation of a real-time entity. Specifically, it symbolizes a database table within the application.
Step 1: Install Nest CLI, create and run project
- Let’s read there the official documentation with the first steps described perfectly and there is no need to describe in details those commands here(I just added short comments):
npm install -g @nestjs/cli /* Install the Nest CLI globally using */
nest new server-name       /* Create a new Nest.js project using */
cd server-name             /* Navigate to the project directory using */
npm run start:dev          /* Start the development server */
This command will start the development server, and you should see output indicating that your Nest.js application is running.
- Open your Nest.js app in a browser.
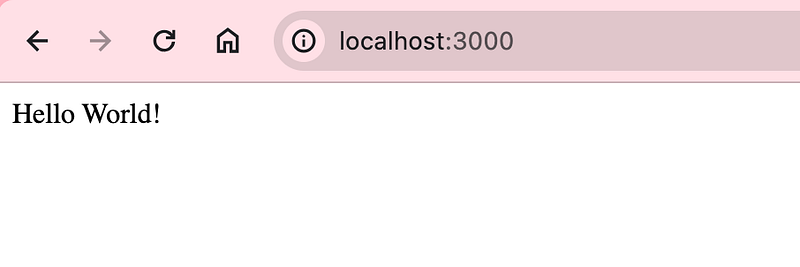
You could visit http://localhost:3000 in web browser. Yeah! There is the default Nest.js landing page there, confirming that your server is up and running.
*Note:
Ensure to check the official Nest.js documentation and GitHub repository for any updates or changes specific to the version available in 2024. The steps mentioned above are based on the common practices as of my last knowledge update.
Step 2: Setup MongoDB in Nest.js server project
- Basic steps are already described in the MongoDB official documentation so I will skip the description on them.
npm i @nestjs/mongoose mongoose- Import Mongoose module in the main src/app.module.ts file
import { Module } from '@nestjs/common';
import { MongooseModule } from '@nestjs/mongoose';

@Module({
  imports: [MongooseModule.forRoot('mongodb://localhost/nest')],
})
export class AppModule {}
Step 3: Create the User Module in /src/service/user.service.ts
To effectively manage user-related functionality, let’s create a dedicated module for users in your Nest.js application. This module will encapsulate the user controller, service, and the user schema.
import { Injectable, NotFoundException } from '@nestjs/common';
import { User, UserDocument } from './user.models';
import { Model } from 'mongoose';
import { InjectModel } from '@nestjs/mongoose';
import { v4 as uuidv4 } from 'uuid';

@Injectable()
export class AppService {

  constructor(
    @InjectModel('user') private readonly userModel: Model<UserDocument>
  ) { }

  async createUser(user: User): Promise<User> {
    const newUser = new this.userModel(user);
    newUser.id = uuidv4();
    return newUser.save();
  }

  async findAll() {
    return await this.userModel.find().exec();
  }

}
Step 4: Integrate UserModule into AppModule
In this step, we will modify the src/app.module.ts file to include the UserModule in the list of modules and import it for proper integration into your Nest.js application.
Update the src/app.module.ts file as follows:
import { Module } from '@nestjs/common';
import { AppController } from './app.controller';
import { AppService } from './app.service';
import { MongooseModule } from '@nestjs/mongoose';
import { UserSchema } from './user.models';


@Module({
  imports: [
    MongooseModule.forRoot('MONGO_DB_DATA'),
    MongooseModule.forFeature([{
      name: 'user', schema: UserSchema
    }])
  ],
  controllers: [AppController],
  providers: [AppService],
})
export class AppModule { }
Step 5: Implement User Endpoints in AppController
In this step, we are adding user-related endpoints to the AppController within your Nest.js application. These endpoints handle actions like creating a new user (/users endpoint) and retrieving all users (/users/all endpoint).
Here’s a breakdown of the updated src/app.controller.ts file:
import { Controller, Query, Get, Post, Body, Put, Param, createParamDecorator, ExecutionContext, Delete } from '@nestjs/common';
import { AppService } from './app.service';
import { User } from './user.models';


const QueryParam = createParamDecorator((data: unknown, context: ExecutionContext) => {
  const req = context.switchToHttp().getRequest();
  return { ...req.query, ...req.params };
});

@Controller()
export class AppController {
  constructor(private readonly appService: AppService) { }

  @Post('users')
  async createUser(@Body() SendUserDto: User) {
    return await this.appService.createUser(SendUserDto)
  }

  @Get('users/all')
  async findAll(@Query() { skip, limit }): Promise<User[]> {
    return this.appService.findAll();
  }

}
Step 6: Define user schema:
The provided code defines a User schema using the @nestjs/mongoose module in a Nest.js application. This schema represents the structure of user data that can be stored in a MongoDB database. Let's break down the key elements.
import { Prop, Schema, SchemaFactory } from '@nestjs/mongoose';
import { Document } from "mongoose";

export type UserDocument = User & Document;

@Schema()
export class User {
    @Prop()
    uid: string;

    @Prop()
    email: string;

    @Prop()
    password: string;

    @Prop()
    birthday: string;

    @Prop()
    surname: string;

    @Prop()
    name: string;

    @Prop()
    familyname: string;

    @Prop()
    passport: string;

    @Prop()
    gender: string;

    @Prop()
    phone: string;

    @Prop()
    country: string;

    @Prop()
    region: string;

    @Prop()
    city: string;

    @Prop()
    address: string;

    @Prop()
    postindex: string;
}


export const UserSchema = SchemaFactory.createForClass(User);
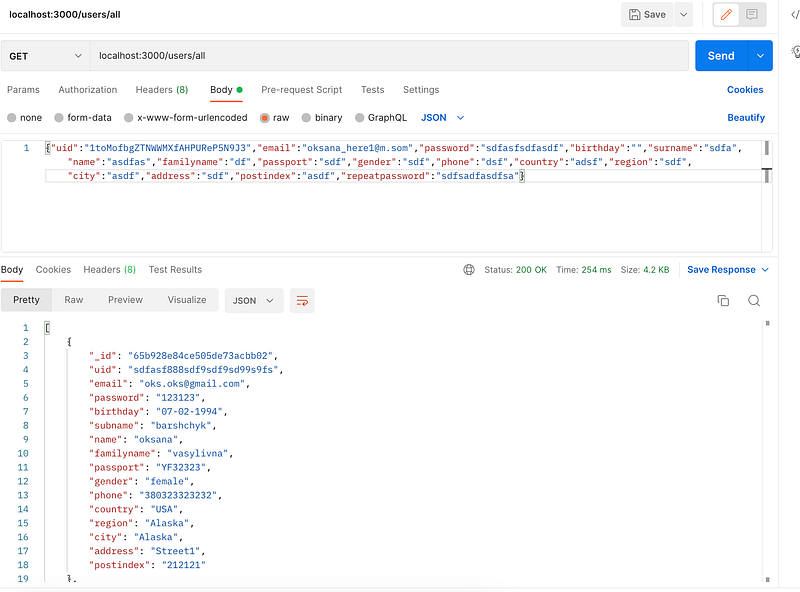
You could open PostMan and run your first api call:
Summary
In embarking on a freelance project(registration form), the choice of technology for the backend is crucial, and for a more streamlined and simplified approach, Nest.js proves to be the ideal solution compared to the complexity of Next.js.
My decision is driven by the need for simplicity in a smaller project requiring a straightforward backend.
To test the working server, I am using PostMan and got the user data back so it is working correctly.
Hey! Thanks for stopping by
Please read my other articles:
What I’ve Learned From My First Year on Medium, And How I Plan To Continue Growing in 2024
or find me in YouTube: 🤍Programmer Girl


