
Harness the Power of Python To Send Emails Programmatically
A step-by-step tutorial on sending emails using Python

Programming can be used for a lot of things. From creating simple math functions to building mobile apps. It can also be used to automate specific tasks to be done in seconds, as opposed to doing it yourself which could take hours. As we have developed unique and special ways to utilize code, more and more tasks have become automated. And one of these tasks is — sending emails.
But isn’t sending emails already an easier way of delivering information? Emails did essentially replace physical mail however it still requires some form of manual intervention. These forms are (but are not limited to):
- Typing up the email
- Scheduling or knowing when to send the email
- Determining who is receiving the email
I’m sure there are more, but these are the most obvious ones. Anyways, what if we could automate sending an email with code? Specifically with Python? The applications of such a program can range from scheduled email reminders to mass marketing emails for a company. As you read on, you will learn how to quickly set up a simple Python script to send an email without the need of using an email provider like Gmail.
Choose an Email Service
Not talking about Gmail or yahoo, but an email service with an API. Using such a service will allow you a lot of flexibility to send multiple emails with an easy-to-use API. I’ve found that this is one of the easiest ways to get started with sending an email in Python.
The email service that I use is called SendGrid. It is free to use and easy to set up an account. The free tier plan for the service allows you to send up to 100 emails every day. It’s also developer-friendly with documentation that supports Python. We will be using SendGrid for the rest of this article tutorial.
Getting Started
In order to get started with SendGrid, you’ll need to create a free account. After you’ve done that, follow these steps:
- Verify your sender email address — In the dashboard sidebar, go to Settings to Sender Authentication to Single Sender Verification to Create New Sender. Enter the required info, and go to the email inbox to verify the address.
- Get the API Key — Go back to Settings to API Key to Create API Key. Get full access and name it. Click Create & View to view and copy the API key for future usage.
And that’s it. If you want to add more email addresses to send from, you’ll need to verify them like before. With the API key and verified email address, you’re ready to get started with the coding.
1. Install SendGrid
Assuming you are using Jupyter notebooks or Jupyter lab, you can install SendGrid directly from Jupyter with the following command:
!pip install sendgridOtherwise, you can just do it in your command terminal with the same command above but remove the exclamation mark — pip install sendgrid.
2. Import SendGrid Libraries and Set the API Key
After you’ve installed SendGrid, you can import the libraries within the package:
from sendgrid import SendGridAPIClient
from sendgrid.helpers.mail import MailNext, you’ll want to use the API key and assign it to the SendGrid client. You’ll need to keep your API key private. I kept mine in a text file outside of the code to access it for assignment when needed:
# Importing and assigning the api key
with open("../sendGrid-API.txt", "r") as f:
api_key = f.read()
# Using the api key with the sendgrid client
sg = SendGridAPIClient(api_key)3. Set the Email Variables
Here you’ll need to set the different variables for your email. The variable names are pretty self-explanatory:
sender = "[email protected]"recipient = "[email protected]"subject = "Hey Check Out This Test Email!"content = "I just sent this email with Python. So cool!"4. Construct the Email Object
This is where we’ll create the email object from SendGrid. Just use the variables above and assign them to the appropriate parameters:
email = Mail(
from_email=sender,
to_emails=recipient,
subject=subject,
html_content=content
)5. Send the Email
Here we will actually send the email object we constructed above by using the SendGrid client:
response = sg.send(email)# Printing out the response
print(response.status_code)Print out the response status code in order to know if the email has been accepted and is ready to ship out.
Additionally, check the recipient’s inbox if you can to see if you’ve received the email.
6. Putting It All Together
Now in order to make the previous code flow collectively, we’ll combine all the elements above into a single function. With the variables being the only thing we need to adjust. Here’s some code:
By using this function, we would only need to change the email variable details. These details can be changed outside of the function if needed. Below are the new details we can use to test out our newly made function.
New Variables
# New Variables
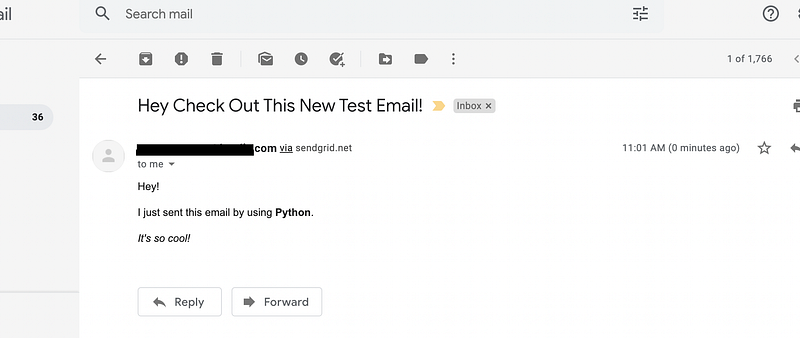
sender = "[email protected]"recipient = "[email protected]"subject = "Hey Check Out This New Test Email!"# With some html formatting
content = """
Hey!
<p>I just sent this email by using <b>Python</b>.</p>

<p><i>It's so cool!<i/></p>
"""# Testing the function
sendMyEmail(sender, recipient, subject, content)The variables above are largely the same except for the content of the message. A great thing about SendGrid's API is that it accepts HTML text formatting. Here we formatted the previous text to include some new HTML tags to make the new test email pop!
Here’s a quick rundown on the HTML tags we used and their effects:
<p>text</p>— Paragraph spacing.<b>text</b>— Bold text.<i>text<i/>— Italicize text.
If the function runs perfectly, then you should receive a return message from the code above saying: ‘Email has been accepted!’
Checking the email
And to be more sure of the functionality, you can check the recipient’s email inbox and look for the message you just sent:
7. Sending Emails With Dynamically Changing Variables
Now that we’ve tested and successfully sent an email, we can move on to some more practical applications of this feature. There are a lot of great applications to be made from a simple function like the one we just created, but let’s stick with something simple but slightly more complex than before.
In the following code blocks, you will learn how to send multiple emails with a changing subject line, content, and at different times.
First, let’s import a new library that we’ll use to send emails at different time intervals:
import timeNext, we’ll create a loop that iterates through a shortlist of greetings. This list will be how our email will change with each iteration. In each iteration, the subject and content will adjust based on the list of greetings.
As you can see in the code above, the greetings affect the subject line and content by altering just one word. At the end of the loop, there is a short period of time of waiting (which you can adjust if wanted) before sending another email again.
If the loop ran successfully, you should be able to see three different emails in the recipient's inbox:
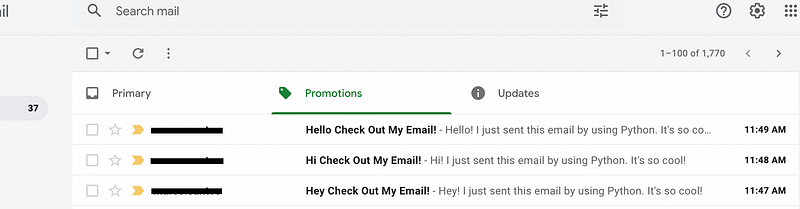
If you see something similar to the image above — excellent! You’ve successfully sent multiple emails with different subject lines and content by using Python!
Other Use Cases
The above was just a simple example of what we can do with sending emails with Python. But there are more applications and different approaches that can be expanded upon with this function such as:
- Sending a somewhat personal email to a large mailing list of contacts.
- Schedule an email reminder to be sent to a select group of individuals.
- Send updates and new information automatically.
- Mass marketing campaigns.
- And more…
SendGrid is an awesome tool for a lot of these, and you should read up on the Python documentation to learn more about its features. For example, they already have built-in functionality for sending to multiple individuals.
I hope you’ve learned plenty about the great applications of sending an email with programming and Python. It is a great application to use for any repetitive email tasks you may encounter. Be creative with the application of this function and you will unlock a lot of opportunities to automate your daily tasks!
Resources
Check out this GitHub repository for the full source code. And here’s the complete SendGrid documentation.