
Hakluke’s Guide to Amass — How to Use Amass More Effectively for Bug Bounties
Amass has a lot of features. It’s a bit of a weird tool because despite being synonymous with bug bounty recon, and despite being extremely well known, most people don’t know how to use it to it’s full advantage. Most people that I see using Amass are just doing this:
amass enum -d clicktheclapbutton50timesplz.comAmass hums away for a few minutes doing its thing, skulking around the slums of the internet, begging for subdomains from anyone that will listen and then sending them back to you, the hacker. You get your loot and walk away, happy with your bucketload subdomains, feeling as though you’ve achieved something great.
There’s a problem though. You’ve got the same damn subdomains that everyone else has because like most other people, you only used one Amass feature! You know how competitive bounties are right? You don’t want to put yourself at a disadvantage by not understanding the features of one of the greatest recon tools in existence do you? Having said this, amass has a lot of features and you probably won’t use most of them. This blog post outlines how I personally use amass. I’m going to highlight the features that I find to be most useful and ignore the rest.
So here are a few ways to use Amass betterererer.
Get Your API Keys Sorted
Right now, 30% of you are thinking “does this guy think I’m stupid?”, 50% are thinking “yeah I really should sort that out”, 19% are thinking “amass uses API keys?” and the other 1% are bots that made it past the paywall.
Using Amass without setting up API keys is like eating sand. It tastes bland and is bad for your health.
Amass has a lot of data sources, but the ones that require API keys are:
AlienVault, BinaryEdge, BufferOver, BuiltWith, C99, Censys, Chaos, CIRCL, DNSDB, DNSTable, FacebookCT, GitHub, HackerOne, HackerTarget, NetworksDB, PassiveTotal, RapidDNS, Riddler, SecurityTrails, Shodan, SiteDossier, Spyse, Twitter, Umbrella, URLScan, VirusTotal, WhoisXML, ZETAlytics, CloudflareMost of these API keys are free, but many only return limited results unless you have a paid API key. A free one is still better than none. So now you have your work cut out for you. For each of the services above you will need to find the website, then sign up and get an API key. This is a very time consuming and boring task but good recon does not come without sacrifice. You can do this.
Once you’ve got all your API keys, stick them into the Amass config file. For an example config file see here: https://github.com/OWASP/Amass/blob/master/examples/config.ini
Now, when you use amass, specify the config file with the -config parameter, like this:
amass enum -d followhaklukeontwitter.com -config ./myconfigfile.iniCongratulations, you’re now the proud new pwner of more targets. Onto the next step we go.
The 5 Holy Subcommands
Amass comes with 5 different subcommands. They are intel, enum, track, viz and db. Their purposes are shown below, copy pasta straight from the amass docs for your convenience.
- amass intel — Discover targets for enumerations
- amass enum — Perform enumerations and network mapping
- amass viz — Visualize enumeration results
- amass track — Track differences between enumerations
- amass db — Manipulate the Amass graph database
I use all of the subcommands in one way or another pretty regularly, except viz. Viz draws very pretty graphs, but graphs aren’t really part of my workflow at this stage.
Amass Intel
intel, in my opinion, is the most underrated subcommand of amass. Everybody knows about enum, but a lot of people seem to just overlook the intel subcommand entirely, oblivious to its power and dashingly good looks.
The Amass intel subcommand is like mixing peanut butter with Vegemite on toast. Underrated.
Mostly, it’s good for finding root domains and additional subdomains that belong to a company. It can do this in a number of ways. Firstly, there’s the “reverse whois” method.
Reverse Whois
This method is invoked using the -whois flag. Essentially it takes the details from the specified domain’s whois records, and then tries to find other domains with similar whois records. As an example, I performed this task on owasp.org in the screenshot below:
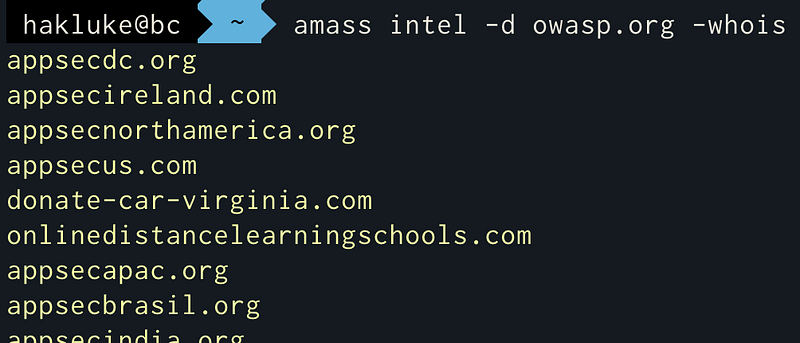
This is a great method for discovering root domains that may be owned by an organisation.
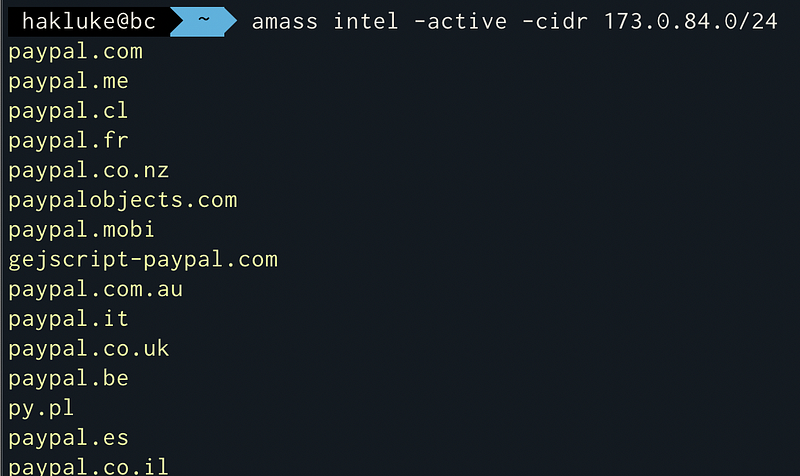
SSL Certificate Grabbing
If you feed IP addresses to Amass and give it the -active flag, it pulls the SSL certificate from every IP address within the IP range and then spits back the domain that the SSL cert is associated with. For example, running it on a well known Paypal-owned CIDR range:
Using ASNs
If you want to find the ASN of a company, Amass can do a nice convenient search. For example, if I wanted to find ASN’s associated with Tesla, I could use this:
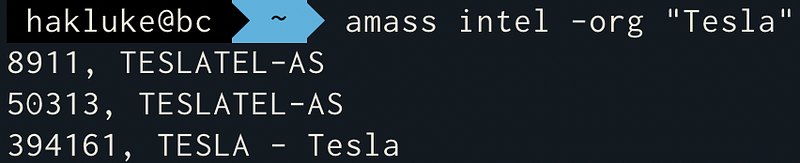
I don’t know what TESLATEL-AS is, but that last one looks like it is probably Tesla (the Elon Musk owned Electric Car company). Now we can use that ASN number (394161) to get some more domains, like this:
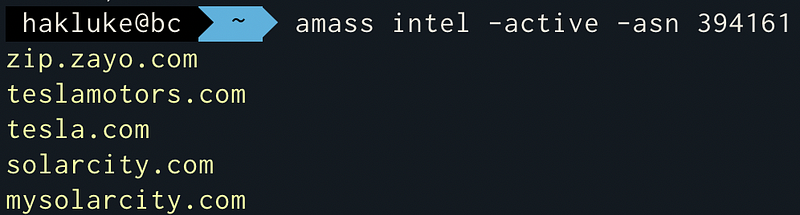
I’m not sure about zip.zayo.com, but the other domains look like they’re probably owned by Tesla. So now we have 4 root domains to investigate. Nice!
Putting Amass intel techniques together recursively
Amass works recursively. It will take the results that it gets from one method, and feed it into the other method. It will continue to do this until no new results are returned. So, for example, we can do this:
amass intel -asn 394161 -whois -d tesla.com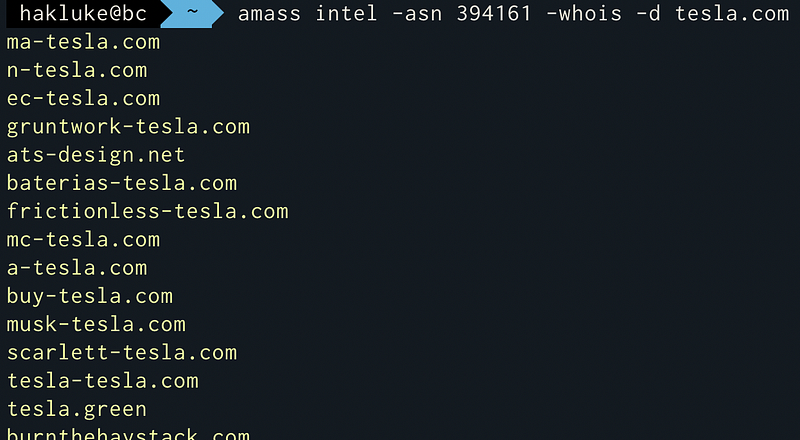
Amass enum
Once you’ve exhausted the intel options, you’re probably ready to find some subdomains. enum is the absolute staple amass subcommand, and the one that most people use. There are so many options that are worth exploring for minor tweaks, but these are the ones that I use frequently.
Get some subdomains
amass enum -d example.comIt’s good, but it could be better.
Get more subdomains
Combining the options will usually lead to better results.
amass enum -d example.com -active -cidr 1.2.3.4/24,4.3.2.1/24 -asn 12345Note that you will first need to get the CIDRs and ASNs associated with the organisation using the intel methods outlined earlier in this post.
Tracking
Every scan that you do with amass is automatically stored on the computer that you ran it on. Then, if you run the same scan again, amass will track any changes that have taken place since your last scan. The most obvious way to use this feature is to discover which subdomains have appeared since your last scan. For example, I ran amass enum -d vimeo.com back in June. It’s now August, so I ran the same command again.
Now I can run amass track -d vimeo.com and it will tell me anything that has changed within the last two months.
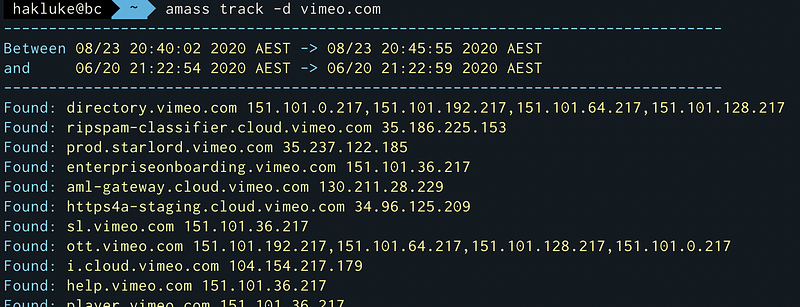
Focusing on these subdomains means that I’m focusing on fresher targets, which are (hopefully) more likely to be vulnerable.
Visualisation
You can use amass viz to create awesome-looking graphs of your recon data. To be totally honest, I never use this feature. I’m glad it’s there and I think it’s cool, but as a bug bounty hunter, I find subdomains in a text file to be more valuable than a graph. It does look pretty badass though:

Amass db
db is the subcommand that allows you to view the recon data for every scan that you’ve ever done.
To list all of the details of all of your previous scans, simply run amass db -show. If you want to see details of a specific domain, just add the -d flag: amass db -show -d paypal.com. If you would prefer a nice clean, plain output, you can output the discovered domains/subdomains using the -names flag instead of -show.
The Scripting Engine
Caffix (Jeff Foley) recently released a new feature for Amass. An entire scripting engine, similar to the Nmap one, but for Amass.
I haven’t had a chance to play with this yet, but basically it allows you to add your own data sources to Amass. Let’s say that a new API is released that you’d like to incorporate into your Amass scans — no problems! You don’t need to wait for it to be incorporated into Amass, you can knock together a Lua script yourself and Amass will start using it as an additional data source. The documentation for the scripting engine can be found here: https://github.com/OWASP/Amass/blob/master/doc/scripting.md
Conclusion
I hope that this article has taught you something new. If you enjoyed it — the best way that you can support me is to share it!
If you’d like to hear more from me, you can find me on Twitter, YouTube and Instagram.


