
Hacking Obsidian: Creating Notion-like banner images in Obsidian without Plugins
A markdown-friendly and portable solution for banner images
Welcome to another article in my Hacking Obsidian series. Today we talk about banner images.
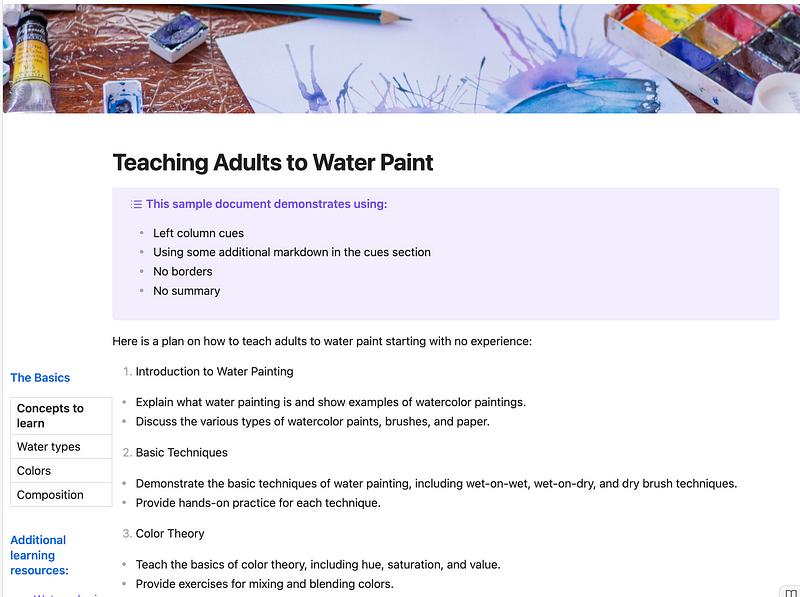
As depicted in this article’s cover image, I have a preference for incorporating banners at the top of my documents.
I can’t pinpoint the exact reason, but incorporating an image with its vibrant colors and shapes undoubtedly adds another layer of visual depth to my notes.
These banners not only clarify the intent of the content but also make it more memorable. When I open a document with a banner, it instantly transports me to a certain mindset. If it’s a technical topic, an image featuring computers or robots sets the mood. If it’s health-related, a serene image ushers in a peaceful state of mind.
In Obsidian, I often achieve this effect using the Banners plugin, which is nothing short of incredible. However, there are times when I’d rather not rely on a plugin, particularly if I want the markdown document to be portable, independent of any plugin.
With that in mind, I’ve devised a handy CSS snippet that can be added to Obsidian, allowing us to seamlessly integrate banners into documents without the need for any plugins.
The Hard Part (but not so hard)
Perhaps the sole challenging aspect of utilizing this solution is installing the CSS snippet into your vault, that is if you have never done this before.
This approach necessitates a CSS snippet tailored to your vault. The advantages of CSS snippets include portability, easy integration with vaults, and the elimination of any need for JavaScript code or plugins.
To access the specific CSS snippet required for this solution, visit this page: https://tfthacker.com/banner-image. Once there, scroll down to the section titled “CSS Snippet for this solution” and copy the text as illustrated in the accompanying image.
This CSS text will need to be added to a snippet file in your vault.
To learn more about installing CSS snippets, check out the Obsidian Help at this link: https://help.obsidian.md/Extending+Obsidian/CSS+snippets.
The Fun Part, Creating a Banner
Now comes the enjoyable and fun part — adding a banner to your document.
The subsequent animated image demonstrates the process. Take a moment to observe it, and then we’ll dissect the steps individually.
First, we need to instruct Obsidian to implement the CSS snippet created in the previous step. The CSS snippet incorporates a CSS class named banner-image. To apply this to our document, we must include some frontmatter at the very beginning of the document, which will appear as follows:
---
cssclass: banner-image
---
Next, we can insert our banner image. For this tutorial, let’s assume you have an image in your vault titled vacation.jpg.
This method is remarkably simple — here’s what you need to add to your markdown for the banner image to appear on the page when in Preview mode:
>[!banner-image] ![[vacation.jpg]]
With this markdown, we instruct Obsidian to utilize the vacation.jpg file as a banner. The banner will align at the very top of the pane, without any left or right margin space.
Let’s delve further into the details.
- The initial part of this line is >[!banner-image]. You might recognize this as an Obsidian callout. We are employing a custom type identifier called banner-image. This customized type is defined in the CSS snippet. However, don’t worry about the nerdy details, just remember you use the `banner-image` type identifier in the callout.
- Following that is the standard embedded image syntax for Obsidian with ![[vacation.jpg]].
- Additionally, you can specify an image size, which will affect the sizing of the displayed image in Live Preview. For instance, ![[vacation.jpg|200]] will resize the image to 200 pixels wide. However, this setting gets disregarded when the page is viewed in Preview mode.
- Note: Refrain from including any other text in the callout.
In review, a document using the previously mentioned example would look like this:
---
cssclass: banner-image
---
>[!banner-image] ![[vacation.jpg]]

# My Header
My document text here ...
...
...
Bonus tip
By the way, you can also use an online image, not just one from your vault. For example:
>[!banner-image] 
I also suggest selecting images that are wide and short. Banners are aligned across the top, so you want them to be wide, but not tall. If an image is not wide, it will not be stretched to fill the screen.Banner Height
The banner height is 150 pixels. This can be adjusted to be less or more pixel height.
To do this, you need to modify the CSS snippet you installed for this solution. In the CSS snippet, you will see the following line:
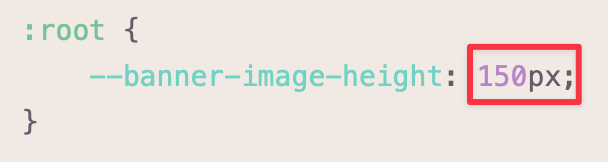
You can change the 150px to another height. For example: 200px or 250px.
My advice: don’t make it too large. Also, the number of pixels needs to be followed by `px`. So you can’t type just 200, it needs to be 200px. Changing it to 200px means the CSS snippet will look like this:
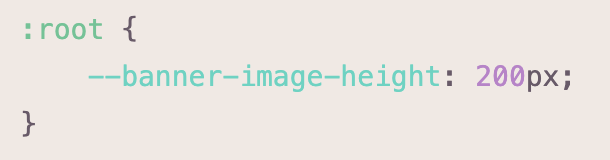
Note: The banner height also affects the margin height at the top of the document, it adds additional margin space to move your text down. I mention this because it’s possible that some themes or plugins might not be compatible with this technique. Always do some experimentation to confirm this solution works reliably in your vault.
Summary
That is it! As a review, you need to:
- Install the CSS Snippet for the banner-image. This is a one-time step per vault.
Then for each document you want to show a banner:
- Add the frontmatter cssclass name: cssclass: banner-image to the document.
- Add a callout using the banner-image identifier, followed by an embedded image link: >[!banner-image] ![[vacation.jpg]]
The good news about this solution is that even without the CSS Snippet, your markdown is still valid markdown and will render nicely in vaults that don’t have the CSS snippet installed. The banner-image callouts won’t appear as banners, but they will appear as standard callouts.
Thus this solution is portable and future-proofs our markdown documents.
If you are interested in more articles from my Hacking Obsidian series, check out this link.
Did you enjoy this useful information? Please consider signing up for email notifications when I publish an article: https://bit.ly/medium-email-sub.
Help support all your favorite writers using my referral link: https://bit.ly/o42-medium or buy me a coffee at: https://bit.ly/o42-kofi. Your support is appreciated!


