

Guide to using sockets in your Laravel application
Nowadays sockets are very popular in web development. Sockets allow real-time communication between the browser of a client and the server. There are a lot of use cases for sockets. For example, sockets could be used for notifications or a chat application. In this article I will show you how to use sockets in your Laravel application by making a chatbox. I will be using Pusher to broadcast my events, but you could also use Redis or Socket.io for broadcasting. In the first part of this article we will make the backend part of the application and in the second part we will be focusing on the frontend.
Part 1: Backend
Pusher
Since we are going to broadcast our events over Pusher we should install it via Composer.
composer require pusher/pusher-php-server "~3.0"Note: To use Pusher you will need an account. You can create a free account at https://pusher.com
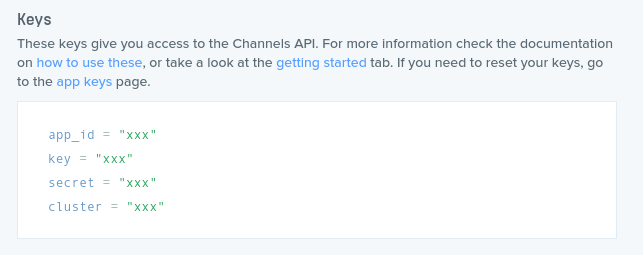
Once you have created your Pusher account, you have to create an app in Pusher. After you have created the app you should add the app id, app key, app secret and cluster to your .env file. Use the PUSHER_APP_ID, PUSHER_APP_KEY, PUSHER_APP_SECRET and PUSHER_APP_CLUSTER for this. Furthermore, change the BROADCAST_DRIVER to pusher.
Time to start making the chatbox
Now that we have installed the dependencies and setup our Pusher app, it is time to start making the chatbox. Let’s have a quick overview of what we are about to do. We will create a Vue component for the chatbox which will send a request to an API controller with the message that is send by the user. This will be implemented in the second part of this article. For the backend we will create an API controller that will broadcast an event to inform all other clients about the message that was send to the chatbox.
Creating the controller
Let’s start by creating a controller, which will handle incoming requests:
php artisan make:controller ChatControllerThe implementation of the controller will be very simple. If the request contains a message we will fire an event, else we do nothing. This event will broadcast the message to all clients.
We will also need to create a route in the routes/api.php file.
Event
As we saw in the ChatController an event, called MessageSend, get’s fired. This event should be broadcasted to the other clients, to let them know that a message was send to the chatbox. First things first, let’s create the event:
php artisan make:event MessageSendThe MessageSend class will broadcast on the chatbox channel, which is a public channel. This is defined in the broadcastOn method.
This is what the implementation looks like:
Note: The MessageSend class implements the ShouldBroadcast interface.
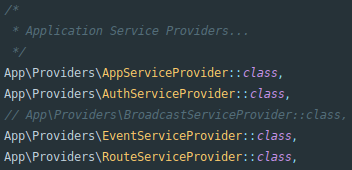
BroadcastServiceProvider
Before we can starting broadcasting our events the App\Providers\BroadcastServiceProvider should be registered. This can be done by uncommenting this provider in the providers array in the config/app.php file.
Since we have made some changes in our configuration we have to run the following command to fix our configuration cache file:
php artisan config:cache
Part 2: Frontend
Receiving broadcasts
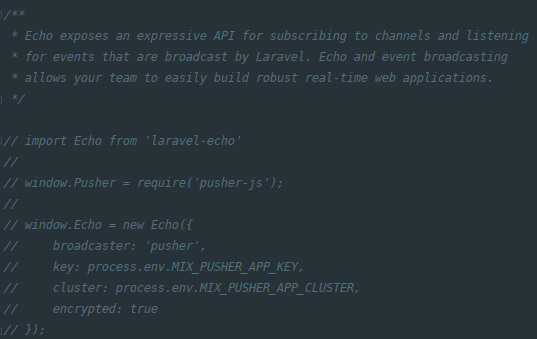
To receive broadcasts we are going to use a Javascript Library, called Laravel Echo. This library makes it very easy to listen to broadcasts and subscribe to channels. We will also install pusher-js since we are using Pusher for broadcasting.
npm install --save laravel-echo pusher-jsOnce we have installed Laravel Echo and Pusher, we have to create an instance of Laravel Echo in the application. On the bottom of the resources/js/bootstrap.js file is some code which creates the Laravel Echo instance for you. Uncomment this part of the code.
Chatbox
As mentioned previously, we are going to create a Vue component that sends a request to our API whenever a message is send. We are going to create that Vue component right now.
Create a ChatboxComponent.vue in the resources/js/components folder. This component contains a very simple form that sends a request to the /api/message endpoint. Futhermore, this component listens to the MessageSend event on the chatbox channel. Whenever it receives a message, it will add it to the chatbox.
Now that we have created the ChatboxComponent let’s change the welcome.blade.php so that it actually uses the component.
To make sure that our newly created component gets registered we have to uncomment the following to lines in the resources/js/app.js file.
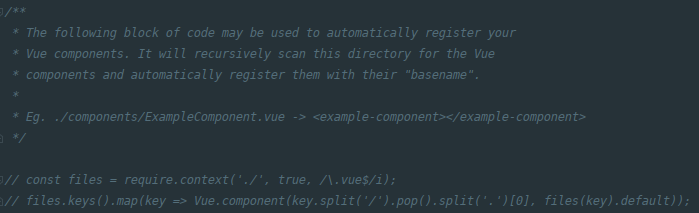
These two lines of code will automatically register your Vue components. Do not forget to run npm run watch .
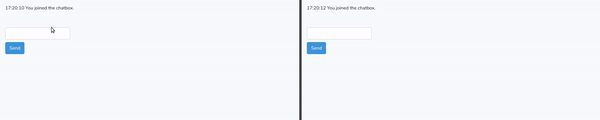
Chitty chat
We can now start a conversation in the chatbox. To test the application open up two tabs in your browser, one of them in incognito mode, and just start typing!
Debugging
If you are running into any issues there is a way to debug your sockets. Pusher has a great debug console which will log any activity happening in your sockets. Just go to the Pusher dashboard and select the Debug console tab. You can check if a client connects to Pusher and if events are being broadcasted.
BroadcastException
Depending on the environment that you are developing on, you may receive a BroadcastException when trying to broadcast the event. This can be fixed by adding the following lines of code to the pusher.options array in the config/broadcasting.php file.
'curl_options' => [
    CURLOPT_SSL_VERIFYHOST => 0,
    CURLOPT_SSL_VERIFYPEER => 0,
],
Congratulations! The chatbox is finished. I hope this article helped you implementing sockets in Laravel. Make sure to check out my other posts aswell, a lot of my content is about Laravel. Please feel free to leave a comment if you have any feedback, questions or want me to write about another Laravel related topic.
Happy coding!


