
Guide to Deploy Vue.js App to Google App Engine With Cloud Build From Git Repository
This tutorial show step by step guide to do deployment from a Git commit, to Google Cloud Build, to Google App Engine
If you are worried about autoscaling, sudden load spike, etc., you can indeed utilize Google App Engine. It helps you automate all of the tasks mentioned and control them using the panel.
Google App Engine has a guide and runtime for Node.js, Python, Go but doesn’t have one for Vue.js.
Prerequisite:
Environment
npm: 8.5.0
node: v16.14.2
vue: @ vue / cli 5.0.3

Server Related
GCP project created
GCP project billing
Google Cloud SDK (gcloud command) installed -> Link Here
Repository Related
GitLab repository (It can be GitHub or BitBucket too)Step 1 — Create a Google Cloud Source Repository and mirror the code from the main Git Repo.
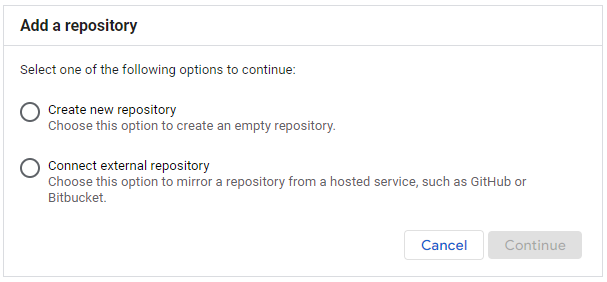
Using GitHub or Bitbucket, click on the second option and authorize the OAuth authentication to sync the Git repository.
If you are using other repositories like GitLab, use the first option.
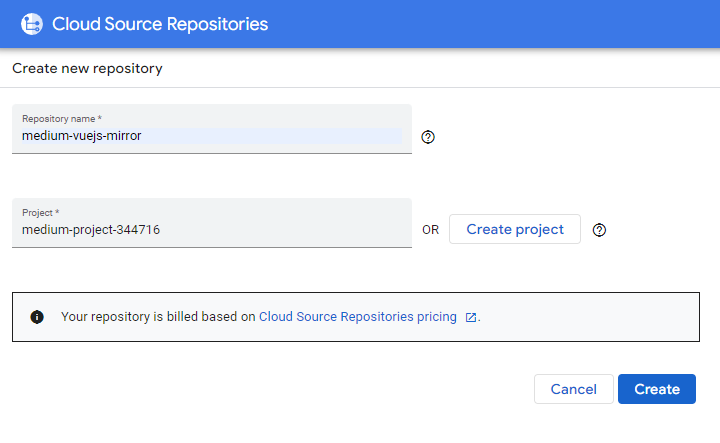
Name the new Google repository as “your_project_name-mirror” for easy reference. And follow the rest of the steps here: How to Mirror GitLab Repositories to Cloud Source Repositories.
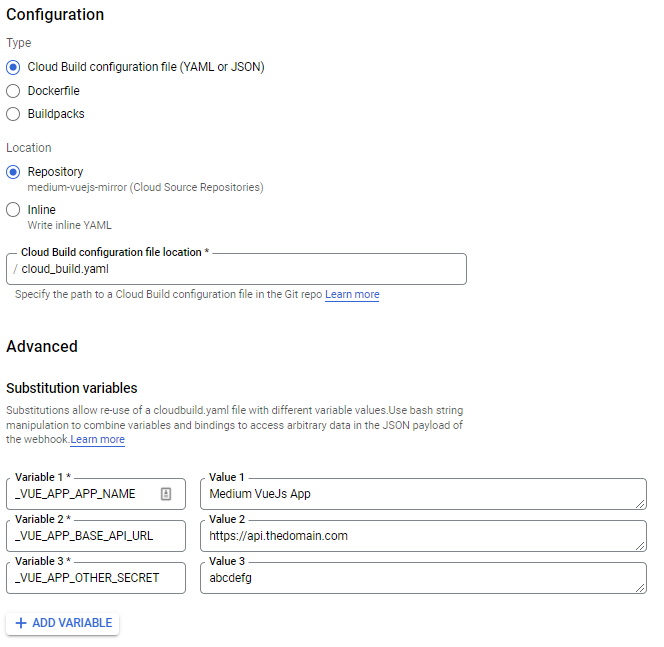
Step 2 — Set up Google Cloud Build trigger.
Enter a name, choose the “Push new tag” option, and the corresponding source repository.
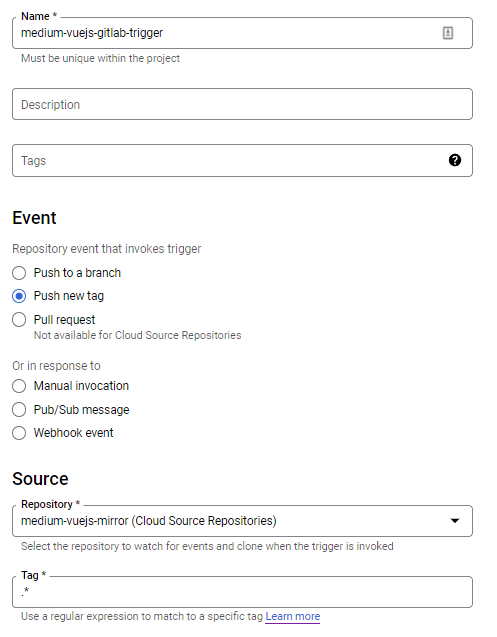
Then, choose the “Cloud Build configuration file” option, and read cloud build configuration from “cloud_build.yaml”.
Also, add any secrets or ENVs needed for the Vue.js application to run.
Step 3 — Add cloud_build.yaml file for Cloud Build trigger and automation
Add cloud_build.yaml to Vue.js project root.
Note: The file name with an underscore because Google doesn’t allow the app.yaml and cloudbuild.yaml at the same directory.
//cloud-build.yaml
steps:
#Create .env file from Google Cloud Build substitution variables
- name: node
  entrypoint: npm
  args: ["run", "create-env"]
  env:
    - 'VUE_APP_APP_NAME=${_VUE_APP_APP_NAME}'
    - 'VUE_APP_BASE_API_URL=${_VUE_APP_BASE_API_URL}'
    - 'VUE_APP_OTHER_SECRET=${_VUE_APP_OTHER_SECRET}'
#The .env file is prepared and ready to deploy to Google App Engine
- name: "gcr.io/cloud-builders/gcloud"
  args: ["app", "deploy"]
timeout: "1600s"
Add the snippet below to the “script” object in package.json. The script line is to support the YAML script above to create a .env file before deploying it to Google App Engine.
//package.json
"scripts": {
    "serve": "vue-cli-service serve",
    "build": "vue-cli-service build",
    "create-env": "printenv > .env",
    "lint": "vue-cli-service lint",
    "watch": "vue-cli-service build --watch --mode development"
},
Step 4 — Add app.yaml file for Google App Engine deployment.
Read more about the app.yaml additional configuration here.
# app.yaml
runtime: custom
env: flex
# If you have one application, please use "default" for service
service: vuejsmedium
# VPC Network if you have one
#network:
# name: defaultautomatic_scaling:
min_num_instances: 1
max_num_instances: 2
cool_down_period_sec: 180
cpu_utilization:
target_utilization: 0.5
resources:
cpu: 1
memory_gb: 2
disk_size_gb: 15Create a .gcloudignore file.
.gcloudignore
.git
.gitignore
/node_modules/
*~
/dist/
.env-sample
babel.config.js
package-lock.jsonStep 5 — Setup Dockerfile
Create a Dockerfile at the root of the Vue.js project.
# build stage
FROM node:lts-alpine as build-stage
WORKDIR /app
COPY package*.json ./
RUN npm install
# Copy all project files to this container and build
# To ignore files like node_modules, dist, use .dockerignore file
COPY . .
RUN npm run build
# production stage
FROM nginx:stable-alpine as production-stage
COPY --from=build-stage /app/dist /usr/share/nginx/html
# Alter Nginx to receive traffic on 8080 instead. Refer below explaination
# App Engine only support port 8080
COPY --from=build-stage /app/deployment/default.conf /etc/nginx/conf.d/default.conf
# Expose container port 8080
EXPOSE 8080
CMD ["nginx", "-g", "daemon off;"]Create a .dockerignore file.
nodemodules
dist
Note: I found that the deployed instance always returns error 503 (Service Unavailable) and error 502 (Bad Gateway) until this step. After reading, Google App Engine stated that their only allowed port is port 8080! Even you write it in the app.yaml, those forwarded port is just for debugging and logging.
Create a “default.conf” file under the “deployment” folder to override the Nginx configuration to use port 8080 and allow history mode for Vue.js. Check out the bold rows for the changes I have made.
# Directory: deployment/default.conf
server {
    #To edit the NGINX 80 port to 8080 port because Google App Engine only support 8080 port. Peace!
    listen       8080;
    listen  [::]:8080;
    server_name  localhost;
location / {
root /usr/share/nginx/html;
index index.html;
try_files $uri $uri/ /index.html;
} # redirect server error pages to the static page /50x.html
error_page 500 502 503 504 /50x.html;
location = /50x.html {
root /usr/share/nginx/html;
} # To redirect HTTP to HTTPS
if ($http_x_forwarded_proto = "http") {
return 301 https://$host$request_uri;
}}
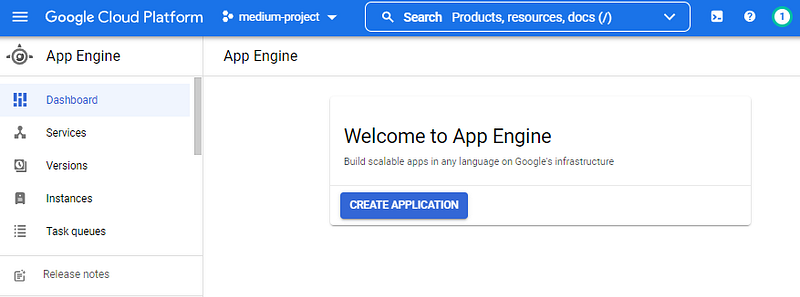
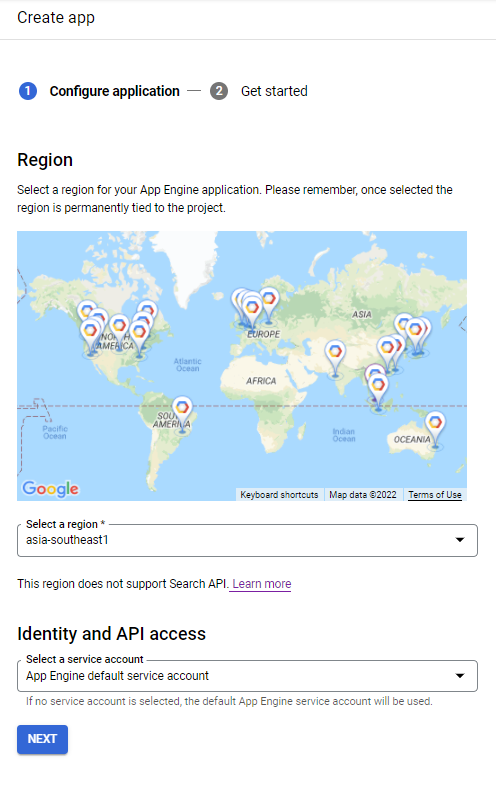
Step 6 — Activations, permissions, and others
Ensure you have activated Google App Engine, Compute Engine, Cloud Build, etc.
Also, make sure you have granted permission to Cloud build service account to build on App Engine.

Double-check the permission in the “IAM and admin” page as shown below:

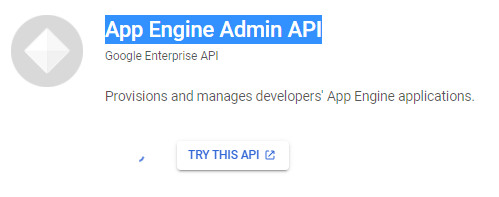
Don’t forget to active App Engine Admin API too. https://console.cloud.google.com/apis/library/appengine.googleapis.com?project=xxxx. If not, you will receive a permission error during cloud build.
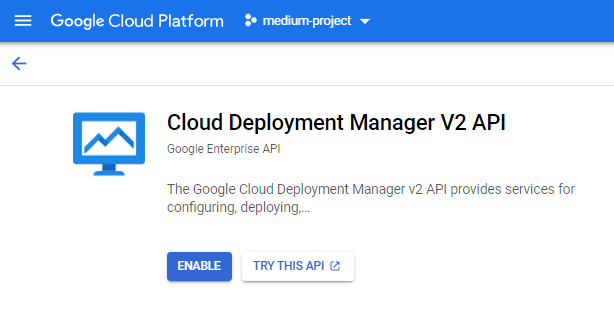
Also, active Cloud Deployment Manager V2: https://console.developers.google.com/apis/api/deploymentmanager.googleapis.com/overview?project=xxxxxxxx
Additional step: We need to add some delegation to the service account. This step means that the service account can act on behalf of another service account. Please do not add this permission on the project level since it poses a security risk! Below you can find an example of how to add roles/iam.serviceAccountUser on another service account.
PROJECT_ID=xxxxxx

PROJECT_NUMBER=$(gcloud projects list \
  --format="value(projectNumber)" \
  --filter="projectId=${PROJECT_ID}")

gcloud iam service-accounts add-iam-policy-binding \
    ${PROJECT_ID}@appspot.gserviceaccount.com \
    --member=serviceAccount:${PROJECT_NUMBER}@cloudbuild.gserviceaccount.com \
    --role=roles/iam.serviceAccountUser \
    --project=${PROJECT_ID}
And run it on Cloud Shell.

Run this in Cloud Shell to increase cloud build timeout to 1200 seconds from 600 seconds.
gcloud config set app/cloud_build_timeout 1200Step 7 — Deployment time!
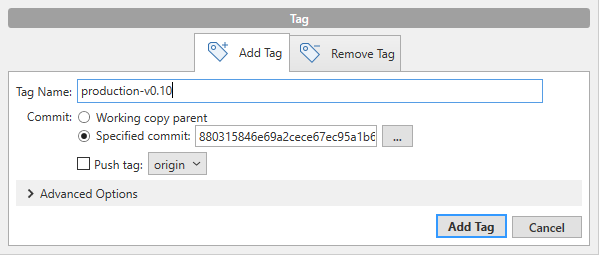
Commit something to the Git repository, tag the commit with a name like “production-v0.10”, and push to remote origin.
Or through Git command.
$ git status
$ git add .
$ git commit -m "Some updates."
$ git tag production-v0.10
$ git push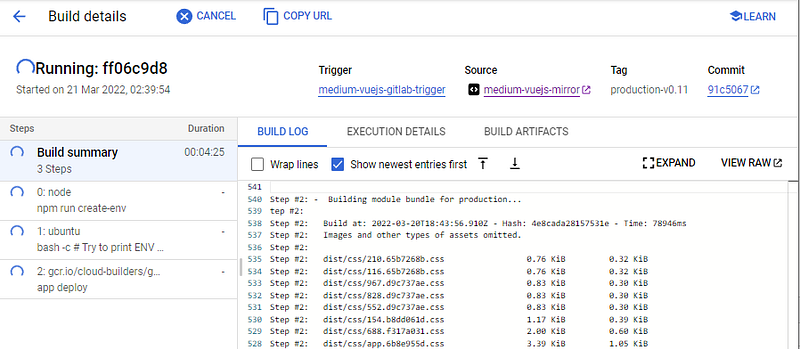
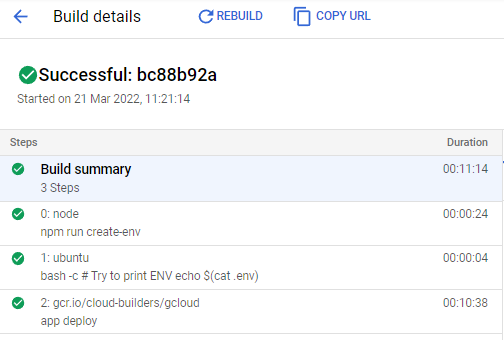
Watch it build automatically, and feels good!
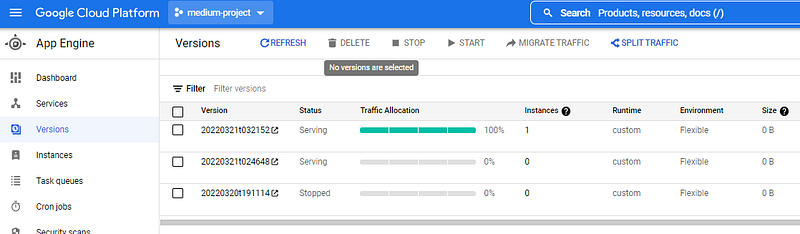
The application is now up and running! You can point your domain name and install SSL using App Engine. App Engine will help you to autoscale and split traffic between versions.
Wrapping up
Here are the steps to build a Vue.js application in App Engine. I decided to use App Engine because the Node.js application is hosted with Node runtime. I prefer my Vue.js to be hosted at the exact location to avoid confusion.
If it is this complicated, you might as well host your Vue application using Cloud Run because we can use Dockerfile to do all the deployment configurations without needing App Deploy.
If you like reading this, you might also like:
References:
https://nickfoden.com/app-engine-environment-variables/
https://www.harubears.com/ja/tech/vue-js/how-to-deploy-vuecli-to-appengine/