
GitFlow Explained With a Simple Example Using Sourcetree
Strict branching model designed around the project release using Sourcetree with a simple example

In this tutorial, we will see how to follow GitFlow on our project using Sourcetree.
We created a new Repository and our project will be called Beers.

As you can see the first branch that you will see is the master. This one should be your main branch and the code there is always the latest version that you have in the store or in a live website.
In GitFlow you have 2 Main Branches, the master and Develop. So let’s create the Develop branch a later to example why we need these two branches.
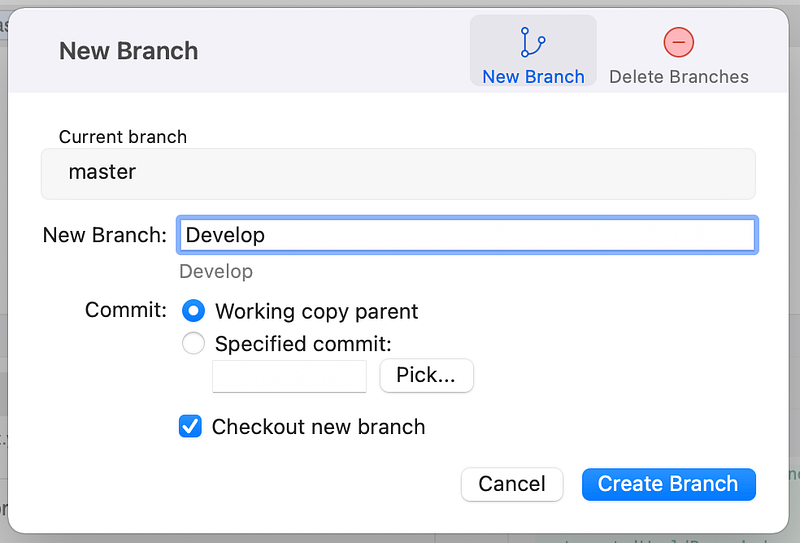
Firstly, check out the master branch and press Branch button in source tree. The following popup should be displayed. Enter Develop as branch name and press Create Branch.
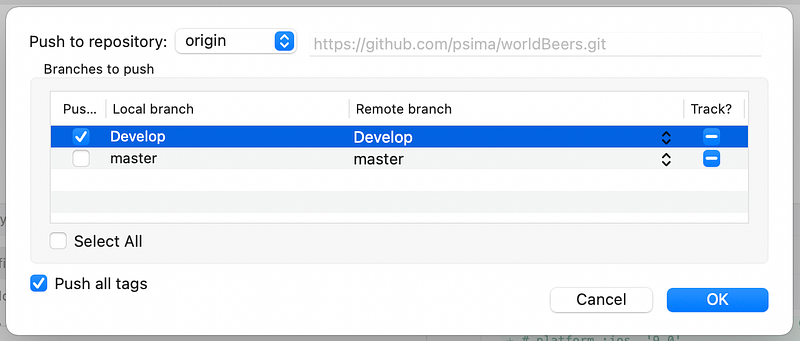
After creating the branch press the button “Push” and push the branch to origin so it will be visible also in the remote repository
Main Branches (master/Develop)
Now that we created the branches let’s see what’s their purpose. As we said before, the master is usually the latest version that we have in the store or maybe a live website and it should be updated only when our project will go live.
The Develop is the branch that all the developers will merge their tasks before the release and it’s the latest version (stable) before going live. We will explain later how we should work/merge on the Develop branch.
Feature Branch
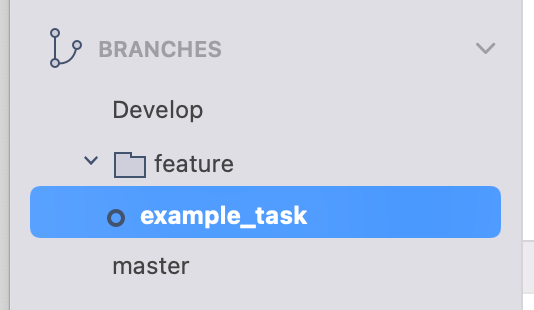
Now let’s suppose that you have a new task to deliver for the next release. All the new tasks should be created in a folder called “feature” and always starting from the Develop branch. To create the new branch for the task, follow the same procedure that we’ve done for the Develop branch, but this time as the name you can put “feature/my_branch_name”.
In this example, we will call it “feature/example_task”. Create it and push it to origin as before. Your project branches should look like this now:
If there are not a lot of people in the same team, the developers could create their tasks in the same git folder (feature). In case there are a lot of developers and different teams, then instead of “feature” you can use your team’s name.
Let’s suppose that you finished your task. The next step is to merge it to Develop. Before doing that you need to make an inverse merge of Develop into your branch because maybe some other developer had finished his task (and merged into develop) and you need to take the latest version.
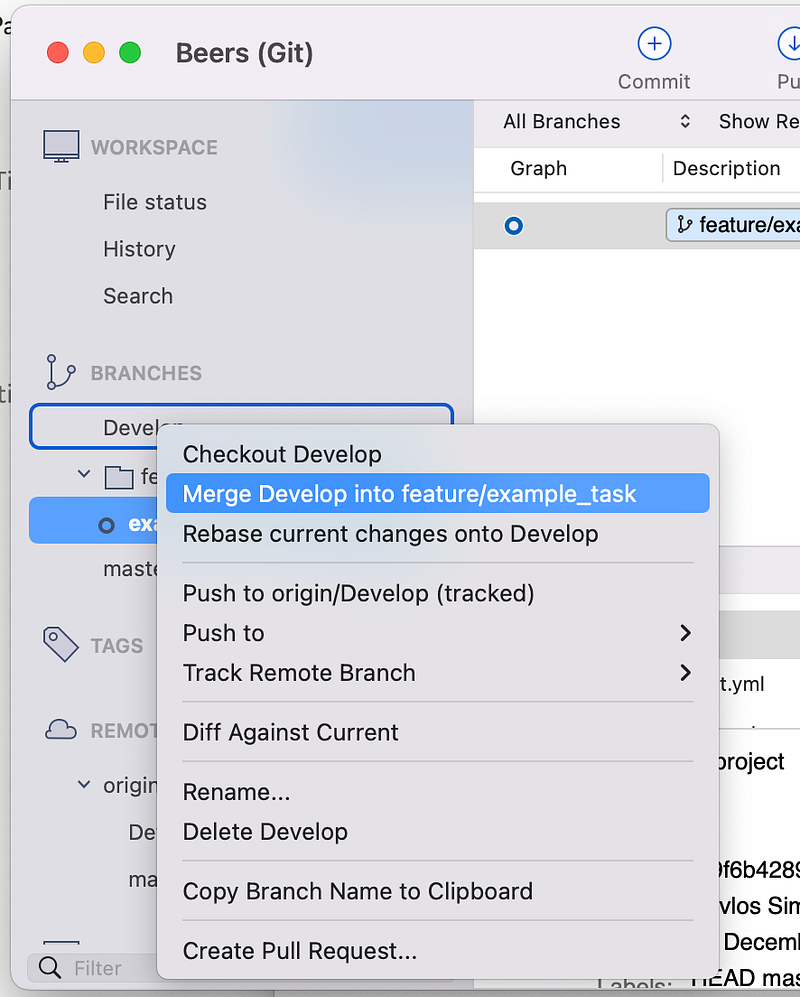
To make an inverse merge you should checkout your example_task branch and the right click on Develop. A dialog should be displayed. Select “Merge Develop into feature/example_task
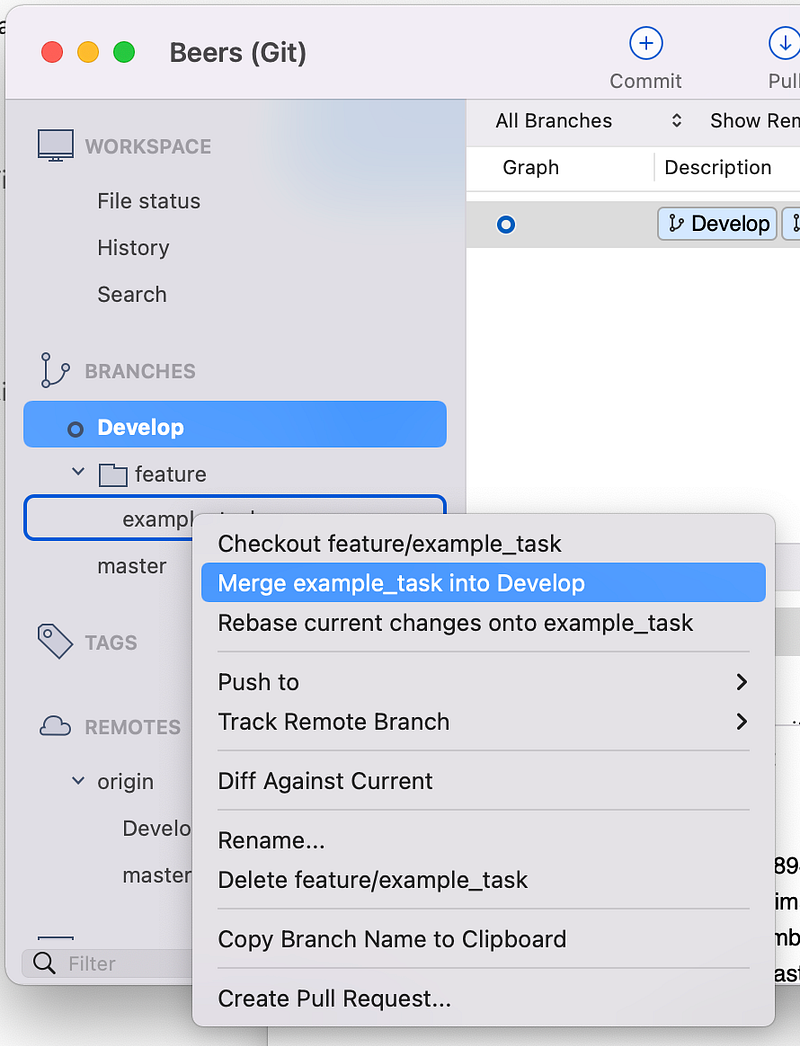
Now your branch has the latest code of Develop. It’s time to merge your branch into Develop. You should do the same thing as before but now checkout Develop and do a right click to example_task.
After the merge it’s a best practise to delete your branch so in the feature folder it will not be so much confusion.
Ok, now all the Developers had finished their tasks, they merged their code to Develop and now it’s time to prepare a version that will go live.
The next step is to create a Release branch.
As before create a new branch and this time we can call it “release/1.0.0” in which the release/ is the folder and the 1.0.0 is the new version of our project. Your repository will look like this:

Let’s explain the release branch
Release Branch
This branch will be used when all the teams have merged their code into development and the app is ready for testing. The naming should be like this: release/1.0.1 which 1.0.1 is our version of the application.
All the possible bug fixes found on the testing should be merged on this branch.
Now let’s suppose that the testing team found a bug in the release version and we need to fix it. A new branch should be created starting this time from the release branch.
Hotfix Branch
This one will be used only if in the previous branch (release) had some issues in the testing and we need to perform a bug fix. This usually is created starting from the release branch. The naming should be hotfix/my_bug
If everything is ok the hotfix branch should be merged on the release branch and after we need to delete the my_bug branch. The release branch has no more bugs and it’s approved from the testing team. When we are live we should follow these steps:
- merge release/1.0.0 to Develop branch
- merge release/1.0.0 to master branch
- delete release/1.0.0
- checkout master
- create a version tag
The last step is just to keep track of our version because sometimes we need to fix some bugs to a specific version. To create a tag you can go to the repository under menu and then press tag. A dialog like this should be displayed:

Check also the Push tag option and press Add.
At this point, you’ve finished with the branching model. Keep in mind that once the release branch is created the other developers could keep working in their branches and add stuff to Develop, but their tasks will be included after the current release.


