
Getting Started with Raspberry Pi: Bring Your Projects to Life
Getting started with a Raspberry Pi can be a little confusing at first. But as you dive in, you realize that it’s not that hard.
Whether you’re a programming prodigy, an aspiring maker, or simply curious about this credit-card-sized wonder, I’ll try to help you get started with Raspberry Pi.
Understanding Raspberry Pi
Before talking about setting up the Raspberry Pi, it’s important to have an idea about what it is composed of. After all, knowing your way around your Raspberry Pi is the key to unlocking its full potential.
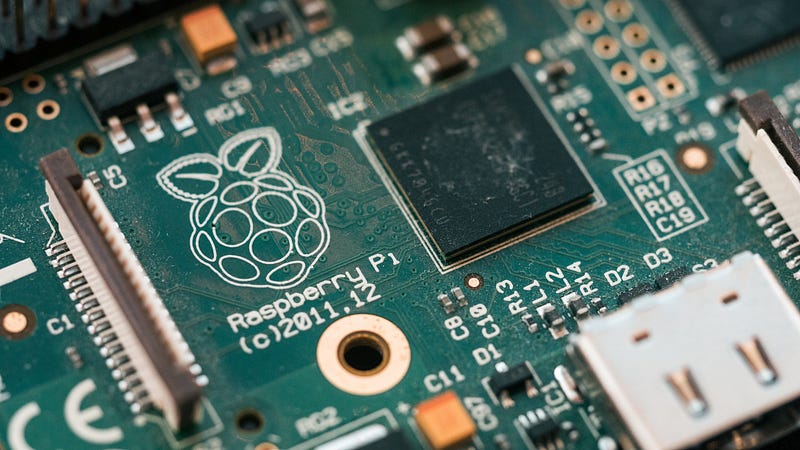
Raspberry Pi is composed of various hardware components that work together seamlessly to create a powerhouse of possibilities. At its core, you’ll find a Broadcom system-on-a-chip (SoC) that includes a processor, memory, and graphics processing unit (GPU). Depending on the model, you’ll also have USB ports, HDMI ports, an Ethernet connection, Wi-Fi capability, and GPIO (General-Purpose Input/Output) pins for connecting external devices.
The specifications of Raspberry Pi models have evolved over the years, offering increased processing power and enhanced capabilities. From the early models like Raspberry Pi 1 Model B to the latest iterations such as Raspberry Pi 4 Model B, each version brings improvements that cater to different needs and projects.
Raspberry Pi comes in a variety of flavors, each with its own set of features and capabilities. It’s essential to understand the differences between the models to choose the one that best suits your needs. Let’s take a quick tour of some popular Raspberry Pi models:
- Raspberry Pi Zero: This tiny Pi packs a punch despite its size. It’s ultra-affordable and perfect for projects where space is limited. Just imagine the possibilities of a pint-sized powerhouse!
- Raspberry Pi 3 Model B+: Offering a balance between cost and performance, this model is a crowd favorite. With built-in Wi-Fi and Bluetooth connectivity, it opens up a world of wireless possibilities.
- Raspberry Pi 4 Model B: The latest and greatest in the Raspberry Pi lineup, this model takes performance to the next level. With faster processors, increased RAM options, and multiple USB 3.0 ports, it’s a beast waiting to be unleashed.
Now that you have a grasp of the hardware, it’s time to talk about the software. Raspberry Pi supports a range of operating systems that can transform it into a media center, a retro gaming console, a home automation hub, or even a mini web server. Some popular choices include:
- Raspberry Pi OS (Raspbian): A Debian-based operating system optimized for Raspberry Pi, providing a user-friendly environment and a vast library of software.
- Ubuntu Mate: A lightweight and powerful Linux distribution that brings the familiar Ubuntu experience to your Raspberry Pi.
- RetroPie: Turn your Raspberry Pi into a retro gaming console with this gaming-oriented operating system that supports a wide range of classic gaming platforms.
Setting Up Raspberry Pi
Now that you understand a bit better you Raspberry Pi, let’s turn it on. I’ll assume you won’t be setting it up only with SSH, so you’ll need the following things:
- Raspberry Pi board: Select the model that best suits your needs and interests. Remember, each model has its own specifications and capabilities, so choose wisely!$
- MicroSD card: This will serve as the Pi’s storage and hold the operating system. Make sure it has sufficient capacity (16GB or higher) to accommodate your projects.
- Power supply: Choose a reliable power adapter that matches your Raspberry Pi’s power requirements. It’s crucial to provide sufficient and stable power to avoid any hiccups.
- Keyboard and mouse: These input devices will help you interact with your Raspberry Pi. Opt for USB-based ones for easy compatibility.
- Display: Connect a monitor or TV via HDMI to visualize the Pi’s output. Ensure that the display is compatible with HDMI connections.
- HDMI cable: Use a high-quality HDMI cable to connect your Raspberry Pi to the display. This will ensure a clear and crisp visual experience.
- Internet connectivity: For most projects, having an Ethernet cable or a Wi-Fi connection is essential. This enables your Pi to communicate with the digital world.
Once you have your materials ready, it’s time to get the heart and soul of your Raspberry Pi in place — the operating system. Raspberry Pi OS (formerly known as Raspbian) is a popular choice and a great starting point for most users. Follow these steps to install the operating system:
- Download Raspberry Pi Imager. It’s a convenient tool to quickly set up a Raspberry Pi.
- Choose the OS you want and flash your image into the SD card. It should be straightforward if you use Raspberry Pi Imager.
- Insert the MicroSD card into the dedicated slot on your Raspberry Pi. This is where all the magic happens!
With the operating system in place, it’s time to perform the initial configuration and set up your Raspberry Pi. Connect the keyboard, mouse, and display to the appropriate ports on your Raspberry Pi, then plug in the power supply. The Raspberry Pi will boot up and display the initial setup wizard on the connected display. Follow the on-screen instructions to configure the language, time zone, and other preferences.
Exploring the Raspberry Pi Environment
When you first boot up your Raspberry Pi, if you’ve installed an OS with a desktop environment, you’ll be greeted by the familiar desktop interface. The desktop environment provides a graphical user interface (GUI) that allows you to interact with the Pi using your mouse and keyboard.
You can navigate the file system just like you would do on your computer. Use the file manager, typically represented by a folder icon, to navigate through your files and folders effortlessly. Copy, move, and delete files as you would on any other operating system.
Make your Raspberry Pi truly your own by customizing its settings and preferences. Access the system settings menu, usually found in the taskbar or the main menu, and explore the various options available. Adjust the display resolution, configure Wi-Fi settings, personalize the desktop wallpaper, etc…
Then, it’s time to venture into the command line interface (CLI). The CLI provides a powerful and efficient way to interact with your Pi using text-based commands. Open a terminal window, and you’ll have the world of command-line magic at your fingertips. From executing commands to writing scripts, the CLI offers unparalleled control and flexibility.
Finally, you can install additional software. Indeed, one of the joys of Raspberry Pi is its vast software ecosystem. Raspberry Pi OS comes with a package manager called “apt” that makes the installation process a breeze. Open a terminal window or use the graphical package manager to search for and install software that matches your interests and projects. To install something, you just have to type sudo apt install package_name in the CLI.
Working with GPIO pins
GPIO pins are the digital “nervous system” of your Pi, allowing you to interface it with a wide range of external components and devices. Each GPIO pin can be configured as either an input or an output, enabling you to read sensor data or control external components such as LEDs, motors, and buttons.
To interact with GPIO pins, you’ll have to learn coding. The perfect companion for this task is Python. Indeed, Python’s simplicity and versatility make it an excellent choice for writing code that controls the GPIO pins. By using libraries such as RPi.GPIO, you can access and manipulate the GPIO pins in your Python programs.
You also have other libraries such as WiringPi and pigpio, offering comprehensive documentation and active communities that can answer your questions and provide insights.
Networking and Connectivity
One of the key features of Raspberry Pi is its ability to connect to a local network, allowing you to access and control it from other devices. There are two primary methods to connect Raspberry Pi to a network: using Ethernet or Wi-Fi.
For Ethernet you just have to connect an Ethernet cable from your router or modem to the Ethernet port on the Raspberry Pi board and the Raspberry Pi should automatically detect the connection and obtain an IP address from the network.
For Wi-Fi, click on the network icon in the top-right corner of the desktop interface on Raspberry Pi. Select your Wi-Fi network from the available networks and enter the required credentials (if any). Once connected, Raspberry Pi will acquire an IP address from the network.
To ensure smooth network communication and access, it’s important to configure the network settings on your Raspberry Pi properly.
If you’re using an Ethernet connection, the network settings are usually obtained automatically through DHCP. However, if you wish to assign a static IP address, you can access the network settings through the Raspberry Pi configuration interface or by modifying the network configuration file. This article is already too long, so click here for a guide on how to set up a static IP address.
For a Wi-Fi connection, you can access the network settings by clicking on the network icon in the top-right corner of the desktop interface. From there, you can manage Wi-Fi networks, set up a static IP address, or configure advanced network options.
Then, you can also set up SSH to allow remote access to your Raspberry Pi. It allows you to control it from another device on the same network, enhancing its functionality and convenience. The most common method for remote access is using Secure Shell (SSH). Here’s how to enable it:
- Open the Raspberry Pi configuration interface by clicking on the Raspberry Pi icon in the top-left corner, selecting “Preferences,” and choosing “Raspberry Pi Configuration.”
- In the “Interfaces” tab, enable SSH by ticking the box next to “SSH” and click “OK.”
Alternatively, you can enable SSH via the command line by running the command sudo raspi-configand navigating to “Interfacing Options” > “SSH” > “Enable.”
Once SSH is enabled, you can access your Raspberry Pi remotely using CLI or SSH client software such as PuTTY. For example, you can type ssh pi@ip_address for a basic SSH connection.
You can also consider port forwarding or installing software like Wireguard if you want to access your Raspberry Pi from a device that is not on the same network as your Raspberry Pi.
Tips for Optimizing Raspberry Pi Performance
To ensure smooth operation and maximize performance, it’s essential to manage system resources effectively on your Raspberry Pi. Here are some tips to keep in mind:
- Close unnecessary applications: Running multiple applications simultaneously can consume valuable resources. Close any unnecessary applications or background processes to free up system memory and CPU cycles.
- Monitor resource usage: Keep an eye on resource usage using system monitoring tools. Tools like htop or the built-in System Monitor can help you identify any resource-hungry processes and take appropriate action.
- Optimize software configurations: Some applications may have settings that allow you to optimize their resource usage. Explore the configuration options of specific applications to fine-tune their performance on your Pi.
Also, if you’re looking to push the boundaries of your Raspberry Pi’s performance, overclocking might be an option worth considering. Overclocking allows you to increase the clock speed of the CPU and other components, resulting in improved performance. However, it’s important to note that overclocking can generate more heat and potentially affect the stability of your Pi. Be sure to cool correctly your Raspberry Pi if you plan to overclock it. For me, I have some fans in my Raspberry Pi case, allowing effective cooling. Another thing to keep in mind i sthat different Raspberry Pi models have different overclocking capabilities. Research your specific Pi model to understand its limitations and recommended settings.
Finally, certain applications or use cases may benefit from specific performance tweaks. Here are a few examples:
- Graphics-intensive applications: If you’re working with graphics-intensive applications or running a desktop environment on your Pi, adjusting the GPU memory allocation may improve performance. Allocate more memory to the GPU in the Raspberry Pi configuration settings or via raspi-config.
- Network performance: If you rely heavily on network connectivity or are running server applications, optimizing network settings can enhance performance. Explore options like reducing network latency, enabling hardware acceleration, or tweaking network buffer sizes to optimize network performance.
- Real-time applications: For real-time applications that require precise timing, disabling the CPU’s dynamic frequency scaling (CPU throttling) can help ensure consistent and predictable performance. This can be done by modifying the CPU governor settings in the operating system.
As you can see, you can really customize your Raspberry Pi to suit your needs.
Ressources and Further Learning
As you continue to explore and expand your Pi knowledge, it’s important to know where to find valuable resources and further learning opportunities.
If you’re looking for online communities, you can check out these:
- Raspberry Pi Forums: The official Raspberry Pi forums (https://www.raspberrypi.org/forums/) provide a space to ask questions, share projects, and interact with a supportive community of Pi enthusiasts.
- Reddit: The Raspberry Pi subreddit (https://www.reddit.com/r/raspberry_pi/) is an active community where you can find discussions, project showcases, and helpful advice from fellow Pi users.
- Stack Exchange: The Raspberry Pi Stack Exchange (https://raspberrypi.stackexchange.com/) is a question and answer site specifically dedicated to Raspberry Pi. It’s a great place to find solutions to specific technical issues or ask your own questions.
If you prefer offline resources or want to delve deeper into specific aspects of Raspberry Pi, there are several excellent books, tutorials, and official documentation available. For example:
- “Raspberry Pi Cookbook” by Simon Monk: This comprehensive guide covers a wide range of Raspberry Pi projects and provides step-by-step instructions along with valuable tips and tricks.
- Raspberry Pi Foundation’s Official Documentation: The Raspberry Pi Foundation (https://www.raspberrypi.org/documentation/) offers extensive official documentation that covers everything from getting started to advanced topics like GPIO, camera modules, and more.
- Online tutorials and project blogs: Websites like Adafruit (https://learn.adafruit.com/category/raspberry-pi) and Instructables (https://www.instructables.com/circuits/) provide a wealth of project tutorials, ideas, and step-by-step instructions to inspire your own Pi creations.
Final Note
By now, you should have a solid foundation of knowledge and practical skills to start building your own projects and exploring new possibilities. Raspberry Pi offers an incredible platform for learning, creating, and innovating.
This article is the first of a series about Raspberry Pi, so be sure to follow me if you want to know more about it!
To explore more of my Tech stories, click here!
If you liked the story, don’t forget to clap and maybe follow me if you want to explore more of my content :)
You can also subscribe to me via email to be notified every time I publish a new story, just click here!
If you’re not subscribed to Medium yet and wish to support me or get access to all my stories, you can use my link: