
Generate video subtitles with NodeJS and AI and incorporate them into the video

Nowadays whenever we want to deliver a message to our audience, the most effective way is to create a video that we upload and distribute on social networks. Here we need to provide a flexible watching experience and take care of video subtitles. Subtitles make video useful when a person is watching it with the sound off or in a noisy environment that obscures the sound. Also, subtitles make it possible for people with hearing and learning disabilities to watch and engage with your videos.
This article will focus on the generation of video subtitles and ways to attach them to videos.
Agenda
1. Ways to embed subtitles in a media container 2. How to create SRT/VTT files for subtitles — — 2.1 Add task to AWS Transcribe service — — 2.2 Track the status of the AWS Transcribe service task 3. Embed subtitles in the video — — 3.1 Adding subtitles as a separate stream in a media container — — 3.2 Hard copy (burn) subtitles into the video stream directly 4. Technique to implement subtitle appearance like in karaoke
1. Ways to embed subtitles in media containers
In most cases, embedded titles in media containers are presented as files in SRT or WebVTT formats. Actually, both files are plain text files following a particular syntax. For example, the SRT file looks like that:
1
00:05:00,400 --> 00:05:15,300
This is an example of a subtitle.
2
00:05:16,400 --> 00:05:25,300
This is an example of a subtitle - 2nd subtitle.By the way, here you may use not only plain text but use HTML tags like <b> , <i> , <u> , <font> if you would like to highlight some words.
1
00:05:00,400 --> 00:05:15,300
This word is <b>bold</b>
An example of a WebVTT file looks like this:
WEBVTT

00:05:00.400 --> 00:05:15.300
This is an example of a subtitle.00:05:16.400 --> 00:05:25.300
This is an example of a subtitle - 2nd subtitle.2. How to create SRT/VTT files for subtitles
Of course, you may create a particular UI interface where users after video creation should type the text on their own and put labels. Based on this information you may generate SRT or VTT files. An example of such an interface you may come across in the Youtube dashboard for example:
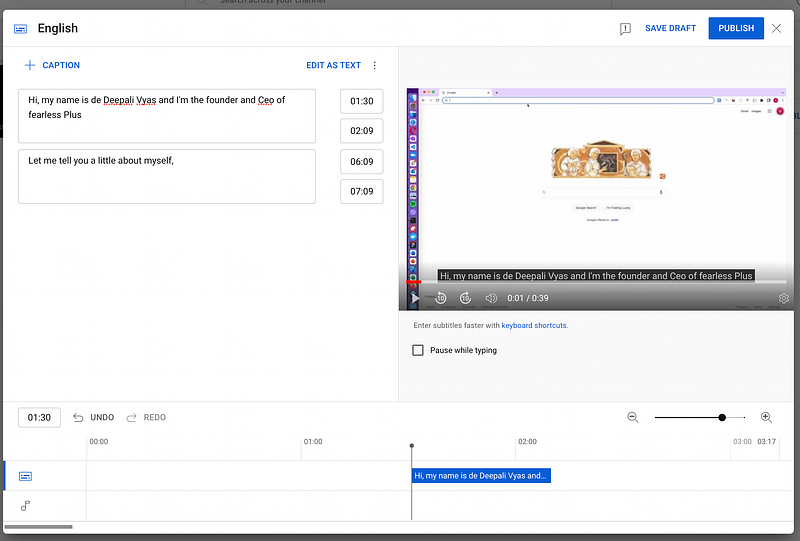
But probably it’s better to try to create this file automatically with a speech-to-text service.
I will show you how you may do it using the AWS Transcribe service. This service is an automatic speech recognition service that uses machine learning models to convert audio to text.
For running the code below you need to have an AWS Account (to create an account, see How do I create and activate a new AWS account). Also, you have to provide AWS credentials (for details, see Setting credentials in Node.js)
Before going further, let’s upload any video/audio file in our s3 bucket.
Let’s develop simple koa server with a router that kicks the job off to AWS Transcribe service and responds back with a transcription job ID which is supposed to be used to check the status of the running job.
We’re going to use AWS SDK for JS version 3 with modular architecture and in our case, we should install the client for speech-to-text service:
yarn add @aws-sdk/client-transcribe
2.1 Add task to service
It’s supposed to be a POST request with the following shape:
curl \
--request POST 'localhost:3100/speech-to-text/add' \
--header 'Content-Type: application/json' \
--data-raw '{
    "mediaFile": "... your media file URL uploaded in s3 bucket...",
    "lang": "en-EN",
    "outputSubtitlesFormats": ["srt", "vtt"]
}'
Each parameter in the request mean:
mediaFile— [required] — URL path to media file uploaded in S3;lang— [optional] — the language of speech; if we skip it — AWS service will try to detect the language automatically, but it takes more timeoutputSubtitlesFormats— [optional] — the shape of subtitles format and AWS supports only two of them— SRT and VTT; if we skip it — AWS service provides subtitles only in JSON format with the following shape:
{
  "jobName": "7c8f1aa5-2073-4788-9828-5e6ad5b83e17",
  "results": {
      "transcripts": [
          {
             "transcript": "Welcome to Amazon Transcribe."
          }
       ],
       "items": [
           {
              "start_time": "0.64",
              "end_time": "1.09",
              "alternatives": [
                  {
                     "confidence": "1.0",
                      "content": "Welcome"
                   }
                ],
               "type": "pronunciation"
            },
            // other items skipped for brevity
        ]
    },
    "status": "COMPLETED"
}
Let’s implement a command (function), which would send a command to Transcribe service:
// src/commands/transcribe.ts
import {
  LanguageCode,
  StartTranscriptionJobCommand,
  TranscribeClient,
  SubtitleFormat
} from '@aws-sdk/client-transcribe';
import { v4 as uuid } from 'uuid';


// create Transcribe client
// pay attention that it's a bad practice to expose
// your creadentials in repository and do not forget
// include .env file in .gitignore file if it exists
const client = new TranscribeClient({
  region: process.env.AWS_REGION,
  credentials: {
    accessKeyId: process.env.AWS_ACCESS_KEY_ID,
    secretAccessKey: process.env.AWS_SECRET_ACCESS_KEY,
  },
});


export type AddTranscribeJobCommand = {
  mediaFile: string;
  lang?: LanguageCode | string;
  outputSubtitlesFormats: (string | SubtitleFormat)[];
};

export const addTranscribeJob = async ({
  mediaFile,
  lang,
  outputSubtitlesFormats
}: AddTranscribeJobCommand) => {
  const transcriptionJobName = uuid();
  const response = await client.send(
    new StartTranscriptionJobCommand({
      TranscriptionJobName: transcriptionJobName,
      Media: {
        MediaFileUri: mediaFile,
      },
      OutputBucketName: process.env.S3_BUCKET_NAME,
      ...(lang ? { LanguageCode: lang } : { IdentifyLanguage: true }),
      ...(outputSubtitlesFormats
        ? { Subtitles: { Formats: outputSubtitlesFormats } }
        : {}),
    })
  );
  return { transcriptionJobName, response };
};
A couple of comments here. In addTranscribe function, we create a unique name for a job. Also, we should define the language of media content (for example, en-US) and if for any reason we could know previously what the language is, we rely on automatic language detection setting field IdentifyLanguage . And of course, we defined the S3 bucket name, where the AWS service uploads extracted subtitles.
And router which invokes this command:
// /src/routers/speechToText.ts
import Router from '@koa/router';
import {
  addTranscribeJob,
  addTranscribeJobSync,
  checkTranscribeJobState,
} from '../commands/transcribe';

const router = new Router({
  prefix: '/speech-to-text',
});

router.post('/add', async (ctx) => {
   const body = ctx.request.body;
   const response = await addTranscribeJob(body);
   ctx.status = 200;
   ctx.body = response;
});

export default router;
And the last step is to attach the router as a koa middleware:
import cors from '@koa/cors';
import Koa from 'koa';
import dotenv from 'dotenv';
import bodyParser from 'koa-bodyparser';

// this library expose all enviroment variables
// from .env file and these are available in
// process.env variable, for example: process.env.AWS_ACCESS_KEY_ID
// FYI: do not forget include your .env file in .gitignore file
dotenv.config();

import speechToTextkRouter from './routers/speechToText';

const app = new Koa();

app.use(bodyParser());
app.use(cors());

app.use(speechToTextkRouter.routes());

export default app;
Time is to test invoking this command:
curl
--request POST 'localhost:3200/speech-to-text/add' \
--header 'Content-Type: application/json' \
--data-raw '{
   "mediaFile": "... your media file URL uploaded in s3 bucket...",
   "lang": "en-US",
   "outputSubtitlesFormats": ["srt", "vtt"]
}'
As soon as we invoke it, it should provide a response with a unique ID of the job transcriptionJobName
{
    "transcriptionJobName": "f470a771-e044-44bd-83d8-9e71f8b10c5d",
    "response": {
       // other information
    }
}
AWS service put a task to transcribe speech to text into a queue and starts to complete it in the background.
2.2 Track the status of the job
AWS Transcribe service could not be completed immediately and its job happens in the background. The next step is the development of a route that by unique ID returns the job status.
// src/commands/transcribe.ts
import {
  TranscriptionJobStatus,
  GetTranscriptionJobCommandOutput,
} from '@aws-sdk/client-transcribe';


// skipped command for adding job for AWS transcribe service
// and initializing Transcribe Client

const normaliseJobState = ({
  TranscriptionJob,
}: GetTranscriptionJobCommandOutput) => {
  const status = TranscriptionJob.TranscriptionJobStatus;

  if (status === TranscriptionJobStatus.FAILED) {
    return {
      status,
      error: TranscriptionJob.FailureReason,
    };
  }
  if (status === TranscriptionJobStatus.COMPLETED) {
    return {
      status,
      completedWithinSec:
        (new Date(TranscriptionJob.CompletionTime).getTime() -
        new Date(TranscriptionJob.CreationTime).getTime())/1000,
      json: TranscriptionJob.Transcript.TranscriptFileUri,
      subtitleFileUris: TranscriptionJob?.Subtitles?.SubtitleFileUris || [],
    };
  }
  return { status };
};

export const checkTranscribeJobState = async (jobId: string) => {
  const response = await client.send(
    new GetTranscriptionJobCommand({
      TranscriptionJobName: jobId,
    })
  );
  return normaliseJobState(response);
};
And let’s create a new route that invokes a command checkTranscribeJobState :
// /src/routers/speechToText.ts
import Router from '@koa/router';
import {
  // skipped for brevity
  checkTranscribeJobState,
} from '../commands/transcribe';

const router = new Router({
  prefix: '/speech-to-text',
});

router.post('/add', async (ctx) => {
   // skipped for brevity
});

router.get('/status/:jobId', async (ctx) => {
  const jobId = ctx.params.jobId;
  const response = await checkTranscribeJobState(jobId);
  ctx.status = 200;
  ctx.body = response;
});

export default router;
Okay, above we have our job ID f470a771-e044-44bd-83d8-9e71f8b10c5d and invoking this URL we’re ready to track the job status (instead of ${jobId} we should put 7c8f1aa5-2073-4788-9828-5e6ad5b83e17):
curl --request GET 'localhost:3200/speech-to-text/status/${jobId}'Well, at first you may get the following response:
{
    "status": "IN_PROGRESS"
}
But as soon as a task is completed — you get a response with this shape:
{
  "status": "COMPLETED",
  "completedWithinSec": 28.801,
  "json": "https://s3.us-east-1.amazonaws.com/${YOUR_BUCKET_NAME}/f470a771-e044-44bd-83d8-9e71f8b10c5d.json",
  "subtitleFileUris": [
     "https://s3.us-east-1.amazonaws.com/${YOUR_BUCKET_NAME}/f470a771-e044-44bd-83d8-9e71f8b10c5d.srt",
      "https://s3.us-east-1.amazonaws.com/${YOUR_BUCKET_NAME}/f470a771-e044-44bd-83d8-9e71f8b10c5d.vtt"
  ]
}
AWS service uploads outputs in the target S3 bucket:

3. Embed subtitles in the video
For this purpose, we’re going to use the FFmpeg framework and it provides two ways to embed it:
- adding subtitles as a separate stream in the media container and it’s supposed to be controlled by the player if it has such a possibility;
- if you don’t want to rely on whether the player natively supports subtitles showing or the video is going to be uploaded to Instagram/TikTok, you may make a hard copy (burn) subtitles into the video stream directly
3.1 Adding subtitles as a separate stream in a media container like MP4
Suppose you play a video with a player which supports subtitles. In that case, the good news here is that we can simply attach subtitles as a separate stream to the video and allow this player manages subtitles via controls.
Well, let’s assume that we have an original video with path video.mov and subtitles in SRT format which we generated in chapter 1 with path subtitle_en.srt . Then with this command, we package the subtitle file in the media container:
ffmpeg \
-i video.mov \
-i subtitle_en.srt \
-map 0:v -map 0:a -map 1\
-c copy -c:s mov_text \
-metadata:s:s:0 language=eng \
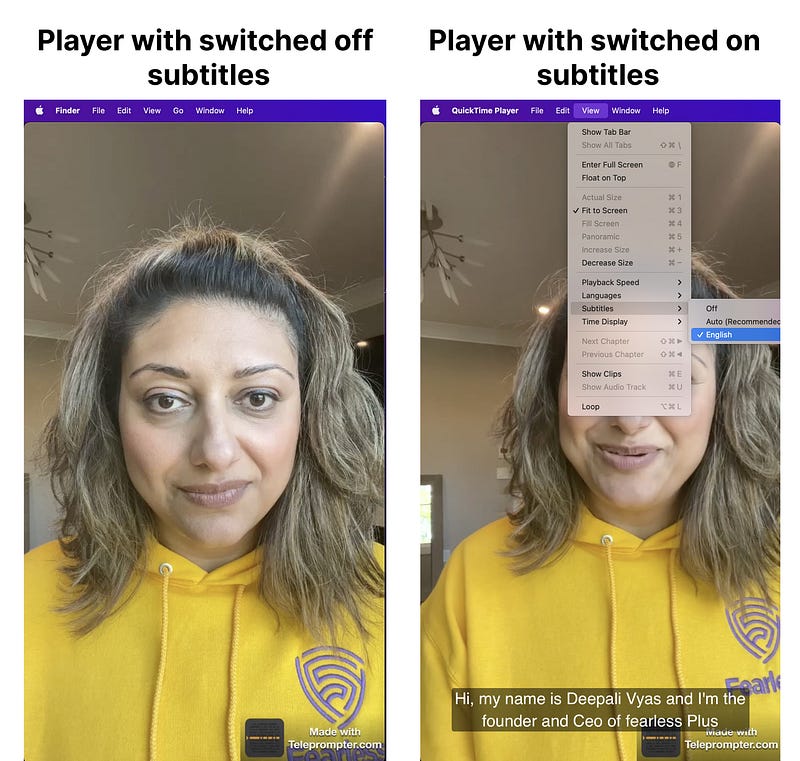
playersubtitles.mp4In this case, as soon as we open this file for example with QuickTime Player you may see that there’re no any captions. You should change setting and go to View->Subtitles->English:
Of course, you may translate your English subtitles and create a new file and let’s say that it’s the path subtitle_fr.srt. It’s absolutely fine to attach to the media container as many subtitles as you wish, therefore in our case, this command may look like that:
ffmpeg \
-i video.mov \
-i subtitle_en.srt \
-i subtitle_fr.srt \
-map 0:v -map 0:a -map 1 -map 2 \
-c copy -c:s mov_text \
-metadata:s:s:0 language=eng -metadata:s:s:1 language=fre \
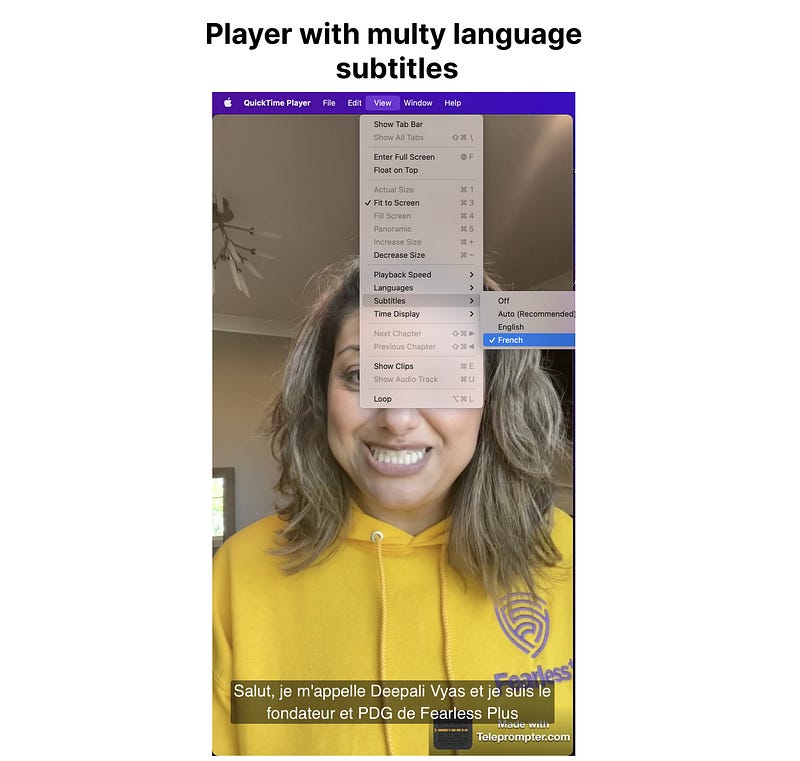
playersubtitles-multilanguage.mp4In this case, if we go to View->Subtitles->English of QuickTime Player we may see that we have two options to pick up subtitles: English and French:
3.2 Hard copy (burn) subtitles into the video stream directly
As we mentioned earlier if you would not like to rely on whether the player supports subtitles or you expect to upload the video to any social network — it's better to burn them in the video stream rather than have a separate subtitle file incorporated in the media container.
We may complete it with this simple FFmpeg command:
ffmpeg \
-i video.mov \
-vf "subtitles=subtitle_en.srt" \
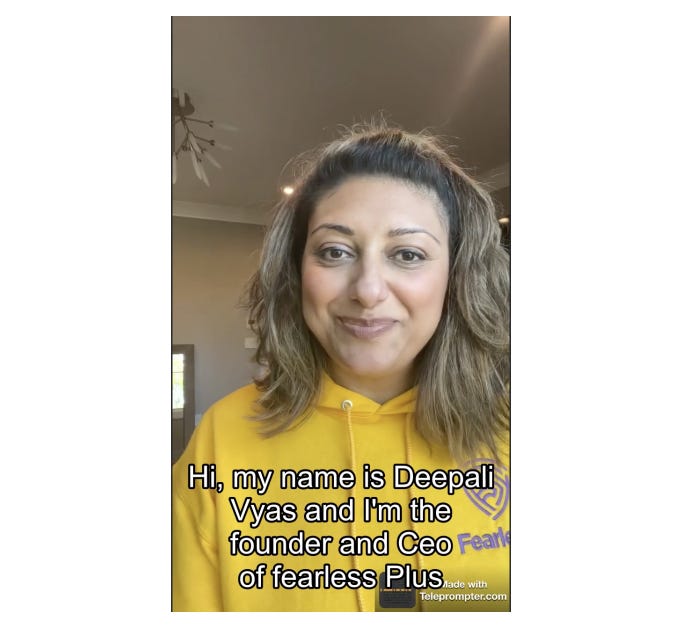
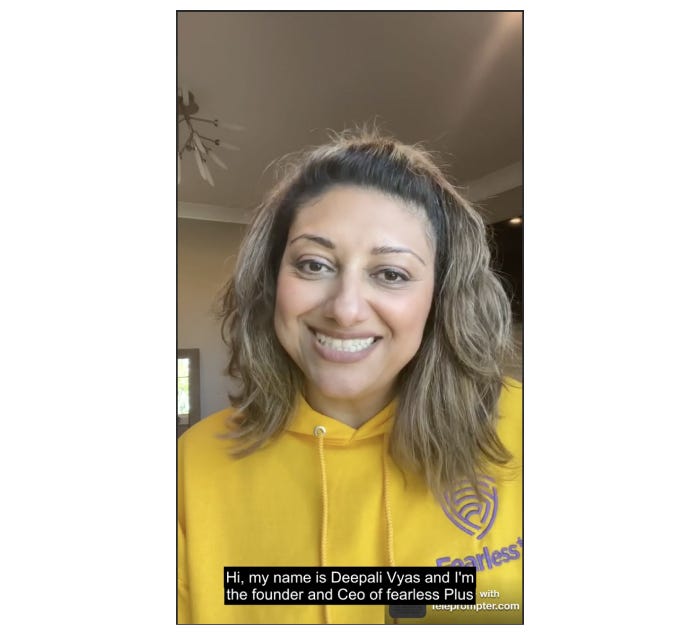
./cmd04_burned.mp4 Well, the result looks like that:
Probably, not so impressive and we need to adjust styles a little bit, and this filter allows us to override default properties, and some of those properties are defined in the parameters of force_style for filter:
ffmpeg \
    -i video.mov \
    -vf "subtitles=./media/cmd04/subtitle_en.srt: \
         force_style='Alignment=9,OutlineColour=&H100000000,BorderStyle=3,\
                      Outline=1,Shadow=0,Fontsize=8'" \
    ./cmd04_burned.mp4
The result will look like that:
In the last command probably all properties are self-explanatory, but I would like to focus on Alignment — it’s a number from range 0–11 and it places subtitles in these areas dependently on the number:
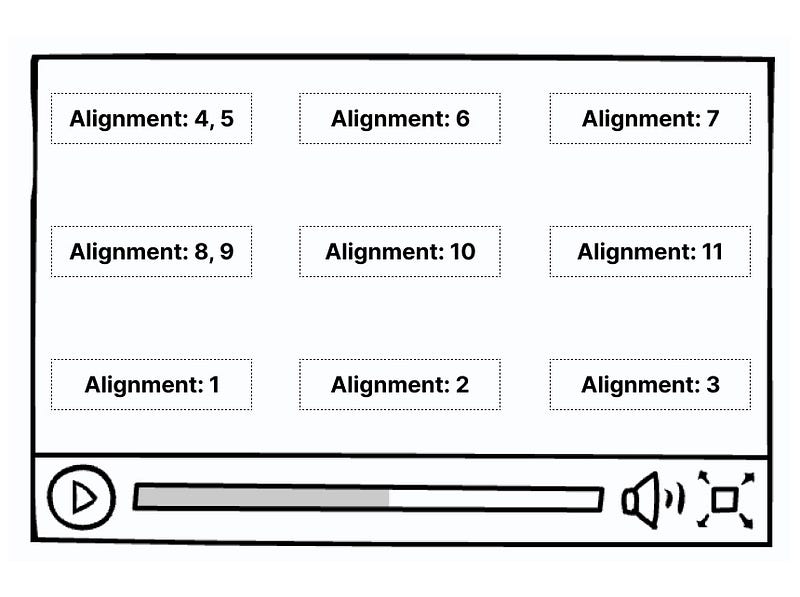
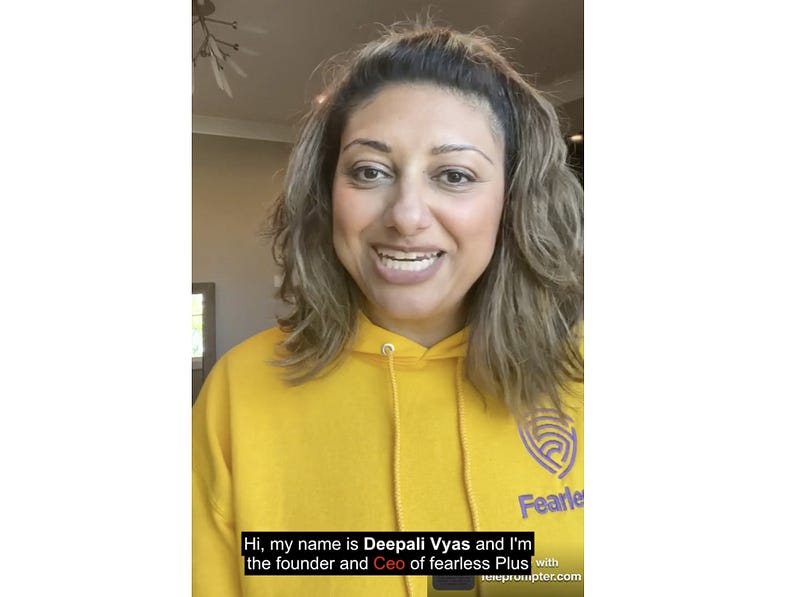
By the way, this filter works perfectly fine if we wrap words in special HTML tags in the SRT file, for example, let’s edit a little bit our SRT file by adding <b> and <font> tags:
0
00:00:01,670 --> 00:00:06,510
Hi, my name is <b>Deepali Vyas</b> and I'm the
founder and <font color="red">Ceo</font> of fearless Plus
Running the same FFmpeg command but with an edited subtitles file we get the following:
4. Technique to implement subtitle appearance like in karaoke
We already know that we may wrap some words in an SRT file with HTML tags and FFmpeg may work with them perfectly fine. Okey, let’s focus on the first timeline 00:00:01,670 -> 00:00:06,510 with text Hi. My name is Deepali Vyas and I'm the founder and CEO of Feraless Plus and split it in this way:
1
00:00:01,670 --> 00:00:02,210
<b>Hi,</b> <font color="#505050">my name is Deepali Vyas and I'm the
founder and Ceo of fearless Plus</font>

2
00:00:02,210 --> 00:00:03,510
<b>Hi, my name is</b> <font color="#505050">Deepali Vyas and I'm the
founder and Ceo of fearless Plus</font>

3
00:00:03,510 --> 00:00:04,510
<b>Hi, my name is Deepali Vyas</b> <font color="#505050">and I'm the
founder and Ceo of fearless Plus</font>

4
00:00:04,510 --> 00:00:05,210
<b>Hi, my name is Deepali Vyas and I'm the
founder</b><font color="#505050">and Ceo of fearless Plus</font>

5
00:00:05,210 --> 00:00:06,510
<b>Hi, my name is Deepali Vyas and I'm the
founder and Ceo of fearless Plus</b>
When we run the well-known FFmpeg command which we used before with a new version of the SRT file, we get the following effect:

You may ask — here you manually split this phrase — but we may implement any NodeJS function which for example may traverse existing SRT files. But it may be not the perfect way since we may see discrepancies between highlighted words and currently seeking ones. But if you remember, AWS Transcribe service provides JSON format, where speech splitter by word, and we have its timeline:
[
   {
      "start_time":"1.67",
      "end_time":"2.3",
      "alternatives":[{"confidence":"1.0","content":"Hi"}],
      "type":"pronunciation"
   },
   {
      "alternatives":[{"confidence":"0.0","content":","}],
      "type":"punctuation"
   },
   {
      "start_time":"2.31",
      "end_time":"2.5",
      "alternatives":[{"confidence":"1.0","content":"my"}],
      "type":"pronunciation"
   },
   {
      "start_time":"2.5",
      "end_time":"2.7",
      "alternatives":[{"confidence":"1.0","content":"name"}],
      "type":"pronunciation"
   },
 // other items
]
Analyzing this JSON file may build your SRT generator more precisely.


