
Games in Flutter — Flame & Box2D Part 2
Welcome to the second round of Games in Flutter. If you stumbled upon this article without reading Part 1, I would recommend having a look at the article linked below first.
Keep it rolling
If you followed the steps from part 1, you might need to clean up your game.dart file as one of the last sections was about drawing an example circle. Meanwhile, I uploaded the complete project (ahead of the posts here but not yet finished) to GitHub. So, if you are as lazy as I would be — simply run git clone on the complete project.
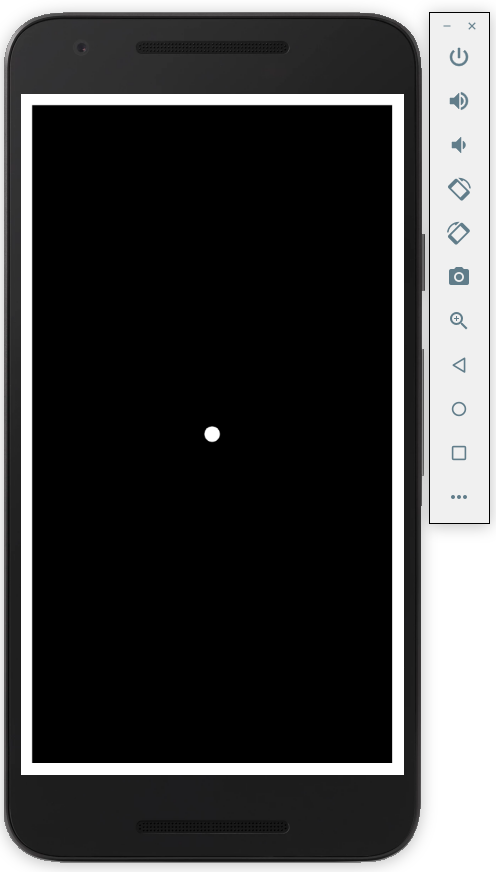
As mentioned before, the code might be ahead of my posts. Nevertheless I will explain the important elements one by one here. To keep the articles in a reasonable length I will skip some parts that are more or less self explaining; feel free to check out the comments in the code. In case you cloned the repository and restored the dart packages, you should see the following screen:
Ready, set, go!
We will start this post with our player class or, to stay within the term of our maze game, the ball class.
Looking at the ball class you will spot two more or less familiar methods:
- render(Canvas c)
- update(double t)
This two functions will show up for all elements of our game as soon as they need to be present on the screen. All of these functions will at the very end be called by our game.dart render and update method. When you create a new ball you have to hand in a reference of our game object and a starting position. The reference to the game is required to share the main physic object and other helper objects. 99% of the magic happens in the constructor, so let’s explore the code top down:
Body, shape and Fixtures
Each element that requires physics and interaction with other elements in our virtual world needs a Body. To build up a Body object we also have to set up a Shape, image it as a description of its appearance. With our ball we are in the lucky situation that we can reuse an existing shape (which is great, we don’t need to reinvent the wheel). Beside the CircleShape Box2D offers the following shape types:
- ChainShape — multiple line segments that offer collision from the outside and the inside
- CircleShape — a circle based on a given radius, collisions from the outside
- EdgeShape — an edge described by two points, you can connect them to multiple edges (for example a rectangle)
- PolygonShape — anything you can build up describing it with multiple points, by default up to 8 points are allowed
Switching back to our CircleShape we create it at the position (0,0) with a size of 10 cm (or 3,9"). If you are wondering why I’m talking in cm now and not in pixel, it’s because Box2D simulates objects based on “real world” properties. Of course, rendering a huge element on a tiny phone will not work, that’s why we scale the objects (have a look at Part 1 for more details) In the end our Ball size will be:
final screen size = 10 cm / (screen width / 5)
With the right scaling you can fit a realistically sized car next to a truck on your phone screen. There is a simple reason why Box2D is so curious about this: calculating the collision of a tiny ball hitting a wall is a total different story than a giant rock hitting this wall.
So, our shape is ready — we now go on with quickly creating our Paint object that will draw the ball with a white color. Followed by our BodyDef object, the body definition sets the initial speed, position and body type of our object. The ball will start with no speed at the provided position as a body type DYNAMIC. Box2D divides bodies into these types:
- Dynamic — positive mass, non-zero velocity determined by forces, moved by solver
- Kinematic — zero mass, non-zero velocity set by user, moved by solver
- Static — zero mass, zero velocity, may be manually moved
Important is the line that generates the final Body object using our world property inside the game class which is required to make Box2D work properly.
Hint: each Body object has a property called userData, you can store anything you like and reuse it later in functions that need to interact with different bodies.
Ok, Shape and Body are ready — last bit we have to add is the FixtureDef. This might sound complicated but in the end it simply describes important properties of our elements that are needed to calculate the interaction with other bodies in our game:
- Density — kg/m² for our ball with a radius of 0.10 m resulting in 0.031 m² surface it would be around 0.31 kg
- Restitution — elasticity from 0 to 1, where 1 means very bouncy
- Friction — ranging from 0 to 1, as higher it get’s, as more friction will be used during interaction with other elements
Linking our definition to our body is archived by calling createFixtureFromFixtureDef method offered by our body object.
Sensor usage — moving by motion
Let’s have a closer look at the code snippet below. It has an important job — making our user able to interact with our game by moving his phone.
As you can see we are using the gyroscope sensor of the phone. The below animation shows the values it provides in the lower right corner (Android Emulator)
Thanks to the Sensor lib we can make use of the gyroscopeEvents property which is called Stream<GyroscopeEvent>. Streams are a great way of handling series of asynchronous events in Dart. If you are familiar with the concept of Futures you can think of Streams as a (maybe never ending) list of Futures (for all details checkout the docs). In our use case we will receive a call to the function defined in the listen callback for each movement. The callback will provide an instance of the type GyroscopeEvent containing the movement data. The Android documentation tells us that the Gyroscope is providing the change to the last measured position as rad/s but we are only interested in the X and Y value for our 2D game. We scale the values with our factor and add them to our existing acceleration vector, the one that started with (0,0). Like in the real world, a ball rolling down a hill will speed up overtime, slow down, change its direction or come to a stop if you let it roll up again.
Draw and update — final parts
Drawing our ball is fairly easy, we simply move our canvas to the current top left corner of the ball and use the build in method drawCircel() with our 0.1 radius and paint object.
Updating the ball means applying a force to it based on the values collected from our Gyroscope sensor. Making use of the applyForceToCenter of the body object, we simply pass our vector every frame. This is not the ideal solution as it will change on how fast the game runs (target is 60 updates by second — 60fps) but for now it’s good enough for us.
Applying a force/impulse to a body in Box2D is one way of getting things to move — below is a brief overview about other options:
- Force (applyForce, applyForceToCenter) — gradual applying a force at a given position of the body, if applied to a none center point the body starts spinning. Forces are used to slowly accelerate, like pushing against a car over time, you will get it moving
- Impulse(applyLinearImpulse) — a force will change the velocity immediately; using the car example again, a car crashing into a parked one will change the velocity of the parked car in a single moment
- Transform(setTransform) — this is more a teleport as an actual movement, in one frame the element will move from its current position to its next position
Like for the impulse and force movement Box2D offers also a method to control the spinning of an object:
- applyAngularImpulse — changes the rotation immediately but not the direction of movement
- applyTorque — slowly over time changes the rotation of the object
Feel free to check out this link for some more examples (in C++).
Conclusion
You got a detailed overview about what kind of objects Box2D handles, how they are build up and what you have to consider while developing. We learned that having a right size and mass of a body is very important to get a realistic simulation. Size and mass is important but it also needs to be represented and this is done by the shapes — we got an overview about what you can do with the build in types. Of course, our users want to move the ball to navigate in the maze, so we check out the gyroscope sensor. In the last section I provided an overview about the different types of movement we can apply to a body.
Up next
In part three we will generate our wall class and prevent the ball from leaving the screen, ’cause that’s what he is doing at the moment as soon as you move the phone. We also will talk about building up the actual maze.
Resources
- Movements in Box2D https://www.iforce2d.net/b2dtut/forces
- Streams in Dart https://dart.dev/tutorials/language/streams
- Motion sensors in Android https://developer.android.com/guide/topics/sensors/sensors_motion


