
Full NestJS Starter Kit — Part 5 API Documentation & Client Code Generation

In this series of articles we’re walking through how to create a NestJS starter kit to use for your cloud applications. In our previous article we walked through how to setup observability in our app via logging, tracing, and metrics.
In this article we’ll setup our starter kit to expose documentation of our APIs via Swagger & OpenAPI. Additionally, we’ll generate typescript client code that can be leveraged by our front end applications.
If you are interested in learning more about what we do at Compoze Labs, please reach out!
OpenAPI & Swagger
OpenAPI is an open source standard for describing RESTful APIs. It is intended for both human and machine readability. On top of this documentation, we can leverage tools to generate clickable documentation (Swagger UI) and generate actual source code to call our APIs with. We’ll walk through configuring Swagger and generating client code!
Configuring Swagger
NestJS offers first class support for swagger which makes the initial setup easy. First, install the NestJS module:
pnpm install @nestjs/swagger
Next, we need to configure our app to use it. For this we’ll modify the bootstrap method in our main.ts file.
import { NestFactory } from '@nestjs/core';
import { AppModule } from './app.module';
import { SwaggerModule, DocumentBuilder } from '@nestjs/swagger';

import { LoggerProvider } from './logging/logger.provider';

async function bootstrap() {
  const app = await NestFactory.create(AppModule);
  const logger = await app.resolve(LoggerProvider)
  app.useLogger(logger);

  const config = new DocumentBuilder() // define Swagger UI via buildter
    .setTitle('Starter Kit API')
    .setDescription('')
    .setVersion('1.0')
    .addTag('startkit')
    .build();

  const document = SwaggerModule.createDocument(app, config); // create doc

  SwaggerModule.setup('api', app, document); // add to our nestjs app

  await app.listen(3000);
}
bootstrap();
If we run our app and navigate to the /api url we’ll see our Swagger UI is exposed.

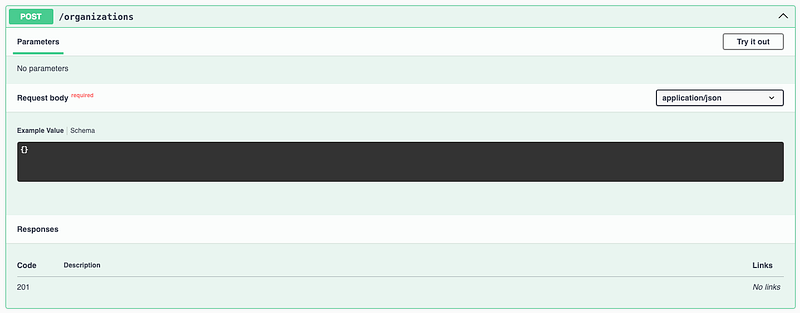
While it is showing the APIs we have defined, there are a few problems.
If we expand our POST /organizations we can see there isn’t much useful information.
Ideally, we want our API documentation to show us:
- Request body schema
- Response body
- Expected HTTP error codes
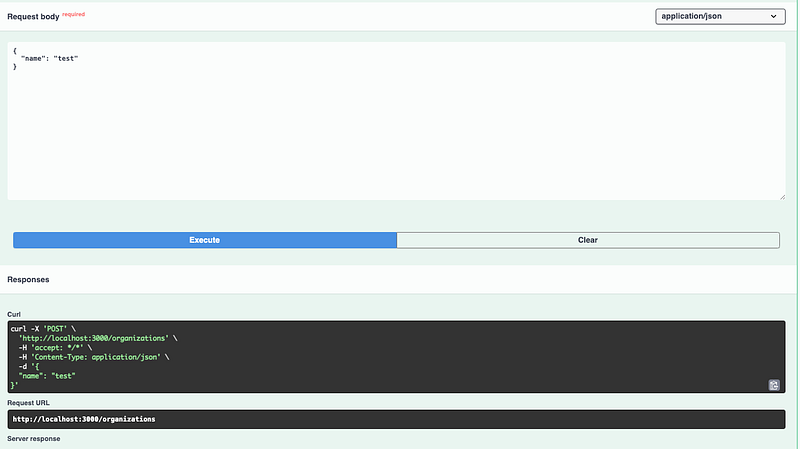
Additionally, if we click the Try it out button to hit our API, you’ll see we’re getting a 401
Let’s fix these issues!
API Documentation
While the NestJS Swagger library will document your endpoints, there is still some manual configuration required to give us the full definitions we want.
Request body schema
First, we’ll setup documentation for our request body. We’ll need to markup our DTOs to do this.
import { ApiProperty } from "@nestjs/swagger";
export class CreateOrganizationDTO {
@ApiProperty({
example: "Organization ABC",
description: 'Name of the organization to create'
})
name: string;
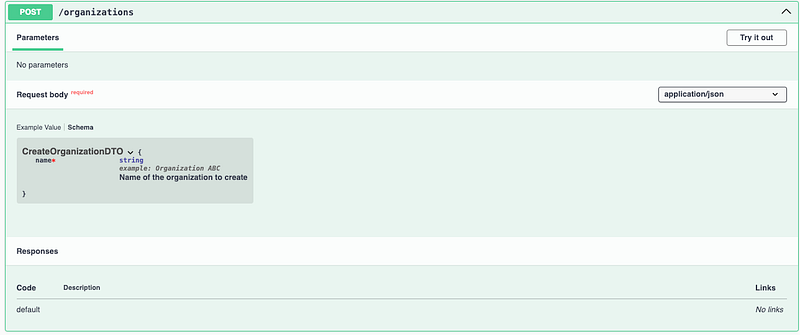
}Note that in order to support these annotations we’ve moved our DTO from a Typescript interface to a class
If we refresh our Swagger page we can see the example request

We can also see our schema definition
Response body
In order to show our users what the API response schema will be, we’ll start by updating our Controller endpoint method to define what our response will be.
  @Post()
  @Roles(Role.Admin)
  @ApiResponse({
    type: Organization, // tell Swagger to expect a response type of Organization
  })
  createOrganization(
    @Body() createRequest: CreateOrganizationDTO,
  ): Organization {
    return this.orgService.createOrganization(createRequest.name);
  }
We’ll also want to mark up our model to give a bit of extra information
import { ApiProperty } from "@nestjs/swagger";
export default class Organization {
@ApiProperty({
example: "1234",
description: 'Id of the organization'
})
id: string
@ApiProperty({
example: "Organization ABC",
description: 'Name of the organization'
})
name: string
constructor(id: string, name: string) {
this.id = id
this.name = name
}
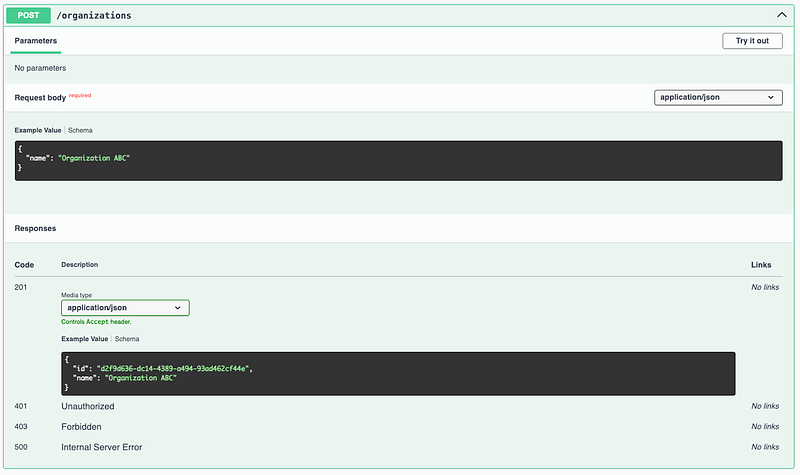
}Now, if we refresh swagger we can see our new schema definition

Expected HTTP error codes
Explicitly defining your error scenarios is critical for client usage of your API. While it may seem less important when you own both sides of the integration (i.e. a frontend & backend), clearly defined error codes and messages can reduce the complexity of handling error scenarios. NestJS offers an out of the box way to handle errors via their Exception Filters. From these filters, errors will be mapped to the following format:
{
  "message": "Something bad happened",
  "error": "Some error description",
  "statusCode": 400,
}
We’ll get into how to configure this exception handling in a separate article, but in the meantime we can document our known global error codes.
Since our app has Authentication & Authorization configured, we can define those error codes, in addition to the global catch all 500, as error responses. We could do this for each endpoint, but instead let’s mark up our controller. This will apply these errors to all endpoints in that controller.
import { Body, Controller, Get, Param, Post, Put } from '@nestjs/common';
import Organization from './organization.model';
import { OrganizationService } from './organization.service';
import { CreateOrganizationDTO } from './organization.dto';
import { Roles } from '../auth/rbac/roles.decorator';
import { Role } from '../auth/rbac/roles';
import { LoggerProvider } from '../logging/logger.provider';
import { ApiResponse } from '@nestjs/swagger';

@Controller('organizations')
@ApiResponse({ // known error codes
  status: 401,
  description: 'Unauthorized',
})
@ApiResponse({ // known error codes
  status: 403,
  description: 'Forbidden',
})
@ApiResponse({ // known error codes
  status: 500,
  description: 'Internal Server Error',
})
export class OrganizationController {
  constructor(private readonly orgService: OrganizationService,
    private readonly logger: LoggerProvider
  ) {
  }

  @Post()
  @Roles(Role.Admin)
  @ApiResponse({
    type: Organization,
    status: 201,
  })
  createOrganization(
    @Body() createRequest: CreateOrganizationDTO,
  ): Organization {
    return this.orgService.createOrganization(createRequest.name);
  }

  @Put(':id')
  @ApiResponse({
    type: Organization,
  })
  updateOrganization(
    @Param('id') id: string,
    @Body() createRequest: CreateOrganizationDTO,
  ): Organization {
    return this.orgService.updateOrganization(id, createRequest.name);
  }

  @Get()
  @ApiResponse({
    type: Organization,
    isArray: true,
  })
  getOrganizations(): Organization[] {
    this.logger.info('Getting organizations');
    return this.orgService.getOrganizations();
  }
}
And now if we look at our Swagger UI page we’ll see those errors added to our endpoints.
We now have a solid documentation foundation for our APIs!
Security Mechanism
We have our documentation setup, however we’re still getting 401s when we try and test our API via Swagger. Fortunately the Swagger UI offers out of the box support for various security mechanisms including:
- Basic Authentication
- Bearer Authentication
- OAuth2 Authentication
Since we’re assuming most of our APIs will be backing a user facing application, let’s go with the OAuth2 Authentication method.
To set OAuth2 Auth in our app we first need to enable it globally
import { NestFactory } from '@nestjs/core';
import { AppModule } from './app.module';
import { SwaggerModule, DocumentBuilder } from '@nestjs/swagger';

import { LoggerProvider } from './logging/logger.provider';
import * as fs from 'fs'

async function bootstrap() {
  const app = await NestFactory.create(AppModule);
  const logger = await app.resolve(LoggerProvider)
  app.useLogger(logger);

  const config = new DocumentBuilder()
    .setTitle('Starter Kit API')
    .setDescription('')
    .setVersion('1.0')
    .addTag('startkit')
    .addOAuth2({
      type: 'oauth2', //configure OAuth 2.0
      flows: {
        authorizationCode: {
          authorizationUrl: 'https://<YOUR_AUTH_DOMAIN>/oauth2/authorize',
          tokenUrl: 'https://<YOUR_AUTH_DOMAIN>/oauth2/token',
          scopes: {
            'email': 'Email Scope',
            'profile': "Profile Scope",
            'openid': "OpenID Scope"
          },
        },
        // ... other flows if needed
      },
    })
    .build();

  const document = SwaggerModule.createDocument(app, config);

  SwaggerModule.setup('api', app, document);

  if (process.env.GENERATE_SPEC) {
    fs.writeFileSync('./client/openapi/swagger.json', JSON.stringify(document))
    return
  }

  await app.listen(3000);
}
bootstrap();
If we rerun the API we’ll see a new Authorize option. This will allow you to leverage your client’s authentication flow to generate a bearer token that swagger will use to authenticate requests
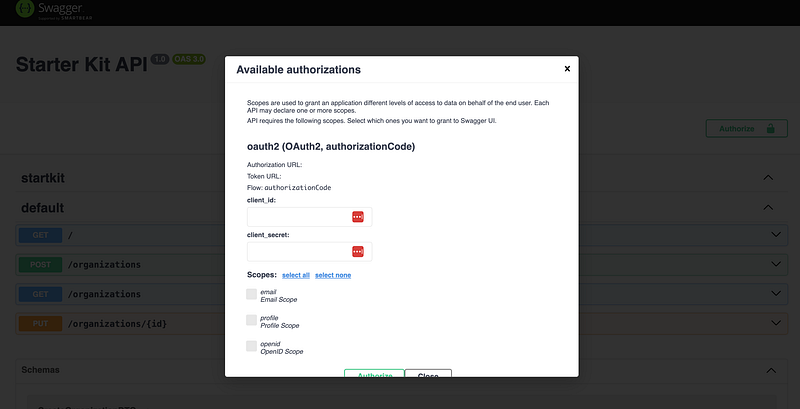
Note that we have placeholders in for the Authorization Url. You can find the details you need with your identity provider. Cognito has decent documentation you can review to understand the concepts better. The documentation can be found here.
Client Code Generation
Client code generation is a simple way to increase our team’s productivity and reduce the amount of boilerplate we have to write.
Since we’re leveraging the OpenAPI standard, we can generate a json spec file (we’ll call it swagger.json) and then leverage one of the many open source tools to turn that into typescript code. We can then use this code in our clients (whether that’s a UI or another API) to make calls to our API. We’ll use the openapi-typescript-codegen library to do this.
First we’ll install it
pnpm install openapi-typescript-codegen
Next, we’ll add two commands to our template’s package.json
"build:swagger": "GENERATE_SPEC=true pnpm start",
"generate:api": "openapi --input ./client/openapi/swagger.json --output ./client/src --client axios --name api",
The first command will spin up our app and inject an environment variable (GENERATE_SPEC=true) to tell our app to write out swagger docs to the files system. This will require some small code changes to our main.ts
import { NestFactory } from '@nestjs/core';
import { AppModule } from './app.module';
import { SwaggerModule, DocumentBuilder } from '@nestjs/swagger';

import { LoggerProvider } from './logging/logger.provider';
import * as fs from 'fs'

async function bootstrap() {
  const app = await NestFactory.create(AppModule);
  const logger = await app.resolve(LoggerProvider)
  app.useLogger(logger);

  const config = new DocumentBuilder()
    .setTitle('Starter Kit API')
    .setDescription('')
    .setVersion('1.0')
    .addTag('startkit')
    .addOAuth2({
      type: 'oauth2',
      flows: {
        authorizationCode: {
          authorizationUrl: '',
          tokenUrl: '',
          scopes: {
            'email': 'Email Scope', 'profile': "Profile Scope", 'openid': "OpenID Scope"
          },
        },
        // ... other flows if needed
      },
    })
    .build();

  const document = SwaggerModule.createDocument(app, config);

  SwaggerModule.setup('api', app, document);

  if (process.env.GENERATE_SPEC) { // look for env variable to write swagger JSON
    fs.writeFileSync('./client/openapi/swagger.json', JSON.stringify(document))
    return
 }

  await app.listen(3000);
}
bootstrap();
This will create a swagger.json that looks something like this
{
    "openapi": "3.0.0",
    "paths": {
        "/": {
            "get": {
                "operationId": "AppController_getHello",
                "parameters": [],
                "responses": {
                    "200": {
                        "description": ""
                    }
                }
            }
        },
        "/organizations": {
            "post": {
                "operationId": "OrganizationController_createOrganization",
                "parameters": [],
                "requestBody": {
                    "required": true,
                    "content": {
                        "application/json": {
                            "schema": {
                                "$ref": "#/components/schemas/CreateOrganizationDTO"
                            }
                        }
                    }
                },
                "responses": {
                    "201": {
                        "description": "",
                        "content": {
                            "application/json": {
                                "schema": {
                                    "$ref": "#/components/schemas/Organization"
                                }
                            }
                        }
                    },
                    "401": {
                        "description": "Unauthorized"
                    },
                    "403": {
                        "description": "Forbidden"
                    },
                    "500": {
                        "description": "Internal Server Error"
                    }
                }
            },
.
.
.
The second command will use the openai library to to generate typescript (with axios) client. This can be included in your client apps to call our api.
Once you run the command you should see the following files:

Using our client will look something like this:
// Create the client instance with server and authentication details
const appClient = new OpenAPI({
    BASE: 'http://server-host.com',
    TOKEN: '1234',
});

// Use the client instance to make the API call
const response = await appClient.organizations.createOrganization({
  name: 'OrgName',
});
We now have a client we can use to call our APIs!
Wrapping it up
Our starter kit is now configured to generate developer documentation and source code for our clients to call our API.
In our next article we’ll update our starter kit to handle exceptions and map those to clean HTTP error codes. The full starter kit can be found in Github.
If you are interested in learning more about what we do at Compoze Labs, please reach out!


