
Full NestJS Starter Kit — Part 3 Environment Variables

In this series of articles we’re walking through how to create a NestJS starter kit to use for your cloud applications. In our previous article we walked through how to configure Authentication and Authorization in our starter kit.
In this article we’ll setup our application to use environment variables.
Environment Configuration
A common practice in our cloud application deployments is to change certain behavior based on what environment the app is running in. For example selecting which database configuration to fetch from a secret, turning feature flags on or off (if we’re not using a tool for that), third party service credentials, etc.
While NestJS recommends leveraging its module system to manage these variables via environment files (.env), we prefer leveraging process-level environment variables. We generally don’t want to mess with files during our deployment process, which is why we rely on these process variables. However, we do still use their module system as, if nothing else, it makes stubbing values far easier in testing.
If you want to understand more how NestJS recommends using their environment module with .env files, you can read more in their docs
First thing we’ll need to do is install the nestjs config module
$ pnpm i --save @nestjs/config
Next, we’ll start with an (initially) uninteresting configuration.ts class. This will be where we setup our expected environment variables, starting with the environment our app is deployed in.
// src/config/configuration.ts
export default () => ({
    environment: process.env.NODE_ENV,
});
Then, we’ll import it into our organization module
// src/app.module.ts
import { Module } from '@nestjs/common';
import { AppController } from './app.controller';
import { AppService } from './app.service';
import { OrganizationModule } from './organization/organization.module';
import { ConfigModule } from '@nestjs/config';
import configuration from './config/configuration'; // our configuration file

@Module({
  imports: [OrganizationModule, ConfigModule.forRoot({
    load: [configuration], // load in our config file
    isGlobal: true, // expose our config globally to all modules
  })],
  controllers: [AppController],
  providers: [AppService],
})
export class AppModule { }
Just to prove this works, we’ll simply log the environment variable to the console for now.
import { Injectable } from '@nestjs/common';
import Organization from './organization.model';
import { ConfigService } from '@nestjs/config';
@Injectable()
export class OrganizationService {
constructor(private configService: ConfigService) { }
updateOrganization(id: string, name: string): Organization {
return new Organization(id, name)
}
createOrganization(name: string): Organization {
return new Organization("2", name)
}
getOrganizations(): Organization[] {
console.log(this.configService.get<string>('environment')); // log our environment
return [{
id: "1",
name: 'Starter Kit Organization',
},];
}
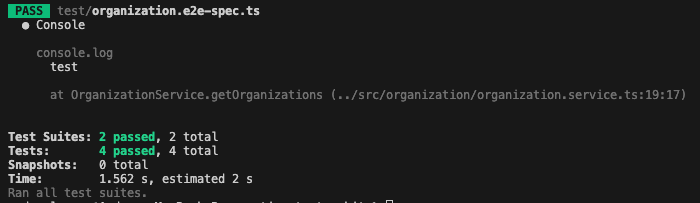
}If we run our e2e tests, we can see our environment environment variable printed
Schema Validation
An important part of managing environment variables is what happens if an environment variable is not present at runtime. By default, the application will startup fine, but when it attempts to read the environment variable, you’ll receive a null/undefined value. This can cause subtle & hard to debug issues. To prevent this from happening, we want our applications to fail at startup time in the event there is a missing required environment variable.
NestJS offers this capability via schema validation. Let’s setup our starter kit to fail if one of our expected environment variables is not present.
Let’s start by introducing a dummy environment variable to our configuration:
// src/config/configuration.ts

export default () => ({
    environment: process.env.NODE_ENV,
    helloVariable: process.env.HELLO_VARIABLE,
});
The actual validation of the schema can be performed either by a custom implementation or using the joi library. Rather than reinventing the wheel let’s install joi.
$ pnpm install joiNow we can update our ConfigModule configuration to enforce our required variables
import { Module } from '@nestjs/common';
import { AppController } from './app.controller';
import { AppService } from './app.service';
import { OrganizationModule } from './organization/organization.module';
import { ConfigModule } from '@nestjs/config';
import { AuthModule } from './auth/auth.module';
import configuration from './config/configuration';
import * as Joi from 'joi';
@Module({
imports: [OrganizationModule, ConfigModule.forRoot({
load: [configuration],
isGlobal: true,
validationSchema: Joi.object({ // create environment schema
NODE_ENV: Joi.string()
.default('development'),
HELLO_VARIABLE: Joi.string()
.required(), // required
}),
}), AuthModule],
controllers: [AppController],
providers: [AppService],
})
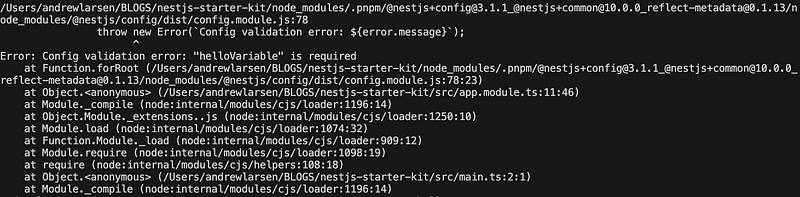
export class AppModule { }If we try to start our application, without setting our HELLO_VARIABLE environment variable, we should see the app fail to start with a helpful message
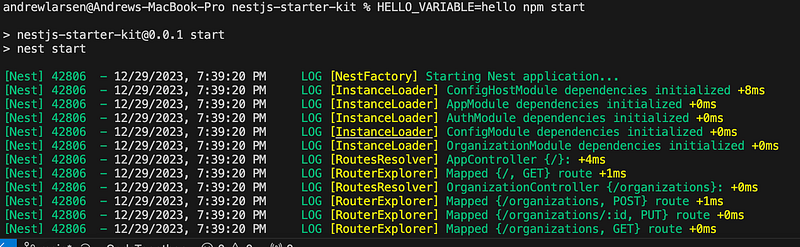
If we restart the application, this time with our environment variable set, it will work:
$ HELLO_VARIABLE=hello npm start
Finally, we’ll need to configure out e2e tests to set our environment variables. To do this, we’ll just need to update our jest configuration.
// test/jest-e2e.json
{
  "moduleFileExtensions": ["js", "json", "ts"],
  "rootDir": ".",
  "testEnvironment": "node",
  "testRegex": ".e2e-spec.ts$",
  "setupFiles": ["<rootDir>/jest.setup.ts"], // configure setup file
  "transform": {
    "^.+\\.(t|j)s$": "ts-jest"
  }
}
// test/jest.setup.ts
process.env.HELLO_VARIABLE = 'hello';And that’s it! We now have the ability to handle environment variables with our starter kit. We’ll expand on this, as we get to later chaptures, to handle more advanced use cases such as setting environment variables based on the output from secrets.
In our next article we’ll show how to configure our application to configure logging and how to publish metrics for improved observability. The full starter kit can be found in Github.
If you are interested in learning more about what we do at Compoze Labs, please reach out!


