
From Storyboards to the Silver Screen: The Process of Making an Animated Film
Since Toy Story premiered in 1995, animation has become a popular method of filmmaking. The combination of technology, innovation, and artistry makes animation a compelling storytelling medium, as a filmmaker is not bound to the constraints of the physical world. Because animation isn’t bound to the real world, the animated pipeline is quite different from that of live production.
Developing the Story and Bringing it into 3D
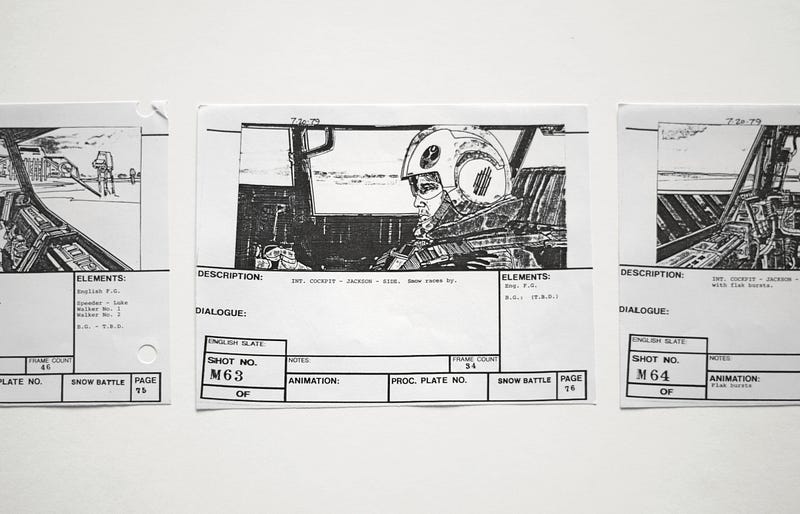
Before beginning production, the story needs to be fleshed out. Just like live-action feature films, a script is written to map out the plot, dialogue, and setting of the film. From there, storyboard artists will “board out” scenes- drawing quick sketches to visually plan out the shots and create a visual roadmap of the film. The process is carried over from the traditional 2D animation pipeline and was integral to the development of classics such as Disney’s Snow White and the Seven Dwarfs.
Once the story is mapped out in 2D sketches, it needs to be translated into 3D. Layout is the process of creating simplified action in 3D software, as well as setting up the camera for different shots. Basic preliminary versions of characters and objects are used to plan out the actions (typically the finalized assets are still being worked on simultaneously). Layout artists take the storyboards from storyboard artists, map out the action, and set up the camera in 3D space so that it can be later passed off to animators who will create more finalized fluid movement. Layout is important for visualizing the 3D sets and tweaking shots and composition as necessary. It also helps finalize the pacing and timing of the film before the tedious process of animation.
Creating the World and the Characters in it
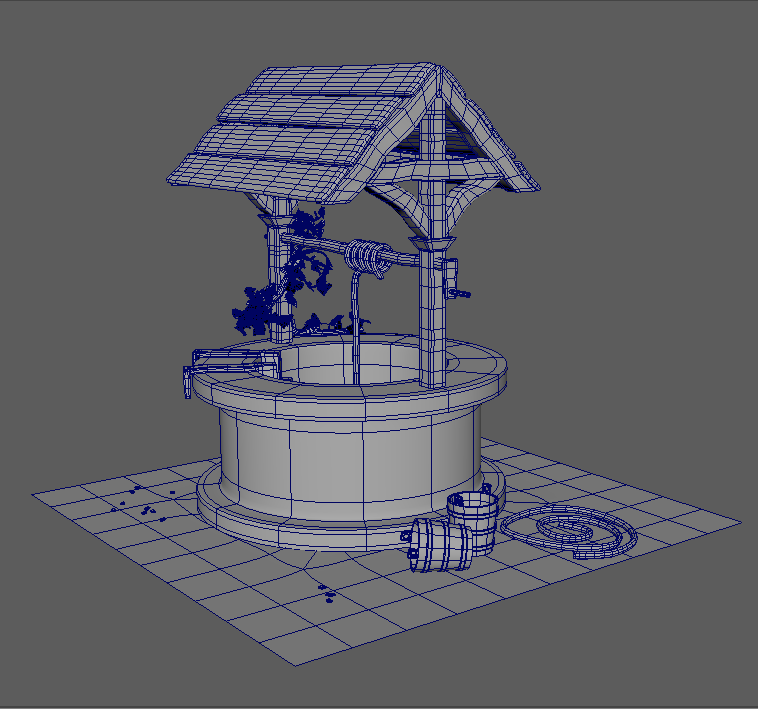
Before animation can begin, a few things need to happen. First, the objects need to be made. Everything that is made in 3D starts out as some sort of primitive shape, such as a cube, sphere, or pyramid, and artists use different tools and actions to transform them into the objects and characters used in a film. This step is known as modeling/sculpting. There are digital sculpting programs that allow the artist to “sculpt” from a base shape by either adding on material or carving into it, similar to working with clay in real life. Additionally, there is more traditional modeling software with techniques that allow the artist to manipulate the faces, edges, and vertices of the object. Often, modeling and sculpting programs are used in tandem to produce the final versions of assets. Zbrush is an industry-standard digital sculpting program, and Maya and Modo are examples of programs used for 3D Modeling.
Once the objects and characters are modeled, UV layout occurs. UVs are a grid system that allows for the software to translate the 3D object into 2D space. Like a sewing pattern for making clothing, objects are mapped out into a set of UV shells arranged on a grid. This step has to be complete before coloring the models in a step known as texturing, so the computer will know how to apply the colors and other data to the model.
Models are just rigid objects, like statues, so how do animators get them to move? After modeling, rigging is the process of creating the control system for moving and posing characters. Riggers will create “skeletons” to allow characters to move. They are made of a series of pivot points known as joints, which are connected by “bones”. Rig skeletons mirror the functionality of a real skeleton- there will be a joint placed in the character’s shoulder, elbow, and wrist, and bones running between them. In addition to creating the character skeleton, riggers create controls for animators to use to more easily pose and move the characters. The combination of the skeleton and control system is known as the character’s rig. Props can also have rigs for moving, such as controls on a car for opening the doors and rolling the wheels.
Once characters and any objects that move are rigged, the film starts to come to life, and animation begins. Animators position characters into the main poses of an action using the rig controls and will save these changes on a timeline in a process known as setting keyframes. The computer calculates the transition from pose to pose, which is visualized in curves that an animator can further tweak. Because there are multiple controls that need to be moved for each position, with different control fields for each axis (in 3D space its x,y, and z), animating and getting the characters to move the way the artist intends can be an involved process. Even actions such as just walking forward will require several keyframes between the different positions of picking up each foot, moving forward, and putting it down, and every part of the body such as feet, knees, hips, waist need to be keyed.
An effects team will work on different simulations such as cloth, hair/fur, water, and fire needed for the film to further bring the world to life. Houdini and Maya are examples of software used to create and tweak these different effects.
Adding Color to a Grey World
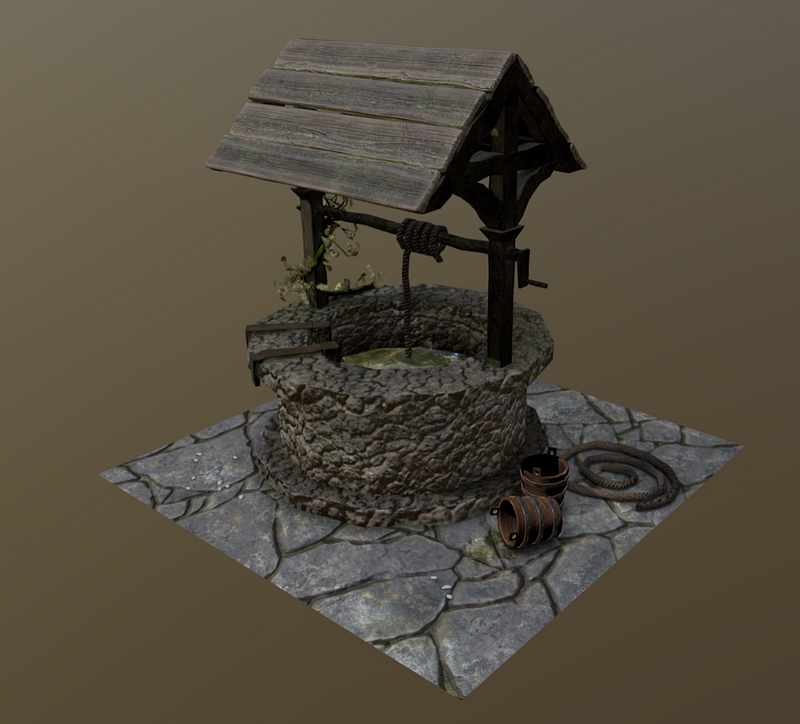
By default, everything will appear grey in 3D. Objects need materials, which give information such as color, how metallic or glossy an object is, or how rough an object is. Texture maps are created by texture artists and then applied to materials to map them to objects. Texture maps will be applied to objects based on the UVs of a model. This allows artists to paint lips a different color than a character’s skin, or to achieve the look of paint scratching off a metallic object. Special texturing programs such as Substance Painter or Mari allow an artist to paint directly on a 3D model, and the program calculates the texture maps for the artist.
Even with textures applied, rendering the film (exporting the images from the 3D software) will still appear black because lighting still needs to be added. Much like setting up a film set, lights can be placed in 3D space and the computer will calculate the highlights and shadows of a scene. The different types of lights and their settings are based on real film lights and effects, such as spotlights, color, and lighting intensity. Like live-action, lighting is used to help convey mood and heighten the emotions of a scene.
Now the film can be rendered! Rendering is when the computer executes all its calculations to output the final image. The amount of time to render can vary based on the number of calculations needed based on the number of lights and characters, as well as the render settings, which can be used to alter things such as the number of calculated light bounces, image dimensions, and from which camera to export. Animation is output into an image sequence, which is a series of images for each frame of time. For a 90-minute film animated at 24 fps (frames per second), that is 129,600 still images!
After rendering, compositing adds the final touches to the look of a film. Compositing software such as Nuke and AfterEffects allow for changes such as color correcting or combining different elements. Different passes that are set up when rendering can allow for control such as tweaking just the highlights, or only a specific object in a shot.
Finally, editing allows the final composited shots to be combined with the voice acting, musical score, and foley (sound effects) to create a film ready for release!
Animation is a wonderful medium and an example of the potential of combining technology with artistry. This wonderful process is also a long one- in an interview with YoungZine Bruce Kuei revealed that “Pixar movies can take anywhere from 4 years to 7 years!” Because of the long development time and multiple steps in the process, hundreds of people might work on a singular animated film. According to Business Insider, 177 animators alone worked on Spider-Man: Into the Spiderverse (and that’s just one part of the pipeline!) The synergy of people across these multiple areas is what brings your favorite characters to life. Most animated films might be targeted towards a younger audience, but you can be any age to appreciate the labor of love required to make them.


