
Flutter Splash Screen — ready, set, go
Splash screen, as referred, is the loading screen that is displayed when you open an app. This screen is the gateway to your app and can provide brief info to the user.
Launch icon, is the thumbnail that sits on your phone when your app is installed.
Flutter has good documentation to help you get started and I referred the same before documenting further the process I went through to implement my splash screen. https://flutter.dev/docs/development/ui/assets-and-images#updating-the-launch-screen
Though the best part of Flutter is a single code base for Android and iOS, since the splash screen is device-dependent, the implementation for each varies. I will share with you the steps I followed to implement both the splash screen and launch/app icon.
Splash Screen for Android
https://docs.nativescript.org/tooling/publishing/creating-launch-screens-android
- Open your project in your favorite editor. (Android Studio or Visual Studio)
- By default “android\app\src\main\res\drawable\launch_background.xml” is provided in the application that enables the launch screen.
- But by default, the <item> <bitmap> code is commented because of which you don’t see the splash screen. Uncomment that code.
- Make sure your screen image is present in all the “mipmap” folders under the “res” directory. There are various mipmap folders to accommodate various images with different resolutions. Image name should always be named “screen.png” across different resolution folders.
- Run your app, you should find the splash screen coming up.
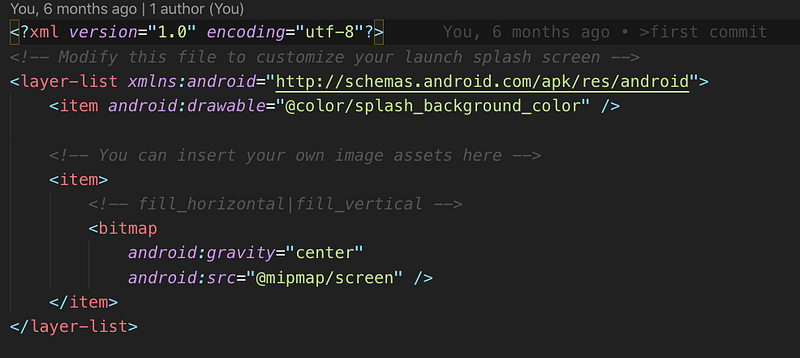
Note: ”gravity” is used to scale both horizontally (fill_horizontal) and vertically (fill_vertical) to cover the screen.
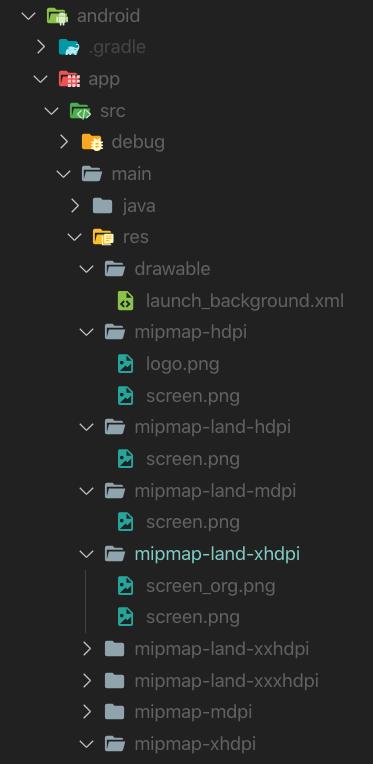
Note: Folders with “*-land-*” are for landscape mode. The following different resolutions are supported.
LDPI: Portrait: 200x320px. Landscape: 320x200px.
MDPI: Portrait: 320x480px. Landscape: 480x320px.
HDPI: Portrait: 480x800px. Landscape: 800x480px.
XHDPI: Portrait: 720px1280px. Landscape: 1280x720px.
XXHDPI: Portrait: 960px1600px. Landscape: 1600x960px.
XXXHDPI: Portrait: 1280px1920px. Landscape: 1920x1280px.
ImageGorilla is a nice tool to create your icons for different resolutions.
Android Launch or App Icon
https://flutter.dev/docs/deployment/android
- In “android\app\src\main\AndroidManifest.xml” change “icon” to “roundIcon”. (Your app shortcut will be a round icon now)
2. Name of the image should always be “logo.png” and should be placed under different resolution folders under “res/drawable” (same folder as your splash screen)
3. Change the value of “label” to change the display name of the app as it appears below the icon.
4. That’s it, you are all set to download your app to your emulator, simulator or a real device to test the launch icon.
I found Android Asset Studio very useful for icon creation
Splash Screen for iOS
https://docs.nativescript.org/tooling/publishing/creating-launch-screens-ios
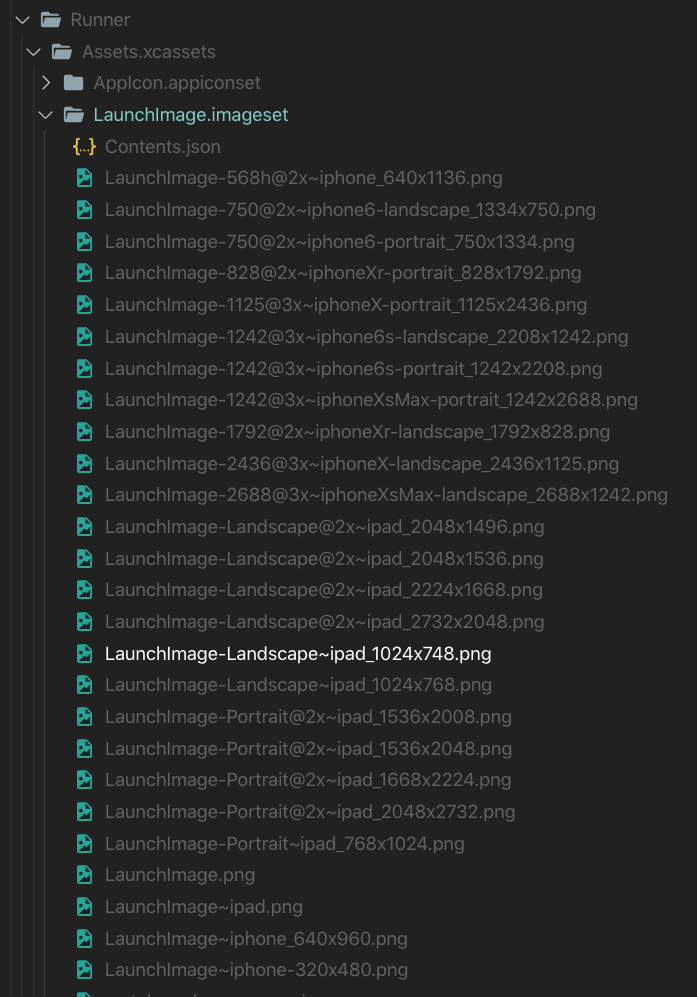
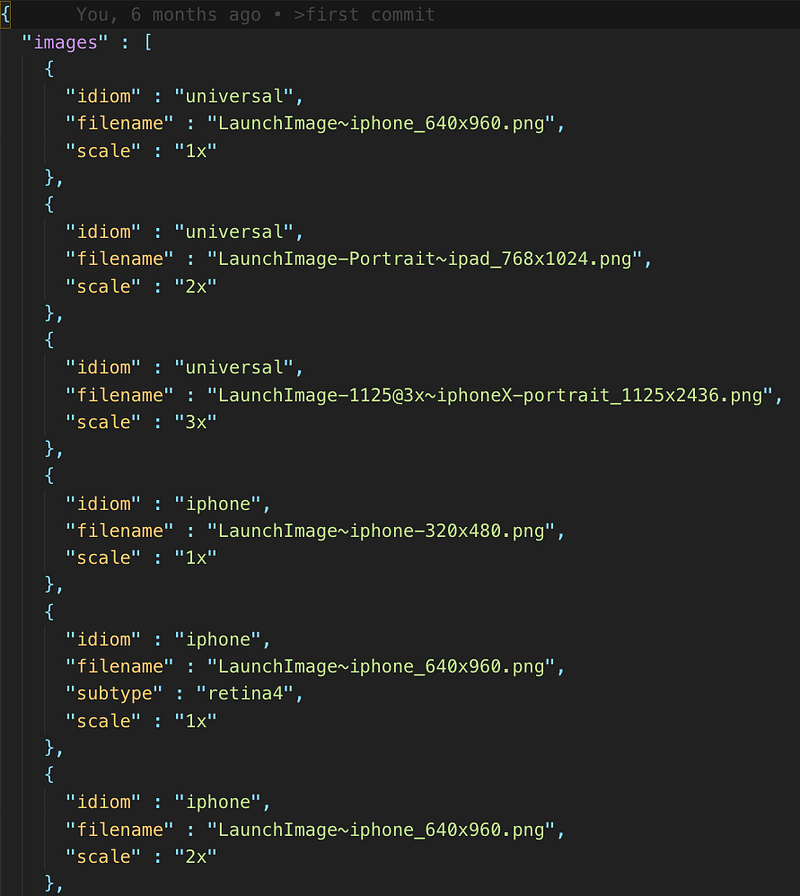
- On Android Studio or Visual Studio, under “ios\Runner\Assets.xcassets\Launchimage.imageset” directory, place/copy all your image logo files.
- In the same folder, in “Contents.json”, add the file name for all the images that you just added.
AppIcon is a nice tool to generate iOS icons along with contents.json contents.
iOS Launch or App Icon
Creating an app icon for iOS happens with the actual App Store. Here is the link for the same: https://flutter.dev/docs/deployment/ios.
I am still working on my app and will update this section when I release my app :-)
Hope you found my article helpful! I know there is a lot of material on the internet and between all of them, you will get your task done!
Happy programming!
Arathi
P.S: I love to see you have clapped…