Flutter Fastlane Deployment to the Firebase App Distribution (Easy Way)
Because time is of the essence and we all love automated processes
There are many ways of ci/cd for the Flutter application, but fastlane is free, simple and gives you every possibility that you need, also you can integrate a spare Mac as gitlab runner and run dev distribution or store version on click.
It’s possible to use fastlane somewhat automatically and easily, so I decided to divide this article in three chapters:
Chapter One: (this one) will be the easiest way of deployment to Firebase App Distribution
Chapter Two: will be easiest way of deployment to the store
Chapter Three: will be combination of both in one Fastfile with multiple lanes, with best practices
In the last article I wrote about setting up a new Flutter app with Flavors so we’ll create fastlane deployment based on that.
Installing fastlane
We need to install Fastlane itself (I’m on Mac so I used brew install fastlane) but you can find details based on OS installation in fastlane docs. Also as suggested I’ve used rbenv version manager and setup ruby version 3.0.2. Since we’ve used fvm for our flutter app this is it for prerequisites.
Android Deployment
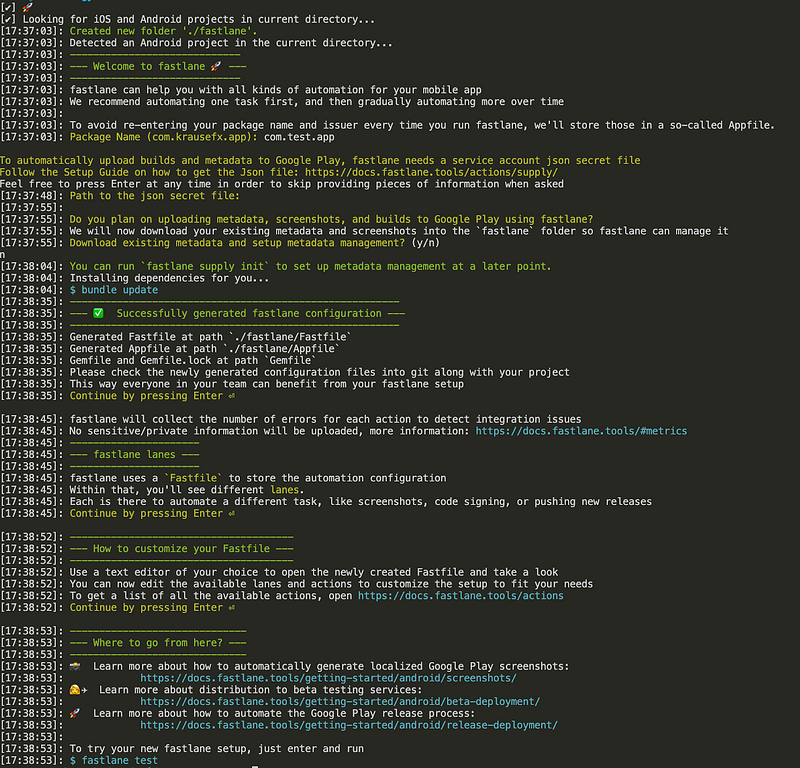
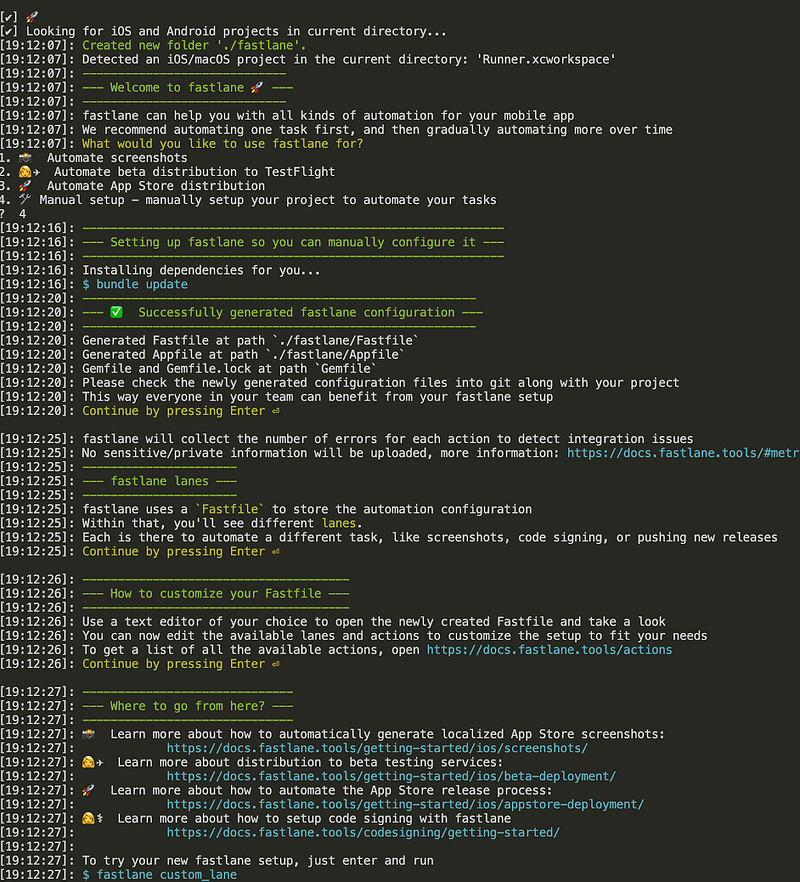
Go to the [project]/android directory and run fastlane init, and you should end up with something like this:
We’ll now add a firebase distribution package to our fastlane with running next command in current directory which will install additional dependencies:
fastlane add_plugin firebase_app_distribution
Then we’ll need to grant access to our firebase account, you can select for yourself, but I chose Firebase service account credentials method
Create new service account for your selected app in Google Cloud Console
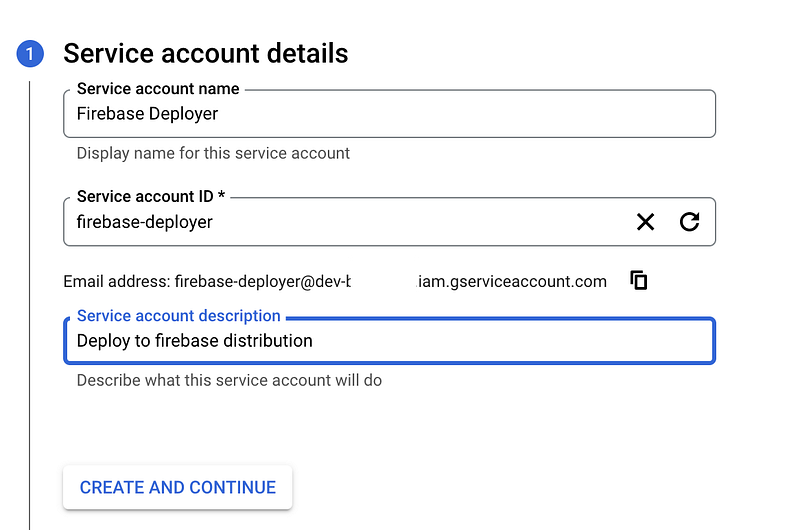
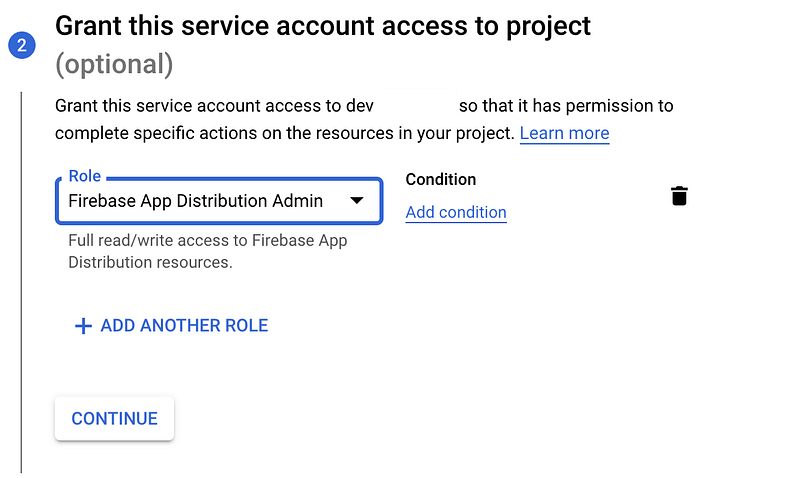
And then just create a key under this new service account and download the json file
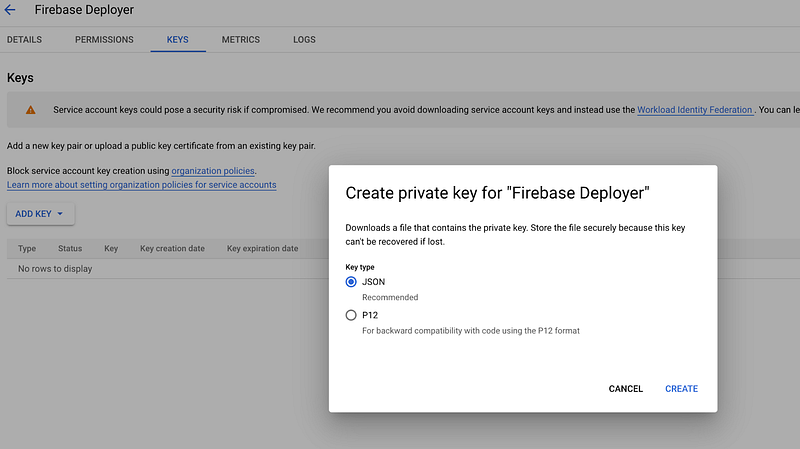
I named the file google-creds.json and just put it in the android/fastlane folder and added it to gitignore!
Since we have dev and prod flavor (for now we’ll deploy both to app distribution, later prod will go just to the internal testing or testflight) we need to add .env files for environments, so add .env.development and .env.production in fastlane root folder:
IMPORTANT: before deploying for every application you need to go to App distribution in Firebase Console and click Start (for android and ios, for both dev and prod)
You can create the same .env.development file and then just update your Fastfile to this:
- it will build APK with selected flutter version
- deploy it to app distribution with notes to selected tester
And then in the fastlane directory just run the magic link, and voila wait for an email invitation for the android app version.
iOS Deployment
Go to the [project]/ios directory and run fastlane init, and you should end up with something like this:
We’ll now add a firebase distribution package to our fastlane with running next command in current directory which will install additional dependencies:
fastlane add_plugin firebase_app_distribution
Once again as in steps for android add .env.development and .env.production files with some extra parameters. Copy google creds in ios/fastlane folder and gitignore it.
Also I’m aware of duplicating stuff here but the sole purpose of this is better understanding of everything that happens here. As I’ve said we’ll clean this up in the last article.
Then Update your Appfile and Fastfile in this way:
- Appfile
- Fastfile (where we setup minimal ruby version, clean all of the builds and build and archive and shipped the ipa to app distribution)
And then in the fastlane directory just run the magic link, and voila wait for an email invitation for the ios app version.
End of chapter one
So this is it for the first and easy setup of automated deployment to Firebase App distribution via fastlane. You can work with this already with a gitlab runner but in next articles after adding store deployment we’ll create a better optimized process. Until then when you have updates just raise the app version in pubspec.yaml and add yourself this script to the project root directory to deliver it to everyone in a single step. Believe me it’s very much worth it!
Also as in a last article I wrote this in kind of a hurry so for every question or misunderstanding just comment or contact me directly. Hope it will be helpful!


