
Flashing The Official ESPRESSIF Firmware in ESP8266 !!!
Easy ESP8266 Flashing!!! — #arduSerie 17
Hello hobbyists!
I spent a great suffocate time as soon as I bought the esp8266! I made some mistakes and wanted to return the stock firmware, or better, to upgrade it, and did not know how!
Now I transcribe the solution so that you do not pass the anger that I passed.
Here it goes! It’s simple:
Step 1: Download the software that flashes the chip.
(At this moment i used: flash_download_tools_v3.4.1_win)
https://github.com/boseji/ESP8266-Store/tree/master/tools
Step 2: Download the latest firmware.
(at this moment i used: esp8266_nonos_sdk_v2.0.0_16_08_10)
We are in September 2016, here is the link to the future!
https://espressif.com/en/products/hardware/esp8266ex/resources
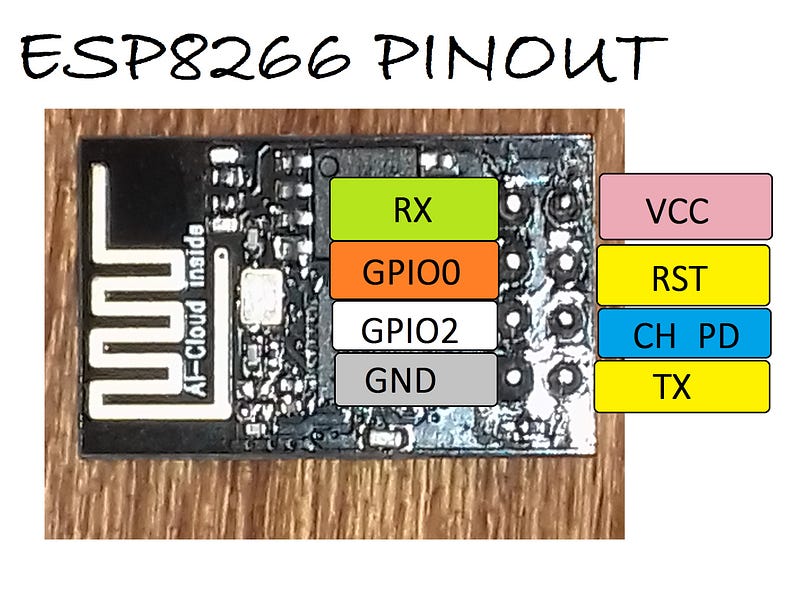
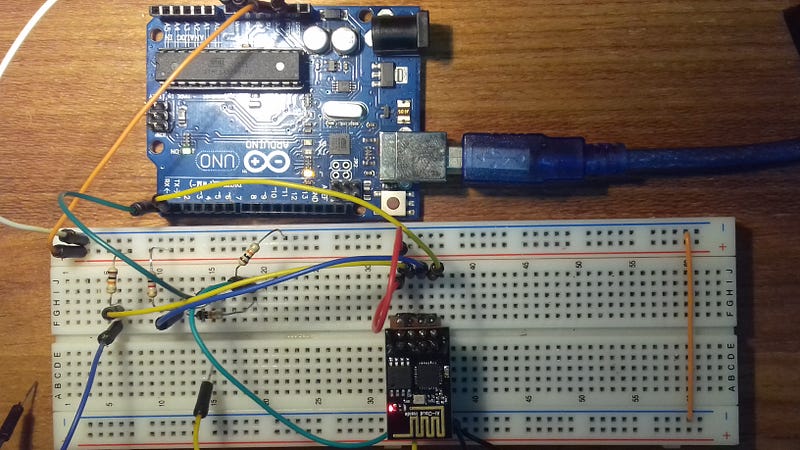
Step 3: Prepare the hardware.
Here’s breadboard scheme:
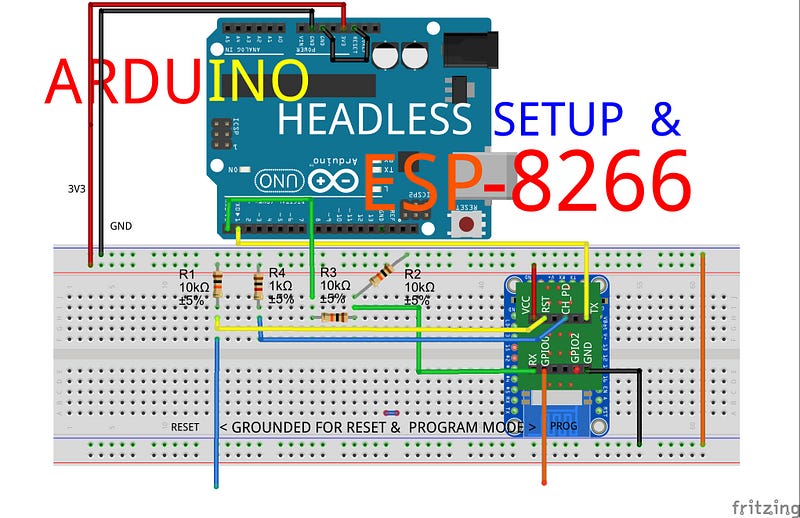
Note that the Arduino makes a pass by of the Atmega chip (black wire in GND+RST). that way we can reach the ESP8266.
This is the best and the simplest way to disable the arduino. So we will use it as the housing. The ESP8266 is the harborer as Orchids are in a branch of tree!!!

Note too that one side of the breadboard I do not connected to the positive track for safety reasons ….
The secret is how to put the chip in flashing mode. I tried several times and this form here was that worked: GND in GPIO0 and pulse GND on RST pin. Watch the video you should be all right !! try there too !!!
Locate the port with speed to 115200 and point out the binaries in the way that I show in the video (or below).
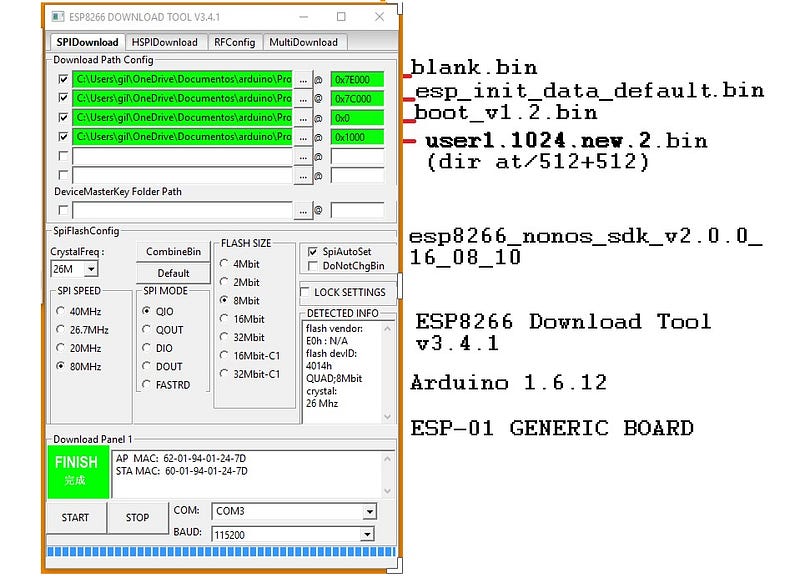

It should work there also!!!
Thanks for watching the video. If you liked it favorite please…;) till the next task with this fabulous chip: ESP8266!
All Project archieves google drive download
Based on: https://goo.gl/uA14Vn (Thanks to Andrew Cross for his awesome website!!!)
Based on: https://goo.gl/kznzHi (Thanks to Zhivko Gospodino for his hard work!!!)
I’ll be back soon!
visit too: https://goo.gl/MmZwU
Related Posts
Arduino Headless Setup & ESP8266 (WIFI cheap chip!) — Rather Stunning MCU!!! — #arduSerie 16
Get Started Using AT Commands w/ ESP8266 — Multiple Connection as TCP Server — #arduSerie 19
Your First NodeMCU/Lua Script Flash on ESP8266!!! — Let’s get our feet wet with NodeMCU/Lua and sees what happens !!- #arduSerie 20