
Enable Your DApp Users to Log In Using Their Email Address or Phone Number
Using Fortmatic to connect users to your DApp

Prerequisite: This article assumes a basic knowledge of Ethereum, web3, and Node.
Since the inception of Ethereum DApps, Metamask has been the primary tool used to connect users. While it is still the most popular, it’s clunky and difficult to use if you’re new to Ethereum.
I recently wrote an article about how connecting users to your DApp can be made easier by allowing them to register and log in using social media accounts, through a wallet provider called Torus.
Here, I’m going to walk through another option. You can now allow your users to connect to your DApp using their email address or phone number using a wallet provider called Fortmatic.
The Sleekest web3 Wallet Interface Available
I’ve played around with multiple online wallet providers recently, and in my opinion, Fortmatic has the smoothest and prettiest user experience of all.
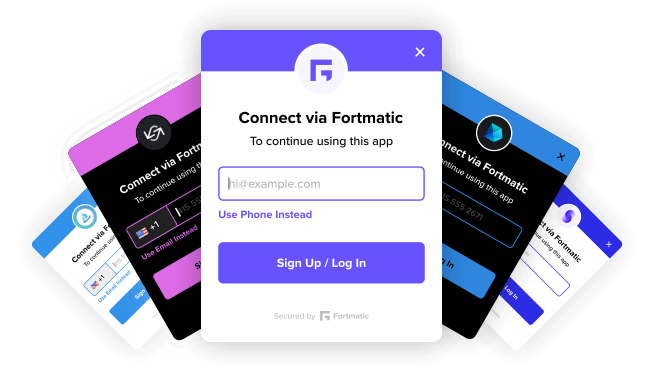
The widget, shown in Figure 1, comes with several display themes and integrates seamlessly with your DApp. Whenever transactions need approving, it prompts them inside your DApp, using this themed widget. This is in contrast to both Metamask and Torus, which open new windows to approve transactions.
This can often be blocked by ad blocker software, if the user has some installed. Having Fortmatic prompt the user on the same webpage as your DApp means a much smoother experience.
Integrate With 3 Simple Steps
For the full documentation, head over to Fortmatic’s website.
Step 1. Create an account
Initially, you’ll need to create an account with Fortmatic to access the developer dashboard. You can sign in with a GitHub account if you have one already.
One there, you’ll be able to create your first application and generate a private key.
Step 2. Import into your project
Fortmatic has an SDK that enables easy access to their widget so long as you have a correct key. Run the following to install it:
npm install --save fortmaticIf you don’t already, make sure you have web3 installed, too, by running:
npm install --save web3Then, in the file where you initialise the connection to web3, import both web3 and Fortmatic by pasting the following at the top of the file:
import Fortmatic from 'fortmatic';
import Web3 from 'web3';
Step 3. Initialise the connection
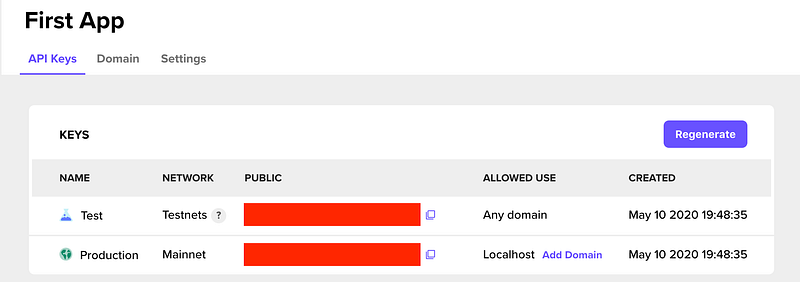
In that same file, initialise the Fortmatic connection by pasting the following, where YOUR_API_KEY is the key generated in the Fortmatic dashboard:
const fm = new Fortmatic('YOUR_API_KEY');
window.web3 = new Web3(fm.getProvider());
In development environments, make sure to use the “Test” key provided.
From this point, use the web3 instance you have stored in window.web3 to interact with the Blockchain, just as you would with Metamask!
Further Reading
If you’re interested in Blockchain Development, I write tutorials, walkthroughs, hints, and tips on how to get started and build a portfolio. Check out some of these resources:


