
Dynamic Island And Live Activity (2/3) | SwiftUI Tutorial
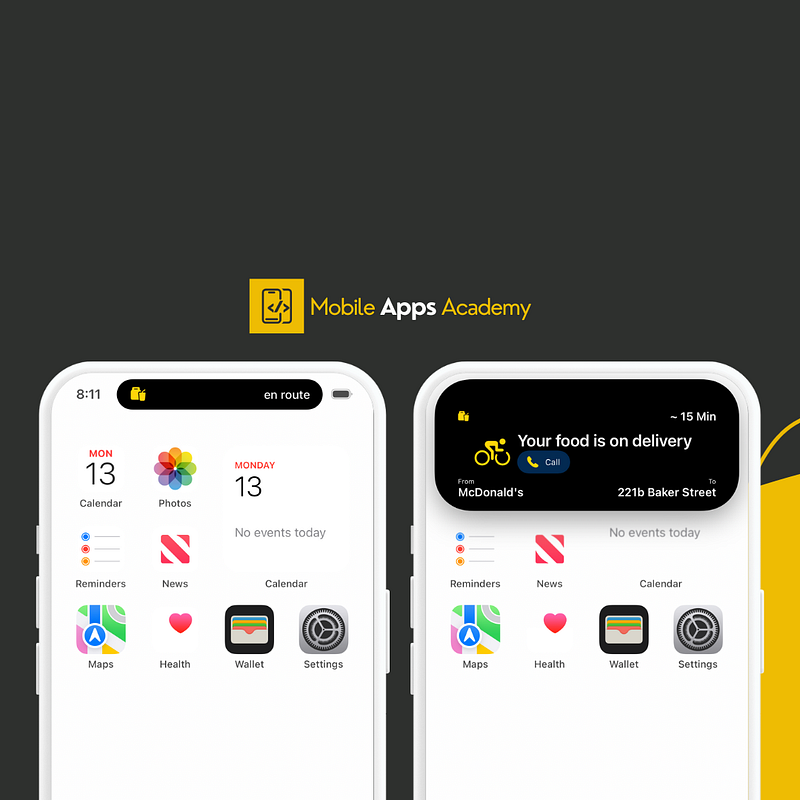
In this article, We will explore how to implement a Dynamic Island & Live Activity using SwiftUI
This Article is divided into 3 PARTS.
This is the second part. Below are the two parts
Before proceeding, please consider subscribing to our YOUTUBE CHANNEL
It gives us a lot of motivation to produce high-quality content for you guys.
if you are interested in watching the video tutorial, Check out below.
Let's continue from where we left out in the last part.
Open the FoodDeliveryActivityWidget script inside the FoodDeliveryActivityWidget folder as shown in the below script.
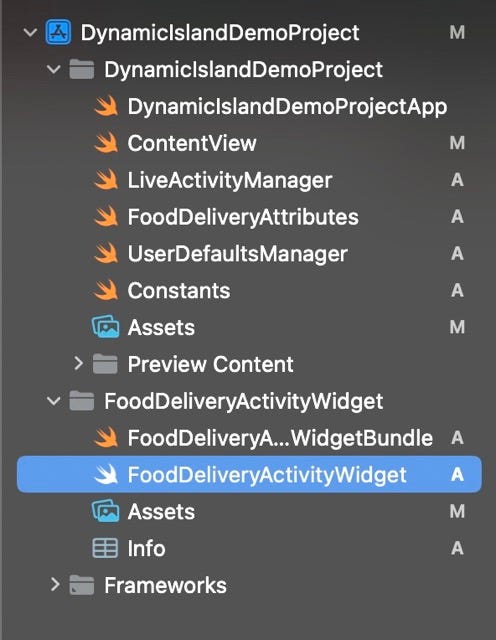
In this script, we’ll add our UI and functionality for both Live Activity and Dynamic Island.
We are using ActivityConfiguration which contains two parts.
One is for Live Activity and another is for Dynamic Island.
import WidgetKit
import SwiftUI

struct FoodDeliveryActivityWidget: Widget {
    var body: some WidgetConfiguration {

        ActivityConfiguration(for: FoodDeliveryAttributes.self) { context in
          //Live Activity
        } dynamicIsland: { context in
          //Dynamic Island
        }
    }
}
In this article, we’ll be concentrating on Dynamic Island. So add Dynamic Island View inside the dynamciIsland section of the ActivityConfiguration
import WidgetKit
import SwiftUI

struct FoodDeliveryActivityWidget: Widget {
    var body: some WidgetConfiguration {

        ActivityConfiguration(for: FoodDeliveryAttributes.self) { context in

        } dynamicIsland: { context in
            DynamicIsland {
                DynamicIslandExpandedRegion(.center) {

                }
            } compactLeading: {

            } compactTrailing: {

            } minimal: {

            }
        }
    }
}
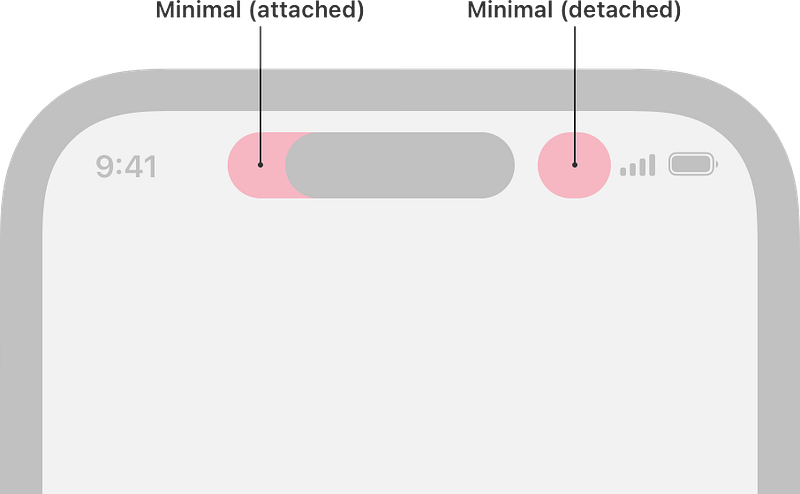
Dynamic Island is divided into four parts
- Expanded Presentation
- Compact Presentation Leading
- Compact Presentation Trailing
- Minimal Presentation
If you want to learn more about them, below are the links
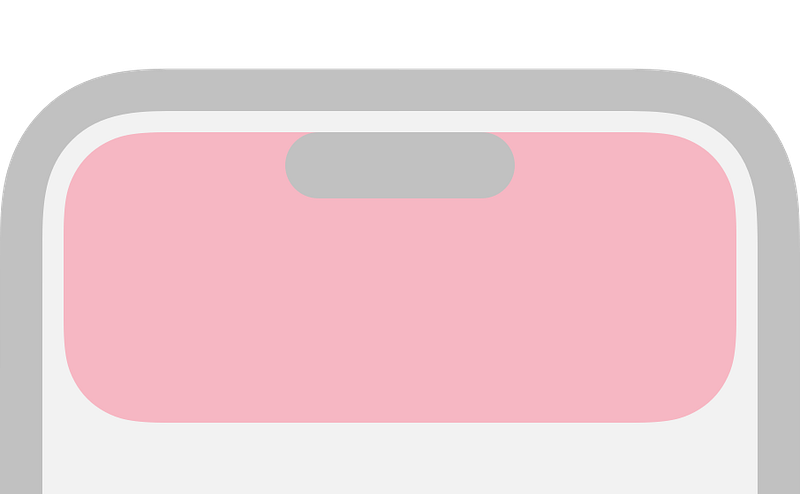
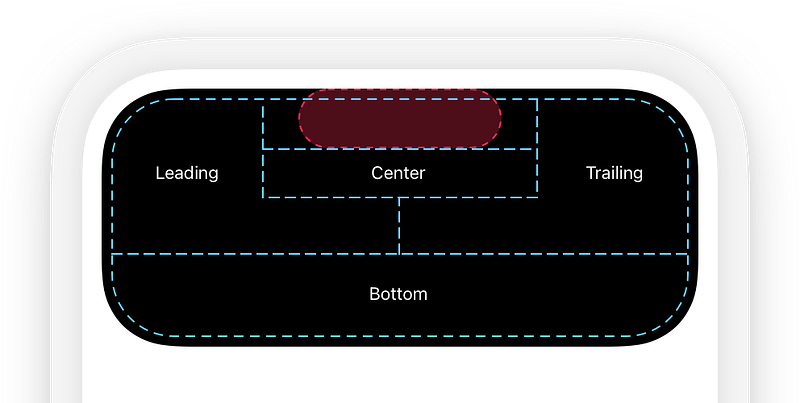
As seen in the below UI, I used DynamicIslandExpandedRegion
which uses the below attributes to position the view
center places content below the TrueDepth camera.leading places content along the leading edge of the expanded Live Activity next to the TrueDepth camera and wraps additional content below it.trailing places content along the trailing edge of the expanded Live Activity next to the TrueDepth camera and wraps additional content below it.bottom places content below the leading, trailing, and center content.
import WidgetKit
import SwiftUI

struct FoodDeliveryActivityWidget: Widget {
    var body: some WidgetConfiguration {

        ActivityConfiguration(for: FoodDeliveryAttributes.self) { context in

        } dynamicIsland: { context in
            DynamicIsland {
                DynamicIslandExpandedRegion(.center) {
                    VStack {
                        HStack {
                            Image(systemName: "takeoutbag.and.cup.and.straw.fill")
                                .resizable().aspectRatio(contentMode: .fit)
                                .frame(width: 14, height: 14)
                                .foregroundColor(.yellow)
                            Spacer()
                            Text("~ \(context.state.arrivalTime)")
                                .font(.system(size: 14))
                                .bold()
                        }
                        .padding(.horizontal, 10)

                        VStack {
                            HStack {
                                Image(systemName: "figure.outdoor.cycle")
                                    .resizable().aspectRatio(contentMode: .fit)
                                    .frame(width: 44, height: 44)
                                    .foregroundColor(.yellow)

                                VStack(spacing: 0) {
                                    HStack {
                                        Text("Your food is on delivery")
                                            .font(.system(size: 20))
                                            .bold()

                                        Spacer()
                                    }
                                    HStack {
                                        Button(action: {}, label: {
                                            HStack {
                                                Image(systemName: "phone.fill")
                                                    .resizable().aspectRatio(contentMode: .fit)
                                                    .frame(width: 14, height: 14)
                                                    .foregroundColor(.white)

                                                Text("Call")
                                                    .font(.system(size: 10))
                                                    .foregroundStyle(.white)
                                            }
                                        })
                                        .buttonBorderShape(.capsule)
                                        Spacer()
                                    }

                                }
                            }.padding(.horizontal, 30)
                        }

                    }
                }
                DynamicIslandExpandedRegion(.bottom) {
                    HStack {
                        VStack(alignment: .leading) {
                            Text("From")
                                .font(.system(size: 8))
                            Text(context.state.restaurantName)
                                .font(.system(size: 14))
                                .bold()
                        }

                        Spacer()

                        VStack(alignment: .leading) {
                            Text("To")
                                .font(.system(size: 8))
                            Text(context.state.customerAddress)
                                .font(.system(size: 14))
                                .bold()
                        }
                    }
                    .frame(height: 20)
                    .padding(.horizontal, 10)
                }
            } compactLeading: {
                Image(systemName: "takeoutbag.and.cup.and.straw.fill")
                    .resizable().aspectRatio(contentMode: .fit)
                    .frame(width: 14, height: 14)
                    .foregroundColor(.yellow)
            } compactTrailing: {
                Text("En Route")
            } minimal: {
                Image(systemName: "takeoutbag.and.cup.and.straw.fill")
                    .resizable().aspectRatio(contentMode: .fit)
                    .frame(width: 14, height: 14)
                    .foregroundColor(.yellow)
            }
        }
    }
}
That's it, you should be able to see the dynamic island now.
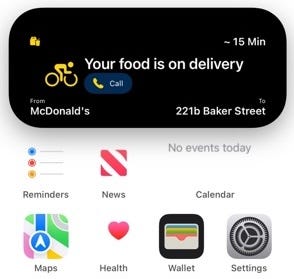
In the next part, we’ll explore the implementation of Live Activity and UI
Once again Thanks for stopping by. Do check out our YOUTUBE CHANNEL
Social Handles
Instagram : https://www.instagram.com/mobileappsacademy/
Twitter : https://twitter.com/MobileAppsAcdmy
LinkedIn : https://www.linkedin.com/company/mobile-apps-academy/


