
Don’t Stop the Music in Your iOS App
Keeping your AVAudioSession active when entering the background

There are many ways of playing audio files in an iOS app, ranging from SpriteKit’s SKAction emitting audio in a game to using the AudioToolbox framework. In this example, we will use AVAudioPlayer from the frameworkAVKit, since it is the most common and easiest to set up and use.
However, without additional preparation, the music will stop playing once the app enters the background or the device gets locked. In this tutorial, we will look at how to keep it playing.
Project Setup
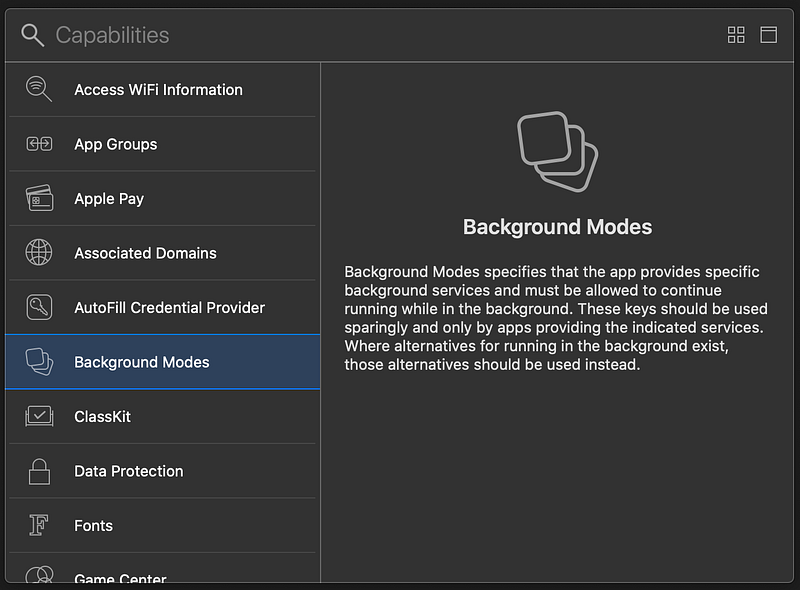
The first step is to enable audio in background mode. This can be done by adding the capability Background Modes in the project settings under the tab Signing & Capabilities.
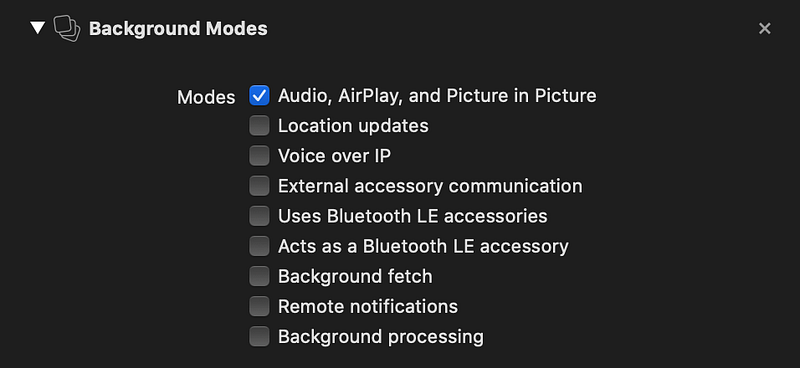
Once the capability is added, we need to check the box Audio, AirPlay, and Picture in Picture.
Now everything is set up we can dive into some code!
Playing Audio
We can create a new AVAudioPlayer by providing it with a URL to the file we want to play. Additionally, we can set some properties, e.g. numberOfLoops. By setting this value to a negative number, the player will repeat its audio in an endless loop.
let url = Bundle.main.url(forResource: "sound", withExtension: "mp3")!
try player = AVAudioPlayer.init(contentsOf: url)
player.numberOfLoops = -1
We could start using the player right now by calling its play() method, but it would stop once the app is closed. Note: You need to test this on a real device, the simulator will actually keep your sound playing.
In order to change this, there are two things we need to do:
- Configure the system-wide
AVAudioSession. - Activate our app’s audio session.
Let’s start with the first point! As you can see in the following code snippet, we call setCategory(_:mode:options:) on the shared instance of AVAudioSession. This method needs three parameters, the first being the category we want to use. We can choose between various values, such as the default audio session category .soloAmbient, .record for recording audio or .playback, which is the category we need in this example. As you can read in its documentation, it allows us to play music in the background, even when the iPhone is set to silent.
Next we need to specify an audio session mode. Again, there are multiple options we can choose from (for example.voiceChat, .videoChat or .gameChat) but we only need the default one being .default.
Finally, we add some options. There are two kinds of options, the first one defines how to react to other audio sessions. Here we can choose whether we want to mix our sound with other sounds, to pause current spoken audio content in favor of our sound, or to reduce the volume of audio from other sessions. The other options determine the output destination of our audio: we can allow bluetooth devices, streaming to AirPlay devices or just use the built-in speakers. In this example, we use the option .duckOthers, which reduces the volume of other audio sessions.
try AVAudioSession.sharedInstance().setCategory(
    AVAudioSession.Category.playback,
    mode: AVAudioSession.Mode.default,
    options: [
        AVAudioSession.CategoryOptions.duckOthers
    ]
)
Now that the session is configured, we need to tell the system that our app will now be using the global session. In this code example we can see how to do that:
There are some things to mention here:
- We need to pause the player prior to deactivating the session, otherwise a
NSOSStatusErrorwill be thrown. setActive(_:options:)may throw anAVAudioSession.ErrorCode.isBusyerror when the currently active audio session has a higher priority than the one we want to start and neither allow mixing.
As you could see in this tutorial, configuring an AVAudioSession is just as easy as using an AVAudioPlayer, yet taking these simple extra steps will improve the quality of your app.


