
Docker — Three Ways To Create Container Images and Their Use Cases
Creating container images with examples in different ways and their use cases

Creating efficient and small images are very important in docker. In this article, we will look at the ways to create them and their use cases
- What are Images
- What is a copy-on-write strategy?
- What are we building
- Three ways of Building Images
- Use cases
- Conclusion
What are images
The whole operating system of Linux is a filesystem. So, Images are nothing but a big tarball of a layered filesystem. If you look at the below diagram, Image is built with a bunch of immutable layers. Each layer consists of files and folders and each layer is built only with the changes corresponding to the previous layer.
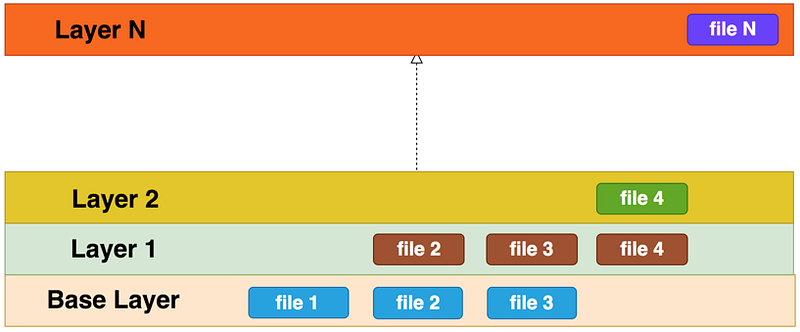
The first layer is called a base layer and each layer is immutable that means once created, we can’t change the file system. It uses a copy-on-write strategy.
What is a copy-on-write strategy?
If you look at the above diagram, the base layer has three files and Layer 1 wants to change the files 2 and 3. So, it copies file2 and file3 from the base layer and writes any changes in layer 1. So, The top layer uses file2 and file3 from Layer 1 and file4 from the Layer2 instead of the base layer and layer1 respectively. But it uses file1 from base layer since there are no changes in top layers.
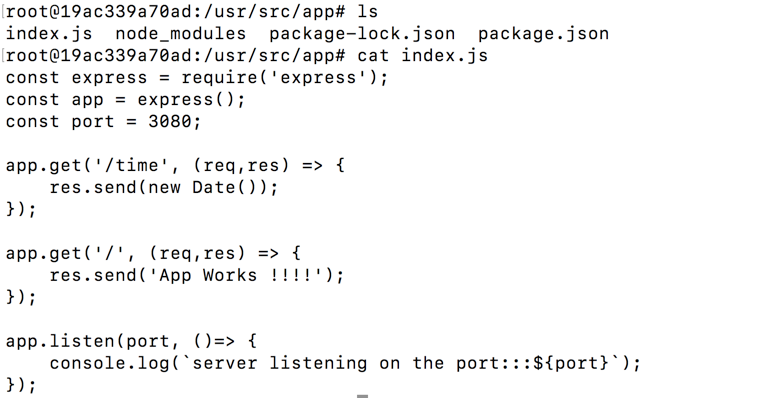
What are we building?
we are building a simple node js API which gives you the current time. we are using express lib for this. Let’s see how it looks from the docker images perspective.

Let’s see how we can build this image in three ways below.
Three ways of Building Images
There are three ways to create container images while working with docker. Let’s explore these methods
- Interactively building Images
- Using Dockerfile
- Importing from a tarball
Interactively building images
Step 1
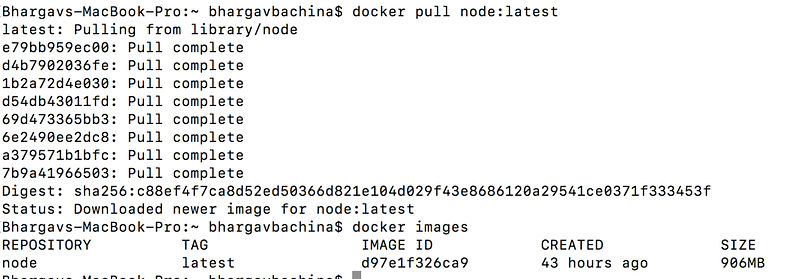
As we know every image starts from the base image, we need to pull the base image node with the command docker pull node:latest
Step 2
Now we have a base image, Let’s build layers on top of this. Let’s run the container in an interactive mode with these commands.
// start a container in a detached mode
docker container run -dit --name node-express-server node
//interact with the container with exec command
docker exec -it node-express-server /bin/bash
we started a container with node image in a detached mode and started in an interactive mode with exec command.
Step 3
Now we can add files, folders and build layers in the running container. Let’s create a folder called /app under usr/src and create some files.
// make a directory
mkdir /usr/src/app
// cd to that directory
cd /usr/src/app//create package.json
npm init//install express
npm install --save express//install vim to edit the file on command line
apt-get update
apt-get install -y vim// create a file here and put all the content here
// i for insert, esc for command mode, : and wq! after editingvi index.js// list all the files
lsonce you are done with this step, you should have all these files and index.js content like below
Step 4
Let’s test the container and commit these changes to save it as an image.
// run the index.js under /usr/src/app
node index.js
// ctrl c and exit
exit// commit the container into an image
docker container commit node-express-server my-node-server//test it
docker images
Step 5
Now we have an image called my-node-server, let’s run it as a container and test it whether it is working or not. We are running a container with port 3080 and with the default command node /usr/src/app/index.js.
// run the container with an image my-node-server
docker container run -dit --name current-time -p 3080:3080 my-node-server node /usr/src/app/index.js

Using Dockerfile
Let’s see how we can build the same image with the dockerfile. Dockerfile is used to automate the process of creating images. Once we have Dockerfile, you can build as many images as you can.
Let’s clone the repo from here for the example project. Here is the Dockerfile. Whatever we have done while building interactively, we are building the same with this Dockerfile.
build the image from this Dockerfile with this command
// clone the project
git clone https://github.com/bbachi/node-express-server.git
// cd into project
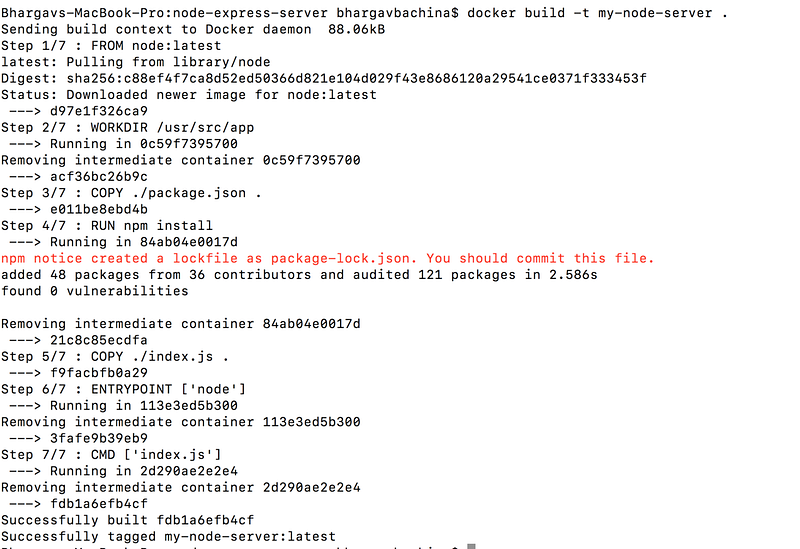
cd node-express-server// build the image
docker build -t my-node-server .here is the output.
Now we can list the images and start the container as above. I don’t want to repeat the same step. You can follow the same steps as above:)
Importing from a tarball
Let’s understand how tarballs work. If we have an image, we can save it into a tarball with docker save command and we can import the same image from the tarball wherever we need with docker load command.

Let’s see this in action and use the image that we built above. use docker save my-node-server > mynodeserver.tar. With this command, a tarball is created.

Let’s remove the existing images and create an image from the tarball.
// list the existing images
docker images
// remove the existing image
docker rmi my-node-server
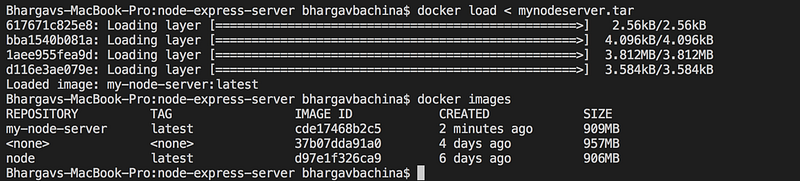
Now we removed the image. Let’s create an image from tarball with this command docker load < mynodeserver.tar and list images docker images
Use cases
Interactively building Images
- If you want to play with images or practicing something or creating some POC, this method is useful
Using Dockerfile
- This is a common method to create images in production or testing. Most of the time we use this method
Importing from a tarball
- This is useful if you want to share images without any kind of central registry
Conclusion
Knowing different ways to create images are handy while developing, testing, deploying apps in docker.
Thank you for reading and If you find this useful, Please give it a clap and help others to find it. Please follow me for more interesting stories:)


