
Django Credit Card Fraud Detection with ML: A Tutorial
Discover Django & ML integration in my friendly guide: Credit Card Fraud Detection made simple! Dive in and learn. 🚀 #DjangoMLTutorial
Hey there, budding developers! 👋
Let’s dive right into an exciting journey where we’re going to seamlessly integrate a Machine Learning model into our Django application. Think of it as crafting a magic wand that’s going to help us detect those sneaky fraudulent transactions.
Here’s our game plan:
- We’ll first wave our wand (well, code) to create an ML model.
- Next, we’ll infuse this magic into our Django Rest Framework application.
- Our final product? An API that can quickly tell if a transaction is up to some mischief (fraudulent) or if it’s an innocent muggle (genuine).
Why just an API, you ask? Well, it’s super versatile! Once you have this API, you can plug it into any frontend — be it Django, React, or even a magic mirror (okay, maybe not the last one). Plus, I want to keep things breezy and fun without making it feel like a never-ending potion class.
🌟 A shoutout to my Django enthusiasts: I’ve seen the magic you brew with your codes. Crafting an authentication system for this API or designing a sleek frontend? You’ve got this! After all, you’ve aced those spells in our previous tutorials.
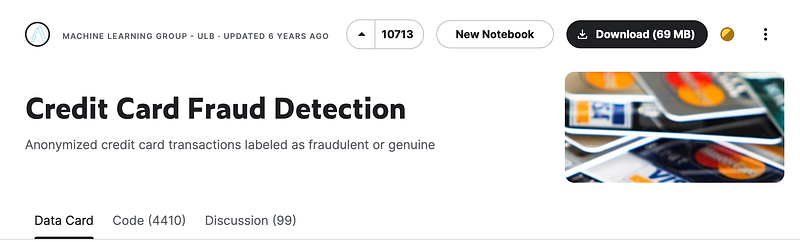
Now, every potion requires ingredients. Our primary ingredient? Data. Let’s fetch some from the treasure trove that is Kaggle. Grab the dataset right here — it’s a goldmine to test your knowledge about detecting bank card fraud.
Using Django with Kaggle or quality datasets opens doors to inventive apps: from tailored Recommendation Systems and E-commerce Price Predictors to Health Diagnostics and Stock Price Forecasts. The potential is vast and exciting!
A bit about our dataset:
- Origins: This dataset is the love child of a collaboration between Worldline and the Machine Learning Group of Université Libre de Bruxelles, focusing on the art of big data mining and fraud detection.
- Size: It’s hefty, with 284,807 transactions. But here’s the twist: only 492 of them are fraudulent. It’s like finding a needle in a haystack!
Features at a glance:
- Time: How many seconds passed since the first transaction.
- V1, V2,… V28: These are the mysterious ones, transformed using PCA for confidentiality. Their original identities? A secret! 🤐
- Amount: How much moolah changed hands in the transaction.
- Class: Our target. It’s a 1 if it’s a fraud and 0 if it’s genuine.
Some quirks about our dataset:
- Rare Frauds: It’s like a Where’s Waldo of frauds — they make up only 0.172% of transactions.
- Mystery Features: Due to some cloak and dagger stuff (privacy issues), many features have been transformed, leaving us with ‘Time’ and ‘Amount’ in their original form.
- Real-world Relevance: It’s a real challenge for the detective in you, mirroring real-world scenarios where genuine transactions vastly outnumber the fraudulent ones.
Strategies to tackle this:
- Resampling: To handle the imbalance, we could either multiply the minority (oversampling) or reduce the majority (undersampling).
- Anomaly Hunting: Techniques like One-Class SVM shine here, designed specifically to spot the odd ones out.
- Metrics: Accuracy can be misleading due to the imbalance. We’d rather dance with precision, recall, F1-score, and AUPRC.
- Deep Dive: Exploring deeper waters with techniques like Autoencoders can be rewarding. They can learn from genuine transactions and then spot the anomalies.
Go ahead and download that CSV, and let’s brew some magic together!
Alright, let’s set up our coding workspace like a pro!
- Folder Magic: Start by conjuring up a new folder. This is going to be our little corner for all the cool coding we’re about to do.
- Editor Time: Pop open that folder in Visual Studio Code. Or hey, if you have another code editor you’re fond of, that works just as great!
- Crafting model.py: Inside our fresh folder, let’s create a new file named
model.py. Think of it as the canvas where we'll paint our machine learning masterpiece. - Virtual Environment: Before we dive deep, let’s create a protective bubble for our project. Setting up a virtual environment (
env) right in this folder will help us manage our dependencies efficiently. And once it's ready, don't forget to activate it and pip install!
pip install scikit-learn imbalanced-learn pandas matplotlib seaborn joblib

Time to Code: Now, with everything in place, open up model.py. This is where we'll pour in our machine learning magic.
1. Importing Libraries
# Import necessary libraries for data manipulation, visualization, model building, and evaluation.

# pandas: A powerful library for data manipulation and analysis.
import pandas as pd

# matplotlib & seaborn: Visualization libraries to plot graphs and charts.
import matplotlib.pyplot as plt
import seaborn as sns

# StandardScaler: For feature scaling, i.e., transforming data so that it follows a standard scale (mean=0, variance=1).
from sklearn.preprocessing import StandardScaler

# RandomForestClassifier: Machine learning algorithm based on the ensemble of decision trees.
from sklearn.ensemble import RandomForestClassifier

# train_test_split: Utility function to split data into training and testing sets.
from sklearn.model_selection import train_test_split

# SMOTE: Synthetic Minority Over-sampling Technique - helps handle imbalanced datasets by oversampling the minority class.
from imblearn.over_sampling import SMOTE

# roc_auc_score & classification_report: Evaluation metrics to assess model performance.
from sklearn.metrics import classification_report, roc_auc_score

# joblib: Useful for saving (serializing) machine learning models and other large objects efficiently.
import joblib
2. Loading the Dataset
# Load the dataset into a pandas DataFrame from a CSV file.
data = pd.read_csv('creditcard.csv')
3. Data Cleaning and Preprocessing
# Check for any missing values in each column and print them.
missing_values = data.isnull().sum()
print("Missing values for each column:\n", missing_values)

# The 'Amount' column is standardized (scaled to have a mean of 0 and a standard deviation of 1), which is common practice for machine learning models.
scaler = StandardScaler()
data['Amount'] = scaler.fit_transform(data[['Amount']])

# The 'Time' column, representing seconds elapsed between transactions, is converted to hours.
data['Hour'] = data['Time'] / 3600 % 24
4. Preparing Data for Machine Learning
# The 'Class' column, which is our target, is separated from the rest of the dataset.
X = data.drop('Class', axis=1)
y = data['Class']

# The dataset is split into a training set and a test set, with 20% of the data used for testing. This is a common ratio for train-test splits.
X_train, X_test, y_train, y_test = train_test_split(X, y, test_size=0.2, random_state=42)
5. Handling Class Imbalance
# SMOTE (Synthetic Minority Over-sampling Technique) is used to handle class imbalance by oversampling the minority class.
smote = SMOTE(random_state=42)
X_resampled, y_resampled = smote.fit_resample(X_train, y_train)
6. Model Training
# A Random Forest classifier is created and trained on the resampled data. Random Forest is a popular choice for classification tasks.
rf_classifier = RandomForestClassifier(random_state=42)
rf_classifier.fit(X_resampled, y_resampled)
7. Model Evaluation
# The trained model is used to make predictions on the test set.
y_pred = rf_classifier.predict(X_test)

# A classification report and ROC-AUC score are printed to evaluate the performance of the model. These metrics are crucial for understanding the model's effectiveness, especially in imbalanced datasets.
print("\nClassification Report:")
print(classification_report(y_test, y_pred))
print("\nROC-AUC Score:", roc_auc_score(y_test, y_pred))
8. Saving the Model and Scaler
# The trained model and the fitted scaler are saved for future use. This is important as the same scaler should be used in the preprocessing of any new data and the model can be directly used to make predictions without needing to be retrained.
joblib.dump(rf_classifier, 'credit_card_fraud_detector.pkl')
joblib.dump(scaler, 'fitted_scaler.pkl')
Step-by-Step Summary:
- Import Libraries: Necessary Python libraries for various stages of the data science pipeline are imported.
- Load Dataset: The CSV file containing the transactions is loaded into a pandas DataFrame.
- Data Cleaning and Preprocessing: Missing values are checked, and necessary columns are transformed for better model performance.
- Preparing Data for ML: Features and target variables are split, and the dataset is divided into training and testing sets.
- Handling Class Imbalance: The SMOTE technique is used to oversample the minority class to address class imbalance in the dataset.
- Model Training: A RandomForestClassifier is initialized and trained on the balanced dataset.
- Model Evaluation: The model’s performance is evaluated using the test dataset with metrics like the classification report and ROC-AUC score.
- Saving the Model and Scaler: The trained model and the scaler used for preprocessing are saved for future use in prediction tasks.
This script is a comprehensive workflow, from initial data loading and preprocessing to model training, evaluation, and saving the final model for future predictions.
model.py
# Import necessary libraries for data manipulation, visualization, model building, and evaluation.
from sklearn.metrics import classification_report, roc_auc_score
from sklearn.ensemble import RandomForestClassifier
from imblearn.over_sampling import SMOTE
from sklearn.model_selection import train_test_split
from sklearn.preprocessing import StandardScaler
import matplotlib.pyplot as plt
import seaborn as sns
import pandas as pd
import joblib

# Load the dataset into a pandas DataFrame from a CSV file.
data = pd.read_csv('creditcard.csv')

# Check for any missing values in each column and print them.
missing_values = data.isnull().sum()
print("Missing values for each column:\n", missing_values)

# The 'Amount' column is standardized (scaled to have a mean of 0 and a standard deviation of 1), which is common practice for machine learning models.
scaler = StandardScaler()
data['Amount'] = scaler.fit_transform(data[['Amount']])

# The 'Time' column, representing seconds elapsed between transactions, is converted to hours.
data['Hour'] = data['Time'] / 3600 % 24

# The 'Class' column, which is our target, is separated from the rest of the dataset.
X = data.drop('Class', axis=1)
y = data['Class']

# The dataset is split into a training set and a test set, with 20% of the data used for testing. This is a common ratio for train-test splits.
X_train, X_test, y_train, y_test = train_test_split(
    X, y, test_size=0.2, random_state=42)

# SMOTE (Synthetic Minority Over-sampling Technique) is used to handle class imbalance by oversampling the minority class.
smote = SMOTE(random_state=42)
X_resampled, y_resampled = smote.fit_resample(X_train, y_train)

# A Random Forest classifier is created and trained on the resampled data. Random Forest is a popular choice for classification tasks.
rf_classifier = RandomForestClassifier(random_state=42)
rf_classifier.fit(X_resampled, y_resampled)

# The trained model is used to make predictions on the test set.
y_pred = rf_classifier.predict(X_test)

# A classification report and ROC-AUC score are printed to evaluate the performance of the model. These metrics are crucial for understanding the model's effectiveness, especially in imbalanced datasets.
print("\nClassification Report:")
print(classification_report(y_test, y_pred))
print("\nROC-AUC Score:", roc_auc_score(y_test, y_pred))

# The trained model and the fitted scaler are saved for future use. This is important as the same scaler should be used in the preprocessing of any new data and the model can be directly used to make predictions without needing to be retrained.
joblib.dump(rf_classifier, 'credit_card_fraud_detector.pkl')
joblib.dump(scaler, 'fitted_scaler.pkl')
So, here’s a little insider tip. Given that our main goal is to test our model and, to be honest, we’re dealing with anonymized values in our CSV, creating a full-blown application might be a stretch. So, I took the liberty of trimming down the CSV a bit. It’s a neat little trick to speed things up during model creation and processing.
After all, who doesn’t love a quick turnaround, right? After running our model.py, you should see a couple of new files pop up. Let’s dive into those next!
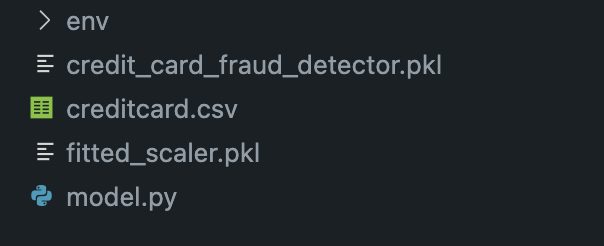
First things first, make sure you hang onto both credit_card_fraud_detector.pkl and fitted_scaler.pkl. Trust me, they'll come in handy shortly. Now, let's dive into setting up our Django app, shall we?
Kick things off with:
python3 -m venv envNext, let’s get our environment up and running:
source env/bin/activate  # If you're on a Mac
env\Scripts\activate # For the Windows folks out there
Now, it’s shopping time! Let’s grab all the packages we’ll need:
pip install Django djangorestframework pandas joblib scikit-learnOnce that’s sorted, let’s get our project off the ground:
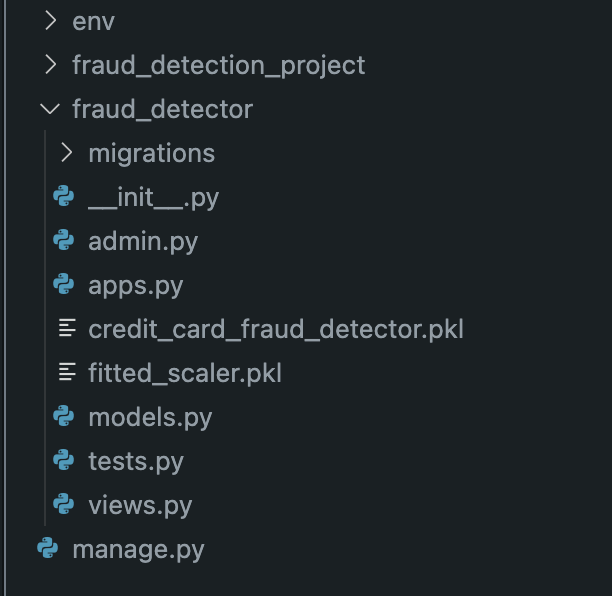
django-admin startproject fraud_detection_project .
And, of course, we need an app within our project. Let’s set that up:
django-admin startapp fraud_detector
Don’t forget to add our app and other essentials to our settings.py:
INSTALLED_APPS = [
    'django.contrib.admin',
    'django.contrib.auth',
    'django.contrib.contenttypes',
    'django.contrib.sessions',
    'django.contrib.messages',
    'django.contrib.staticfiles',

    'rest_framework', # new added for REST
    'fraud_detector', # our app
]
For our project’s urls.py, it should look a bit like this:
from django.contrib import admin  # Import Django's admin module.
from django.urls import path, include  # Import Django's function for URL routing and including other URLconfs.

# Define the list of URL patterns, urlpatterns.
# Django runs through each URL pattern, in order, and stops at the first one that matches the requested URL.
urlpatterns = [
    path('admin/', admin.site.urls),  # Assign the URL 'admin/' to Django's built-in admin site. For example, if your website is 'www.example.com', you can go to 'www.example.com/admin/' to access the admin site.

    path('', include('fraud_detector.urls'))  # Include the URL configurations from the 'fraud_detector' app. The 'include()' function allows referencing other URLconfs. Note that the empty string ('') as the first parameter means that for any URL request not caught by the previous patterns, Django will look into 'fraud_detector.urls' for further instructions.
]
And lastly, since we’re just prototyping here, let’s drop the credit_card_fraud_detector.pkl and fitted_scaler.pkl files right into the app's folder. It's a tad unconventional, but hey, it gets the job done for now!
Alright! Let’s get coding and see what we can build together!
After that we create the file fraud_detector/urls.py in the application
# Import the 'path' function from Django's URL routing module.
# This function is used to define URL patterns for the application.
from django.urls import path

# Import the 'check_fraud' function from the 'views' module within the current directory (i.e., the views.py file in the same app).
from .views import check_fraud

# Define the list of URL patterns for this app, 'urlpatterns'.
# Whenever a URL request matches one of these patterns, the associated view function will be invoked.
urlpatterns = [
    # Define a URL pattern:
    # When a request hits 'api/check_fraud/', it should be handled by the 'check_fraud' view function.
    # The 'name' parameter assigns a unique name to this URL pattern, which can be used elsewhere in Django (e.g., in templates) to refer to this specific URL.
    path('api/check_fraud/', check_fraud, name='check_fraud'),
]
Then we start creating the functionality in the fraud_detector/views.py
Imports:
from django.shortcuts import render
from rest_framework.decorators import api_view
from rest_framework.response import Response
import pandas as pd
import joblib
from sklearn.preprocessing import StandardScaler
This section simply imports the required libraries and modules.
render: A Django function to render templates.api_view: A decorator for Django Rest Framework (DRF) views that specifies the HTTP methods a view should accept.Response: A DRF class to return data in a format suitable for client-side rendering.pandas: A library for data manipulation and analysis.joblib: A library for serializing Python objects, often used to save and load machine learning models.StandardScaler: A scikit-learn class for standardizing features by removing the mean and scaling to unit variance.
Loading the Model and Scaler:
loaded_model = joblib.load('fraud_detector/credit_card_fraud_detector.pkl')
scaler = joblib.load('fraud_detector/fitted_scaler.pkl')
Here, the pre-trained machine learning model and the scaler (used for standardizing the ‘Amount’ feature) are loaded from their saved .pkl files using joblib.
Preprocessing Function:
def preprocess_data(payment_data):
    """
    Preprocess the input data for prediction.

    :param payment_data: dict, input transaction data
    :return: DataFrame, processed data
    """

    # Convert the payment_data dictionary to a DataFrame
    df = pd.DataFrame([payment_data])

    # Scale 'Amount'
    df['Amount'] = scaler.transform(df['Amount'].values.reshape(-1,1))

    # Convert the 'Time' column from seconds to hours
    df['Hour'] = df['Time'] / 3600 % 24

    return df
This function prepares the input data for prediction.
df = pd.DataFrame([payment_data]): It converts the input data (a dictionary) into a pandas DataFrame.df['Amount'] = scaler.transform(df['Amount'].values.reshape(-1,1)): The 'Amount' column is standardized using the preloaded scaler.df['Hour'] = df['Time'] / 3600 % 24: The 'Time' column, which represents seconds since the first transaction, is converted to hours to possibly extract more meaningful information.- It returns the preprocessed DataFrame.
Prediction Function:
def predict_fraud(payment_data):
    """
    Predict whether the input transaction is fraudulent.

    :param payment_data: dict, input transaction data
    :return: str, prediction result
    """

    processed_data = preprocess_data(payment_data)
    prediction = loaded_model.predict(processed_data)

    return "Fraudulent Transaction Detected!" if prediction == 1 else "Transaction Appears Genuine."
This function predicts whether a transaction is fraudulent using the preloaded model.
processed_data = preprocess_data(payment_data): The input data is preprocessed.prediction = loaded_model.predict(processed_data): The model predicts the class of the transaction (fraudulent or genuine).- Based on the prediction, a message is returned indicating the result.
API Endpoint:
@api_view(['POST'])
def check_fraud(request):
    """
    API endpoint to check if a transaction is fraudulent.

    :param request: HTTP request
    :return: Response, status of the transaction (fraudulent or genuine)
    """

    payment_data = request.data
    prediction_message = predict_fraud(payment_data)

    return Response({"status": prediction_message})
This function serves as an API endpoint to check if a transaction is fraudulent.
@api_view(['POST']): The decorator specifies that this view will only accept POST requests.payment_data = request.data: The input data is extracted from the POST request.prediction_message = predict_fraud(payment_data): The prediction message is generated based on the input data.return Response({"status": prediction_message}): The prediction message is wrapped inside a dictionary and returned as an HTTP response.
fraud_detector/views.py
from django.shortcuts import render
from rest_framework.decorators import api_view
from rest_framework.response import Response
import pandas as pd
import joblib
from sklearn.preprocessing import StandardScaler

# Load the model and the scaler
loaded_model = joblib.load('fraud_detector/credit_card_fraud_detector.pkl')
scaler = joblib.load('fraud_detector/fitted_scaler.pkl')

def preprocess_data(payment_data):
    """
    Preprocess the input data for prediction.

    :param payment_data: dict, input transaction data
    :return: DataFrame, processed data
    """

    # Convert the payment_data dictionary to a DataFrame
    df = pd.DataFrame([payment_data])

    # Scale 'Amount'
    df['Amount'] = scaler.transform(df['Amount'].values.reshape(-1,1))

    # Convert the 'Time' column from seconds to hours
    df['Hour'] = df['Time'] / 3600 % 24

    return df

def predict_fraud(payment_data):
    """
    Predict whether the input transaction is fraudulent.

    :param payment_data: dict, input transaction data
    :return: str, prediction result
    """

    processed_data = preprocess_data(payment_data)
    prediction = loaded_model.predict(processed_data)

    return "Fraudulent Transaction Detected!" if prediction == 1 else "Transaction Appears Genuine."

@api_view(['POST'])
def check_fraud(request):
    """
    API endpoint to check if a transaction is fraudulent.

    :param request: HTTP request
    :return: Response, status of the transaction (fraudulent or genuine)
    """

    payment_data = request.data
    prediction_message = predict_fraud(payment_data)

    return Response({"status": prediction_message})
In summary, this code defines a Django view to predict if a given credit card transaction is fraudulent. The view expects the transaction data as input, preprocesses the data, uses a trained model to make a prediction, and then sends back a response indicating whether the transaction is likely to be fraudulent or genuine.
Alright, let’s get things rolling!
First, let’s ensure our database structure is in sync with our code. Fire up your terminal and run these commands:
python manage.py makemigrations
python manage.py migrate
Now, it’s time to see our creation in action. Start up the Django server with:
python manage.py runserverOnce it’s running, open up your favorite web browser and head over to:
http://127.0.0.1:8000/api/check_fraud/Now, for the fun part! Let’s test out our API. Input the data for a potentially fraudulent transaction into the content box and hit the “POST” button. Let’s see what our model thinks about it!
{
    "Time": 406,
    "V1": -2.3122265423263,
    "V2": 1.95199201064158,
    "V3": -1.60985073229769,
    "V4": 3.9979055875468,
    "V5": -0.522187864667764,
    "V6": -1.42654531920595,
    "V7": -2.53738730624579,
    "V8": 1.39165724829804,
    "V9": -2.77008927719433,
    "V10": -2.77227214465915,
    "V11": 3.20203320709635,
    "V12": -2.89990738849473,
    "V13": -0.595221881324605,
    "V14": -4.28925378244217,
    "V15": 0.389724120274487,
    "V16": -1.14074717980657,
    "V17": -2.83005567450437,
    "V18": -0.0168224681808257,
    "V19": 0.416955705037907,
    "V20": 0.126910559061474,
    "V21": 0.517232370861764,
    "V22": -0.0350493686052974,
    "V23": -0.465211076182388,
    "V24": 0.320198198514526,
    "V25": 0.0445191674731724,
    "V26": 0.177839798284401,
    "V27": 0.261145002567677,
    "V28": -0.143275874698919,
    "Amount": 0
}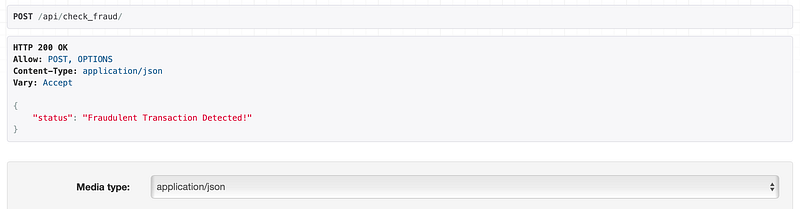
Alright, our app just flagged a transaction as potentially fraudulent. Impressive, right? But let’s not stop there. Let’s throw a curveball at it and try a genuine transaction. I’m eager to see how it handles the real deal. Dive in and test it out!
{
    "Time": 50000,
    "V1": -0.694242,
    "V2": -0.044075,
    "V3": 1.672773,
    "V4": 0.973366,
    "V5": -0.245117,
    "V6": 0.347068,
    "V7": 0.193679,
    "V8": 0.082637,
    "V9": 0.331128,
    "V10": 0.083386,
    "V11": -0.540407,
    "V12": 1.580003,
    "V13": 1.347247,
    "V14": 0.504055,
    "V15": 0.049967,
    "V16": 0.284376,
    "V17": -0.932738,
    "V18": 0.326118,
    "V19": 0.090012,
    "V20": -0.387910,
    "V21": -0.009302,
    "V22": 0.313894,
    "V23": -0.037083,
    "V24": 0.640132,
    "V25": 0.044536,
    "V26": 0.488603,
    "V27": 0.357441,
    "V28": 0.078280,
    "Amount": 150.00
}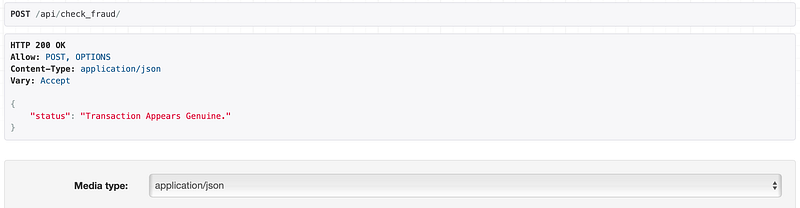
Bingo! It nailed it again, indicating an approved transaction. Now, let’s keep things in perspective. This app is pretty basic, especially considering the fields are anonymized, so we can’t test with real-world data. But the goal here was to help beginners see how seamlessly they can integrate a model with a Django application. There are more layers we can add, like hosting the model on a separate server, enabling automatic updates, and so forth.
In conclusion, if you found this tutorial insightful or even just a tad helpful, I’d genuinely appreciate a follow or a clap.
It goes a long way in encouraging creators like me. And hey, if you want to stay in the loop with more tech insights and discussions, consider joining my Discord group.
Let’s keep the learning going! Cheers! ❤️👋
In Plain English
Thank you for being a part of our community! Before you go:
- Be sure to clap and follow the writer! 👏
- You can find even more content at PlainEnglish.io 🚀
- Sign up for our free weekly newsletter. 🗞️
- Follow us: Twitter(X), LinkedIn, YouTube, Discord.
- Check out our other platforms: Stackademic, CoFeed, Venture.


