
DIY Toys for Cats
Unwind With Crochet
I learned to crochet at the age of 11 or 12. I began to teach myself from a book. My mother was a knitter, and she did try to teach me how to knit, but she did not know how to crochet. It was a struggle, and it was a lot of trial and error that took years before I could make a simple rectangle. I can’t tell you how long because I think I was pretty much an adult before that happened.
So, lots of years of wrapping the yarn, going through the wrong loops, and not remembering about the extra turning chains you have to make when you flip the work over to start a new row, which resulted in many not-so-perfect squares or rectangles but boatloads of trapezoids. There was lots of uneven tension. There is a hilarious subreddit called r/TensionPorn. I know for a fact just how many years of practice it takes to get your stitches to be even on a consistent basis. Maybe I am the odd duckling out there, and everybody learns faster than I do.
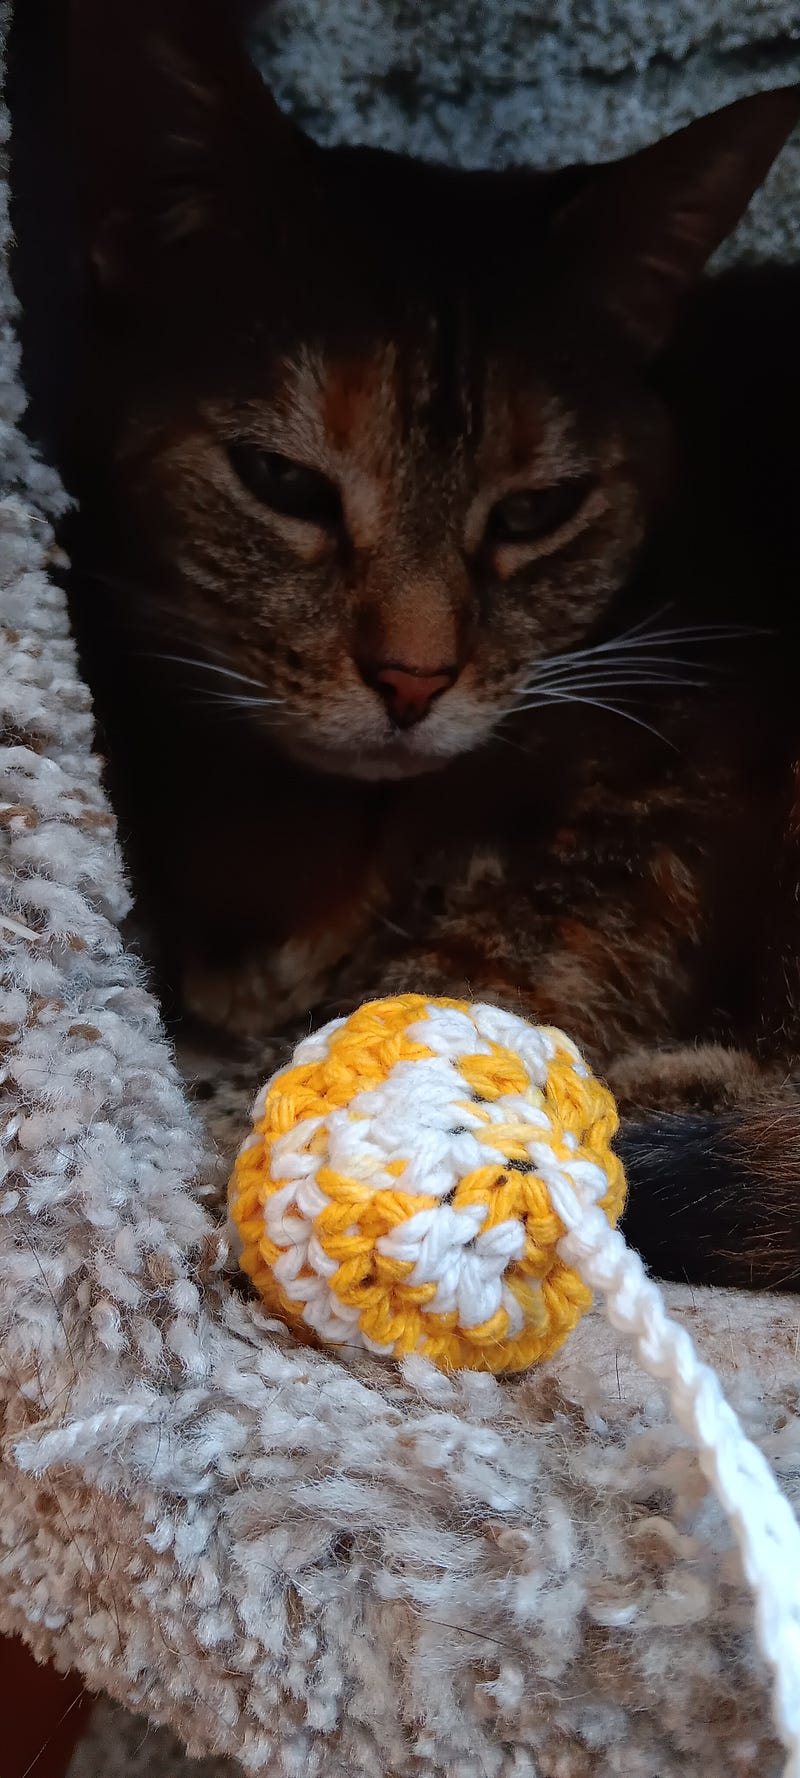
These days, if I miss having a crochet project, I will grab a bit of yarn and make a cat toy. They are small balls, maybe one to two inches in diameter.
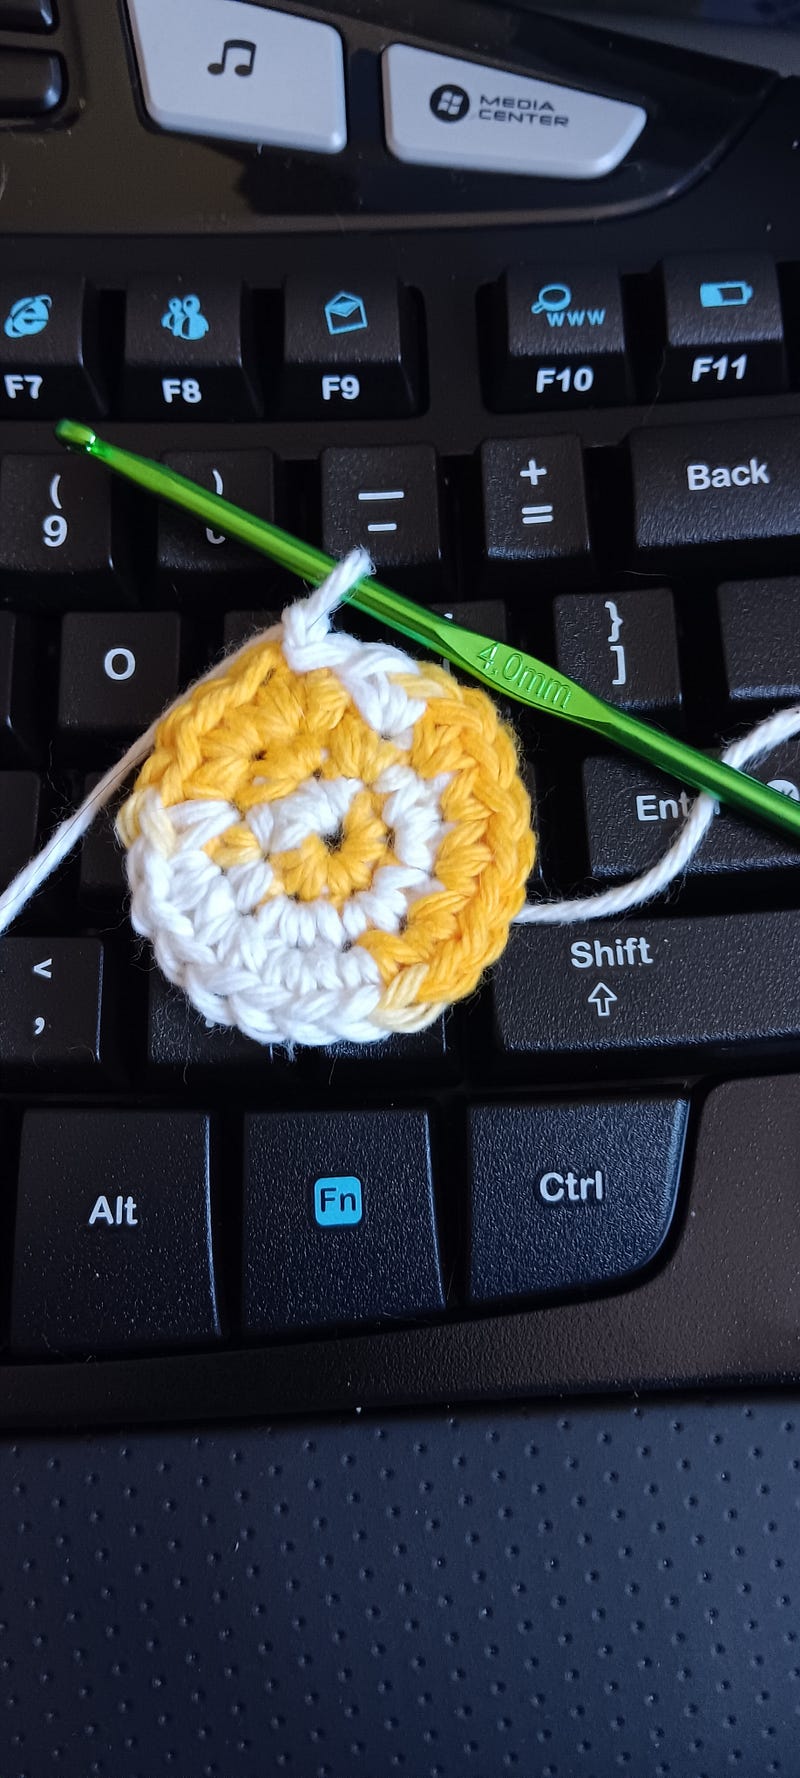
You make a magic ring and crochet six single crochet stitches into the circle, or, if you don’t know how to make a magic ring, you chain six and slipstitch through the first one to draw it up into a circle. Your first round is to single-crochet six stitches into your ring.
Once you’ve done that, you’re on to your next row. If you want to, you can mark it with a different colored piece of yarn or a paperclip or, like I do, just eyeball it. So, what if it’s wonky? The cats will love it just the same. In your second row, you double your stitches. Every row around you single crochet in each of the stitches, so your third round is going to be 24 stitches. If you want a bigger ball, keep going. You’re aiming for the widest part of your ball. Usually, my cats prefer the 24-stitch wide versions.
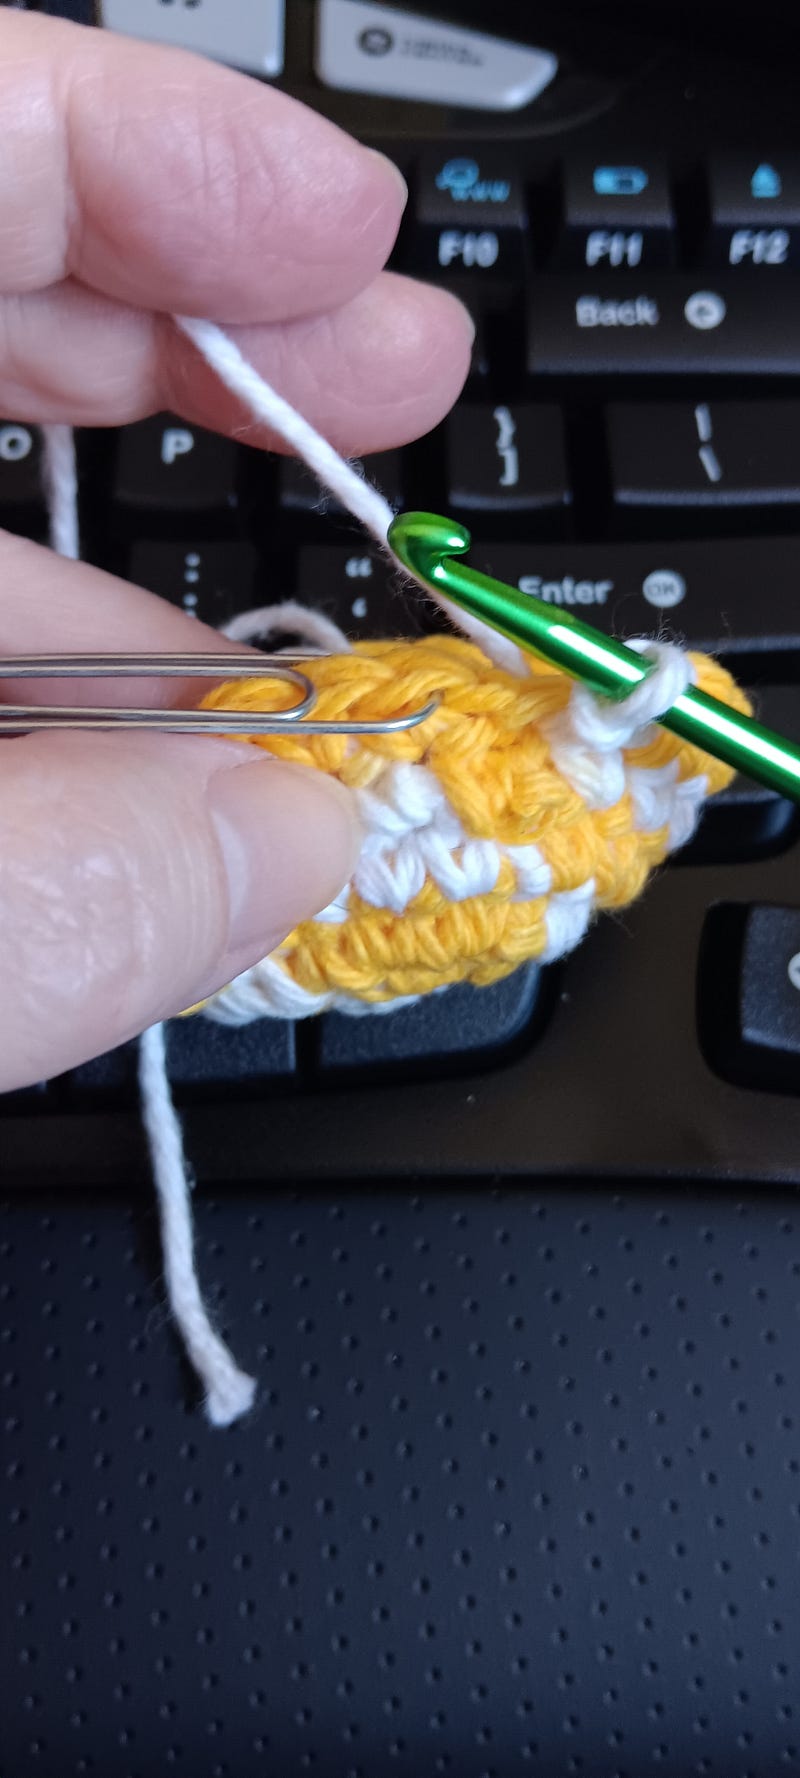
Every time you get to the end of your current round, you connect the rows with a slip stitch and then do one chain to bring you up to the next level and ready to start the next row. I have to tell you this was one of those maneuvers that was difficult for me and took me several years to understand. Thank God for YouTube and all the wonderful instructional videos people can access.
Then, you can single crochet in each stitch around for a while. I did that for three rows in the picture of the ball I’m making today. You can change colors at any time, which makes for an interesting ball. So, say you are done with the middle now you begin decreasing to form the other half of the ball. This is where you make two stitches into one. It looks like you’re going to make a single crochet in your next stitch, but instead, when you get to the part of the stitch where you’re going to pull the yarn through, you put your hook through the next stitch. Two in one.
You will decrease from 24 stitches, decreasing in each stitch back down to 12, and the next row around, you’ll go down to six. You can continue to decrease until you’ve just got a few stitches left on the hook, and then bring a long tail from your working end of the yarn through all your stitches, thread a yarn needle with the end, and sew the puppy together. Or, you can finish the way I did the one in the pictures here with just a bunch of gnarly crochet stitches. Once the ball was done and I was ready to tie it off I left a two-foot tail of yarn and crocheted a little chained tail of about 10 inches for you to use as part of the play with your cat. If you leave a shorter tail, say two or three inches, your cat can carry it around the house.
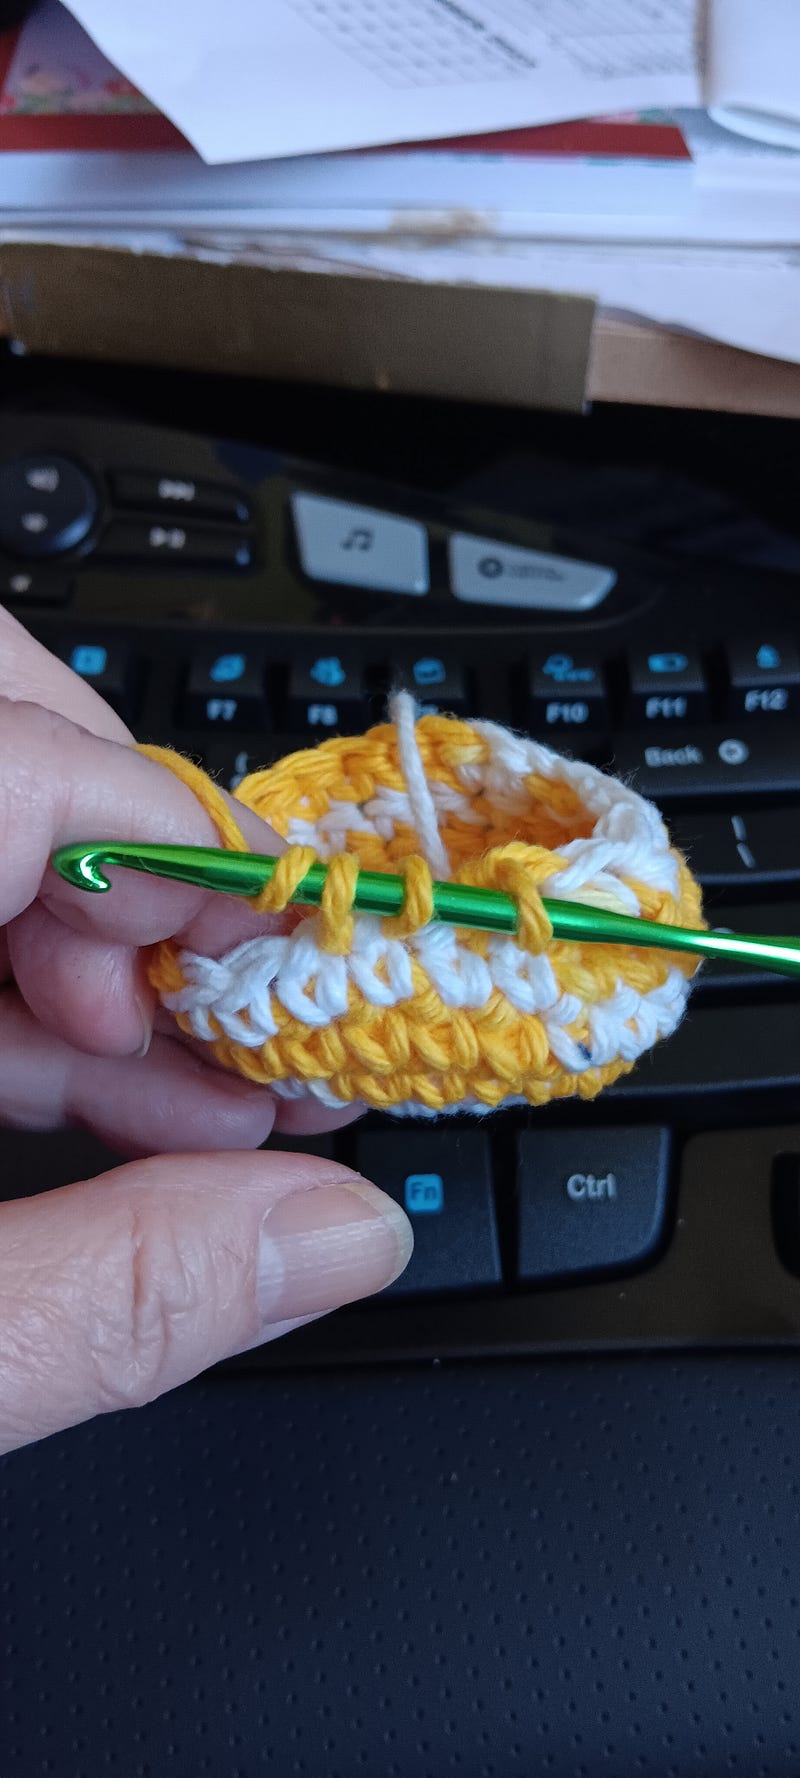
I did forget to mention this ball should be stuffed with something. There is really no need for you to go out and purchase a bag of fiberfill stuffing. Use one of the odd socks you’ve been collecting. You know, the ones whose mate got eaten by the washer or the dryer. Or the one with a hole in it that you saved. Cut them up and stuff with those. I stuff the balls when I am in decreasing mode. As you make another row of decreases, you can stuff some more in. It’s a fun way to pass an hour or so. And it’s fun for the cats. I used to have some spare jingle bells around, and I’d pop one of those inside with the stuffing, but be warned that stepping on one of those finished cat toys in your bare feet is sometimes a bit of a shock. Oh, and you can also either rub catnip on the outside of the ball to give your cats a thrill or just put some inside with the stuffing.
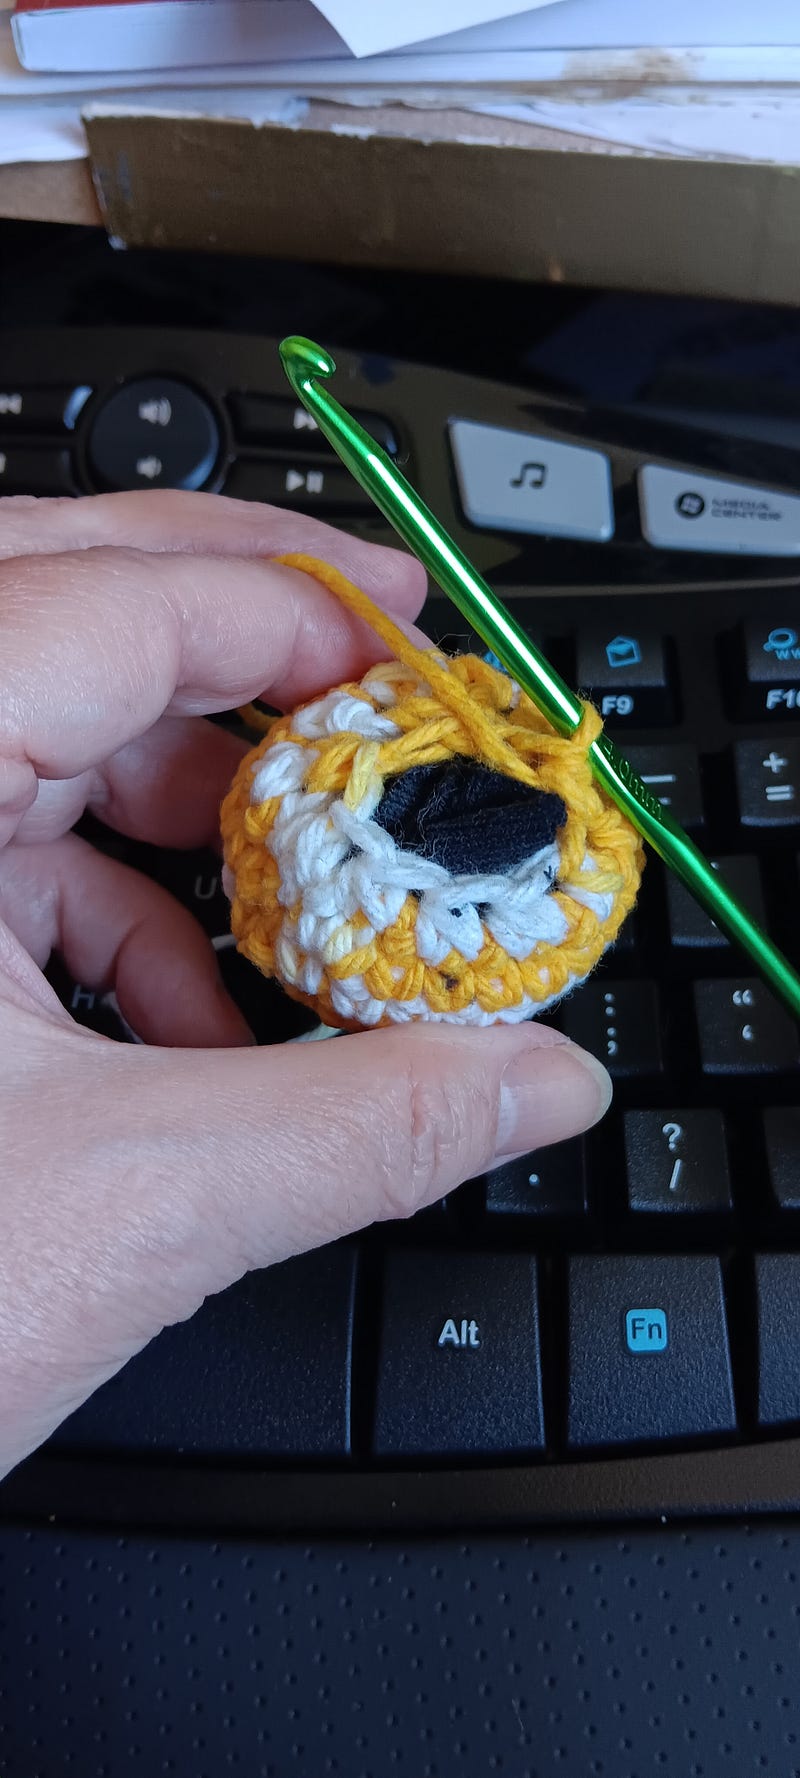
This sounds like so much fun, I’m going to start one today so I can show you. 1 used a leftover ball of yellow and white variegated 100% cotton Lily’s sugar and cream crochet cotton. It’s a thick thread that works up more quickly than a thin crochet cotton. You can get it on Amazon for about $7 for one 2oz skein. I think that was the size I had when I got it at Goodwill. I used a size 4.25 mm or G hook. I like to make a sturdy fabric. If you were to use a larger hook, 5 mm or F hook, the ball would be a little bit bigger. But use whatever you’ve got on hand or something from somebody else’s stash for sale in the Goodwill or a thrift store.
If you are worried about bugs or whatnot, after you are done crocheting, put the toy in a bag and toss it in your freezer for three days. That ought to take care of their little bug butts.
It’s been fun.
The Links: Tension Porn at Reddit.com How To Crochet a Ball with Tiffany — Video at YouTube