Directly Read and Write An NTFS Portable Driver in macOS without any Apps

If you had a portable driver or a USB Flash working in the Windows system, its file format may be NTFS which is developed by Microsoft. One day you want to use this driver in your MBP with macOS which is developed by Apple, unfortunately, these two system’s file format is totally different. Normally, you just read an NTFS driver in macOS.
There is a solution to make you directly read and write an NTFS drive, without install any apps. This method is mainly achieved by modifying the fstab file.
What is fstab file?
The
fstab(or file systems table) file is a system configuration file commonly found at /etc/fstab on Unix and Unix-like computer systems. In Linux it is part of the util-linux package. Thefstabfile typically lists all available disk partitions and other types of file systems and data sources that are not necessarily disk-based, and indicates how they are to be initialized or otherwise integrated into the larger file system structure. Thefstabfile is read by the mount command, which happens automatically at boot time to determine the overall file system structure, and thereafter when a user executes the mount command to modify that structure. It is the duty of the system administrator to properly create and maintain thefstabfile. Whilefstabis still used for basic system configuration, for other uses it has been superseded by automatic mounting mechanisms. (Wikipedia)
- The
fstabfile is a file about the file system configuration in Unix and Unix-like System. - The
fstabfile lists all available disk file partitions and other types of file systems and other non-disk data resources. - The
fstabfile will be automatically loaded by mount at system startup.
Proceed as follows: System: macOS Catalina version 10.15.4
- check the name of your Driver
open a terminal, input command
diskutil list
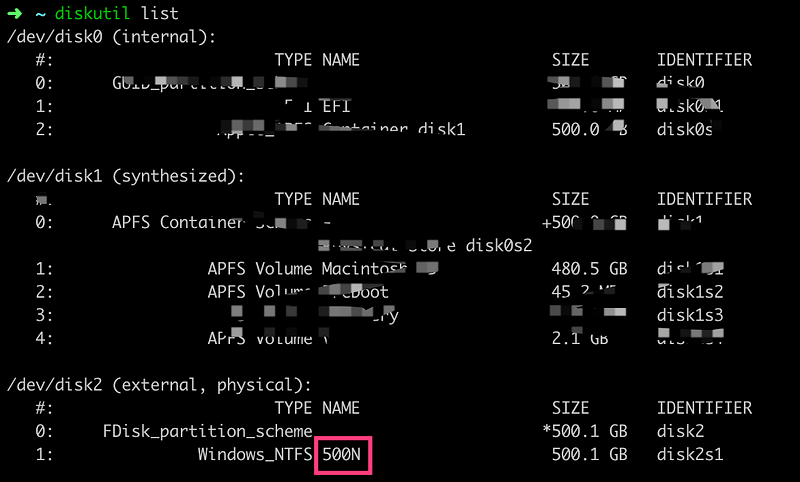
As shown in the screenshot, my driver name is 500N
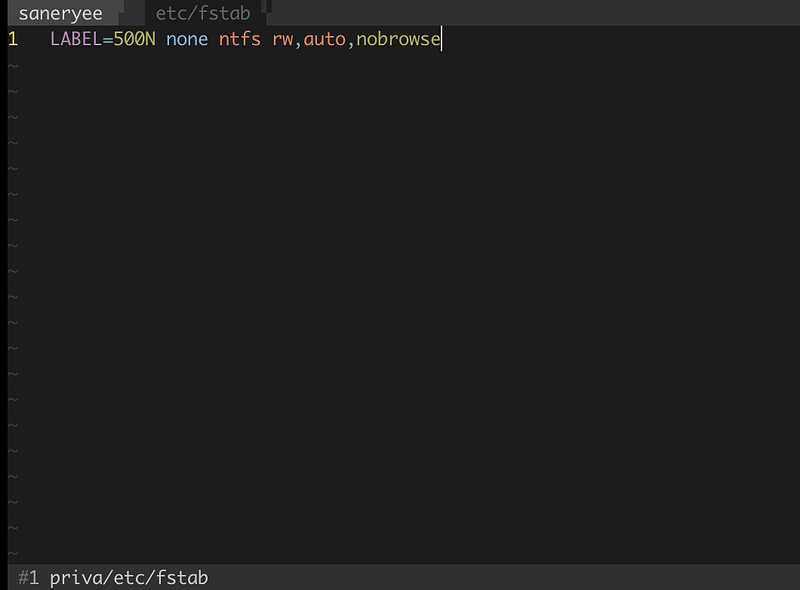
2. Edit etc/fstab Type in the terminal sudo vi /etc/fstab

Add LABEL=NAME none ntfs rw,auto,nobrowse in the fstab, save, and exit.
Command interpretation:
Label = fs_spec fs_file fs_type fs_options fs_dump fs_pass- fs_spec , The driver name found in step one.
- fs_file, This field describes the mount point (target) for the filesystem. For swap partitions, this field should be specified as `none’.
- fs_type, The type of the filesystem. Here is
ntfs. - fs_options, The mount options associated with the filesystem. - rw, Be mounted read-write - auto, A file system is mounted automatically - nobrowse, Don’t show the disk in the Finder sidebar or Desktop.
- fs_dump, This option is used by the dump command to check how quickly a file system should be dumped and set this field to 0 if no dump is required
- fs_pass, This field is used by the fsck command to determine the sequence of file systems that need to be scanned at startup, the value of the root file system/pair should be 1, and the other file system should be 2. Set this field to 0 if the file system does not need to be scanned at boot time
3. Restart computer. There is no portable driver icon on your desktop. You can find the portable driver has mounted the /Volumes
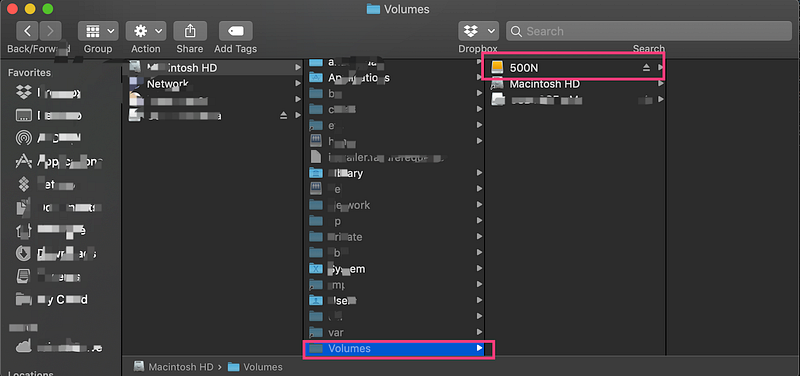
Just add the connection manually. Open the terminal, input command
sudo ln -s /Volumes/Your Driver Name ~/Desktop/Your Driver Name

Finish, when you will use your portable driver, just plug in the driver and click the icon.