
Digital Transformation: Google Tag Manager Automation — Part 1
At the end of this article, you will learn how to automatically set up multiple GTM accounts using selenium, google chrome, and python.

In this first part of this series, we will examine how to automatically create multiple accounts using selenium, google chrome, and python. Unfortunately, there isn’t a GTM API’s method to create the accounts. This is the reason why we have to utilize this procedure.
In the second part, we will learn how to generate tags, variables, triggers, folders leveraging the GTM APIs.
Let’s quickly explain what GTM is. It’s simply a container that collects all your digital analytics (Adobe Analytics, Google Analytics, Amplitude, ComScore, etc) and marketing tags. GTM is one of the data collection’s pillars and it’s crucial to install it properly from the beginning. You can learn more about visiting: https://support.google.com/tagmanager/answer/6102821?hl=en
GTM Automation Benefits.
- you will be able to set-up multiple accounts instantly, being able to scale up your business, saving money and time.
- you will eliminate human errors which can cause; data inconsistency towards the analytics platforms and all the other marketing systems like Criteo, Adwords, Bing, etc.
- you’ll avoid situations like not being able to track users’ behavior on-site, or not being able to track the business KPIs. If the business doesn’t collect accurately his data, it won’t be able to make necessary adjustments and revisions.
Below, the video showing the final result of this first part of the series.
Gtm Automation: Environment and Dependencies Set-up.
It’s worth to spend few words about Selenium, before starting. Selenium is a framework that allows automating the most common browsers, it’s that simple. It’ applied to test automation, data extraction, and much more. You can learn more about it visiting: https://www.selenium.dev/
Let’s start with the set-up of our development environment.
Step one: create a python virtual environment. A virtual environment is Python’s way of separating dependencies between projects.
python3 -m venv tag_manager_automationStep two: activate the virtual environment.
source tag_manager_automation/bin/activateStep three: install in the virtual environment, the selenium library.
pip install seleniumStep four: Download and install the chrome web-driver. Visit https://chromedriver.chromium.org/downloads and download the drivers for your chrome version and operating system.
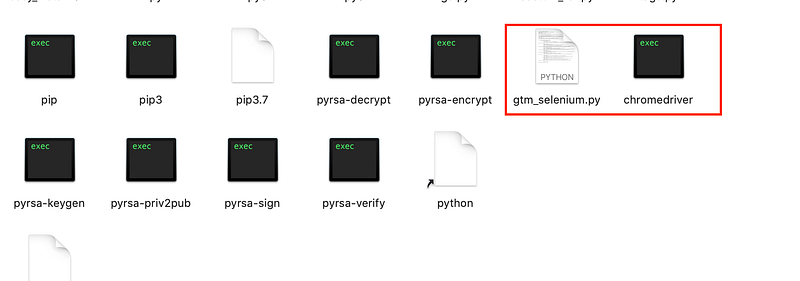
Step five: Unzip the chromedriver folder. Copy and past the chromedriver executable, in the “tag_manager_automation/bin/” path. This path will contain as well the automation script that we will build. Below the screenshot from my local environment.
We are done with the development environment set-up.
GTM Automation: Website Inspection.
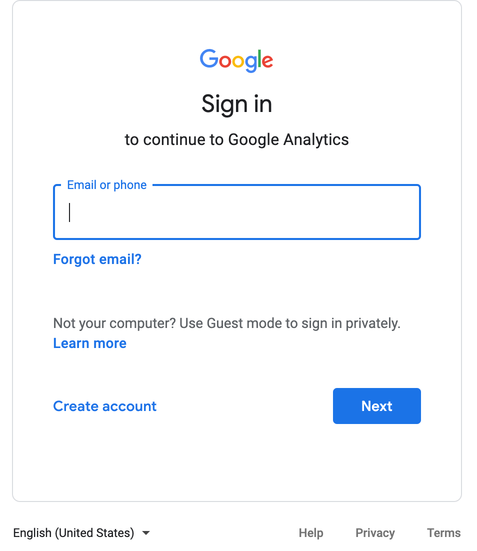
For Selenium to perform an automation process, we need to examine the HTML structure of the target website, in our case GTM site. You don’t need to perform these operations because I already executed them. I’m sharing the details so that you can apply the same logic to any websites. The screenshot below shows the starting point of the inspection process. If you don’t care to know how it works, you can go to the code section.
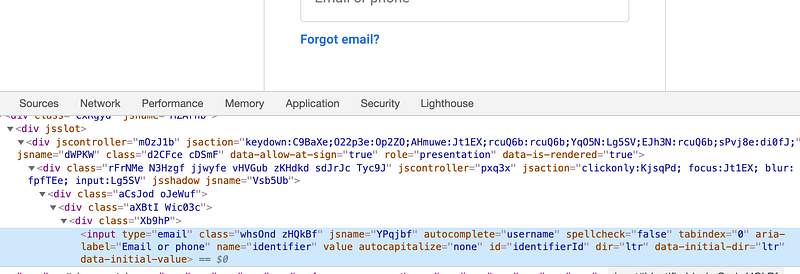
- for the email: we need to open the developer console and inspect the “email address” field. We need to look for the HTML attribute “name”. The attribute value is “identifier”. Check the screenshot below for reference.
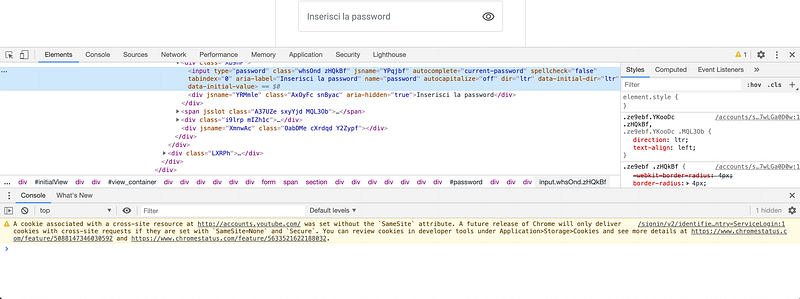
- for the password: we have to perform the same operation. We need to inspect the “password field” and look for the HTML attribute name. The attribute value is “password”. Check the screenshot below for reference.
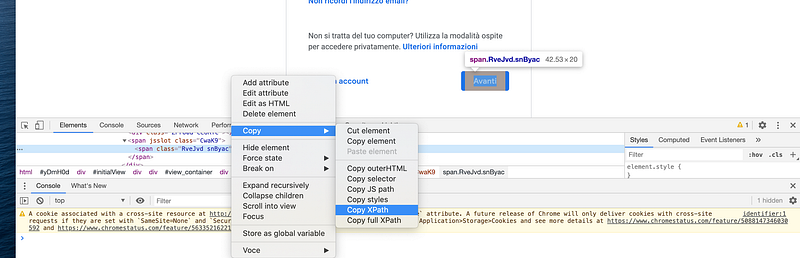
For clicking on the “Next” button: we need to inspect the “Next” button and copy its Xpath. Check the screenshot below for reference.
Now, we have all the information necessary to proceed. Let’s jump to the code.
GTM Automation: The Code.
Activate your Python interpreter and enter the code line by line.
First block: importing modules and dependencies.
- In the first line, we import the web driver module which provides all the WebDriver implementations necessary to proceed with the browser automation.
- In the second line, we import the Select class. The Select class provides the implementation of the HTML SELECT tag.
- In the third line, we import the time module. The time module is necessary because we have to give time to the DOM elements to load.
Second block: GTM login.
- in the first line, we define the path on our local environment to the chromedriver.
- in the third line, we open the target website.
- in the fifth line, we enter our email in the pertinent field.
- in the seventh line, we click on the “Next” button to proceed to the following step.
- in the tenth line, we enter the password.
- in the twelfth line, we click on the “Next” button to proceed.
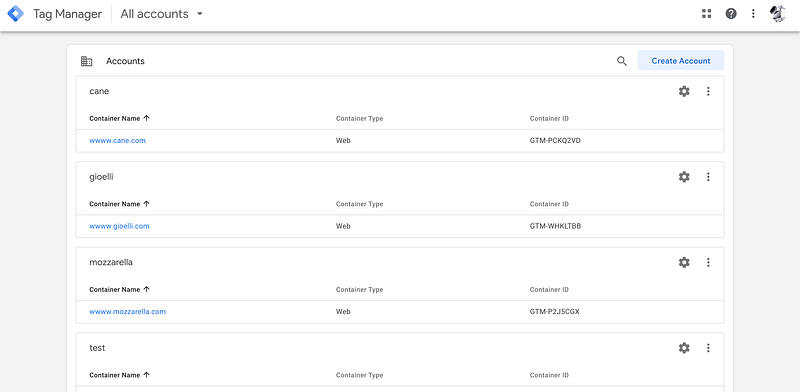
Execute this first part of the code and we will be inside GTM. The GTM homepage is displayed in the screenshot below.
Third block: lists definition.
The two lists above, define the accounts and the sites that we will create using a “for” loop.
Forth block: create the GTM account.
- in the first line, we define a function.
- in the second line, we create a parallel for loop, to go through the account and the site lists.
- in the fifth line, we click the “create account” in the GTM home page (see homepage screenshot above).
- in the eighth line, we fill in the “account name” field.
- in the tenth line, we select the country. A note about this: you have to look for country XPath that suits you. In this instance, the value I wanted to get Italy, so the value is 75.
- in the twelfth line, we fill in the “Container name” field.
- in the fourteenth line, we select the Target platform. Look for the XPath of your desired platform. In the example, I selected the “Web” platform.
- in the seventeenth line, we click the create button.
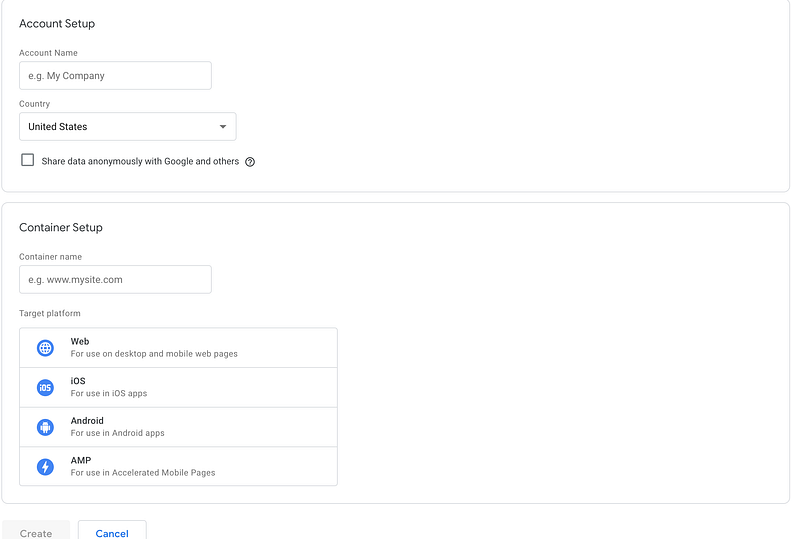
Below the GTM website screenshot, where the above actions will be performed.
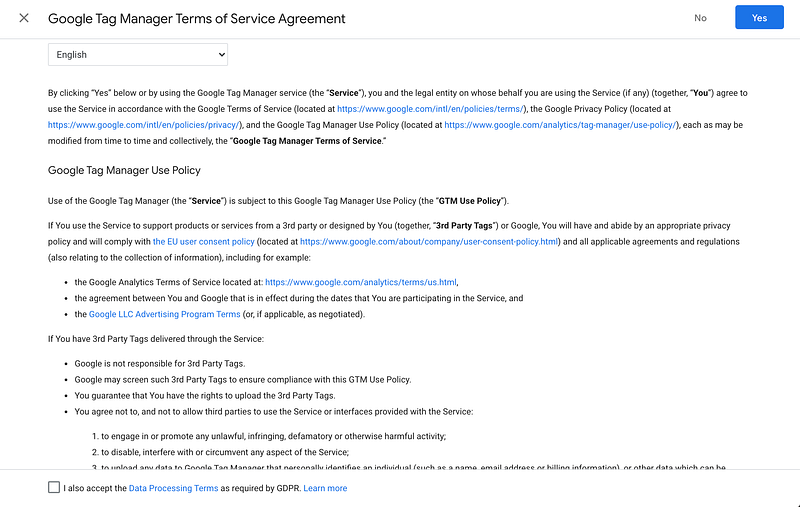
- in the twentieth line, we check the box to accept the GDPR terms.
- in the twenty-third, we click yes to accept the Google Tag Manager Terms of Service Agreement. Check the screenshot below for reference.
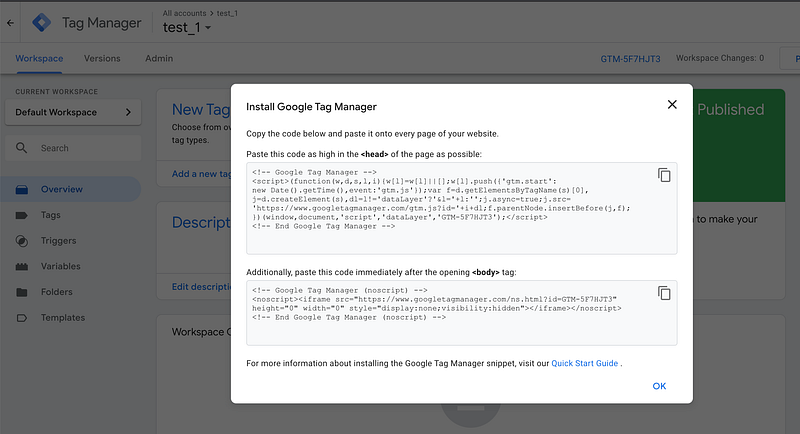
- in the twenty-sixth, we close the pop-up containing the GTM javascript code. Check the screenshot below for reference.
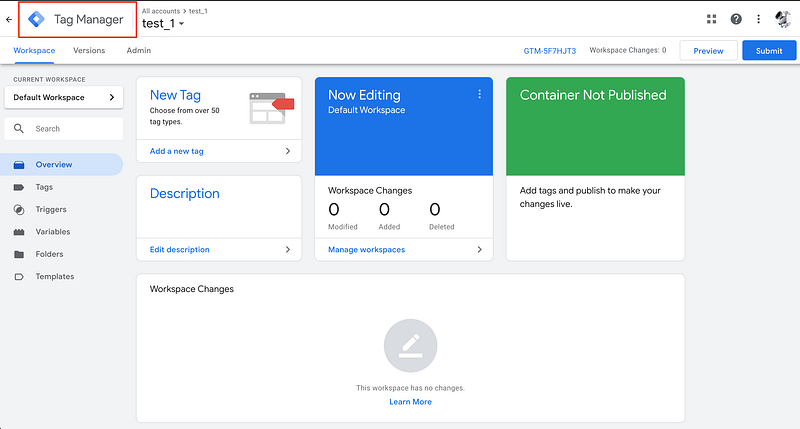
- in the twenty-ninth line, we click on the Tag Manager logo, going back to the homepage, so that the loop will restart. Check the screenshot below for reference.
Great, we just created two accounts automatically!! Just copy and paste the code in your editor and you will be good to go.
Next time, we are going to learn how to use the GTM APIs, to create tags, triggers, variables, and folders.


