
IdentityServer4 Register Clients and ApiResources | Tutorial 2

In tutorial 1, it provides step by step instructions to set up the Admin UI fo for the IndentityServer4. In tutorial 2, you will learn how to register a client (Angular SPA) and an API resource (ASP.NET WebAPI) via the Admin UI. Figure 1 shows the scope and relationship between tutorials 1 and 2.

Prerequisites
- IdentifyServer4 with Admin UI. Notice: if you do not have an instance of IdentityServer4 with Admin UI, follow the instructions in Tutorial 1.
- Familiarity with oAuth2 terminologies such as Client (ex. Angular SPA), Resource Server (ex. ASP.NET WebAPI), and Token Server (ex. IdentityServer4)
- Familiar with oAuth2 grant flow such as PKCE and Client Credential
Tutorial Content
The tutorial is divided into two parts:
- Register a sample of Angular SPA in STS. The repo of the sample Angular can be found at https://github.com/workcontrolgit/devkit-clients-angular-auth-oidc-client
- Register Angular SPA as a Client in IdentityServer4
Part 1 — Register ASP.NET WebAPI project as Api Resource
Note — If you have WebAPI and Angular SPA ready, you should register the ASP.NET WebAPI as API Resources in STS first. The oAuth2 scopes will be referenced later one when setting up the Angular SPA client
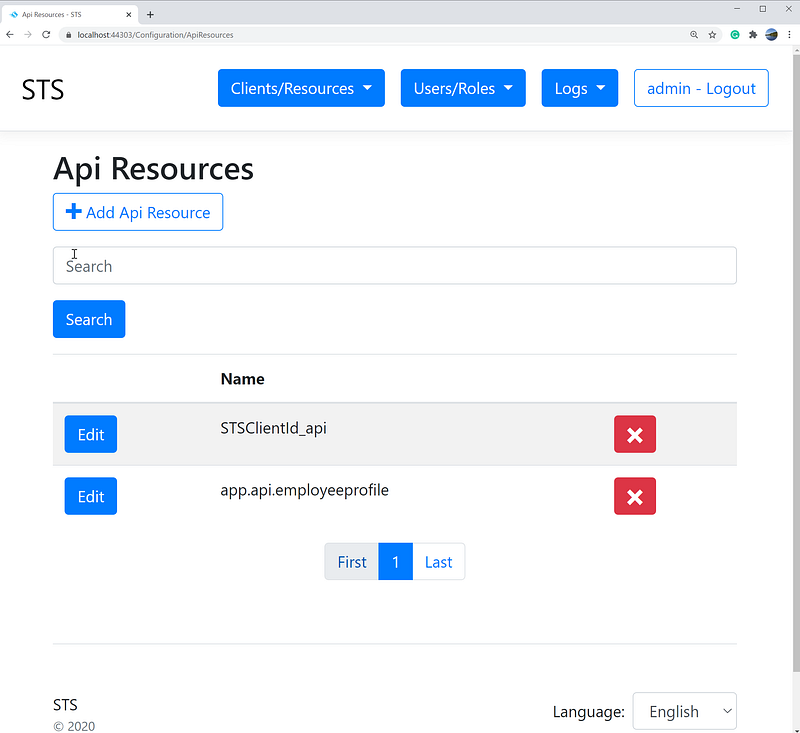
Task 1 — Navigate to Api Resource management screen in STS to register WebAPI project
- Login STS Admin UI
- Navigate to Api Resources
- Click on Add Api Resources (see Figure 2)
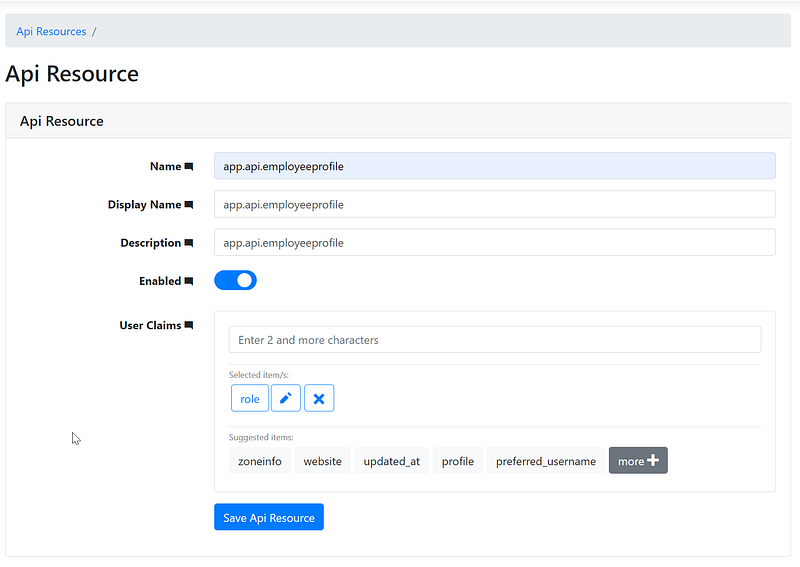
Task 2 — Register WebAPI as an Api Resources in STS
- Complete the Api Resource form as shown in Figure 3
- Click on Save Api Resource button
Task 3 — Set up two example scopes
- On the Api Resource screen, click on Manage Api Scopes (see Figure 4)
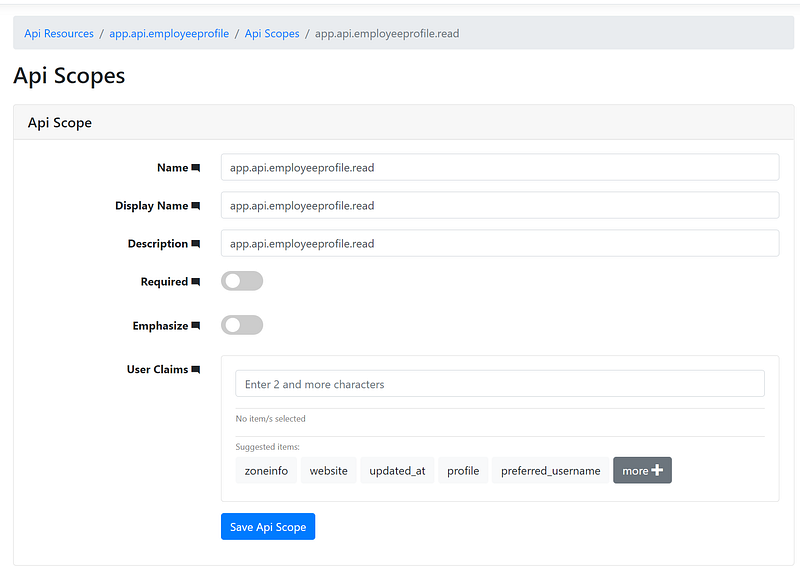
- Setup app.api.employeeprofile.read (see Figure 5)
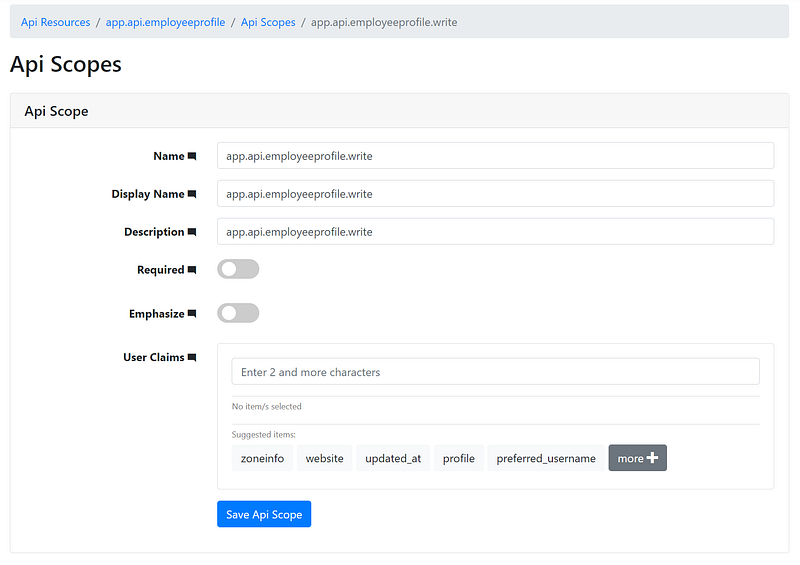
- Setup app.api.employeeprofile.write (see Figure 6)
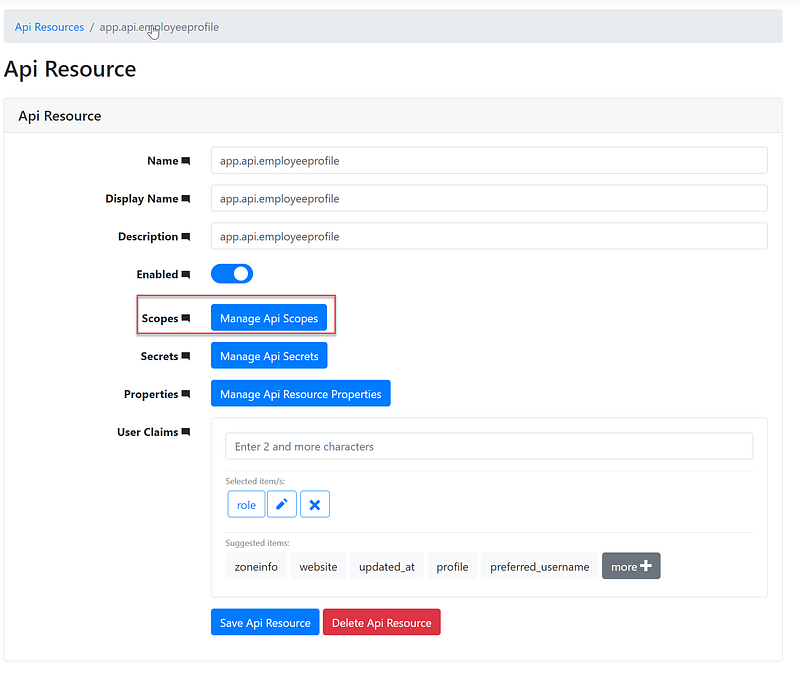
Task 4 — Setup an Api Secret key (optional)
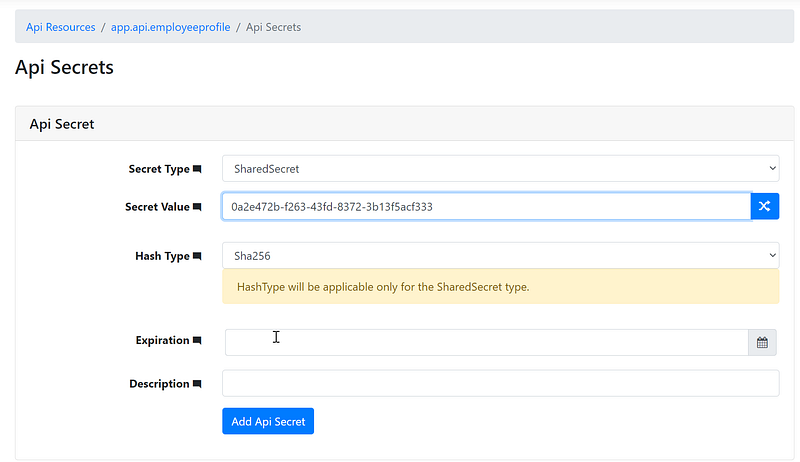
- Click on “Manage Api Secrets” button (see Figure 4)
- Set up a secret key value 0a2e472b-f263–43fd-8372–3b13f5acf333 (see Figure 7). Notice that this secret key is used by the WebAPI for back-channel JWT validation. Check the appsettings.json in the ASP.NET WebAPI Employee Profile project for usage.
Part 2 — Register Angular SPA as a Client in the IdentityServer4
Task 1 — Register the Angular SPA in STS, follow the steps below
- Log in STA vis Admin UI
- Navigate to Clients screen
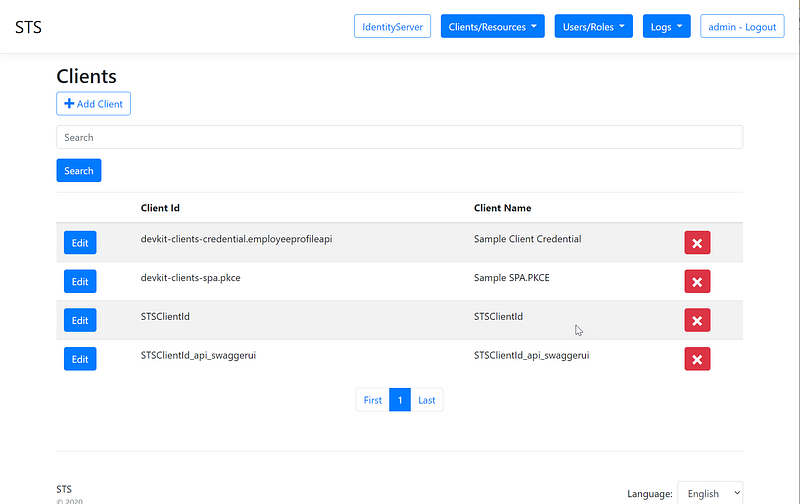
- Click on Add Client (See Figure 8)
Task 2 — Set up a new client, on the client Settings screen
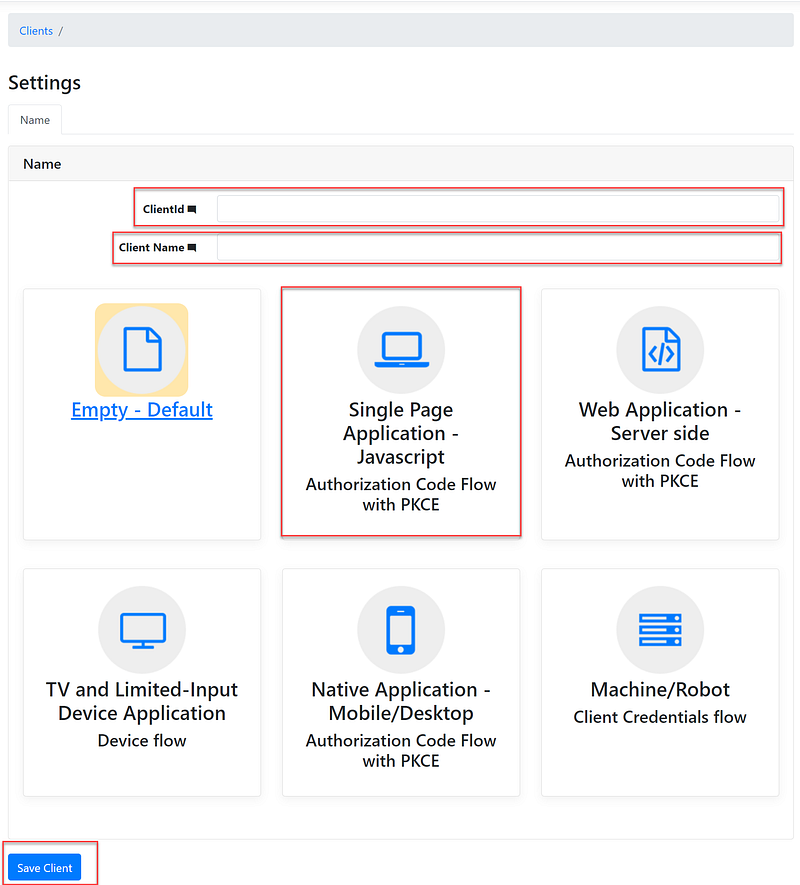
- Enter the ClientId. For the tutorial purpose, enter “devkit-clients-spa.pkce”. See Figure 9. In production, you might want to use a GUI instead.
- Enter the Client Name. For the tutorial purpose, enter “ Sample SPA.PKCE”
- Select Single Page Application — Javascript Authorization Code Flow with PKCE
- Click on Save Client
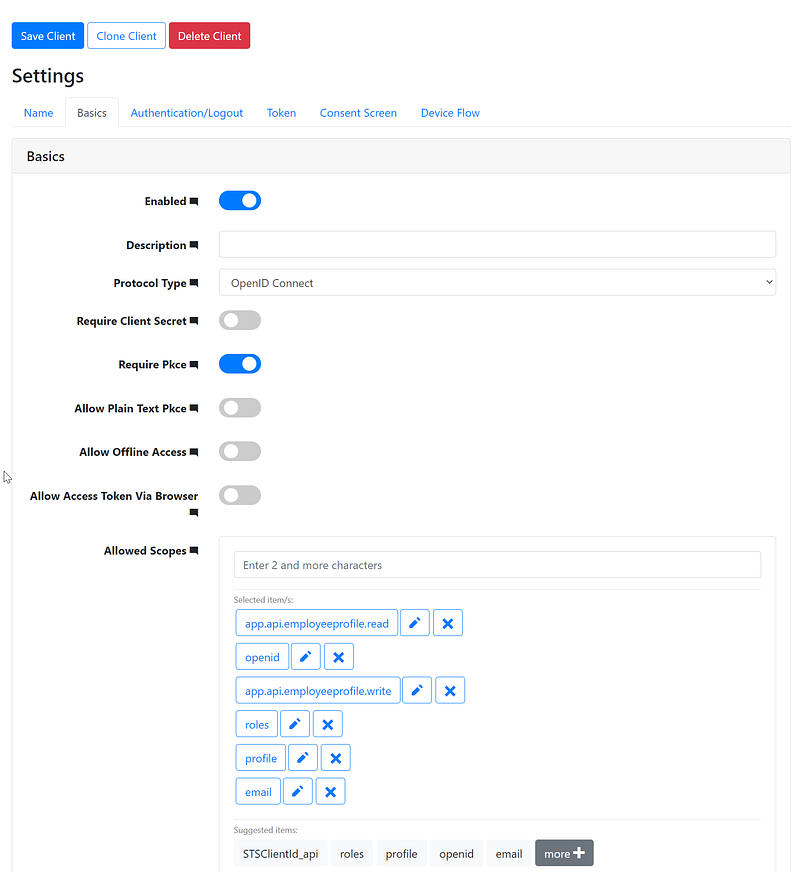
Task 3 — Setup Allowed Scopes
- Navigate to the client and click on the Basics menu tab
- Setup the Allowable scope as shown in Figure 10
Related Tutorials
Rapid Prototype Asp.Net Core REST API using KissApi Template — use Visual Studio template to generate Clean Architecture solution based on Repository Pattern, Unit of Work, Dapper, SQLKata, and Swagger.
Summary
In this tutorial, you learned how to use the STS Admin UI to register a sample WebAPI and Angular SPA. To view all other related tutorials, visit DevKit WebAPI Security.


