
Design a Nice Horizontal Sliding Presentation for iOS using Swift 5
Create a custom view using a xib file — Part 2

Hello there! I am finally back with my continuation of Part 1. Today we are going to create the slides for our presentation! Excited yet?
Part 2: create the slides
In order to create the slides, we will need:
- a struct object to define what data a slide should carry,
- a .xib file to define what a slide should look like,
- a list of slides, with a defined title and subtitle.
Ready to start?
Step 1: create the xib file
This step is pretty simple. Right click in your navigator panel, hover over “New File…” and select it.
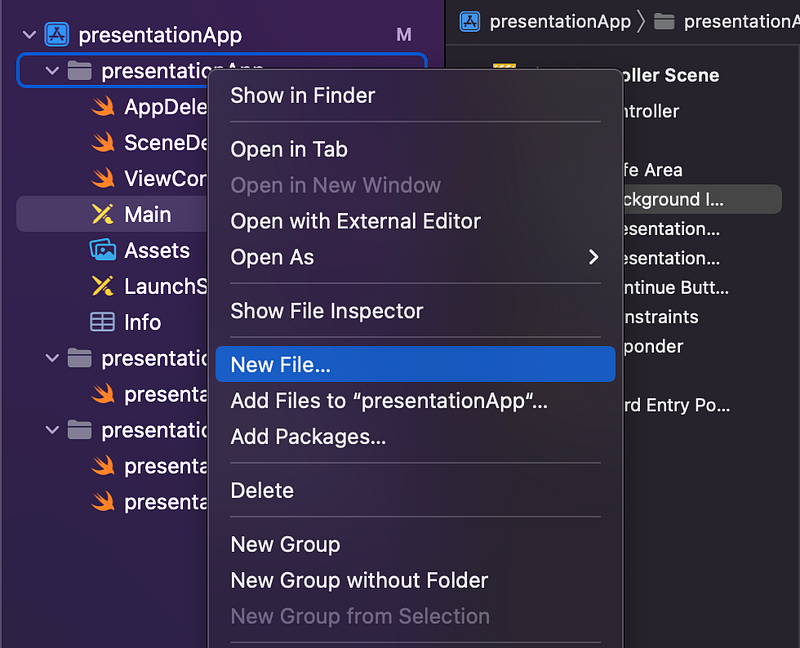
This is what you usually do to add a new .swift file, only this time you will select a different type of file.
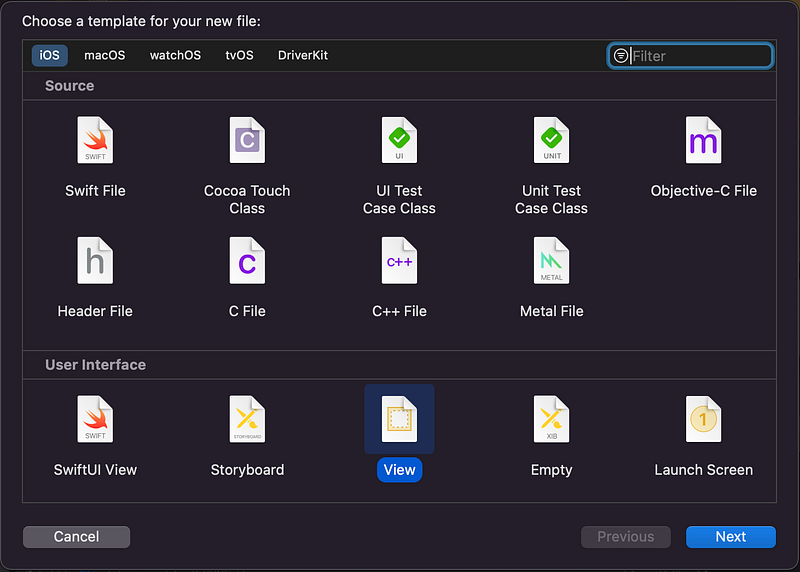
In the User Interface section, select “View” as type of file you will create.
Now name your file. I will use the name presentationSlide but, as usual, if you are not just following along this tutorial for educational purposes, I suggest you use a name that makes more sense in the context of your project.
You should see something like this now:
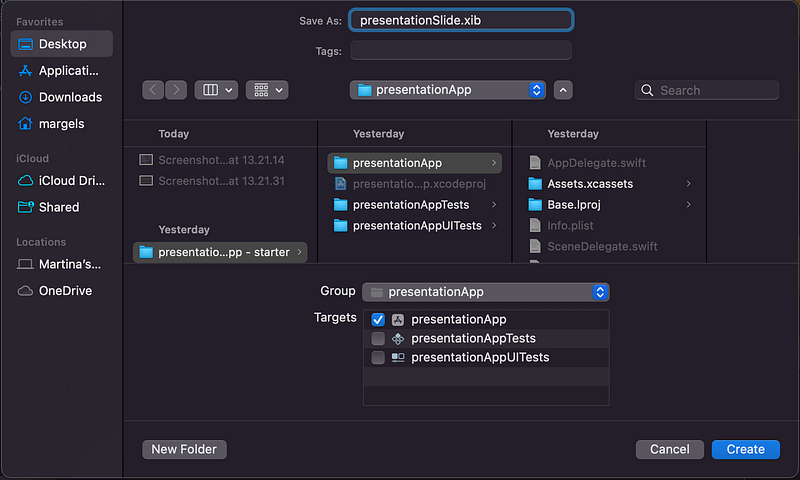
Click “Create”, and you should see something like this:
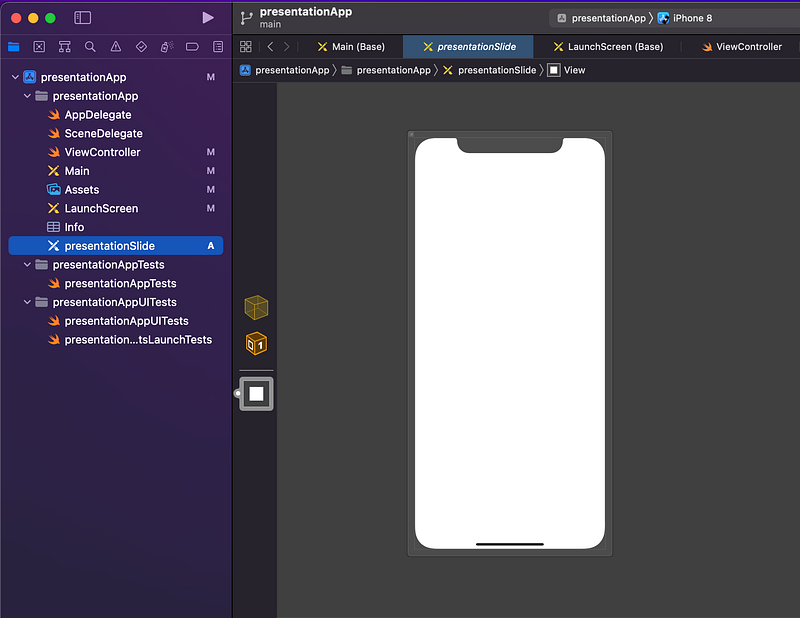
Perfect! The .xib file is ready. Now it’s time to define what each slide will look like.
Step 2: create your slides
My slides will be structured as follows:
- the background will be transparent, so the user will be able to see the background image behind the scroll view;
- there will be a vertical stack view in the centre of this view, and that is where the title and the subtitle label will be.
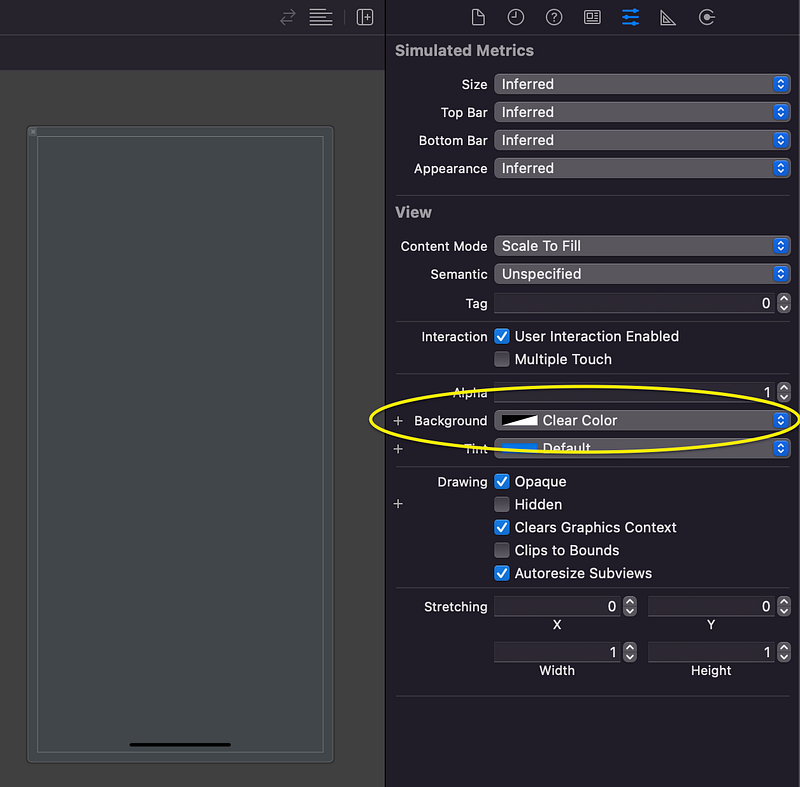
You can do that by using this interface as you would use the storyboard. Click on the white view and, using the inspector on the right, set the background colour to “clear color”:
Nice! Now, let’s add the stack view and the labels.
Add the vertical stack view to the view just as you would with the storyboard, by opening the object library and dragging a UIStackView inside your view:
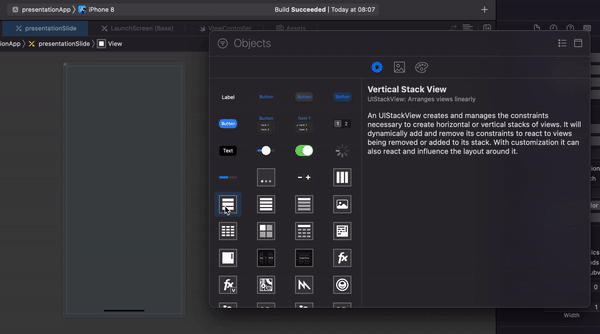
We will take care of its constraints later.
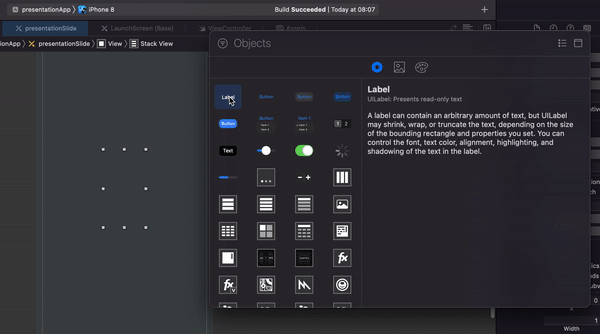
Next up, open the objects library and drag two UILabelobjects inside the stack view:
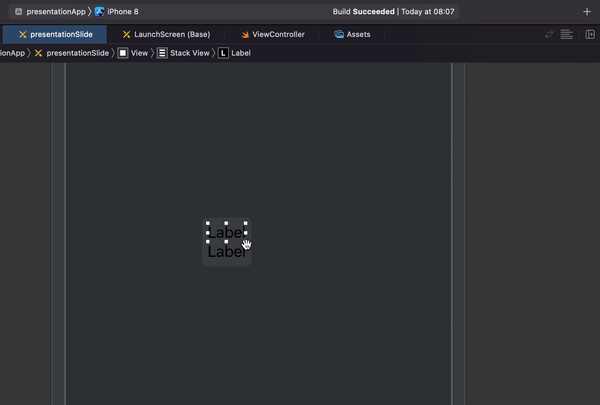
Now all we have to do is position them correctly and style them.
We will start by the stack view. If you have a hard time selecting it, use the panel above as shown in the GIF below:
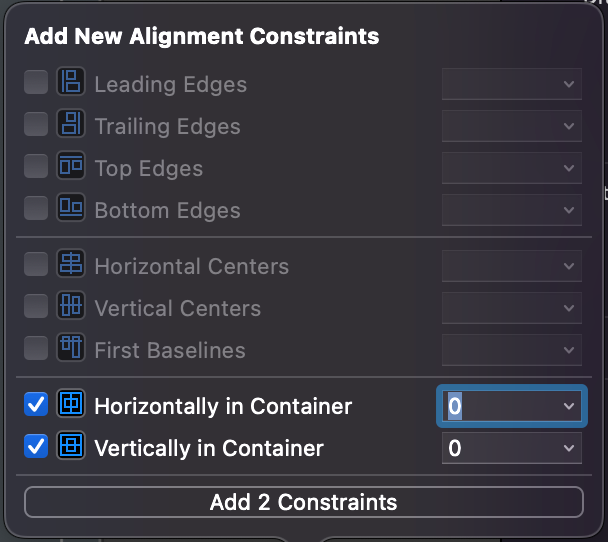
Once it is selected, we will set the following constraints:
- horizontally and vertically centred in the view,
- leading and trailing constraint greater than or equal to 30 (you should consider adding also similar top and bottom constraints for taller slides).
Center the view using the “Align” panel at the bottom:
Then, add leading and trailing constraints:
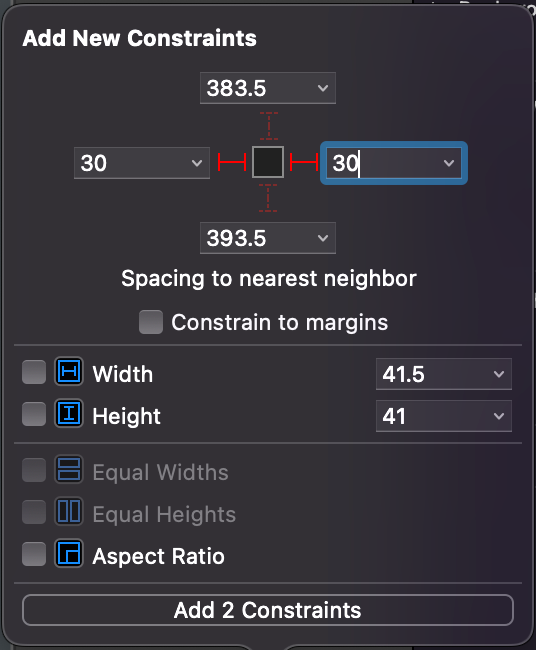
Finally, select the constraint on the view and change its relation to “Greater Than or Equal”.
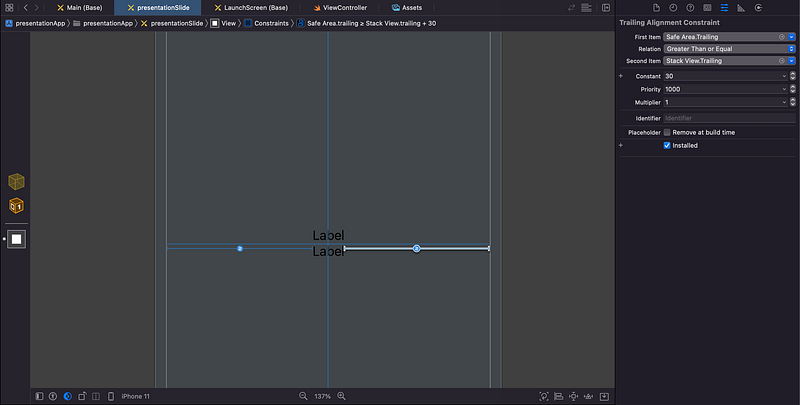
Perfect! Now we’ve perfectly positioned our stack view.
Before we style our labels, make sure you set the number of lines to zero for both:
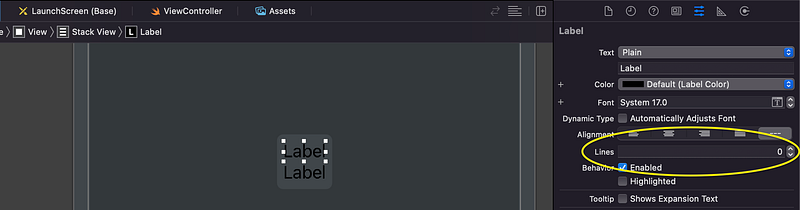
By doing this, you make sure that the label’s height will adjust to the text that it contains.
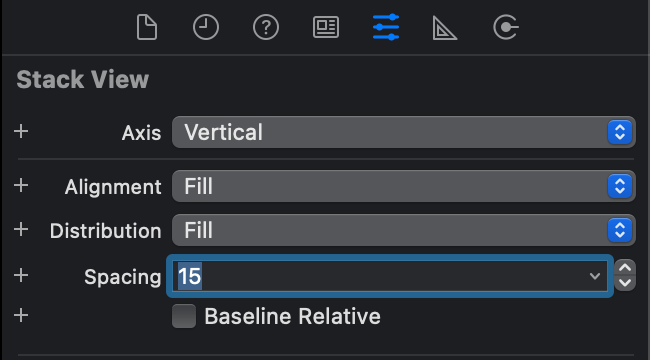
Select the stack view and set the spacing to 15:
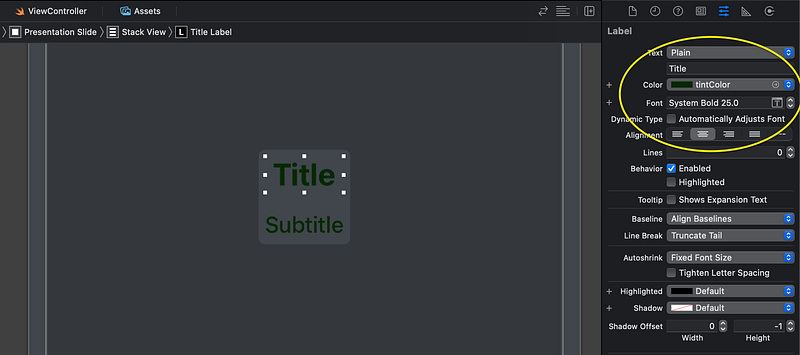
And now, style your labels:
- for the title label, I used my custom-defined tint colour, centred text and system bold font of size 25 and weight bold;
- for the subtitle label, I used my custom-defined tint colour, centred text and system bold font of size 18 and weight medium.
Good work, we now have our presentation slide ready to go! The only thing is, it’s still not connected to our class. Let’s get to the next step and change that.
Step 3: create a class for the presentation slides
You can do this using a different file (File > New > File… > Cocoa Touch Class > Subclass of: UIView) but I will go ahead and add my class at the bottom of my view controller class.
At the very bottom of your view controller file, on line 50, declare a class for your slides:
class presentationSlide: UIView {}
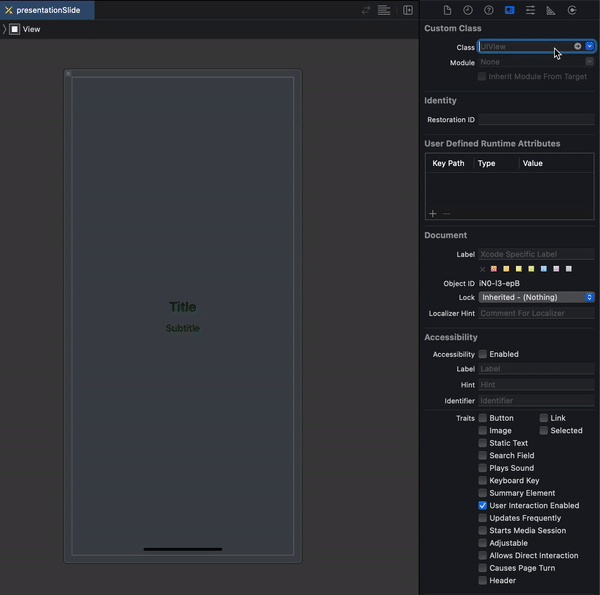
Now go to your presentation slide xib file, click on the view and open the identity inspector panel on the right. Add presentationSlide as custom class for this view.
Once this is done, when you will open the assistant from the presentation slide filee, you will see your view controller file:
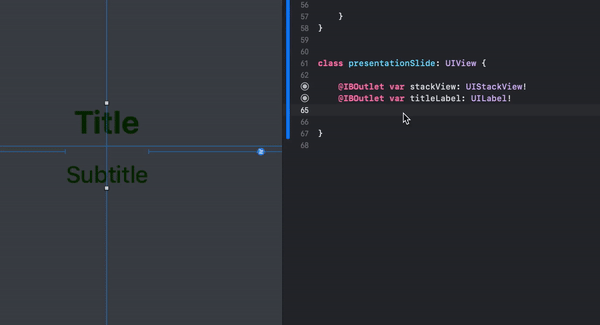
Connect the stack view, the table label and the subtitle to the presentationSlide class and name them stackView, titleLabel and subtitleLabel. You can do this by control-dragging your objects inside the class as we usually do, but my XCode was acting up a little… so I did it another way, might be useful if your XCode starts bugging, too:
Now that we have our slide’s skeleton, we can create the data we want it to display. To do that, we will create:
- a structure to define our data type (namely, a
slide) and values (a title and a subtitle, in the form ofString); - an array, containing objects of type
slide, with the list of titles and subtitles data we want to add in each slide; - an array of slides, type
presentationSlide, to represent the views that will display.
In code:
// prepare slides
var presentationSlides: [presentationSlide] = []
var slides: [slide] = [ slide(title: "This is the best presentation ever!",
subtitle: "This presentation is made of beautiful slides."), slide(title: "When you slide, the background moves!",
subtitle: "Isn't that the coolest thing ever?"), slide(title: "The title shrinks as you slide away...",
subtitle: "...and gets bigger as it slides in!"), slide(title: "Follow the tutorial to see how it's done!",
subtitle: "Don't worry, it's easier than you think."), slide(title: "Press the button below...",
subtitle: "...and make the magic happen!")]
struct slide {
   var title = String()
   var subtitle = String()
}
Your view controller file should now look like this:
That was it for the second part of the tutorial. The animation will be the main topic for the third part of the tutorial. Stay tuned with my content to be instantly updated when part 3 comes out, and let me know your feedback so far in the comments below!
Did you enjoy this tutorial? Did it work well with your project?
Want to Connect? Follow me on…
❤️ YouTube
💖 Dribbble
💜 Instagram
💙 Ko-Fi
🖤 GitHub