
Deploy your first Serverless Function to Kubernetes
In this tutorial I want to show you how to deploy your first Serverless Function to Kubernetes. From there I’ll show you how to access confidential secrets such as API keys and how that differs from using environment variables for configuration. Then it’s over to you, to build something awesome that you can run on any cloud.
Why Kubernetes?
Kubernetes provides a portable way to run containers, and containers we know solve the packaging and deployment problem of “works on my machine” (tm).
All the major cloud players have built their own managed Kubernetes services, meaning that you can have a “serverless” experience where you only deal with what you want to deploy, and nothing else. You can also deploy Kubernetes to bare-metal, your laptop, or to a low-powered Raspberry Pi using k3s from Rancher Labs.
Get Kubernetes on your laptop
If you already have Kubernetes set up, then you can skip this section.
The easiest and fastest way to get Kubernetes on your laptop is by first installing Docker, that then gives us two main options:
KinD — from the Kubernetes community. KinD stands for Kubernetes in Docker and roughly equivalent to installing Kubernetes the vanilla way, however that also means it can be slower, larger and needs more RAM. I should say that KinD is a great option for testing your patches on the Kubernetes codebase.
k3d — from the Rancher community. k3d installs k3s, which is a lightweight version of Kubernetes which passes the CNCF’s suite of compliance tests. With k3d you can start a single-node cluster in about 5 seconds. It’s my tool of choice right now and I wish I had started using it sooner.
Get k3d, and create a cluster (make sure Docker is running first)
curl -s https://raw.githubusercontent.com/rancher/k3d/master/install.sh | bashk3d createNow after creating the cluster, you need to tell the Kubernetes CLI to point at that cluster. This is an important step and you can, if not careful, point at the wrong cluster and destroy something important.
export KUBECONFIG="$(k3d get-kubeconfig --name='k3s-default')"kubectl get nodeNAME STATUS ROLES AGE VERSIONk3d-k3s-default-server Ready master 4s v1.17.2+k3s1Install a Serverless Platform for Kubernetes
You cannot install a cloud Serverless platform on a Kubernetes cluster, however you can find some emulation tools and local testers. These are not the same thing.
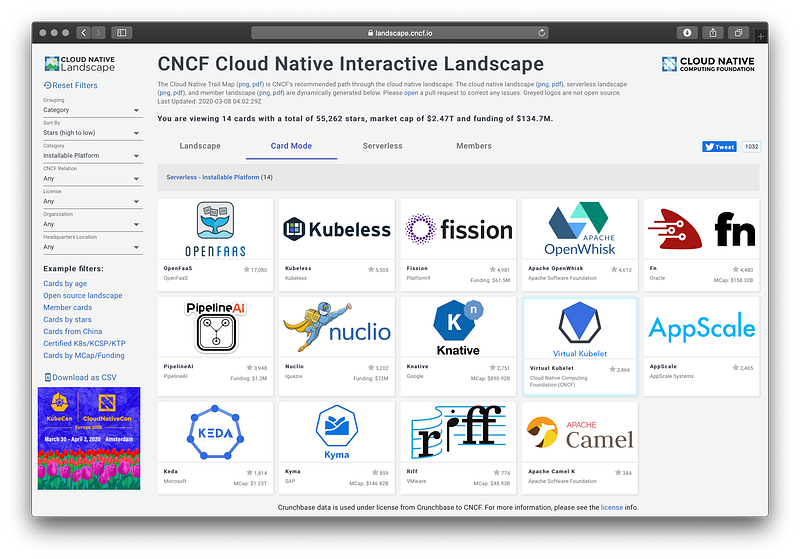
There are several options for installing a serverless platform to Kubernetes, as listed on the CNCF landscape.

Today we’ll use OpenFaaS which aims to be developer-friendly, operationally simple and community-centric. It is also lightweight (can run on a 1GB Raspberry Pi or VPS) and simple to use.
OpenFaaS is used in production by companies using Kubernetes and has a large, active community of open source contributors. You can read more about the project and its users on its homepage and blog.
OpenFaaS can be installed with helm 2 or 3 and has its own installer called arkade that automates everything from downloading helm, to adding the chart path, to configuring the system.
First install the OpenFaaS CLI:
curl -sSLf https://cli.openfaas.com | sudo shNow install arkade:
curl -sSLf https://dl.get-arkade.dev | sudo shNext, use arkade to install OpenFaaS:
arkade install openfaasYou can see install options via --help, such as adding additional replicas of core services or using cloud LoadBalancer.
After the installation you will be given a help message, you can get back this at any time via arkade info openfaas
Log into the API
After the deployment you’ll receive instructions on how to get started, follow each step:
# Forward the gateway to your machine
kubectl rollout status -n openfaas deploy/gateway
kubectl port-forward -n openfaas svc/gateway 8080:8080 &
# Now log in using the CLI
PASSWORD=$(kubectl get secret -n openfaas basic-auth -o jsonpath="{.data.basic-auth-password}" | base64 --decode; echo)
echo -n $PASSWORD | faas-cli login --username admin --password-stdinCheck that the CLI is authenticated by deploying a sample function from the store:
faas-cli store deploy nodeinfo# Check to see "Ready" status
faas-cli describe nodeinfo# Invoke
echo | faas-cli invoke nodeinfo
echo | faas-cli invoke nodeinfo --async# You should see two invocations
faas-cli list
Function Invocations Replicas
nodeinfo 2 1You can open the OpenFaaS UI dashboard too at http://localhost:8080, the username is “admin”.
# Get the password so you can open the UI
echo $PASSWORD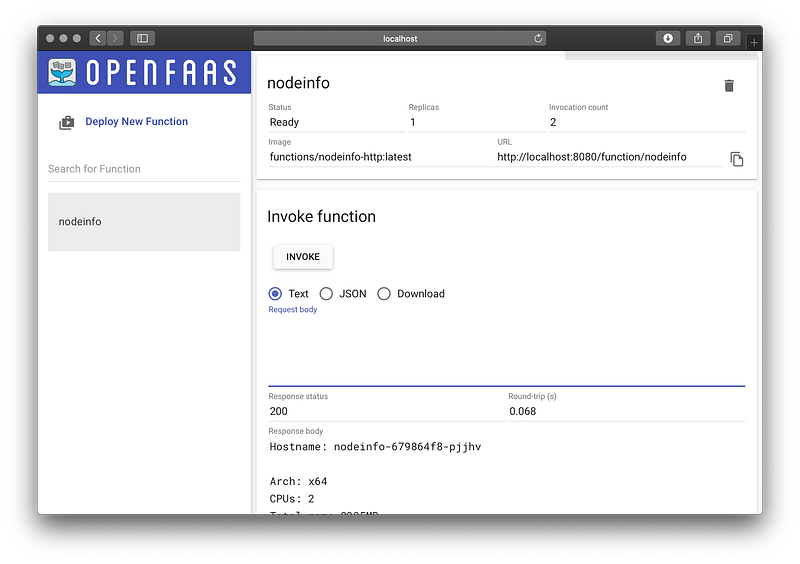
Build a new Python function
You can build a new function using the python3 template, or search for others using the Template Store (faas-cli template store list).
OpenFaaS is a cloud native Serverless platform which means it uses a Docker image for each build of your function. That means it works natively with Kubernetes.
Sign up for a Docker Hub account, so that you can store your functions for free.
export OPENFAAS_PREFIX="DOCKER_HUB_USERNAME"faas-cli new --lang python3 serverlessNow you’ll see three important files:
├── serverless
│   ├── __init__.py
│   ├── handler.py
│   └── requirements.txt
└── serverless.yml
The YAML file contains info about your function, how to build and deploy it. The serverless folder contains your function’s handler and a requirements.txt file which can be used to set up pip modules that you need.
Let’s edit the handler.py file:
def handle(req):
    return "serverless"
Deploy your function
To deploy your function simply run:
faas-cli up -f serverless.ymlIn a few moments you’ll receive your URL, and can then invoke the function or check its status on the OpenFaaS UI / CLI:
faas-cli describe -f serverless.yml serverlessName: serverless
Status: Ready
Replicas: 1
Available replicas: 1
Invocations: 10
Image: alexellis2/serverless:latest
Function process: python3 index.py
URL: http://127.0.0.1:8080/function/serverless
Async URL: http://127.0.0.1:8080/async-function/serverlessTry to invoke the function:
echo | faas-cli invoke serverlessserverlessConsume an environment variable
Environment variables are useful for non-confidential configuration and are set in the YAML file.
functions:
  serverless:
    lang: python3
    handler: ./serverless
    image: alexellis2/serverless:latest
    environment:
      MESSAGE: kubernetes
Let’s edit the handler.py file:
import os
def handle(req):
    return "serverless " + os.getenv("MESSAGE")
Deploy the function again and invoke it, you should see “serverless kubernetes”
Consume a secret
You should use secrets for things like API tokens and callback URLs.
export SECRET="secure"faas-cli secret create api-token --from-literal $SECRETNow to consume the secret, add it to your YAML file:
functions:
  serverless:
    lang: python3
    handler: ./serverless
    image: alexellis2/serverless:latest
    environment:
      MESSAGE: kubernetes
    secrets:
    - api-token
Edit the handler and read the secret from /var/openfaas/secrets/
import osdef read_secret(name):
val = ""
with open("/var/openfaas/secrets/api-token", "r") as f:
val = f.read()
return valdef handle(req):
if req.strip() == read_secret("api-token").strip():
return "authenticated"
return "invalid api-token"Let’s try it?
faas-cli up -f serverless.ymlcurl -d "hi" http://127.0.0.1:8080/function/serverless
invalid api-tokencurl -d "secure" http://127.0.0.1:8080/function/serverless
authenticatedecho -n "secure" | faas-cli invoke serverless
authenticatedOver to you
We’ve deployed Kubernetes to our laptop using a lightweight option, ideal for local development. We then went on to deploy a popular serverless platform for Kubernetes and built out a function in Python3 to consume both configuration and confidential secrets.

You can deploy functions and microservices to OpenFaaS using any programming language, binary, or even a custom Dockerfile.
If you’d like to learn more, try the OpenFaaS workshop where you’ll learn how to put all of this together to scale and monitor your code.


