
Deploy your FastAPI app in serverless Google App Engine
No server, no stress. Pay what you use with Google Cloud App Engine service.
Introduction
Google App Engine
Google App Engine (GAE) is a fully managed platform-as-a-service (PaaS) offering by Google Cloud that enables developers to build and deploy scalable web applications without the need to manage the underlying infrastructure. Google App Engine provides a straightforward and efficient way for developers to focus on coding their applications while leaving the deployment, scaling, and maintenance tasks to Google’s infrastructure.
With App Engine, developers can use popular programming languages such as Python, Java, Node.js, Go, and others to build applications that automatically scale in response to incoming traffic. The platform abstracts away the complexities of server management, allowing developers to concentrate on writing code and creating features rather than worrying about server provisioning, configuration, and scaling challenges.
Some of the key features that make GAE very compelling:
- Automatic Scaling: GAE dynamically adjusts resources based on traffic, ensuring optimal performance and cost-efficiency.
- Multi-Language Support: Developers can choose from a variety of languages, including Python, Java, Node.js, Go, Ruby, and PHP, providing flexibility for different project requirements.
- Managed Infrastructure: Google handles server provisioning, monitoring, and maintenance, freeing developers from infrastructure concerns and allowing them to focus on coding and innovation.
- Built-in service for storage with Datastore: A NoSQL database for storing and retrieving data at scale.
- Built-in service for task queues: Enables background processing of tasks, enhancing application responsiveness.
- Authentication Services: Streamlines user authentication and authorization.
- Deployment Options: GAE supports easy deployment via command-line tools or integrated development environments (IDEs), facilitating a smooth development-to-production workflow.
- Versioning and Traffic Splitting: Developers can deploy multiple versions of an application and split incoming traffic between them, allowing for gradual rollouts and A/B testing.
- Integrated Development Environment (IDE) Support: Seamless integration with popular IDEs, such as Eclipse and IntelliJ, simplifying the development process.
- Monitoring and Logging: GAE provides tools for monitoring application performance, tracking errors, and analyzing logs to ensure reliable and efficient operation.
- Custom Runtimes: For cases where predefined runtimes are not sufficient, GAE allows the use of custom runtimes, enabling the deployment of applications written in languages not directly supported.
- Security Features: Built-in security features include automatic data encryption, traffic segregation, and identity and access management (IAM) controls.
FastAPI
FastAPI is a modern, fast (high-performance), web framework for building APIs with Python 3.7+ based on standard Python type hints. It is designed to be easy to use and to produce fast and efficient code. FastAPI is built on top of Starlette and Pydantic, leveraging their capabilities to provide an easy-to-use and highly performant web framework.
Key features of FastAPI include:
- Fast: As the name suggests, FastAPI is designed for high performance. It uses asynchronous programming concepts to handle concurrent requests efficiently.
- Type Hints: FastAPI leverages Python type hints to provide automatic data validation, serialization, and documentation generation. This not only helps catch errors early but also generates OpenAPI and JSON Schema documentation automatically.
- Asynchronous Support: FastAPI natively supports asynchronous programming, allowing you to write asynchronous code for improved performance, especially in scenarios where handling concurrent requests is essential.
- Automatic Documentation: FastAPI automatically generates interactive API documentation based on the provided type hints. This documentation is accessible through a web browser and includes details on request and response models, available endpoints, and more.
- Dependency Injection: FastAPI uses a dependency injection system to manage the dependencies of your application, making it easier to organize and test your code.
- Data Validation: FastAPI uses Pydantic models for data validation. By defining data models using Pydantic, you can ensure that the incoming data is of the expected structure and types.
- WebSocket Support: FastAPI supports WebSocket communication, allowing you to build real-time applications that involve bidirectional communication between clients and servers.
- Security Features: FastAPI includes security features out of the box, such as automatic validation of request payloads, support for OAuth2, and more.
FastAPI app deployment in Google App Engine
Step 1: Create a FastAPI application
As a first step let’s create a bare minimum FastAPI application.
In a main.py file we will declare just a single / root endpoint to return a JSON response:
from fastapi import FastAPI
from fastapi.responses import JSONResponse
app = FastAPI()
@app.get("/")
def index():
return JSONResponse(
content={
"message": "Hello from Google App Engine!"
}
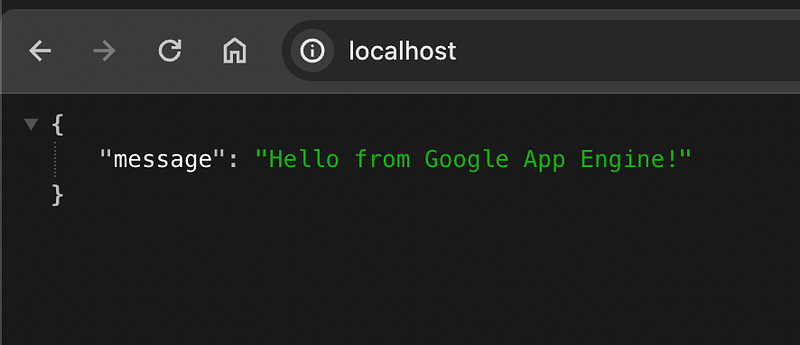
)Let’s try to start our application in a terminal with gunicorn server:
➜  fastapi-google-appengine-example git:(main) ✗ gunicorn -w 1 -k uvicorn.workers.UvicornWorker main:app
[2023-12-26 21:43:55 +0200] [30544] [INFO] Starting gunicorn 20.1.0
[2023-12-26 21:43:55 +0200] [30544] [INFO] Listening at: http://127.0.0.1:8000 (30544)
[2023-12-26 21:43:55 +0200] [30544] [INFO] Using worker: uvicorn.workers.UvicornWorker
[2023-12-26 21:43:55 +0200] [30545] [INFO] Booting worker with pid: 30545
[2023-12-26 21:43:56 +0200] [30548] [INFO] Started server process [30548]
[2023-12-26 21:43:56 +0200] [30548] [INFO] Waiting for application startup.
[2023-12-26 21:43:56 +0200] [30548] [INFO] Application startup complete.
and then access it in our browser at localhost :
Step 2: Create dependencies for Python runtime
Create a file for the dependencies of the project, since in Python runtime, a requirements.txt . In my case, the bare minimum app I created just has a dependency on FastAPI:
fastapi==0.104.1
uvicorn==0.24.0.post1
gunicorn==20.1.0
Those dependencies are going to be installed and used for the code deployed in the Google App Engine service, so that our app can run when served in the created instance(s).
Step 3: Create Google App Engine YAML configuration file
A simple YAML is enough to get this demo going:
service: default
entrypoint: gunicorn -w 4 -k uvicorn.workers.UvicornWorker main:app
runtime: python311
instance_class: F1

automatic_scaling:
  min_instances: 0
max_instances: 10service: this is how our GAE service will be named and referenced in Google Cloud Console.entrypoint: This is the command that will be used when launching the app engine instances. For our case is thegunicornserver. Much like we did locally in our machine, we need to serve the FastAPI app via a server. We useduvicornlocally.gunicornis a more sophisticated, basically application, server using the WSGI standard and we are using that in conjuction ofuvicornworker class instances to serve our app.runtime: The runtime for our application. In our case it is Python 3.11 .instance_class: The instance reference name which reflects resources specification. You can take a look on detailed specs here.automatic_scaling: The section where we can configure our app automatic scaling strategy. In our case here, I have declared that minimum instances are0, which means nothing will run constantly if there is noone requesting the service and there is a maximum of10instances to be raised and serve traffic.
For more YAML options and customized configurations you can explore the documentation. Request limits, security, efficiency and latency are few of the customizable features among others, which are brought out of the box for each App Engine service.
Step 4: Create a Google Cloud Project
Needless to say, for one to be able to use Google Cloud Platform, they need to already have a Google account. In Google Cloud Platform, accounts start with a $300 in free credits. That credit expires in 90 days after account initialization, if not used already. However, Google Cloud serves many products in a free tier, based on usage and up times. You can read more on that here.
Personally I have used up my free credits, so I ‘ll just see what happens with that demo. After all, Google App Engine has a free tier of 28 hours per day of F instances, so I should be fine and with no charge at all for this showcase.
Given that, visit https://cloud.google.com/ and on top right corner, locate and click the console link.
That should bring you to the browser based console of Google Cloud Platform.
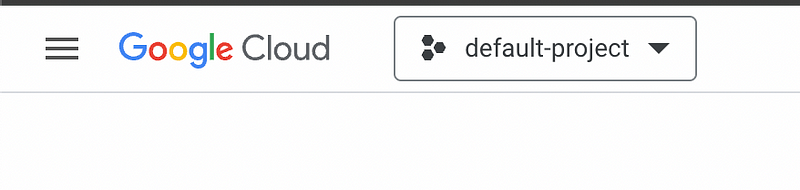
On the left top corner, locate the project selection:
Click on the dropdown and a popup windows will appear, select the top right corner choice to create a new project.
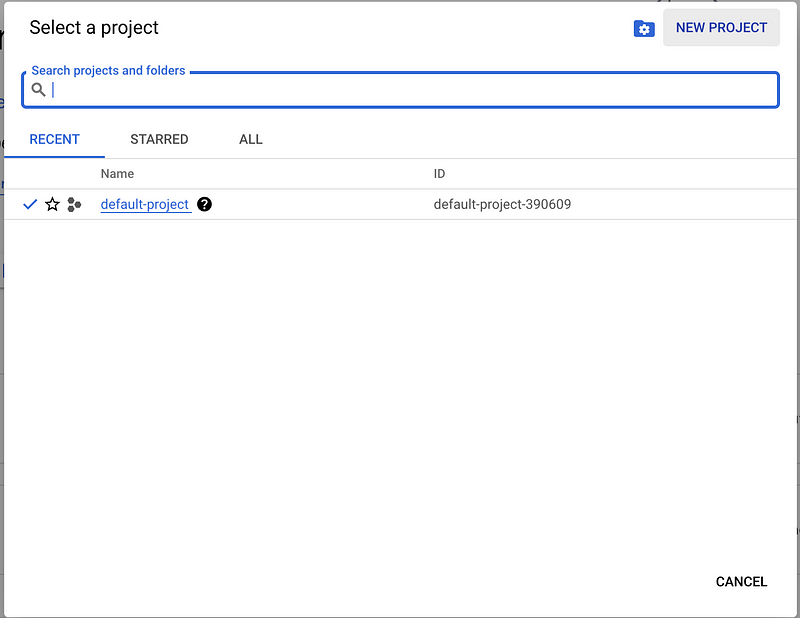
One the next screen give your project a name (that is going to be the project’s ID), for my case I used the fastapi-deploy-example. Optionally one can have projects under organizations for better structure but for this demo case we will not go over that. Hit next. Your project is going to be initialized in the background with the default APIs enabled and so on. As moving forward to a Google Cloud project, one may need to enable various APIs based on the product or functionalities that they require for their cases. As with all resources, Google Cloud products all have permissions scopes which can be customized as much as anyone can need, to accomodate for all use cases.
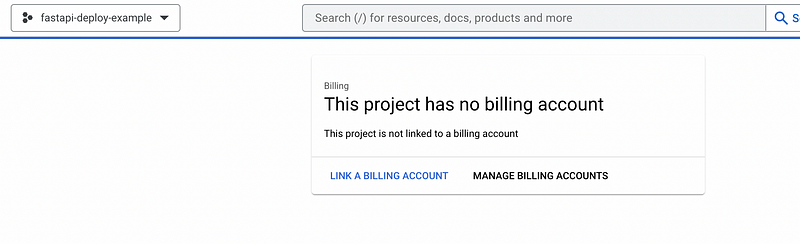
Step 5: Setup billing account for your project
Even if we are sure that our project is going to receive only usage inside the free tiers limits, we still need to setup a billing account to proceed. So for that, locate the billing module through search bar.
Then create an account for your project.
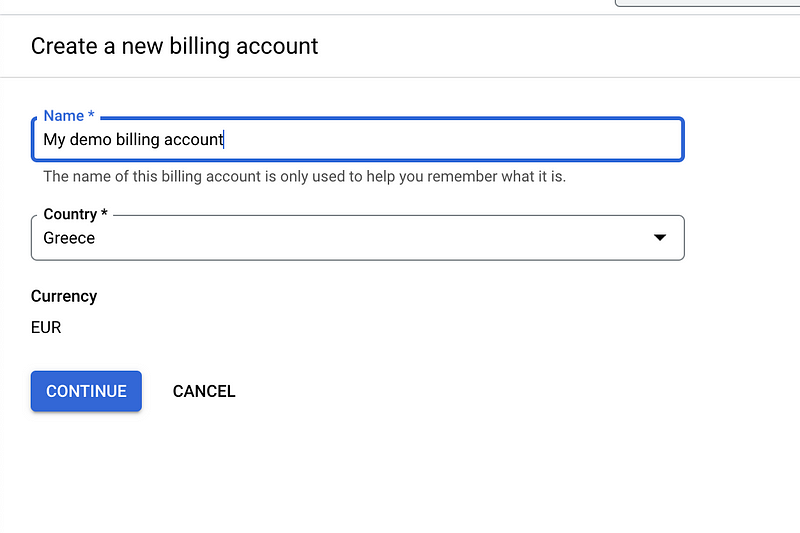
Then provide with your information and a debit/credit card (no screenshots here hehe). In the process, Google will authenticate you and require for a 0 amount transfer to verify the bank account. After that, everything is setup.
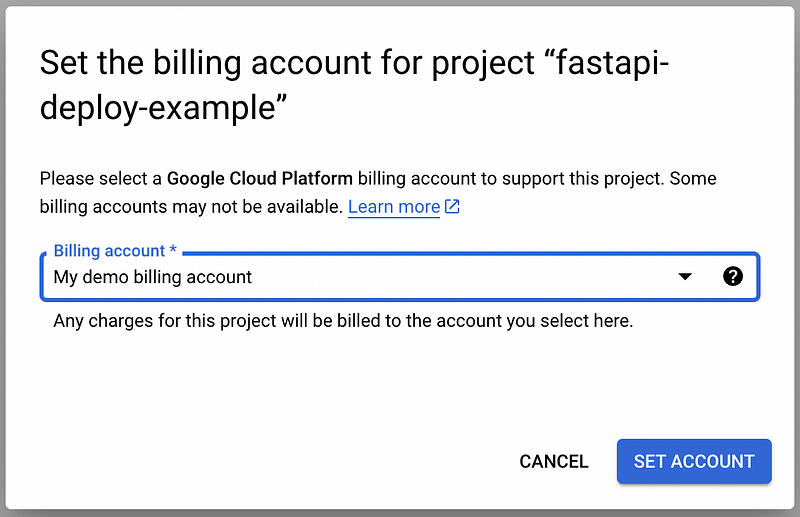
For the billing account to be used in the App Engine module, search for the module, enter it and link it to the billing account you just created.
Step 6: Install Google Cloud CLI
In order to be able to deploy our code in Google Cloud Platform we are going to need the Google Cloud Command Line Interface, in short gcloud CLI.
Based on your host platform you can download and install the latest version from the official documentation.
As per guide, after downloading and installing, one needs to initialize the CLI in order to make use of it, via gcloud init . During the process, you will setup (or select if setup already previously, as in my case) an account for the CLI, including authentication via browser or command line, and a configuration for it.
Step 7: Deploy FastAPI app in Google App Engine
Before deploying, make sure you have setup your account correctly via the gcloud cli and set your project correctly as well. In my case, I created also a configuration, so that all that can be switched over to easily the next times I navigate across my projects. Here is how it looks like in the cli:
➜  fastapi-google-appengine-example git:(main) ✗ gcloud config list
[core]
account = [email protected]
disable_usage_reporting = True
project = fastapi-deploy-example

Your active configuration is: [fastapi-example]
Note: In some cases Google permissions after creation or switching etc, require a refresh. You can accomplish that with:
gcloud auth application-default loginOk, now that are all set, let’s deploy our app:
➜  fastapi-google-appengine-example git:(main) ✗ gcloud app deploy --project=fastapi-deploy-example --version=v1
Services to deploy:

descriptor:                  [/Users/chriskarvouniaris/workspace_local/github/fastapi-google-appengine-example/app.yaml]
source:                      [/Users/chriskarvouniaris/workspace_local/github/fastapi-google-appengine-example]
target project:              [fastapi-deploy-example]
target service:              [default]
target version:              [v1]
target url:                  [https://main-dot-fastapi-deploy-example.ew.r.appspot.com]
target service account:      [[email protected]]


Do you want to continue (Y/n)?
As seen above:
descriptor: Shows our current YAML configuration used for the deployment.source: The source code location.target service: The service that we have targetted in our YAML file.target project: The project where the service is going to be deployed, hence the one we just created some steps ago.target_version: The version we provided as option in thegcloudCLI. It would be a random big number if we didn’t specify any.target url: The default domain where our service will be available after deployment.target service account: The service account that is associated with app engine module in our project.
Type yes and press enter to continue with the deployment:
Do you want to continue (Y/n)?  y

Beginning deployment of service [default]...
╔════════════════════════════════════════════════════════════╗
╠═ Uploading 1 file to Google Cloud Storage                 ═╣
╚════════════════════════════════════════════════════════════╝
File upload done.
Updating service [default]...done.
Setting traffic split for service [default]...done.
Deployed service [default] to [https://fastapi-deploy-example.ew.r.appspot.com]

You can stream logs from the command line by running:
  $ gcloud app logs tail -s default

To view your application in the web browser run:
  $ gcloud app browse
Ok, so it seems all are done, let’s see what comes up in the browser if we hit that URL provided (same happens if we type the recommended command gcloud app browse). One can see that URL also in the browser Google Cloud Console in the App Engine module, where the service is listed as well for management.
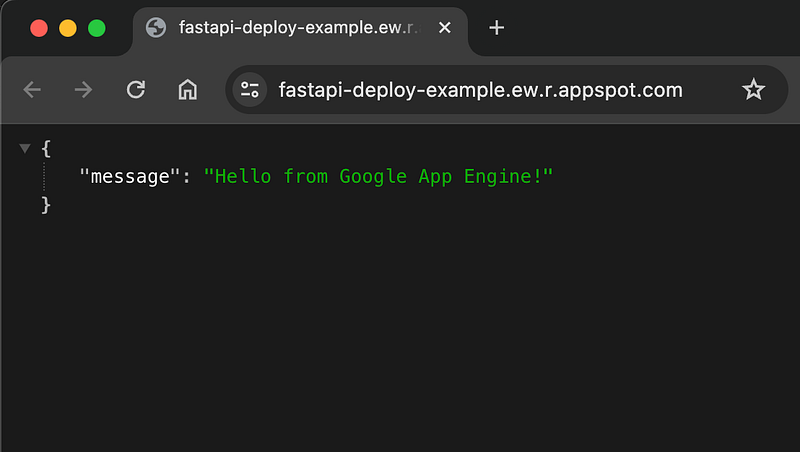
Exactly what we saw in local environment! So that worked!
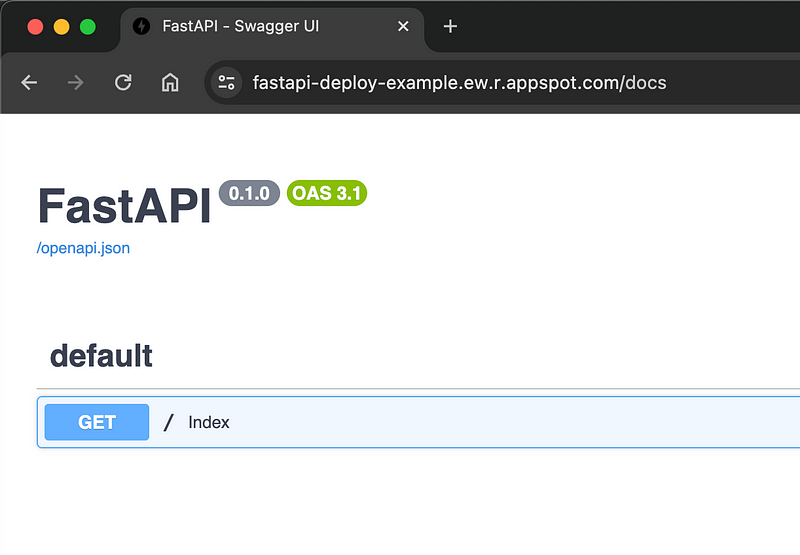
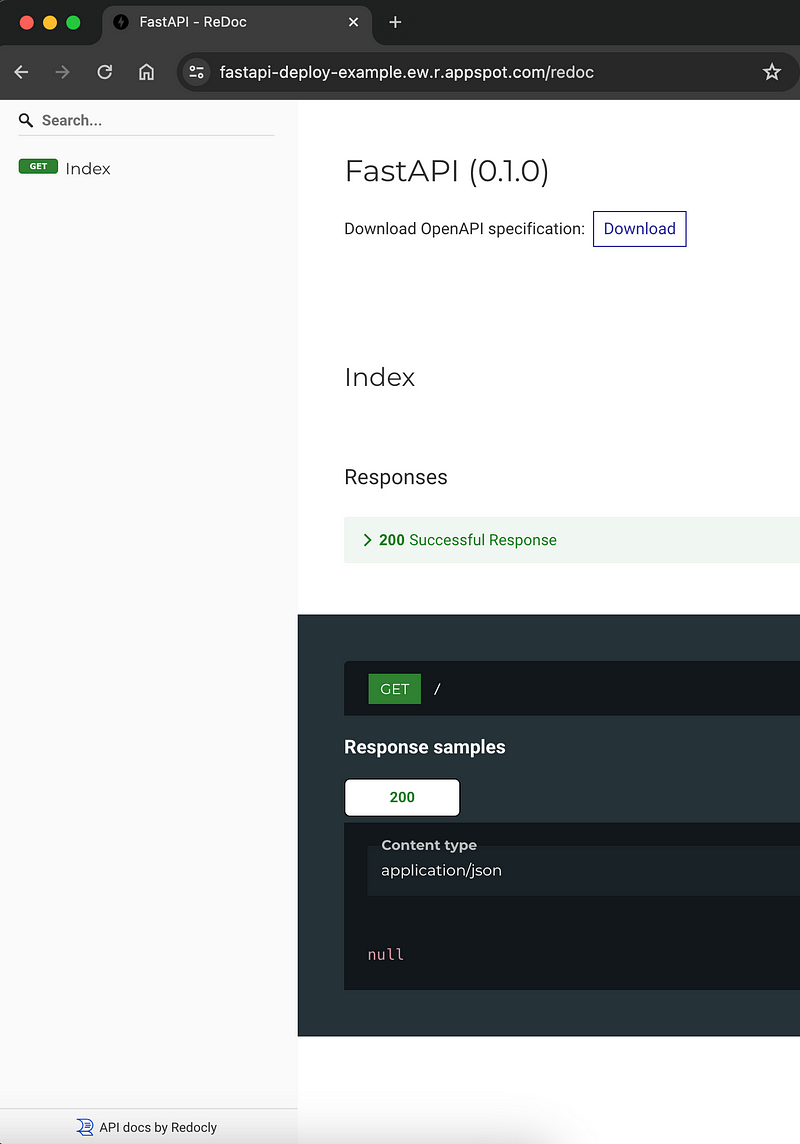
We can also visit the automatically created documentation of our FastAPI at the default URL paths for docs and redoc .
Conclusion
In summary, deploying your FastAPI app on Google App Engine streamlines web development by eliminating infrastructure concerns. Google App Engine’s automatic scaling and managed infrastructure simplify deployment. FastAPI’s high performance, asynchronous support, and built-in security features enhance the development process. Follow the provided guide for a seamless deployment experience, taking advantage of the strengths of both technologies. This approach offers an efficient solution for building and scaling serverless web applications. Happy coding!
That’s all folks!
I hope you find that one useful. If so, please leave your clap and/or your feedback in the comments sections. Feel free to follow for more content like that.


