Deploy an application powered by the large language models (llms) on Streamlit cloud
Deploying applications on cloud platforms has become easier in recent years. However, for data scientists and analysts who aren’t well-versed in platform and app development, sharing data-driven apps online hasn’t always been simple. The Streamlit cloud platform changes that. With Streamlit Cloud, we can transform Python scripts or LLM based applications into live web. This streamlined process removes the hassle of setting up servers, letting us focus on creating engaging apps.
This article is a step-by-step guide for developing and deploying LLM-based apps on the Streamlit cloud, aimed at those new to the process. It starts by creating an environment on your computer or development platform, setting up libraries, and obtaining necessary API keys. For this LLM-based app, we only need an OpenAI API key since we are using the LLM developed by OpenAI. There are many articles that describe how to create an environment and OpenAI API keys, and I am not going to cover this part in this article.
Imagine a simple LLM-based app — a LangChain-powered calculator. This compact application operates with a few lines of code. Python agent is used within the LangChain framework to build this calculator. The entire source code is provided below.
import streamlit as st
import openai
from streamlit_chat import message

from langchain.agents.agent_toolkits import create_python_agent
from langchain.tools.python.tool import PythonREPLTool
from langchain.llms import OpenAI

from dotenv import load_dotenv, find_dotenv
load_dotenv(find_dotenv(), override=True)

st.title('Simple math chatbot')

#query = st.text_input("Query: ", key="input")

#query = st.text_input("write your question")

query = st.text_input("Write a simple math question: ", key="input")


llm = OpenAI(temperature=0)
agent_executor = create_python_agent(
    llm=llm,
    tool=PythonREPLTool(),
    verbose=True
)
# agent_executor.run('Calculate the square root of the factorial of 20 \
# and display it with 4 decimal points')
print(query)
if not query:
    print('yes None')

if query:
    output=agent_executor.run(query)
    st.write(output)
    st.write('*************')
    st.write("Thank you for using it")
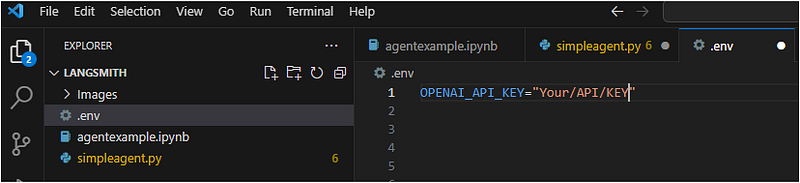
To begin, we’ll execute this application within our local setting. To achieve this, we must generate an .env file and specify OPENAI_API_KEY = ‘Your/OpenAI/api/key’. The folder layout appears as follows (both the source code, simpleagent.py, and the .env files reside within the same directory, LANGSMITH). It’s important to note that alternative methods also exist for integrating the API key into our source code.
With the source code prepared and the OpenAI API key in hand, we initiate the streamlit command from the terminal. This command is used to verify whether the code operates as intended. To achieve this, employ the following command.

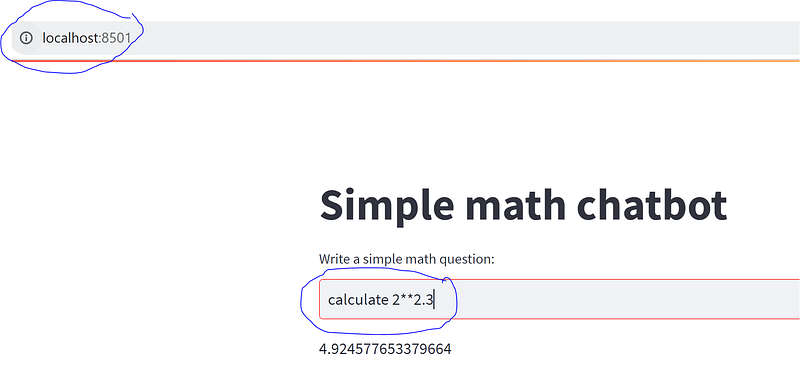
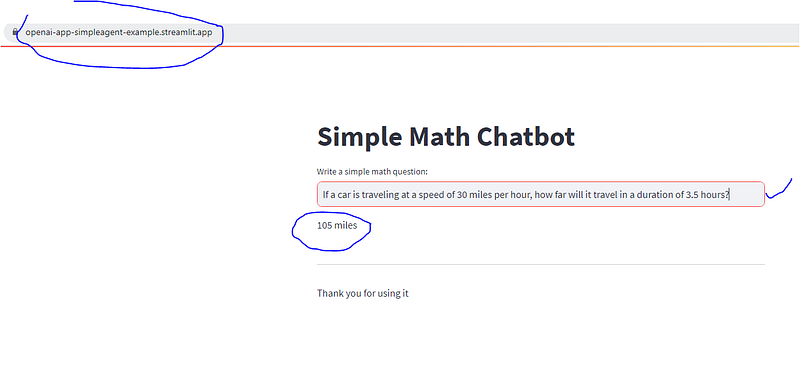
A successful execution generates two URLs that guide you to the subsequent interface within your browser. You can easily input a basic math problem statement into the provided text box and then press the ‘Enter’ key. This action triggers calculations on the backend, swiftly presenting you with the immediate result.
Our application functions as anticipated within our local environment. Our current objective is to make this app accessible in the cloud. Streamlit simplifies this process greatly; by following a few straightforward steps, we can effortlessly deploy the app on the Streamlit cloud platform.
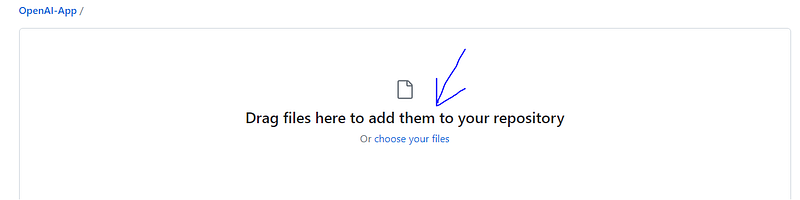
To achieve this, you’ll need to push your code to your Git repository. There are multiple methods to accomplish this, with the simplest being a drag-and-drop approach. Navigate to your repository and select the “Add file” option. After uploading your source code (.py file), be sure to commit the changes before proceeding.

Additionally, generate a “requirements.txt” file in the same location. This file should encompass a comprehensive list of the essential libraries necessary for the proper functioning of the app.
A crucial aspect to note is the necessity of incorporating our OpenAI API Key within the application to enable access to the OpenAI based models. To achieve this, certain adjustments need to be made in the source code. It’s imperative to ensure that our secret API key remains confidential, safeguarding it from unauthorized access. Following the integration of this segment into the source code, we can proceed to furnish the API key when hosting the app on Streamlit.
# from dotenv import load_dotenv, find_dotenv
# load_dotenv(find_dotenv(), override=True)
### Authentication
headers = {
    "authorization":st.secrets['OPENAI_API_KEY'],
    "content-type":"application/json"
    }
openai.api_key = st.secrets["OPENAI_API_KEY"]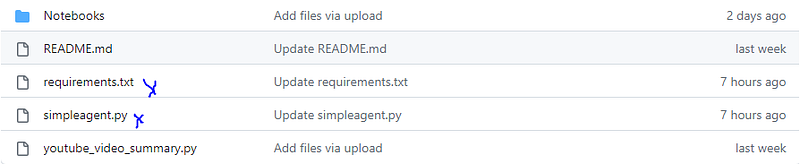
The subsequent phase involves deploying this app on the Streamlit cloud platform. To initiate this process, we must begin by establishing an account on the Streamlit cloud. If you haven’t already done so, please navigate to this website and complete the sign-up procedure. Once you’ve successfully logged into your account, the appearance of the page will resemble the following.

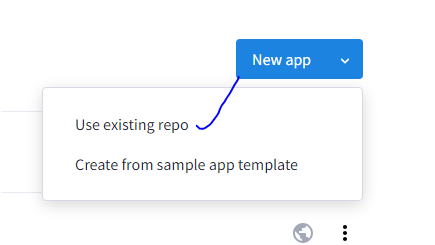
To launch your app, click on “New app” and opt for the “Use existing repo” option. Proceed to furnish the requisite details on this page.
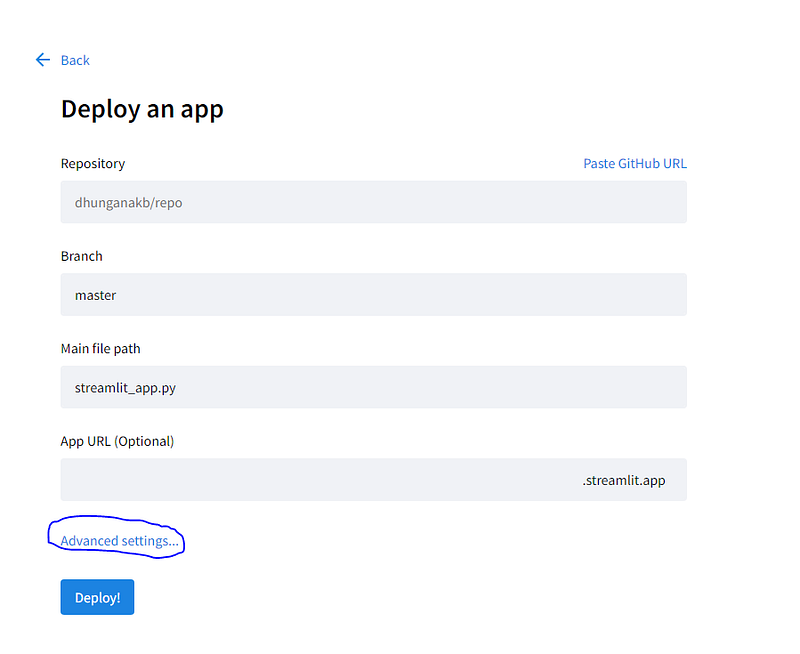
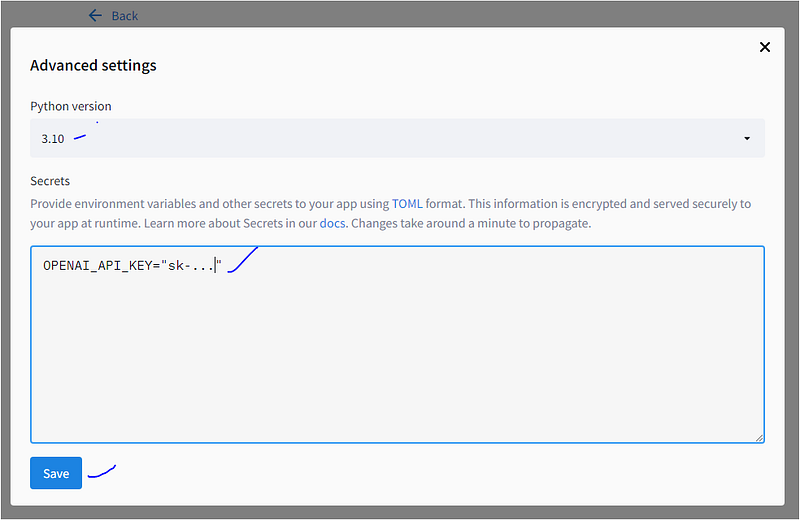
Following that, select “advanced settings.” This grants the opportunity to input your OpenAI API key. Additionally, you can opt for the appropriate Python version that aligns with your app. Once these selections are finalized, proceed by clicking the “save” option.
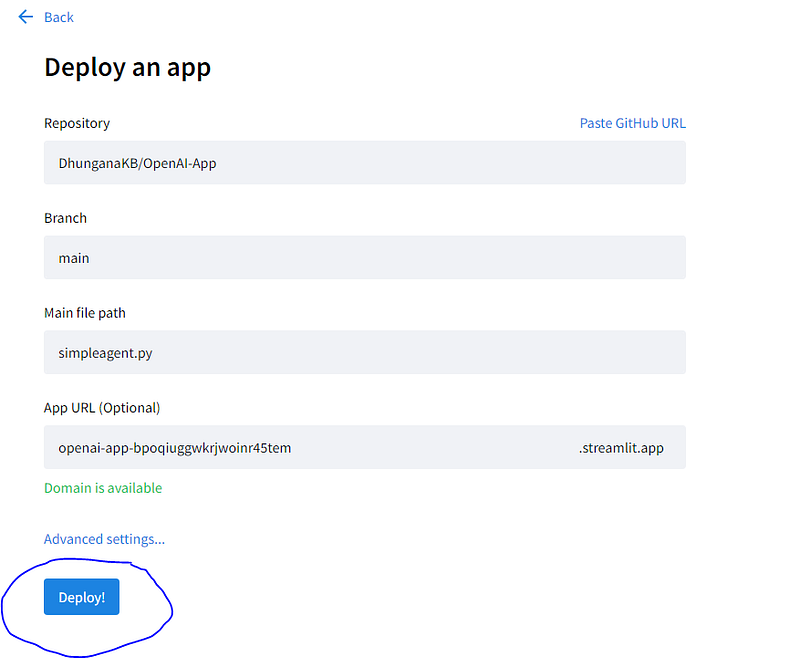
We’re nearly finished now. The subsequent action involves clicking the “Deploy!” button.
Once the deployment process is concluded, you will encounter a user interface resembling the following:
Should the deployment encounter an unsuccessful outcome, the log file will document all error messages. This log serves as a valuable resource for pinpointing the cause of any issues during the deployment process. One prevalent error could stem from inadequately defined access keys or the absence of specific libraries in the GitHub “requirements.txt” file.
The app deployment on the Streamlit Cloud is now complete. You can now effortlessly share the app link with your team members and others.


