
Deploy an Angular App to Azure
With help from your old friends Docker and GitHub.

You built an app — now host it
This tutorial will help you deploy the official Angular Tutorial — Tour of Heroes app to Microsoft Azure using a Web App that runs a docker container from Azure Container Registry. We will then set up an automatic deployment from pushes to a GitHub repository.
There are a couple of moving parts, but we will go over every step in detail. Some major thank-yous are in order:
- Wojciech Krzywiec’s explanation of how to do a multi-stage build for an Angular docker container.
- Devdungeon article detailing nginx for angular.
- Official Docker docs explaining multi-stage builds.
- The official Azure Container Deployment docs.
- Azure docs — Automate container builds
You can clone this app and Dockerfile from my GitHub repo.
Note on connection strings
If you have been following along from my .NET API series, you will need to add the connection string in src/app/hero.service.ts to point to your .NET API deployed to azure. This is inserted in the HeroService class as:
private heroesUrl = ‘https://your-api.azurewebsites.net/api/Heroes';
The full instructions for converting your angular app from using a built-in mock web server to a true API are in this article.
Before doing anything in the cloud, test the local docker build.
Going forward, we assume you have a working Angular Tour of Heroes application. If not, go check out the Angular Tour of Heroes tutorial app and build it yourself, or download it from here.
The Dockerfile used to build this container is shown below. This is largely inspired by Wojciech Krzywiec’s medium article, go check it out. We will use NGINX (pronounced “Engine-X”), an open-source web server, to serve our Angular app.
Size differences
The difference in image size between an alpine multi-stage versus an out of the box Node.js non-multi-stage app is tremendous. While writing this article, I originally built off the node:12.2.0 image, but further reading convinced me to use the node:12.7-alpine image, and run the app through NGINX’s nginx:1.17.1-alpine image.
Image size using node:12.2.0 → 1.32 GB
Image size using node:12.7-alpine and nginx:1.17.1-alpine → 39.2 MB
Also, NGINX’s default configuration listens on port 80, which is perfect for deploying on Azure.
Dockerfile
# Dockerfile
# Thank you:
# https://readmedium.com/build-and-run-angular-application-in-a-docker-container-b65dbbc50be8
# Stage 1: BuildFROM node:12.7-alpine AS build
WORKDIR /usr/src/app
COPY package.json ./
RUN npm install
COPY . .
RUN npm run build# Stage 2: RunFROM nginx:1.17.1-alpine
# Copy compiled files from previous build stage
COPY --from=build /usr/src/app/dist/angular-tour-of-heroes /usr/share/nginx/htmlCreate a .dockerignore file with these entries:
node_modules
 .git
 .gitignore
Build the image locally and tag it.
docker build -t tourofheroes:dev .
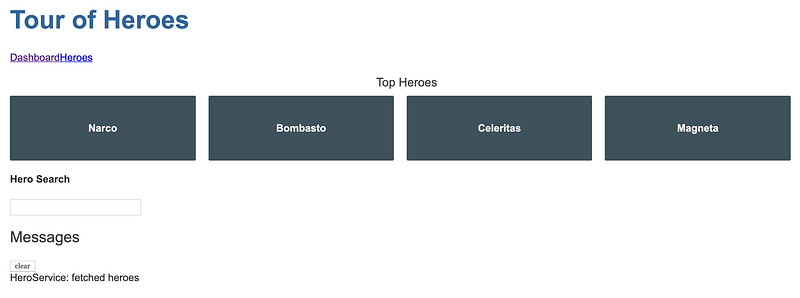
Run the image and navigate to port 8888 in a web browser.
docker run -d -p 8888:80 tourofheroes:devYou have a working app! Let’s deploy it.

Create a Resource Group for your App
Install the Azure CLI if needed or navigate to the cloud shell. If using the CLI, log in to Azure by running az login. Note, many of the steps in this tutorial can be done in the Portal, but I recommend using the CLI for reproducibility.
Then, create a Resource Group to house all the resources for your app.
az group create --name TourOfHeroesRG --location eastusCreate a Container Registry
In your new Resource Group, create a Container Registry called TourOfHeroesRegistry to hold your Docker images. We will use the highly dynamic and customizable az acr command, and I suggest reading up on it.
az acr create --resource-group TourOfHeroesRG \
--name TourOfHeroesRegistry \
--sku Basic \
--subscription MySubscription
Now, login to your new Container Registry so that we can extract some container information, such as its login server name.
az acr login --name TourOfHeroesRegistryGet the login server name of the container registry.
az acr show --name TourOfHeroesRegistry \
--query loginServer \
--output table \
--subscription MySubscription
The login server name should print to the terminal: tourofheroesregistry.azurecr.io
Container Security: Service Principals
We need to deploy the container as someone with Admin level privileges. We do so with the help of Azure Service Principals, which are essentially user identities stored in a key vault in the Resource Group which we can use to interact with our container at different privilege levels.
Create a Key Vault
Run the following commands
RES_GROUP=TourOfHeroesRG # Resource Group nameACR_NAME=TourOfHeroesRegistry # Azure Container Registry registry AKV_NAME=acrkeyvault-docker # Azure Key Vault vault name# Create the key vaultaz keyvault create -g $RES_GROUP -n $AKV_NAMECreate a Service Principal
Create a secret set, which is a credential username and password in your key vault with access to your container registry. The example below uses the variables declared above in creating the key vault.
# Create service principal, store its password in vault (the registry *password*)az keyvault secret set \
— vault-name $AKV_NAME \
— name $ACR_NAME-pull-pwd \
— value $(az ad sp create-for-rbac \
— name http://$ACR_NAME-pull \
— scopes $(az acr show — name $ACR_NAME — query id — output tsv) \
— role acrpull \
— query password \
— output tsv)Store the AppID in the vault
# Store service principal ID in vault (the registry *username*)az keyvault secret set \
— vault-name $AKV_NAME \
— name $ACR_NAME-pull-usr \
— value $(az ad sp show — id http://$ACR_NAME-pull — query appId — output tsv)Tag your local image
Tag your local tourofheroes:dev image with the login server of your container registry, and change the :dev to :prod.
docker tag tourofheroes:dev tourofheroesregistry.azurecr.io/tourofheroes:prodPush your image to Azure
docker push tourofheroesregistry.azurecr.io/tourofheroes:prodWhen this is complete, confirm that your push was successful by checking the portal or running the below command. This should return a single value of your repository.
az acr repository list --name TourOfHeroesRegistry --output tableDeploy the Web App from your Container Image
Create an App Service Plan for your web app. This will determine the size of the virtual machine that will run your docker image. Here I have selected a sku of F1 — free tier. Create the app service plan from within the portal or by running:
az appservice plan create \
--resource-group TourOfHeroesRG \
--name TourOfHeroesAppServicePlan \
--location eastus \
--is-linux \
--sku F1
Create the Azure web app from the docker container in the Container Registry by running the below command, or from the portal.
az webapp create --resource-group TourOfHeroesRG \
--plan TourOfHeroesAppServicePlan \
--name tourofheroes-azure-demo \
--deployment-container-image-name tourofheroesregistry.azurecr.io/tourofheroes:prod \
--docker-registry-server-password
From the resulting output, find:
“defaultHostName”: “tourofheroes-azure-demo.azurewebsites.net”Navigate to that website, and bask in the glory of a successful deployment!

Re-deploy your App from GitHub
Wouldn’t it be nice to have your app re-build and deploy whenever you make changes to a GitHub repository? We are going to do exactly that by following the Azure docs for automating deployment.
Generate a GitHub personal access token
Navigate: https://github.com/settings/tokens/new, add a Note and make these selections.
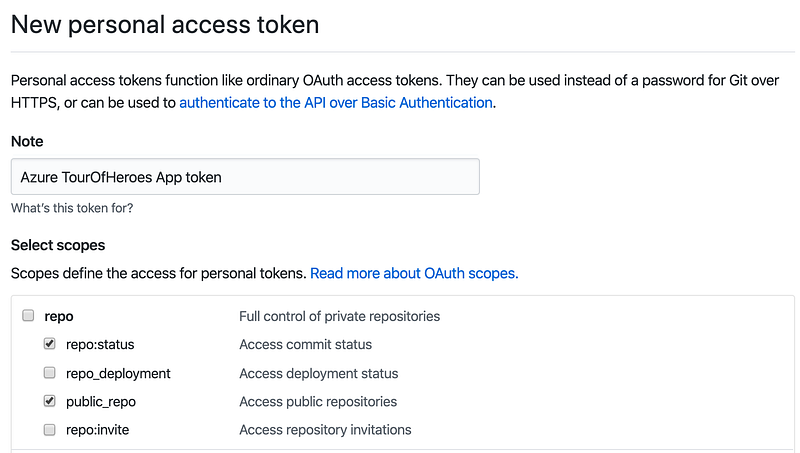
Click Generate Token and save the token for safekeeping.
Container Registry Tasks
Add these variables to your terminal:
ACR_NAME=TourOfHeroesRegistry # The name of your Azure container registryGIT_USER=yourusername # Your GitHub user account nameGIT_PAT=e04c06c3b571babe4e712ba0347a64119a61b61a # The PAT you generated in the previous sectionCreate the Task
Create a registry task using az acr task create. Make sure to update the context to the address of your GitHub repo.
az acr task create \
--registry $ACR_NAME \
--name taskgitpull \
--image tourofheroesregistry.azurecr.io/tourofheroes:prod \
--context https://github.com/$GIT_USER/Angular-Tour-of-Heroes.git \
--file Dockerfile \
--git-access-token $GIT_PAT
View the task logs while the container is being re-built
Now, make a small change to your app and commit and push the change to your GitHub repo. Run this command to show the logs for the currently running task. You should see logs that are similar to the docker build logs, as essentially Azure is re-building the container based on the contents of the GitHub repo.
az acr task logs — registry $ACR_NAMECheck your website again to make sure it is still running.
Thank you for reading.


