
Deploy a Multi-node Elasticsearch Cluster with Docker Compose

A link to the companion GitHub repository is available at the bottom of this article.
Quick Intro to Elasticsearch
Why Elasticsearch?
Elasticsearch is one of the most popular and powerful search engines made available to the open source community today. Some of the major, consumer software companies utilize Elasticsearch, as well as the rest of the ELK (Elasticsearch, Logstash, Kibana) stack, to store/manage/query their data and logs. Elasticsearch’s multi-node cluster setup allows you to easily scale your Elasticsearch deployment as the size of your data grows and/or the number of queries increases. Elasticsearch can be scaled either vertically on the same server or horizontally across servers — although cross-server deployments in a production environment typically use Docker Swarm or Kubernetes, which falls outside the scope of this beginner-intended article. Typical Elasticsearch deployments also have a companion UI service called Kibana; which is an easy-to-use portal used to manage your Elasticsearch instance.
How does Elasticsearch work?
Elasticsearch is written in Java and built on top of Apache Lucene. Lucene is the “meat and potatoes” library for Elasticsearch, which handles the core indexing and search features.
When we “start” Elasticsearch, we are creating a node. A node is just an instance of Elasticsearch that stores data. We can have as many nodes as we want in our Elasticsearch cluster, which is just a collection of nodes. Each node stores part of the cluster’s data.
Elasticsearch stores data as documents. A document is stored as a JSON object (in Apache Lucene) that separates its data into fields and given a unique ID. Documents are stored in indices (an index). An index is a logical grouping of documents; conceptually similar to (but not really) a table in a relational database where each row would be a document.
Indices are distributed into pieces across nodes in a process called sharding, where each piece is called a shard. The main function of sharding is:
- store more documents in a index
- enable queries to be distributed and parallelized across nodes
- allow replication and redundancy
That is a brief introduction to the basic concepts of Elasticsearch. Now let’s dive into the tutorial.
Deploy Elasticsearch with Docker Compose
You can follow along with the tutorial by visiting the companion GitHub repository at the bottom of the article.
Note: Explicit container names are not used for any of the services as they are not required for this deployment, but feel free to add container_name to any service you see fit.
To get started, I always like to start with the main docker-compose.yml file first and establish the services we will be deploying. We will be deploying the following services:
- Elasticsearch — Node 1
- Elasticsearch — Node 2
- Kibana
- NGINX Web Server
The structure of the docker-compose.yml file will look like:
version: "3.8"
services:
  elasticsearch01:
  elasticsearch02:
  kibana:
  web_server:
Step #1 — Create a file called /docker-compose.yml and copy/paste the snippet above.
Next, we’ll set up our Elasticsearch nodes.
Elasticsearch Nodes
Step #2 — Copy and paste the section below into /docker-compose.yml:
services:

  elasticsearch01:
    build:
      context: elasticsearch/
      args:
        ELK_VERSION: ${ELK_VERSION:-7.10.1}
    volumes:
      - type: bind
        source: ./elasticsearch/elasticsearch.yml
        target: /usr/share/elasticsearch/config/elasticsearch.yml
        read_only: true
      #- ${ELASTICSEARCH_DATA:-/data}/elasticsearch01:/usr/share/elasticsearch/data
    ports:
      - "9200:9200"
      - "9300:9300"
    environment:
      - node.name=elasticsearch01
      - discovery.seed_hosts=elasticsearch02
      - cluster.initial_master_nodes=elasticsearch01,elasticsearch02
      - bootstrap.memory_lock=true
      #- "ES_JAVA_OPTS=-Xms${ES_HEAP_SIZE:-2g} -Xmx${ES_HEAP_SIZE:-2g}"
    ulimits:
      memlock:
        soft: -1
        hard: -1

  elasticsearch02:
    build:
      context: elasticsearch/
      args:
        ELK_VERSION: ${ELK_VERSION:-7.10.1}
    volumes:
      - type: bind
        source: ./elasticsearch/elasticsearch.yml
        target: /usr/share/elasticsearch/config/elasticsearch.yml
        read_only: true
      #- ${ELASTICSEARCH_DATA:-/data}/elasticsearch02:/usr/share/elasticsearch/data
    environment:
      - node.name=elasticsearch02
      - discovery.seed_hosts=elasticsearch01
      - cluster.initial_master_nodes=elasticsearch01,elasticsearch02
      - bootstrap.memory_lock=true
      #- "ES_JAVA_OPTS=-Xms${ES_HEAP_SIZE:-2g} -Xmx${ES_HEAP_SIZE:-2g}"
    ulimits:
      memlock:
        soft: -1
        hard: -1
Each node configuration is nearly identical, aside from named references to itself and the sister node. We’ll break down the elasticsearch01 service configuration step-by-step, creating the necessary files as we go.
Elasticsearch Node Configuration & Setup
Build (from Dockerfile)
build:
      context: elasticsearch/
      args:
        ELK_VERSION: ${ELK_VERSION:-7.10.1}
We’re going to build this service from its own Dockerfile, which is why we’re using the build config key. We’re stating that the context, or location, of the Dockerfile will exist in a child directory called /elasticsearch .
Step #3 — Create a new directory called /elasticsearch .
The args key is used to pass build argruments from the docker-compose.yml file into the Dockerfile of the respective service. In this case, we’re passing the argument ELK_VERSION into the Dockerfile (which we will create momentarily), which just so happens to be accepting the environment variable ELK_VERSION from the docker-compose.yml file. Hopefully that is not too confusing — same variable name, different meanings.
However, the ELK_VERSION environment variable is optional (defaulting to version 7.10.1 if empty).
Step #4 — Create a new file called /elasticsearch/Dockerfile and paste the following snippet:
ARG ELK_VERSIONFROM docker.elastic.co/elasticsearch/elasticsearch:${ELK_VERSION}We’re simply taking the value of our ELK_VERSION argument, passed in from the docker-compose.yml file (default v7.10.1), and pulling the corresponding Docker Image from Docker Hub.
Volumes (and Elasticsearch config)
volumes:
      - type: bind
        source: ./elasticsearch/elasticsearch.yml
        target: /usr/share/elasticsearch/config/elasticsearch.yml
        read_only: true
      #- ${ELASTICSEARCH_DATA:-/data}/elasticsearch01:/usr/share/elasticsearch/data
In the volumes section, we are binding a new file called /elasticsearch/elasticsearch.yml to a location within the Docker container that will be created at /usr/share/elasticsearch/config/elasticsearch.yml. We could devise a different way to do this, in which we COPY the file into the container via the Dockerfile, but I find my method to be much more clear and compact.
The elasticsearch.yml file simply defines the configuration of our Elasticsearch node.
The second section in the volumes section, ${ELASTICSEARCH_DATA:-/data}/elasticsearch01:/usr/share/elasticsearch/data is responsible for persisting the data from the node to the host machine. The data is located within the container at /usr/share/elasticsearch/data. Each node’s data should be saved in its own host directory, typically named with the same name as the service (elasticsearch01, elasticsearch02). The directories should be created before your Elasticsearch nodes have started. Ensure that the directories have the appropriate write permissions or else the Elasticsearch nodes will be unable to start and throw “Permission Denied” errors internally in their logs.
Depending on your OS (Linux, Windows) and general setup, the location of your host data directories will vary. I will leave that up to you. However, I have written a similar Docker Compose article in which I define the Windows/Linux volume creation in depth (See Step 8a & Step 8b). Utilizing data volumes for your nodes is not mandatory, but it is recommended if you plan on ingesting large amounts of data into Elasticsearch at any point.
Now, let’s create the Elasticsearch configuration file.
Step #5 — Create a file called /elasticsearch/elasticsearch.yml and paste the following snippet:
cluster.name: "docker-cluster"
network.host: 0.0.0.0
# License
xpack.license.self_generated.type: basic# Monitoring
xpack.monitoring.collection.enabled: trueThe cluster.name and network.host settings provide the necessary information for our node to connect to our cluster.
The xpack.license.self_generated.type setting (read about this here) is not required, but its inclusion is important. The default value is “basic” which allows you to access only the free and open-source features of Elasticsearch. You can change this value to “trial” to generate a license file that will give you 30-day access to all X-Pack features (like advanced security, for instance). You can always downgrade to the basic version once your trial expires.
The xpack.monitoring.collection.enabled will allow us to collect monitoring data and monitor our stack’s health.
Ports
ports:
      - "9200:9200"
      - "9300:9300"
Since all of our services will be accessible to each other within the context of our Docker network via private IP address, it is not a requirement to open up the Elasticsearch node ports to the host. However, if you want to access the Elasticsearch API for external querying or have nodes communicate cross-network, you should open up the ports. For simplicity, I will just open up Node #1.
- Port 9200 is for the REST API
- Port 9300 is for node communications
Remember that the port configuration goes “HOST:CONTAINER”. So the right-side value of 9200, “_ : 9200”, will always remain the same, but the left-side value “9200 : _” can be changed to whatever you like. If you want to open up both nodes ports, you can simply do:
elasticsearch01:
  ports:
      - "9200:9200"
      - "9300:9300"
elasticsearch02:
  ports:
      - "9201:9200"
      - "9301:9300"
Environment
environment:
      - node.name=elasticsearch01
      - discovery.seed_hosts=elasticsearch02
      - cluster.initial_master_nodes=elasticsearch01,elasticsearch02
      - bootstrap.memory_lock=true
      #- "ES_JAVA_OPTS=-Xms${ES_HEAP_SIZE:-2g} -Xmx${ES_HEAP_SIZE:-2g}"
We need to pass several environment variables into the Elasticsearch node. These values are necessary in order to establish what our cluster is; meaning, what are the nodes that make up our cluster and how do they communicate with each other.
Our nodes are accessible to each other in the same network. We can refer to them by either private IP, or, much more easily, their Docker Compose service names: “elasticsearch01” and “elasticsearch02".
node.name: The name of our node. We’ll use the same name as the respective service name.
discover.seed_hosts: This setting allows the cluster formation module to find other eligible nodes to form the cluster. Here, we specify the other nodes in the cluster.
cluster.initial_master_nodes: These are all of the nodes that are eligible to be the “master” node of the cluster. You can technically just specify one node as the master, but this disallows any fault tolerance. If and when a master node goes down, master responsibilities should be able to fall back to one of the other nodes. Here, we specify all nodes in the cluster.
bootstrap.memory_lock: It is recommended that you disable swapping, which is the process of an OS trying “to use as much memory as possible for file system caches and eagerly swap out unused application memory. This can result in parts of the JVM heap or even its executable pages being swapped out to disk.” Swapping degrades performance and should be disabled. If you don’t want to disable swapping for your entire OS, you can use bootstrap.memory_lock=true “to try to lock the process address space into RAM, preventing any Elasticsearch heap memory from being swapped out.”
ES_JAVA_OPTS: You can pass Java parameters to the Elasticsearch node to control the JVM. I’ve commented this out in the docker-compose.yml file by default. However, Xms and Xmx can be used to put lower and upper thresholds on the amount of heap memory the node is allowed to use.
Ulimits
ulimits:
      memlock:
        soft: -1
        hard: -1
The following has only been tested on Linux (CentOS).
Finally, ulimits (read here) with a memlock of soft: -1 and hard: -1 establishes that our process is entitled to an unlimited amount of locked memory. This sometimes is not always desired depending on what other processes are running on your OS, but it is the quickest fix if you don’t care about Elasticsearch being a dominant process. Without establishing ulimits you will receive the following error message in your Elasticsearch nodes, followed by a container exit:
Unable to lock JVM Memory: error=12, reason=Cannot allocate memoryHowever, after adding ulimits, attempting a docker-compose up will result in a separate, but related, error:
ERROR: [1] bootstrap checks failed
[1]: max virtual memory areas vm.max_map_count [65530] is too low, increase to at least [262144]
ERROR: Elasticsearch did not exit normally — check the logs at /usr/share/elasticsearch/logs/docker-cluster.log
This is Elasticsearch letting us know that the default OS limits for mmapfs are too low. To resolve this:
sysctl -w vm.max_map_count=262144In order to have this change persist after shell exit:
- Edit
/etc/sysctl.conf - Add
vm.max_map_count=262144
That’s it for Elasticsearch!
Kibana Configuration & Setup
The Kibana service setup and explanation is more straightforward than the Elasticsearch explanation, so I will keep this brief.
Step #6 — Copy and paste the section below into /docker-compose.yml:
kibana:
    build:
      context: kibana/
      args:
        ELK_VERSION: ${ELK_VERSION:-7.10.1}
    volumes:
      - type: bind
        source: ./kibana/kibana.yml
        target: /usr/share/kibana/config/kibana.yml
        read_only: true
    ports:
      - 5601:5601
    depends_on:
      - elasticsearch01
      - elasticsearch02
Build
Similar to the elasticsearch01 and elasticsearch02 services, the kibana service builds from its own Dockerfile.
Step #7 — Create a new directory called /kibana
Step #8 — Create a new file called /kibana/Dockerfile and paste the following snippet:
ARG ELK_VERSIONFROM docker.elastic.co/kibana/kibana:${ELK_VERSION}This will pull the Kibana Docker image with the same version as the Elasticsearch Docker images pulled previously. This is important, as our containers will fail with version incompatibility errors.
Volumes
volumes:
      - type: bind
        source: ./kibana/kibana.yml
        target: /usr/share/kibana/config/kibana.yml
        read_only: true
Similar to Elasticsearch, Kibana will have its own YAML file called kibana.yml. We will bind it as a volume from the host to the container.
Step #9 — Create a new file called /kibana/kibana.yml and paste the following snippet:
server:
  name: "elk"
  host: "0.0.0.0"
  port: 5601
  basePath: /kibana
rewriteBasePath: trueelasticsearch.hosts: ["http://elasticsearch01:9200","http://elasticsearch02:9200"]
xpack.monitoring.ui.container.elasticsearch.enabled: truecsp.strict: trueserver.name: A display name for this Kibana instance. You can name this whatever you’d like.
server.host: The host of the back end server. We could configure this to our host machine by using the IP address or domain name where we’re running Kibana. However, with NGINX, we will be reverse proxying anyway, so set it as “0.0.0.0” or “localhost”. The default is “localhost”.
server.port: The port to serve Kibana from. Remember that this is the container’s port — not the host port. The default port is 5601.
server.basePath: This is the only non-default field we’re going to use. With basePath, we can force Kibana to mount its base path (the root route from which all other routes are set) from the default of / to /kibana. This is necessary if we want to run Kibana behind a proxy and/or host our Kibana instance on the same server/domain that we are hosting other front ends. For example, you can run a typical website from “http://www.example.com/”. When you want to connect to Kibana, you’ll navigate to “http://example.com/kibana”. All routes that begin with “http://example.com/kibana” will serve the Kibana UI and all routes beginning with “http://www.example.com/” will serve anything and everything else.
server.rewriteBasePath: Set this to “true” if you utilize server.basePath. Else, remove entirely or set to “false”. See explanation for server.basePath.
elasticsearch.hosts: Specify the Elasticsearch nodes that Kibana will use for queries. You can specify one or both of “elasticsearch01” and “elasticsearch02”.
xpack.monitoring.ui.container.elasticsearch.enabled: Since we are running our Elasticsearch cluster inside of Docker containers, we will set this key to “true”. To read more about this, take a look at the documentation.
csp.strict: “csp” stands for “Content Security Policy”. The default is “true” and should be “true” for most deployments. However, if you need to support Internet Explorer, you may find that you need to set this as “false”. I like to leave this setting in even though I use the default of “true” to remind myself.
Ports
ports:
      - 5601:5601
We will be proxying to Kibana from behind an NGINX web server, so it is not necessary to open up the Kibana port to the host. However, if you want to access the Kibana UI directly, you can navigate to it by going to http://your-host-machine:5601/kibana. This will bypass NGINX altogether.
Dependencies
depends_on:
      - elasticsearch01
      - elasticsearch02
This is just an optional addition and will inform Docker Compose that the creation of the kibana service will run if and only if both elasticsearch01 and elasticsearch02 start up successfully.
That’s it for Kibana!
NGINX Configuration
Finally, we’ll configure our NGINX web server, which will be responsible for reverse proxying to our Kibana and Elasticsearch containers.
Step #10 — Copy and paste the section below into /docker-compose.yml:
web_server:
    build:
      context: ./nginx
    restart: always
    ports:
      - 80:80
    volumes:
      - ./nginx/nginx.conf:/etc/nginx/nginx.conf
Build
Once again, we’ll be building from a dedicated Dockerfile.
Step #11 — Copy and paste the section below into /nginx/Dockerfile:
FROM nginx:alpine# -- Install Utilities
RUN apk add --no-cache bash# -- Upload NGINX configuration
RUN rm /etc/nginx/nginx.conf
COPY nginx.conf /etc/nginx/nginx.conf# -- Expose Ports (for documentation)
EXPOSE 80# -- Start NGINX
CMD ["/bin/bash", "-c", "nginx -g \"daemon off;\""]In this Dockerfile, we’ll:
- pull the lightweight NGINX Alpine image from Docker Hub
- remove the default
nginx.conffile and replace it with our own - document that port 80 will be exposed
- start NGINX
Restart
We’ll set the restart policy to “always”, so that the container will always restart if it is stopped.
Ports
ports:
      - 80:80
It is mandatory that we expose port 80 to the host machine. Network traffic will come in through the host’s port 80 and then proxy to port 80 of the NGINX Docker container. From inside the NGINX container, we will reverse proxy to other services within the Docker network.
Volumes
volumes:
      - ./nginx/nginx.conf:/etc/nginx/nginx.conf
We will volumize our NGINX configuration file.
Now, we will configure out NGINX configuration file.
Step #12 — Copy and paste the section below into a new file called /nginx/nginx.conf:
worker_processes auto;events {}
http { default_type application/octet-stream;
include /etc/nginx/mime.types; error_log /etc/nginx/error_log.log; server { listen 80 default_server; resolver 127.0.0.11 valid=30s; server_name localhost; access_log /var/log/nginx/access.log;
error_log /var/log/nginx/error.log; include /etc/nginx/mime.types; location / {
# We can proxy to some other service or serve some static files here
} # Kibana
location /kibana { set $upstream http://kibana:5601;
proxy_pass $upstream;
proxy_redirect off;
proxy_buffering off; proxy_http_version 1.1;
proxy_pass_header Authorization;
proxy_set_header Connection "Keep-Alive";
proxy_set_header Proxy-Connection "Keep-Alive";
}}
}
We’ll just focus on the bolded section.
There will be one location created:
/kibana, which will reverse proxy to our Kibana container
Remember the server.basePath from the Kibana kibana.yml configuration file? NGINX will match all requests for “http://example.com/kibana/*” to the location /kibana section, then pass along the “/kibana” path (and everything after it) to our proxied service — which, in our case, is our Kibana service called kibana from our docker-compose.yml file; which is really just the private IP address of the service’s corresponding container.
And because we set our basePath appropriately, Kibana will use the whole path it received from NGINX to pass resources back and forth as requested. This looks like:
1. Client requests http://example.com/kibana/* -->
2. NGINX matches "location /kibana" -->
3. Proxy to kibana service @ http://kibana:5601/kibana/* -->
4. Kibana fetches resource and sends back resources to NGINX -->
5. NGINX sends resources back to Client
Start Your Elasticsearch Cluster
Now it’s time to start our cluster! Simply confirm that your current directory is set to the root directory of our project and run:
docker-compose up -dAllow ~1-2 minutes for Elasticsearch and Kibana to start up successfully. You can confirm the Kibana server is up and ready by viewing the logs:
docker logs <CONTAINER ID> -fMore specifically:
docker logs <CONTAINER ID> -f | grep "server"Once ready, the Kibana container will output:
{"type":"log","@timestamp":"2021-01-19T04:21:16Z","tags":["info","http","server","Kibana"],"pid":7,"message":"http server running at http://0.0.0.0:5601/kibana"}In your browser, go to http://your-server-name/kibana. You should see the landing page for Kibana:
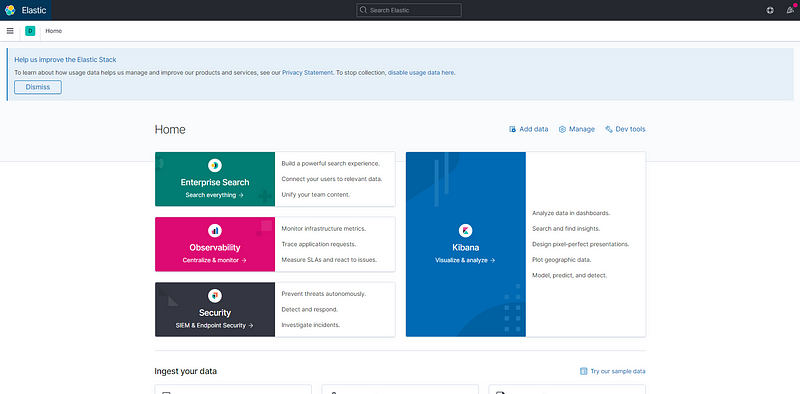
Click the hamburger icon in the top-left of the screen and scroll all the way down to “Stack Monitoring”.

Here we can see the name of our cluster, “docker-cluster”, provided via the cluster.name setting of our /elasticsearch/elasticsearch.yml file.
In the “Nodes” card, we can see that we have two nodes available as expected. Clicking on the title of that card, we see information about our nodes:
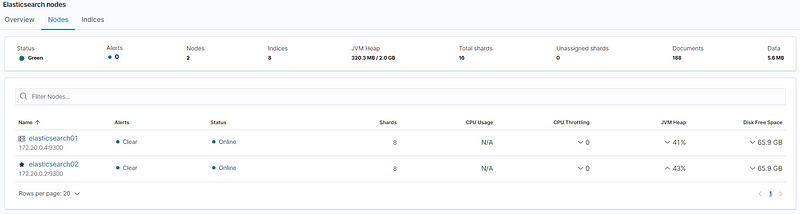
Here, we can see that both nodes have successfully started (green). We can also see that the node called elasticsearch02 was randomly selected as our master node:

Conclusion
In this article, we learned how to successfully deploy a multi-node Elasticsearch cluster, along with a companion Kibana UI and NGINX web server for reverse proxying. We illustrated how nodes can communicate with one another to form a cluster in order to distribute and parallelize work and data storage.
GitHub Repository
Updates
- 4/14/2021 — Fixed some language referring to Kibana Docker Compose service in NGINX reverse proxy section (Step #12)


