
Deep Fake Image and Video Detection using CNN’s and RNN’s
DeepFake is composed from Deep Learning and Fake and means taking one person from an image or video and replacing with someone else likeness using technology such as Deep Artificial Neural Networks. Large companies like Google invest very much in fighting the DeepFake, this including release of large datasets to help training models to counter this threat.The phenomen invades rapidly the film industry and threatens to compromise news agencies. Large digital companies, including content providers and social platforms are in the frontrun of fighting Deep Fakes. GANs that generate DeepFakes becomes better every day and, of course, if you include in a new GAN model all the information we collected until now how to combat various existent models, we create a model that cannot be beatten by the existing ones.
!pip install -U --upgrade tensorflowThis Python code installs or upgrades the TensorFlow library using the pip package manager. TensorFlow is an open-source machine learning framework thats used for a variety of applications, including deepfake detection. The ! at the beginning allows this command to be run in a Jupyter notebook or similar interactive environment. The -U or — upgrade option ensures that if TensorFlow is already installed, it will be upgraded to the latest version available.
import sys
import sklearn
import tensorflow as tf

import cv2
import pandas as pd
import numpy as np

import plotly.graph_objs as go
from plotly.offline import iplot
from matplotlib import pyplot as plt
This Python code appears to import a set of libraries that are commonly used for data science and machine learning tasks, with a specific focus on deepfake detection:
sys: Provides access to some variables used or maintained by the interpreter and to functions that interact strongly with the interpreter.
sklearn: An abbreviation for Scikit-learn, it is a machine learning library that contains various tools for data mining and data analysis.
tensorflow: An open-source library for numerical computation and machine learning, particularly deep neural networks.
cv2: The OpenCV library for computer vision tasks, which includes capabilities for image and video analysis.
pandas: A data manipulation and analysis library that offers data structures and operations for manipulating numerical tables and time series.
numpy: A package for scientific computing that provides support for arrays and matrices, along with a collection of mathematical functions to operate on these data structures.
plotly.graph_objs and plotly.offline.iplot: Components of the Plotly library, which is used to create interactive plots and figures for data visualization.
matplotlib.pyplot: A plotting library that is often used to generate 2D graphics and plots. Although the code block solely consists of import statements and doesnt perform any operations, it suggests that the larger script or application of which this code is a part likely engages in deepfake detection by analyzing visual data using cv2, manipulating and analyzing data using pandas and numpy, employing machine learning algorithms sklearn and tensorflow, and visualizing results plotly and matplotlib.
import os

def get_data():
    return pd.read_csv('../input/deepfake-faces/metadata.csv')
This Python code defines a function get_data that reads a CSV file named metadata.csv from the directory ../input/deepfake-faces/ using the pandas library implicitly assumed to be imported as pd and returns the resulting DataFrame. This function could potentially be part of a larger script for loading data that will be used in deepfake detection analysis.
meta=get_data()
meta.head()
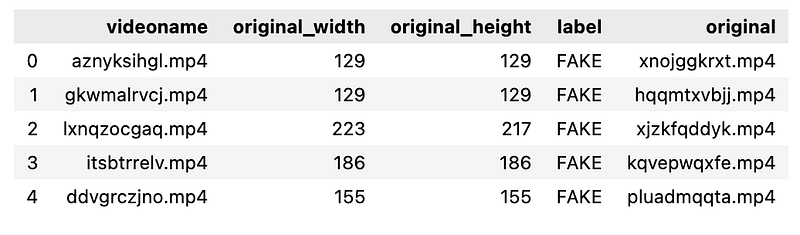
The code performs two steps:
meta = get_data: Calls the get_data function, which is presumably defined elsewhere in the code. This function is expected to retrieve some form of data necessary for the deepfake detection process, potentially including images, videos, or metadata. The data is then stored in the variable meta.
meta.head: This line suggests that the meta variable is a pandas DataFrame, which is commonly used for handling tabular data in Python. The .head method is a pandas function that returns the first five rows of the DataFrame meta. This is typically used to quickly inspect the first few entries of the dataset to ensure its been loaded correctly. Please note that without the complete context or the implementation of the get_data function, this explanation is based on common usage patterns for these lines of code.
real_df = meta[meta["label"] == "REAL"]
fake_df = meta[meta["label"] == "FAKE"]
sample_size = 8000

real_df = real_df.sample(sample_size, random_state=42)
fake_df = fake_df.sample(sample_size, random_state=42)

sample_meta = pd.concat([real_df, fake_df])
This Python code is designed to create a balanced dataset of real and fake samples, which can be used for training a deepfake detection model. The dataset is presumably stored in a dataframe meta with a column label that specifies whether each entry is REAL or FAKE.
It first filters the meta dataframe into two separate dataframes: real_df containing only the real examples and fake_df containing only the fake examples.
It then randomly selects 8000 samples from each of the real and fake dataframes using the .sample method, ensuring reproducibility by setting a random state random_state=42.
Finally, it combines these two sampled subsets back into one dataframe sample_meta using pd.concat, which now has an equal number of real and fake samples and a total of 16000 samples for use in deepfake detection.
As mentioned instead of using 95k images we will only use 16000 images.
y = dict()

y[0] = []
y[1] = []

for set_name in (np.array(Train_set['label']), np.array(Val_set['label']), np.array(Test_set['label'])):
    y[0].append(np.sum(set_name == 'REAL'))
    y[1].append(np.sum(set_name == 'FAKE'))

trace0 = go.Bar(
    x=['Train Set', 'Validation Set', 'Test Set'],
    y=y[0],
    name='REAL',
    marker=dict(color='#33cc33'),
    opacity=0.7
)
trace1 = go.Bar(
    x=['Train Set', 'Validation Set', 'Test Set'],
    y=y[1],
    name='FAKE',
    marker=dict(color='#ff3300'),
    opacity=0.7
)

data = [trace0, trace1]
layout = go.Layout(
    title='Count of classes in each set',
    xaxis={'title': 'Set'},
    yaxis={'title': 'Count'}
)

fig = go.Figure(data, layout)
iplot(fig)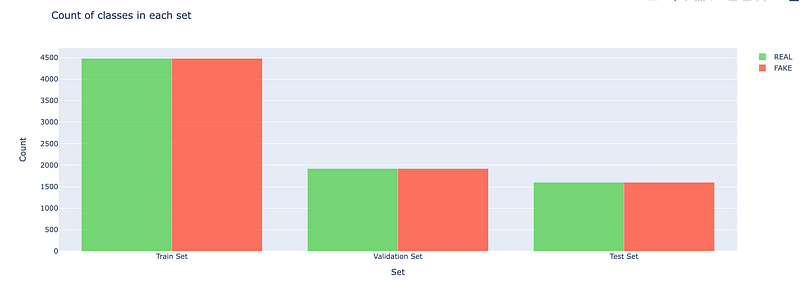
This Python code is creating a bar chart to visualize the counts of real and fake labels in training, validation, and test datasets. Its using Plotly for plotting, where go.Bar creates bar chart traces for real and fake counts separately. These counts are determined by summing the number of REAL and FAKE labels in Train_set, Val_set, and Test_set. The resulting bar chart is displayed using iplotfig, showing the distribution of real and fake labels across the three datasets.
The original image dataset were biased with more fake images than real since we are taking a sample of it its better to take equal proportion of real and fake images.
plt.figure(figsize=(15,15))
for cur,i in enumerate(Train_set.index[25:50]):
    plt.subplot(5,5,cur+1)
    plt.xticks([])
    plt.yticks([])
    plt.grid(False)

    plt.imshow(cv2.imread('../input/deepfake-faces/faces_224/'+Train_set.loc[i,'videoname'][:-4]+'.jpg'))

    if(Train_set.loc[i,'label']=='FAKE'):
        plt.xlabel('FAKE Image')
    else:
        plt.xlabel('REAL Image')

plt.show()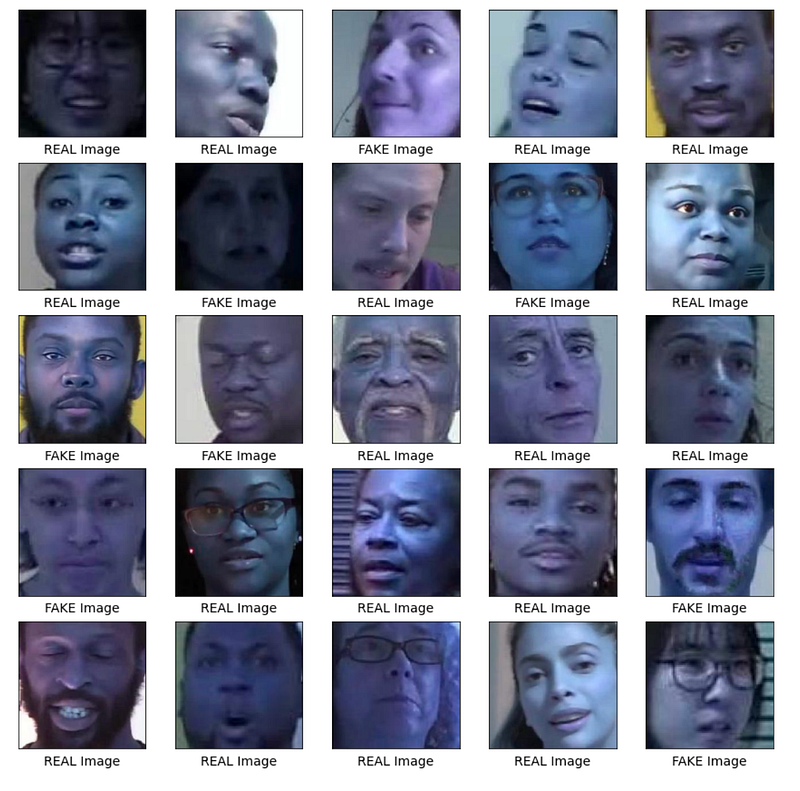
This Python code snippet is creating and displaying a grid of images with labels indicating whether they are real or fake. Specifically, it is:
Setting up a figure with a size of 15x15 inches using matplotlib.pyplot aliased as plt.
Iterating over a subset of indexes from the Train_set from the 26th to the 50th element.
For each iteration, it configures a subplot within a 5x5 grid without ticks on the x and y axes and no grid lines.
It reads images from a specified directory using cv2.imread, with the image filenames constructed from Train_set and adds the .jpg extension.
It uses plt.imshow to display these images in the subplots.
It sets the x-axis label to FAKE Image or REAL Image depending on the label column value in Train_set for each corresponding image.
Finally, it uses plt.show to display the figure with the plotted images. This is typically used in deepfake detection to visualize and manually inspect a set of images for authenticity.
Modelling
Before jumping to use pretrained model lets develop some base line model to test how our pretrained model outperforms.
def retreive_dataset(set_name):
    images,labels=[],[]
    for (img, imclass) in zip(set_name['videoname'], set_name['label']):
        images.append(cv2.imread('../input/deepfake-faces/faces_224/'+img[:-4]+'.jpg'))
        if(imclass=='FAKE'):
            labels.append(1)
        else:
            labels.append(0)

    return np.array(images),np.array(labels)
This Python function named retrieve_dataset is designed to process a dataset for deepfake detection by loading images and their corresponding labels into separate lists, which are then converted into NumPy arrays before returning. It iterates over pairs of video names and labels from the set_name argument, reads each image using OpenCVs imread function from a specified directory, appends the image to the images list, and appends a label value to the labels list, where fake images are labeled with 1 and real ones with 0. The image paths are constructed by removing the last four characters of the video name likely its file extension and appending .jpg to form the complete path to the image file. The function finally returns the images and labels as NumPy arrays.
X_train,y_train=retreive_dataset(Train_set)
X_val,y_val=retreive_dataset(Val_set)
X_test,y_test=retreive_dataset(Test_set)
The code snippet retrieves and assigns training, validation, and test datasets along with their corresponding labels for deepfake detection. The retreive_dataset function is called with different dataset identifiers Train_set, Val_set, Test_set and returns two items each time: the dataset inputs X and the expected outputs or labels y. These are respectively assigned to the variables X_train, y_train for training data, X_val, y_val for validation data, and X_test, y_test for test data.
from functools import partial

tf.random.set_seed(42)
DefaultConv2D = partial(tf.keras.layers.Conv2D, kernel_size=3, padding="same",
                        activation="relu", kernel_initializer="he_normal")

model = tf.keras.Sequential([
    DefaultConv2D(filters=64, kernel_size=7, input_shape=[224, 224, 3]),
    tf.keras.layers.MaxPool2D(),
    DefaultConv2D(filters=128),
    DefaultConv2D(filters=128),
    tf.keras.layers.MaxPool2D(),
    tf.keras.layers.Flatten(),
    tf.keras.layers.Dense(units=128, activation="relu",
                          kernel_initializer="he_normal"),
    tf.keras.layers.Dropout(0.5),
    tf.keras.layers.Dense(units=64, activation="relu",
                          kernel_initializer="he_normal"),
    tf.keras.layers.Dropout(0.5),
    tf.keras.layers.Dense(units=1, activation="sigmoid")
])
This Python code defines a convolutional neural network CNN using TensorFlows Keras API, which could be used for binary classification tasks such as deepfake detection. It sets a fixed seed for random number generation to ensure reproducibility, creates a custom convolutional layer with predefined parameters using partial, and then builds a sequential model consisting of several convolutional layers, max pooling layers, a flattening layer, dense fully connected layers with dropout for regularization, and an output layer with a sigmoid activation function for binary classification. The network takes input images of size 224x224 with 3 color channels.
model.compile(loss="binary_crossentropy", optimizer="nadam",
              metrics=["accuracy"])
model.summary()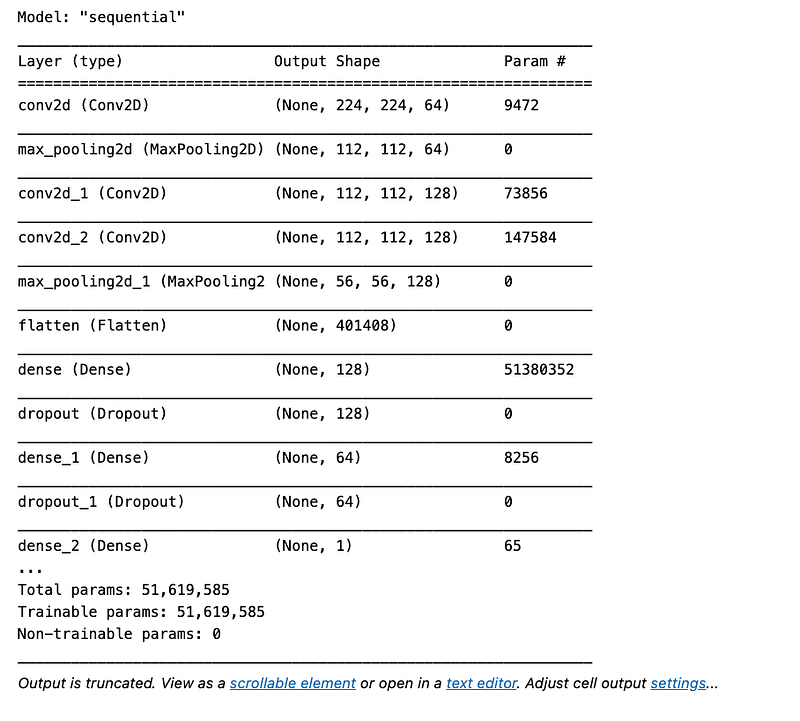
This Python code snippet is configuring a machine learning model for the training process in the context of deepfake detection. The model.compile method sets up the model with the following parameters:
loss=binary_crossentropy: This defines the loss function to be binary crossentropy, which is a common choice for binary classification problems like deepfake detection, where each input is classified as either real or fake.
optimizer=nadam: Nadam is an optimization algorithm used to update the models weights based on the data it sees and the loss its trying to minimize.
metrics=[accuracy]: This tracks the accuracy metric during training, which is the percentage of correctly classified instances. Finally, model.summary prints a summary of the model architecture, providing details about the layers, their shapes, and the number of parameters. This helps to understand the models structure before the actual training begins.
history = model.fit(X_train, y_train, epochs=5,batch_size=64,
                    validation_data=(X_val, y_val))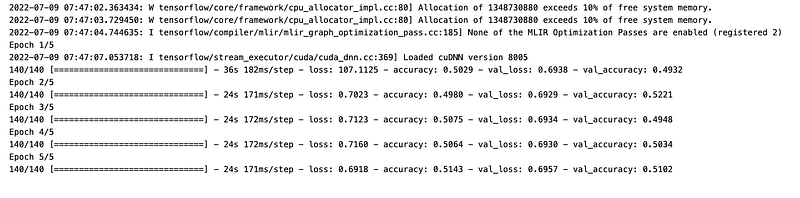
This code trains a machine learning model using training data. Specifically, it feeds the training input data X_train and the corresponding labels y_train to the model for a total of 5 training iterations, known as epochs. During training, the model uses mini-batches of 64 samples at a time. It also evaluates the models performance on a separate validation dataset, consisting of X_val and y_val, to monitor its accuracy on data it hasnt seen during the training process. The history variable captures the performance metrics of the model for each epoch, such as loss and accuracy for both the training and validation datasets. This process is part of training a deepfake detection system to distinguish between real and synthetic media.
# plot model performance
acc = history.history['accuracy']
val_acc = history.history['val_accuracy']
loss = history.history['loss']
val_loss = history.history['val_loss']
epochs_range = range(1, len(history.epoch) + 1)

plt.figure(figsize=(15,5))

plt.subplot(1, 2, 1)
plt.plot(epochs_range, acc, label='Train Set')
plt.plot(epochs_range, val_acc, label='Val Set')
plt.legend(loc="best")
plt.xlabel('Epochs')
plt.ylabel('Accuracy')
plt.title('Model Accuracy')

plt.subplot(1, 2, 2)
plt.plot(epochs_range, loss, label='Train Set')
plt.plot(epochs_range, val_loss, label='Val Set')
plt.legend(loc="best")
plt.xlabel('Epochs')
plt.ylabel('Loss')
plt.title('Model Loss')

plt.tight_layout()
plt.show()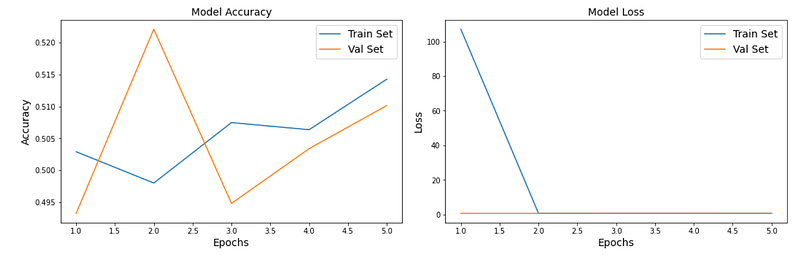
This Python code plots the performance of a model used for deepfake detection over a series of training epochs. It generates two graphs: the first graph shows the training accuracy and validation accuracy over the epochs, and the second graph shows the training loss and validation loss over the same period. The graphs are displayed side by side for easy comparison using subplots, with labeled axes and legends for clarity. The plt.show command at the end displays the plotted graphs.
Pre-trained Models For Transfer Learning
All three datasets contain individual images. We need to batch them, but for this we first need to ensure they all have the same size, or else batching will not work. We can use a `Resizing` layer for this. We must also call the `tf.keras.applications.xception.preprocess_input()` function to preprocess the images appropriately for the Xception model. We will also add shuffling and prefetching to the training dataset.
train_set_raw=tf.data.Dataset.from_tensor_slices((X_train,y_train))
valid_set_raw=tf.data.Dataset.from_tensor_slices((X_val,y_val))
test_set_raw=tf.data.Dataset.from_tensor_slices((X_test,y_test))
This Python code creates TensorFlow datasets for training, validation, and testing from existing arrays of data features and labels. X_train, y_train represent training features and labels, X_val, y_val for validation, and X_test, y_test for testing. These datasets can be used for building and evaluating a deepfake detection model.
tf.keras.backend.clear_session()  # extra code – resets layer name counter

batch_size = 32
preprocess = tf.keras.applications.xception.preprocess_input
train_set = train_set_raw.map(lambda X, y: (preprocess(tf.cast(X, tf.float32)), y))
train_set = train_set.shuffle(1000, seed=42).batch(batch_size).prefetch(1)
valid_set = valid_set_raw.map(lambda X, y: (preprocess(tf.cast(X, tf.float32)), y)).batch(batch_size)
test_set = test_set_raw.map(lambda X, y: (preprocess(tf.cast(X, tf.float32)), y)).batch(batch_size)
The Python code snippet is preparing datasets for training, validation, and testing in a deepfake detection system using TensorFlows Keras API. It does the following:
Clears the Keras session to remove any existing model or layer configurations.
Sets a batch size of 32 for processing multiple images in each iteration.
Applies a preprocessing function from the Xception model to the datasets, casting the input data to float32 type.
Shuffles the training dataset with a buffer size of 1000 and sets a fixed seed for reproducibility.
Batches the training dataset into the specified batch size and uses prefetch1 to ensure that data loading does not become a bottleneck.
Batches the validation and test datasets similarly, but without shuffling.
Let’s take a look again at the first 9 images from the validation set: they’re all with values ranging from -1 to 1:
# extra code – displays the first 9 images in the first batch of valid_set

plt.figure(figsize=(12, 12))
for X_batch, y_batch in valid_set.take(1):
    for index in range(9):
        plt.subplot(3, 3, index + 1)
        plt.imshow((X_batch[index] + 1) / 2)  # rescale to 0–1 for imshow()
        if(y_batch[index]==1):
            classt='FAKE'
        else:
            classt='REAL'
        plt.title(f"Class: {classt}")
        plt.axis("off")

plt.show()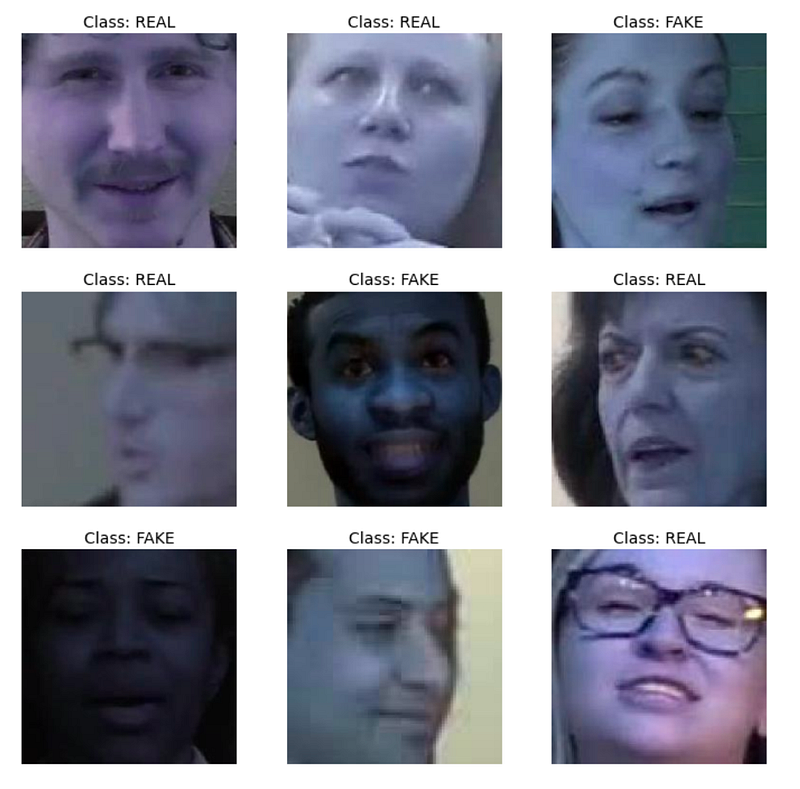
This Python code visualizes the first nine images from the first batch of a validation dataset, valid_set. It displays each image in a 3x3 grid with their corresponding class labels FAKE if y_batch[index] is 1, or REAL if its 0, after rescaling the image data to a 0–1 range for proper rendering by plt.imshow. The axes are turned off for a cleaner look. This visualization is likely used for evaluating a deepfake detection models performance on the validation set.
data_augmentation = tf.keras.Sequential([
    tf.keras.layers.RandomFlip(mode="horizontal", seed=42),
    tf.keras.layers.RandomRotation(factor=0.05, seed=42),
    tf.keras.layers.RandomContrast(factor=0.2, seed=42)
])
The Python code creates a data augmentation pipeline using TensorFlows Keras API that consists of three layers designed to randomly augment images as part of preprocessing for deepfake detection:
RandomFlip: Flips images horizontally with a set random seed for reproducibility.
RandomRotation: Rotates images by a random amount, up to 5% factor=0.05 of 360 degrees, again with a set seed for consistency.
RandomContrast: Adjusts the contrast of the images randomly by a factor of up to 20% factor=0.2 with the same seed for reproducibility. This augmentation helps in simulating different variations of input data, potentially improving the robustness of the deepfake detection model.
Try running the following cell multiple times to see different random data augmentations:
# extra code – displays the same first 9 images, after augmentation

plt.figure(figsize=(12, 12))
for X_batch, y_batch in valid_set.take(1):
    X_batch_augmented = data_augmentation(X_batch, training=True)
    for index in range(9):
        plt.subplot(3, 3, index + 1)
        # We must rescale the images to the 0-1 range for imshow(), and also
        # clip the result to that range, because data augmentation may
        # make some values go out of bounds (e.g., RandomContrast in this case).
        plt.imshow(np.clip((X_batch_augmented[index] + 1) / 2, 0, 1))
        if(y_batch[index]==1):
            classt='FAKE'
        else:
            classt='REAL'
        plt.title(f"Class: {classt}")
        plt.axis("off")

plt.show()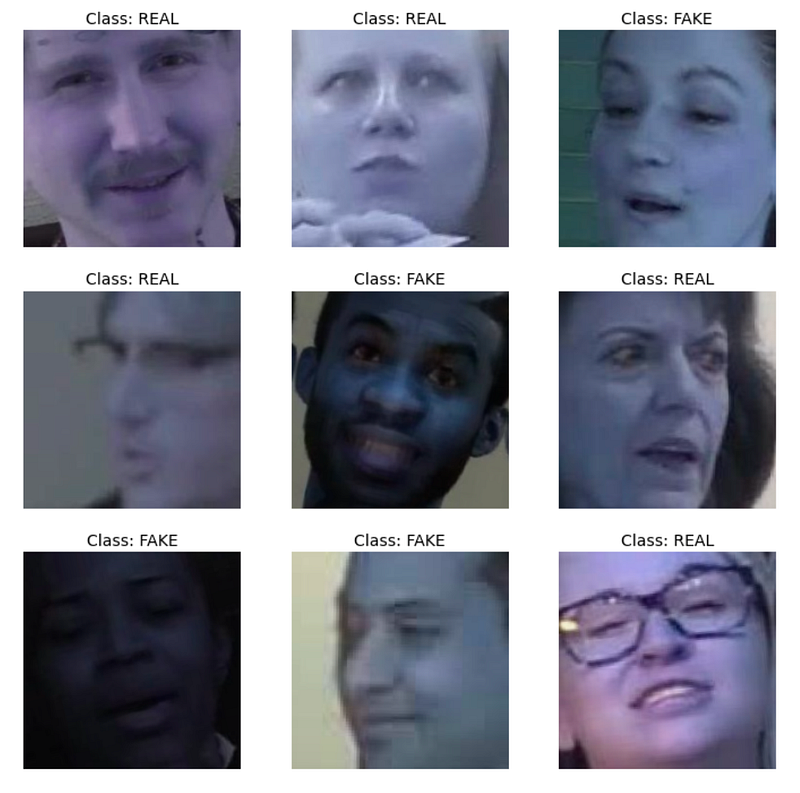
This Python code snippet is for visualizing the first 9 images from a validation set after they have been augmented using a data_augmentation function, specifically within the context of deepfake detection. It takes a batch of images with their corresponding labels X_batch, y_batch from the validation set valid_set, applies the data augmentation on the images X_batch_augmented, and then displays these augmented images in a 3x3 grid plot. Each subplot title indicates whether the original image is FAKE or REAL based on its label y_batch. The images are rescaled to the 0–1 range for display purposes using imshow and clipped to this range to ensure that any out-of-bounds values resulting from augmentation like contrast adjustments dont cause issues with the display.
Now let’s load the pretrained model, without its top layers, and replace them with our own task
optimizer = tf.keras.optimizers.SGD(learning_rate=0.1, momentum=0.9)
model.compile(loss="binary_crossentropy", optimizer=optimizer,
              metrics=["accuracy"])
history = model.fit(train_set, validation_data=valid_set, epochs=3)
The provided Python code is configuring and initiating the training process for a deep learning model in TensorFlow, with the intent of possibly using it for deepfake detection. Specifically:
optimizer: An SGD Stochastic Gradient Descent optimizer is created with a learning rate of 0.1 and momentum of 0.9. This optimizer will be used to update the models weights during training to minimize the loss.
model.compile…: The model is compiled with binary crossentropy loss suitable for binary classification tasks such as deepfake detection, using the previously defined SGD optimizer, and will track the accuracy metric during training.
model.fit…: The model is trained using the train_set dataset, validated using the valid_set dataset, and the training will run for 3 epochs iterations over the entire dataset. The history object will capture the loss and accuracy metrics for analysis after training.
for indices in zip(range(33), range(33, 66), range(66, 99), range(99, 132)):
    for idx in indices:
        print(f"{idx:3}: {base_model.layers[idx].name:22}", end="")
    print()
This Python code iterates over tuples of indices created by zipping together four ranges that divide the range of numbers from 0 to 132 into four equal parts. For each tuple of indices, it prints the index and the name of the corresponding layer from a model named base_model. The layer names are printed in columns for comparison, with the index and layer name formatted for alignment. This could be used in deepfake detection to display information about layers in a neural network at specific intervals to understand the architecture or for debugging purposes.
for layer in base_model.layers[56:]:
    layer.trainable = True

optimizer = tf.keras.optimizers.SGD(learning_rate=0.01, momentum=0.9)
model.compile(loss="binary_crossentropy", optimizer=optimizer,
              metrics=["accuracy"])
history = model.fit(train_set, validation_data=valid_set, epochs=10)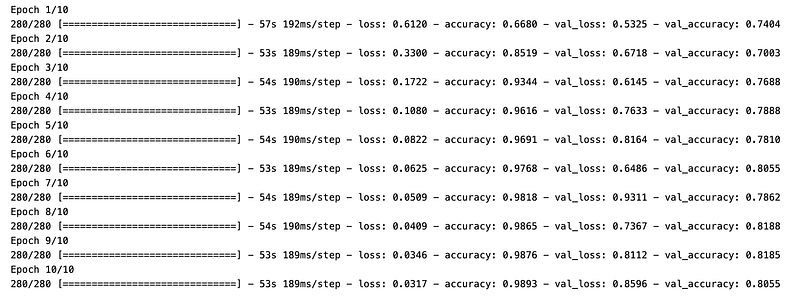
This Python code snippet is configuring and training a neural network model for an unspecified number of iterations epochs. Specifically, its taking a pre-existing base_model and setting the layers from the 56th layer to the end as trainable, which means their weights will be updated during the training process. An SGD Stochastic Gradient Descent optimizer is created with a learning rate of 0.01 and a momentum of 0.9, which will be used to update the weights of the trainable layers during training by minimizing the binary cross-entropy loss suitable for a binary classification problem. The model.compile statement prepares the model for training by specifying the loss function, optimizer, and metrics to track in this case, accuracy. The model.fit function trains the model on a train_set, evaluates its performance on a valid_set, and does this for 10 full iterations through the dataset epochs. The models progression is captured in the history object, which typically contains the loss and accuracy values per epoch for both training and validation datasets. This code is part of a deepfake detection system where the neural network is likely fine-tuning its parameters to better differentiate between genuine and fake images or videos.
Add Explainability to the model
plt.figure(figsize=(12, 12))

for index in range(9):
    plt.subplot(3, 3, index + 1)
    plt.imshow((x[index] + 1) / 2)  # rescale to 0–1 for imshow()
    if(y[index]==1):
        classt='FAKE'
    else:
        classt='REAL'
    plt.title(f"Class: {classt}")
    plt.axis("off")

plt.show()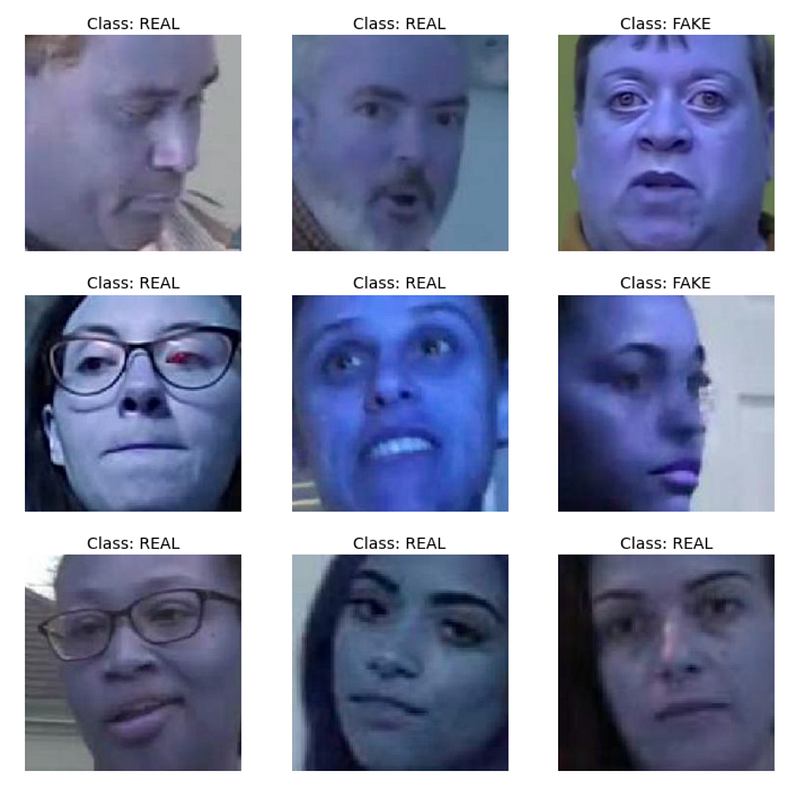
This Python code snippet is used for visualizing a set of images in a 3x3 grid format using matplotlib, a plotting library. Each image retrieved from the array x is normalized from a range that perhaps is -1 to 1 due to x[index] + 1 / 2 to a range suitable for display 0 to 1, and then displayed. The title of each subplot indicates whether the image is classified as FAKE or REAL, based on the corresponding value in the array y. If y[index] is 1, the image is labeled FAKE; otherwise, its labeled REAL. The axes are turned off for a cleaner look. The plt.show function is called to display the plot once all subplots have been configured. This code likely serves the purpose of evaluating or demonstrating the performance of a deepfake detection algorithm by presenting examples of real and fake images.
from skimage.segmentation import mark_boundaries

temp_1, mask_1 = explanation.get_image_and_mask(explanation.top_labels[0], positive_only=True, num_features=5, hide_rest=True)
temp_2, mask_2 = explanation.get_image_and_mask(explanation.top_labels[0], positive_only=False, num_features=10, hide_rest=False)

fig, (ax1, ax2) = plt.subplots(1, 2, figsize=(15,15))
ax1.imshow(mark_boundaries(temp_1, mask_1))
ax2.imshow(mark_boundaries(temp_2, mask_2))
ax1.axis('off')
ax2.axis('off')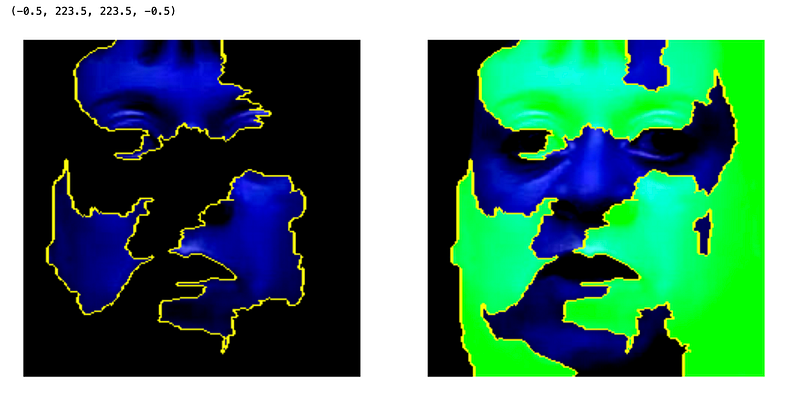
This Python code uses a library for image segmentation to visualize important regions of an image that contribute to a deepfake detection algorithms decision. First, it obtains two variants of the image and corresponding masks using a method get_image_and_mask: one with only the positive contributions of the top predicted label limited to 5 features and hiding the rest of the image, and another considering both positive and negative contributions with 10 features and showing the whole image. It then creates a figure with two subplots, and uses mark_boundaries to overlay the obtained masks onto the original images, indicating important areas for the prediction. These are displayed in two axes, side by side, without axis labels for a cleaner look.
DeepFake Video Classification
Few Fake Videos
fake_train_sample_video = list(train_sample_metadata.loc[train_sample_metadata.label=='FAKE'].sample(3).index)
fake_train_sample_video
The code snippet selects three random indices from the train_sample_metadata DataFrame where the label column is FAKE. It creates a list of these indices and stores it in the fake_train_sample_video variable. This is likely used to sample three fake videos for deepfake detection training purposes.
def display_image_from_video(video_path):
    '''
    input: video_path - path for video
    process:
    1. perform a video capture from the video
    2. read the image
    3. display the image
    '''
    capture_image = cv2.VideoCapture(video_path)
    ret, frame = capture_image.read()
    fig = plt.figure(figsize=(10,10))
    ax = fig.add_subplot(111)
    frame = cv2.cvtColor(frame, cv2.COLOR_BGR2RGB)
    ax.imshow(frame)
This Python code defines a function called display_image_from_video that takes a video_path as input and does the following:
Initiates video capture from the specified video path.
Reads the first frame image from the video.
Converts the color format of the frame from BGR to RGB since OpenCV uses BGR by default, but Matplotlib expects RGB.
Creates a Matplotlib figure and displays the color-corrected frame within it. The code is part of a deepfake detection process, presumably for visually inspecting frames from videos to detect signs of manipulation.
for video_file in fake_train_sample_video:
    display_image_from_video(os.path.join(DATA_FOLDER, TRAIN_SAMPLE_FOLDER, video_file))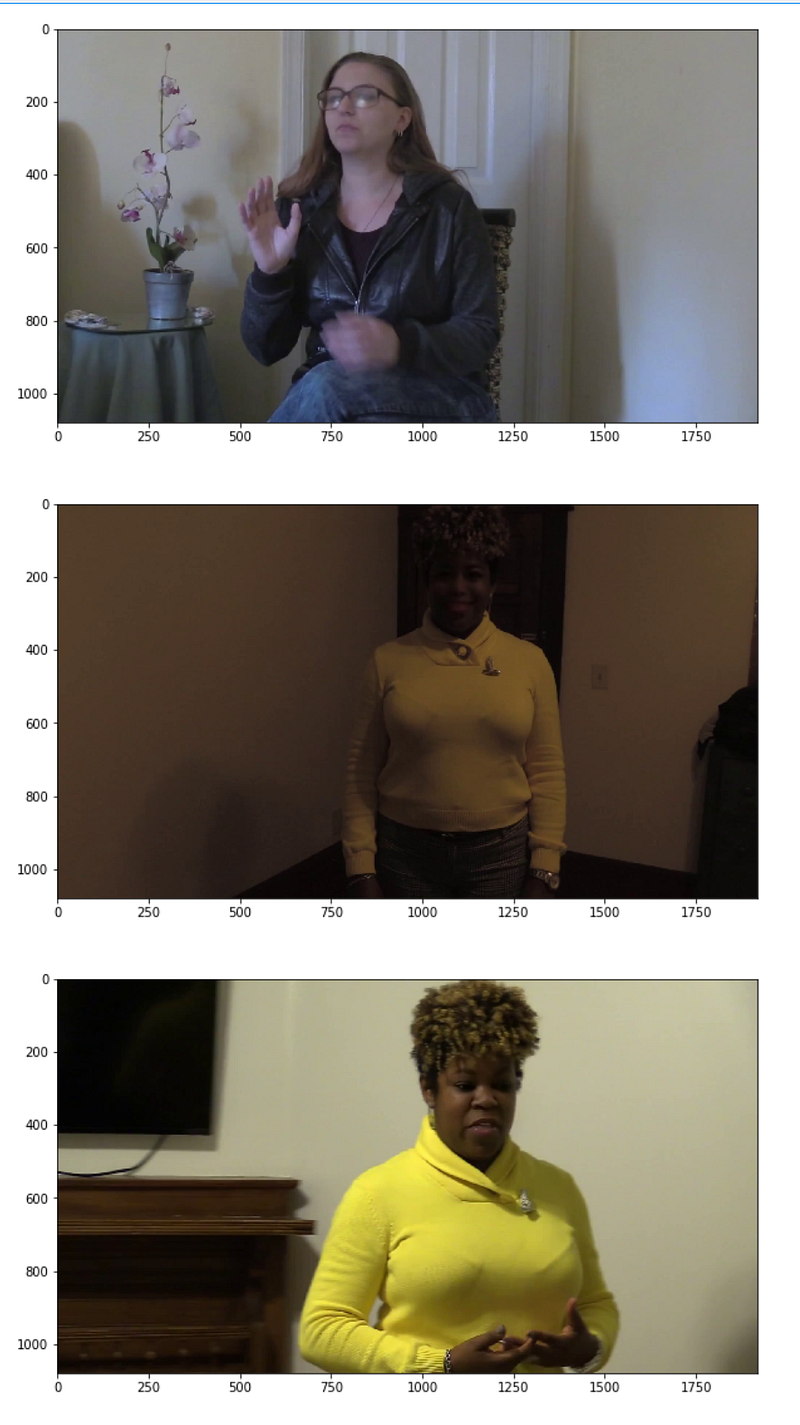
This Python code snippet iterates over a list of video filenames fake_train_sample_video, and for each video file, it calls the function display_image_from_video with the full path to the video file as an argument. The full path is constructed by joining a data folder path DATA_FOLDER, a training samples folder TRAIN_SAMPLE_FOLDER, and the current video filename video_file. The purpose in the context of deepfake detection is to display images from a sample of videos labeled as fake for further analysis or review.
Few Real Videos
real_train_sample_video = list(train_sample_metadata.loc[train_sample_metadata.label=='REAL'].sample(3).index)
real_train_sample_video
This Python code selects three random video entries labeled as REAL from a dataset containing metadata for training samples. It then stores the indices of these selected videos in a list called real_train_sample_video. The dataset is likely part of a collection used for deepfake detection, and these REAL labeled videos are probably genuine videos used to train a model to distinguish between real and fake content.
for video_file in real_train_sample_video:
    display_image_from_video(os.path.join(DATA_FOLDER, TRAIN_SAMPLE_FOLDER, video_file))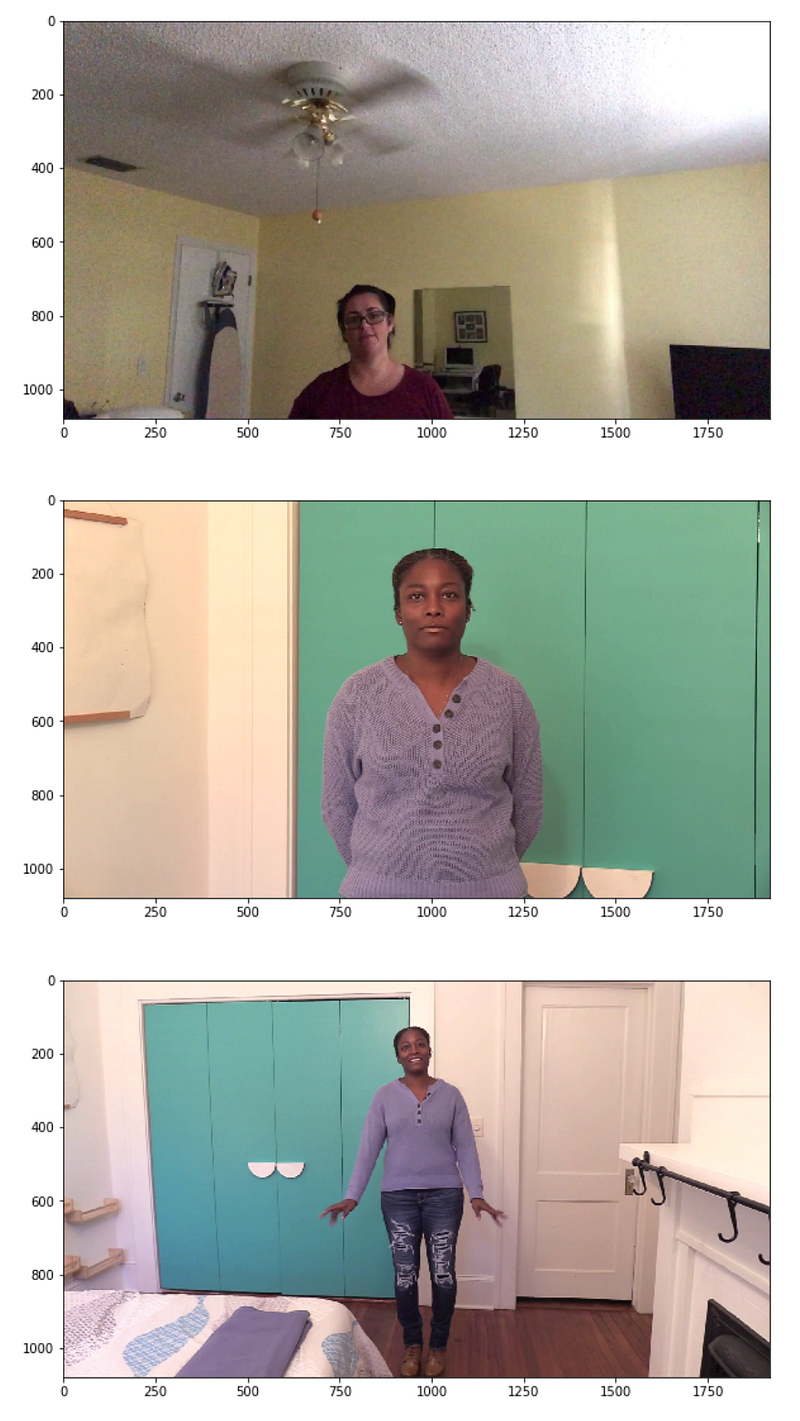
This Python code snippet is designed to display images from a collection of video files that are used for training a deepfake detection system. For each video file in a list named real_train_sample_video, it constructs a full file path by joining a data folder DATA_FOLDER, a training sample folder TRAIN_SAMPLE_FOLDER, and the name of the current video file video_file. Then it displays an image from the video using a function display_image_from_video.
Videos with same original
train_sample_metadata['original'].value_counts()[0:5]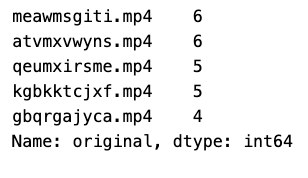
The code snippet is extracting value counts of unique entries in the original column of the DataFrame train_sample_metadata, and then it selects the top 5 most frequent entries. It is likely being used to analyze the distribution of original videos from which deepfakes might have been generated, as part of a deepfake detection pipeline.
We pick one of the originals with largest number of samples.
We also modify our visualization function to work with multiple images.
def display_image_from_video_list(video_path_list, video_folder=TRAIN_SAMPLE_FOLDER):
    '''
    input: video_path_list - path for video
    process:
    0. for each video in the video path list
        1. perform a video capture from the video
        2. read the image
        3. display the image
    '''
    plt.figure()
    fig, ax = plt.subplots(2,3,figsize=(16,8))
    # we only show images extracted from the first 6 videos
    for i, video_file in enumerate(video_path_list[0:6]):
        video_path = os.path.join(DATA_FOLDER, video_folder,video_file)
        capture_image = cv2.VideoCapture(video_path)
        ret, frame = capture_image.read()
        frame = cv2.cvtColor(frame, cv2.COLOR_BGR2RGB)
        ax[i//3, i%3].imshow(frame)
        ax[i//3, i%3].set_title(f"Video: {video_file}")
        ax[i//3, i%3].axis('on')
The given Python code defines a function display_image_from_video_list that takes a list of video file paths video_path_list and an optional video_folder argument specifying the base directory of these videos. The function displays the first frame/image from each of the first six videos in the list. It does this by capturing the video, reading the first frame, converting its color space from BGR to RGB, and then plotting it on a 2x3 grid of subplots using Matplotlibs plotting library. Each image is labeled with the corresponding videos file name. The path to the video files is constructed by joining the data folder, video folder, and video file name. The axison command for each subplot is likely meant to be axisoff to hide the axes for a cleaner display of only the images.
same_original_fake_train_sample_video = list(train_sample_metadata.loc[train_sample_metadata.original=='atvmxvwyns.mp4'].index)
display_image_from_video_list(same_original_fake_train_sample_video)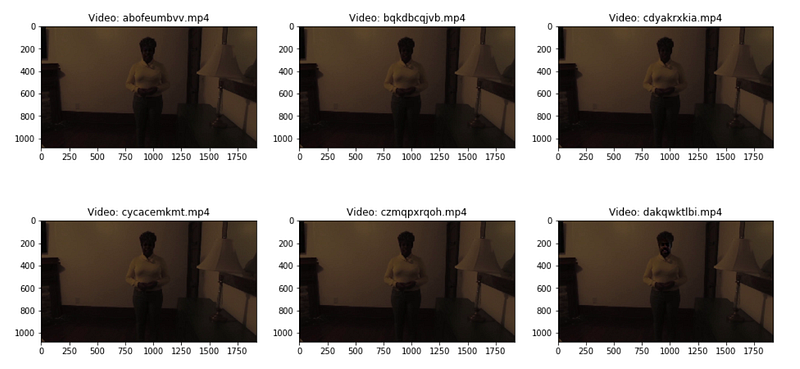
This Python code snippet is likely part of a larger deepfake detection system. It selects and displays images from a list of videos in a training dataset that are associated with the original video file named atvmxvwyns.mp4. The train_sample_metadata is presumably a DataFrame that contains metadata about training samples. The code filters this DataFrame to find all entries with the original column matching atvmxvwyns.mp4, gets the index of these entries, and stores them in a list. This list, same_original_fake_train_sample_video, is then passed to a function display_image_from_video_list, which presumably displays images from the videos in that list.
Test Video File
test_videos = pd.DataFrame(list(os.listdir(os.path.join(DATA_FOLDER, TEST_FOLDER))), columns=['video'])This line of Python code creates a pandas DataFrame called test_videos. It populates this DataFrame with the filenames of all the files in the directory specified by the path os.path.joinDATA_FOLDER, TEST_FOLDER. The filenames are listed in a single column named video. Essentially, this is used to prepare a list of video files presumably for further processing in a deepfake detection task.
test_videos.head()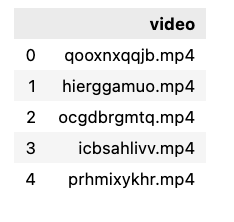
The Python code test_videos.head is likely calling the head method on a DataFrame named test_videos. This method, when used on a pandas DataFrame, returns the first few rows by default, the first five rows of the DataFrame for quick examination of the dataset. The context suggests that test_videos contains data related to test videos used in a deepfake detection task.
Let’s visualize now one of the videos.
display_image_from_video(os.path.join(DATA_FOLDER, TEST_FOLDER, test_videos.iloc[2].video))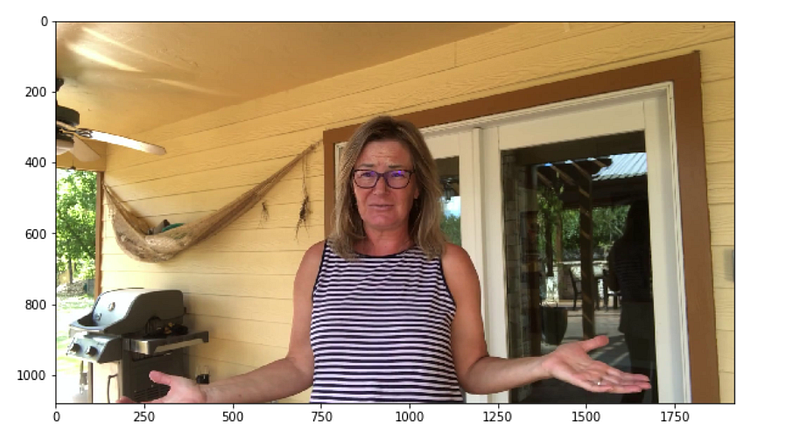
The given Python code snippet calls a function named display_image_from_video with a single argument that is a constructed file path. This function presumably displays an image extracted from a video. The file path is created using the os.path.join function, which combines DATA_FOLDER, TEST_FOLDER, and the filename of the third video iloc[2].video from the test_videos data structure. iloc[2] implies it is accessing the third item in test_videos using index-based selection. The DATA_FOLDER and TEST_FOLDER are variables that likely hold the names of directories, and test_videos.iloc[2].video suggests that test_videos is a pandas DataFrame or similar structure with a column video that contains the names of video files. The code is part of a deepfake detection system, so the function display_image_from_video is possibly used to show a frame from a video file for visual inspection or further processing in the context of identifying manipulated or synthetic media content.
Modelling
IMG_SIZE = 224
BATCH_SIZE = 64
EPOCHS = 10

MAX_SEQ_LENGTH = 20
NUM_FEATURES = 2048
The Python code snippet defines several constants that are likely used to configure a machine learning model or data processing for deepfake detection:
IMG_SIZE: The size height and width to which input images are to be resized, likely before being fed into a neural network. Images will be resized to 224x224 pixels.
BATCH_SIZE: The number of images or data samples to be processed at once during training or inference. The model will process 64 images per batch.
EPOCHS: The number of times the entire dataset is passed forward and backward through the neural network during training. The model will be trained for 10 complete passes of the dataset.
MAX_SEQ_LENGTH: Possibly the maximum number of frames, time steps, or sequence length to consider for each video or sample, depending on the context. It is likely used in sequence processing or time-series data, indicating 20 time steps per sequence.
NUM_FEATURES: The number of features to be extracted from each frame or part of the data, or the dimensionality of the feature vector. After processing, each sample will be represented by a feature vector with 2048 elements.
def crop_center_square(frame):
    y, x = frame.shape[0:2]
    min_dim = min(y, x)
    start_x = (x // 2) - (min_dim // 2)
    start_y = (y // 2) - (min_dim // 2)
    return frame[start_y : start_y + min_dim, start_x : start_x + min_dim]


def load_video(path, max_frames=0, resize=(IMG_SIZE, IMG_SIZE)):
    cap = cv2.VideoCapture(path)
    frames = []
    try:
        while True:
            ret, frame = cap.read()
            if not ret:
                break
            frame = crop_center_square(frame)
            frame = cv2.resize(frame, resize)
            frame = frame[:, :, [2, 1, 0]]
            frames.append(frame)

            if len(frames) == max_frames:
                break
    finally:
        cap.release()
    return np.array(frames)
This Python code defines two functions for processing video frames, typically used for deepfake detection:
crop_center_squareframe: Takes a single frame as input and crops it to a square shape by finding the smaller dimension of the frame, either width or height, then creating a new frame centered around the middle of the original one with dimensions equal to the smallest side.
load_videopath, max_frames=0, resize=IMG_SIZE, IMG_SIZE: Loads a video from the provided path up to a specified maximum number of frames max_frames. It captures frames one by one, crops each to a square using crop_center_square, resizes it to a specified size IMG_SIZE, IMG_SIZE, and then adjusts the color channels from BGR to RGB the order used by OpenCV to its reverse, which is commonly used in other libraries. The frames are collected into a list, converted to a NumPy array, and returned. The video capture is properly released after processing.
We can use a pre-trained network to extract meaningful features from the extracted frames. The Keras Applications module provides a number of state-of-the-art models pre-trained on the ImageNet-1k dataset. We will be using the InceptionV3 model for this purpose.
def build_feature_extractor():
    feature_extractor = keras.applications.InceptionV3(
        weights="imagenet",
        include_top=False,
        pooling="avg",
        input_shape=(IMG_SIZE, IMG_SIZE, 3),
    )
    preprocess_input = keras.applications.inception_v3.preprocess_input

    inputs = keras.Input((IMG_SIZE, IMG_SIZE, 3))
    preprocessed = preprocess_input(inputs)

    outputs = feature_extractor(preprocessed)
    return keras.Model(inputs, outputs, name="feature_extractor")


feature_extractor = build_feature_extractor()
This Python code defines a function build_feature_extractor that creates a feature extractor model using the InceptionV3 architecture pre-trained on the ImageNet dataset. The model is adapted to use average pooling and is set up to process input images of size IMG_SIZE, IMG_SIZE, 3, where IMG_SIZE is a predefined constant representing the height and width of the images, and 3 is the number of color channels RGB. The feature extractor excludes the top final classification layer of the InceptionV3 network, making it suitable for feature extraction rather than end-to-end classification. The preprocess_input function is applied to the input data to prepare it for being fed into the InceptionV3 model following the same preprocessing steps that were used for the ImageNet data. Outputs from the feature extractor are the result of the average pooling layer. Once defined, the function build_feature_extractor is called to instantiate the actual feature extractor model, which can be used in subsequent deepfake detection tasks to convert input images into feature vectors.
Finally, we can put all the pieces together to create our data processing utility.
def prepare_all_videos(df, root_dir):
    num_samples = len(df)
    video_paths = list(df.index)
    labels = df["label"].values
    labels = np.array(labels=='FAKE').astype(np.int)

    # `frame_masks` and `frame_features` are what we will feed to our sequence model.
    # `frame_masks` will contain a bunch of booleans denoting if a timestep is
    # masked with padding or not.
    frame_masks = np.zeros(shape=(num_samples, MAX_SEQ_LENGTH), dtype="bool")
    frame_features = np.zeros(
        shape=(num_samples, MAX_SEQ_LENGTH, NUM_FEATURES), dtype="float32"
    )

    # For each video.
    for idx, path in enumerate(video_paths):
        # Gather all its frames and add a batch dimension.
        frames = load_video(os.path.join(root_dir, path))
        frames = frames[None, ...]

        # Initialize placeholders to store the masks and features of the current video.
        temp_frame_mask = np.zeros(shape=(1, MAX_SEQ_LENGTH,), dtype="bool")
        temp_frame_features = np.zeros(
            shape=(1, MAX_SEQ_LENGTH, NUM_FEATURES), dtype="float32"
        )

        # Extract features from the frames of the current video.
        for i, batch in enumerate(frames):
            video_length = batch.shape[0]
            length = min(MAX_SEQ_LENGTH, video_length)
            for j in range(length):
                temp_frame_features[i, j, :] = feature_extractor.predict(
                    batch[None, j, :]
                )
            temp_frame_mask[i, :length] = 1  # 1 = not masked, 0 = masked

        frame_features[idx,] = temp_frame_features.squeeze()
        frame_masks[idx,] = temp_frame_mask.squeeze()

    return (frame_features, frame_masks), labels
The provided Python code defines a function prepare_all_videos that processes a set of videos for deepfake detection. It takes two arguments: df, a DataFrame containing video metadata with labels, and root_dir, the directory containing the video files. Heres what the function does:
It reads video paths and labels from the dataframe df and converts the FAKE labels to binary.
It initializes two arrays frame_masks and frame_features to store boolean masks indicating the presence of video frames and to store extracted features from the videos, respectively.
It iterates over each video, loading its frames and extracting features from each frame up to a defined MAX_SEQ_LENGTH, ensuring that videos with more frames are truncated, and shorter ones are padded.
It uses a feature_extractor to predict features from each frame, storing these features and masks in the pre-initialized arrays.
Finally, it returns these arrays frame_features and frame_masks along with the binary labels indicating if a video is FAKE or not. This data will likely be used as input for a sequence model for deepfake detection.
Since we don’t have test labels we split the training data to find its performance in unseen data
from sklearn.model_selection import train_test_split

Train_set, Test_set = train_test_split(train_sample_metadata,test_size=0.1,random_state=42,stratify=train_sample_metadata['label'])

print(Train_set.shape, Test_set.shape )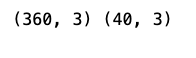
This Python code snippet splits a dataset into a training set and a test set. The train_sample_metadata is the data being split, and the split ratio is such that 10% of the data is allocated to the test set test_size=0.1 and the rest to the training set. The split is done in a stratified manner ensuring that the proportion of the different classes labels is maintained in both the training and test sets stratify=train_sample_metadata[label]. The random state is set to 42 for reproducibility of the split. Lastly, it prints out the shapes number of samples and features of the training and test sets after the split.
frame_features_input = keras.Input((MAX_SEQ_LENGTH, NUM_FEATURES))
mask_input = keras.Input((MAX_SEQ_LENGTH,), dtype="bool")

# Refer to the following tutorial to understand the significance of using `mask`:
# https://keras.io/api/layers/recurrent_layers/gru/
x = keras.layers.GRU(16, return_sequences=True)(
    frame_features_input, mask=mask_input
)
x = keras.layers.GRU(8)(x)
x = keras.layers.Dropout(0.4)(x)
x = keras.layers.Dense(8, activation="relu")(x)
output = keras.layers.Dense(1, activation="sigmoid")(x)

model = keras.Model([frame_features_input, mask_input], output)

model.compile(loss="binary_crossentropy", optimizer="adam", metrics=["accuracy"])
model.summary()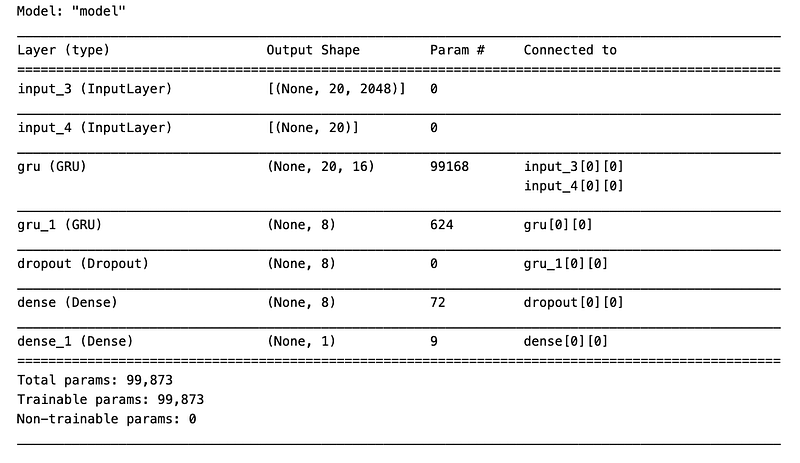
This Python code defines a sequential model using Keras API for detecting deepfakes by analyzing sequences of frame features. It constructs a model with two GRU Gated Recurrent Unit layers to process temporal data across frames, utilizes a dropout layer to prevent overfitting, and employs dense layers with ReLU and sigmoid activations for classification. The model uses a binary crossentropy loss function, the Adam optimizer, and measures accuracy. The use of a mask allows the GRU to handle varying sequence lengths by ignoring certain time steps. The model is summarized to display its architecture.
checkpoint = keras.callbacks.ModelCheckpoint('./', save_weights_only=True, save_best_only=True)
history = model.fit(
        [train_data[0], train_data[1]],
        train_labels,
        validation_data=([test_data[0], test_data[1]],test_labels),
        callbacks=[checkpoint],
        epochs=EPOCHS,
        batch_size=8
    )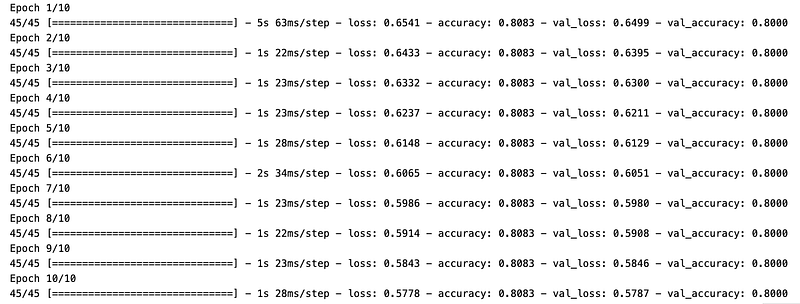
This Python code snippet is configuring and running the training process for a machine learning model using the Keras library, with the purpose of deepfake detection. It sets up a callback to save the models weights only not the full model at the path ./ whenever it achieves the best performance on the validation set denoted by save_best_only=True. Then, it starts training the model model.fit using a set of training input data train_data and labels train_labels, validating against a separate test dataset test_data, test_labels. It uses the specified callback to save the model weights during the training process, runs for a predefined number of epochs EPOCHS, and processes the data in batches of 8 examples.
def prepare_single_video(frames):
    frames = frames[None, ...]
    frame_mask = np.zeros(shape=(1, MAX_SEQ_LENGTH,), dtype="bool")
    frame_features = np.zeros(shape=(1, MAX_SEQ_LENGTH, NUM_FEATURES), dtype="float32")

    for i, batch in enumerate(frames):
        video_length = batch.shape[0]
        length = min(MAX_SEQ_LENGTH, video_length)
        for j in range(length):
            frame_features[i, j, :] = feature_extractor.predict(batch[None, j, :])
        frame_mask[i, :length] = 1  # 1 = not masked, 0 = masked

    return frame_features, frame_mask

def sequence_prediction(path):
    frames = load_video(os.path.join(DATA_FOLDER, TEST_FOLDER,path))
    frame_features, frame_mask = prepare_single_video(frames)
    return model.predict([frame_features, frame_mask])[0]

# This utility is for visualization.
# Referenced from:
# https://www.tensorflow.org/hub/tutorials/action_recognition_with_tf_hub
def to_gif(images):
    converted_images = images.astype(np.uint8)
    imageio.mimsave("animation.gif", converted_images, fps=10)
    return embed.embed_file("animation.gif")


test_video = np.random.choice(test_videos["video"].values.tolist())
print(f"Test video path: {test_video}")

if(sequence_prediction(test_video)>=0.5):
    print(f'The predicted class of the video is FAKE')
else:
    print(f'The predicted class of the video is REAL')

play_video(test_video,TEST_FOLDER)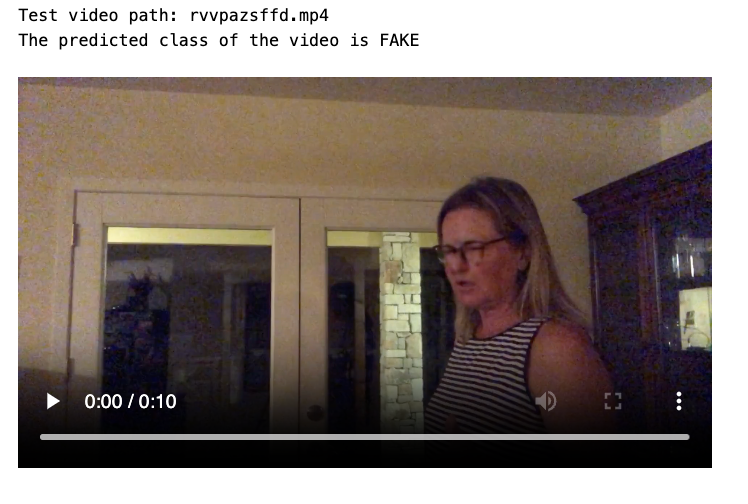
The provided Python code is designed to predict whether a video is fake or real, as part of a deepfake detection system. Heres a brief breakdown of its functionality:
prepare_single_videoframes: This function prepares the video frames for prediction. It initializes frame masks and feature arrays. It then extracts features from each frame using a pre-defined feature_extractor up to a max sequence length MAX_SEQ_LENGTH, and updates the masks accordingly.
sequence_predictionpath: This function loads a video from a given path, processes it using prepare_single_video, and then passes the processed frame features and mask to a models predict method to get the prediction.
to_gifimages: This utility function converts a sequence of images into a GIF file for visualization.
The last part of the code performs the actual deepfake detection. It selects a test video at random, uses the sequence_prediction function to predict whether its fake or real, prints out the prediction, and plays the video. If the prediction probability for the video being fake is 0.5 or higher, its classified as FAKE; otherwise, its classified as REAL.
Conclusion
The deep fake image classifier and deep fake video classifier model gave a generalisation error of around 80%


