
Debian: Fully Encrypted + Testing With Oracle VirtualBox
How-To Protect Your Data, The Fun Way!
Here’s a guide to help you install Debian with full hard drive encryption.
This setup is useful in the case of losing your laptop, as the device is locked and scrambled while turned off.
Other cases could include to protect your device from being turned on remotely without your knowledge, or deterring nosy family members and roommates from snooping while you’re away.
Warning : forgetting the initial passphrase means losing full access to your device. No data recovery can be made without it.
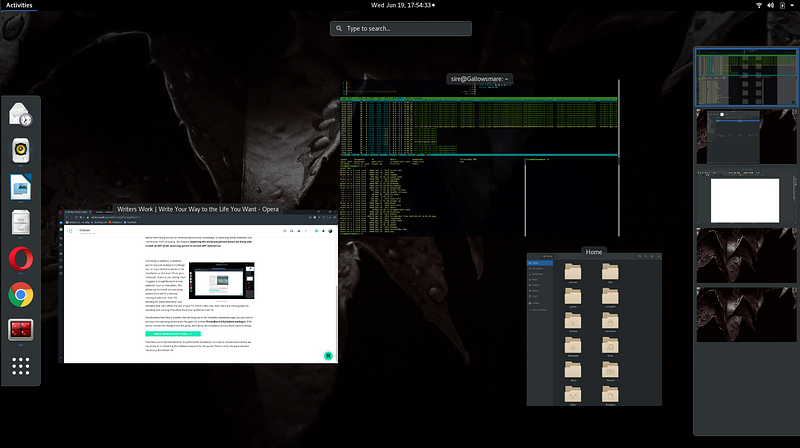
Debian Linux and VirtualBox by Oracle
First to address, is whether you’re now just looking to try things out, or if you intend to perform the installation as the main OS of your computer.
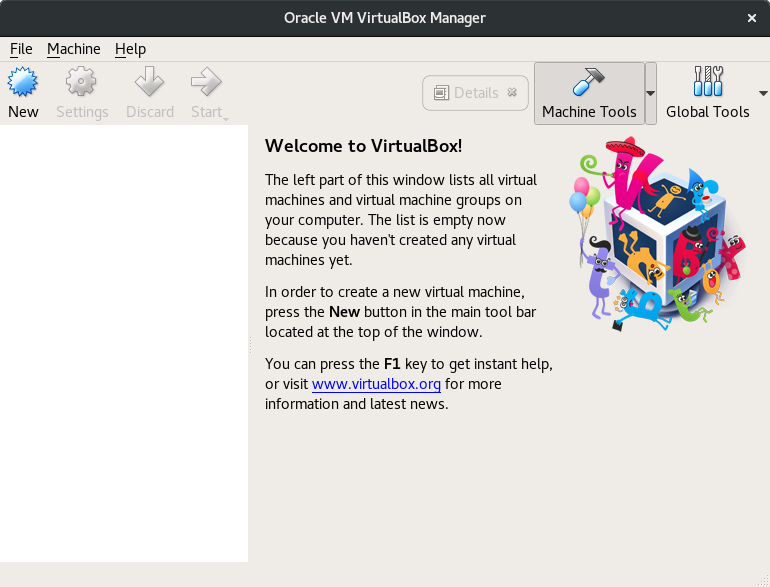
If just testing, then it is recommended to use a virtual platform, such as VirtualBox by Oracle.
This allows you to install any full OS from within a window running on your main OS. This allows for experimentation and mistakes without affecting the rest of your PC.
If going to install Debian with full encryption directly onto your PC, then you can skip to the next section, entitled Downloading Debian. Otherwise, here are the links you need to install VirtualBox:
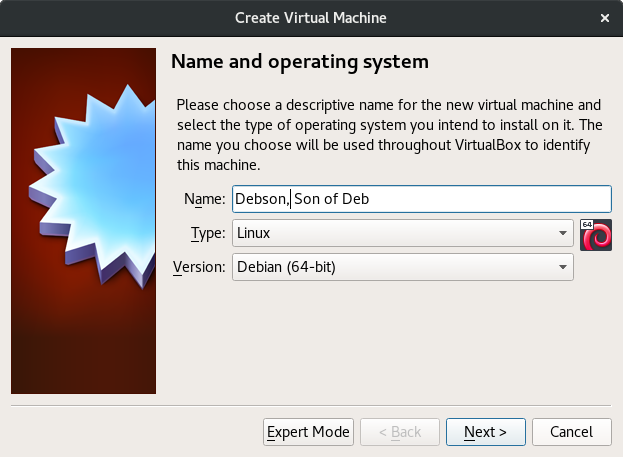
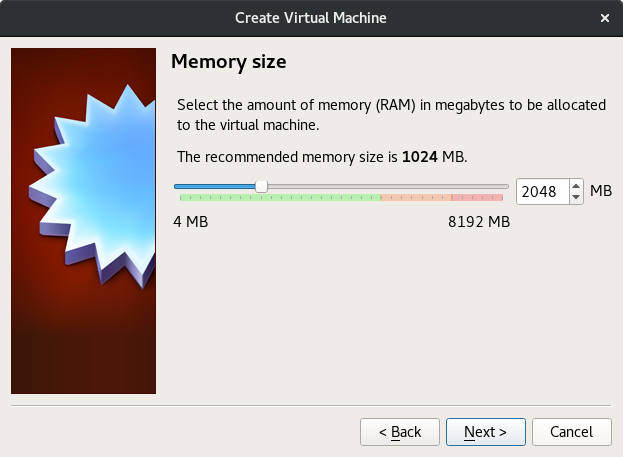
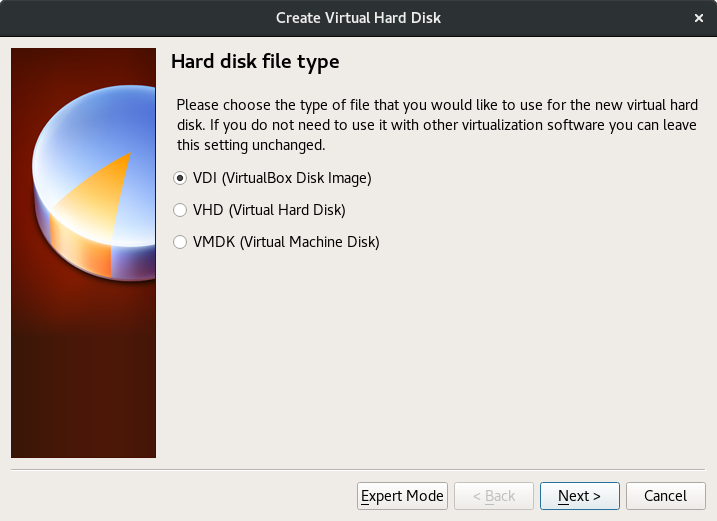
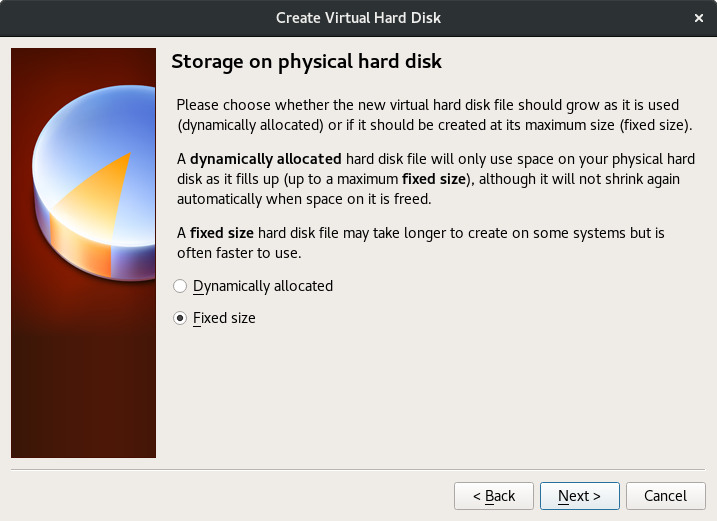
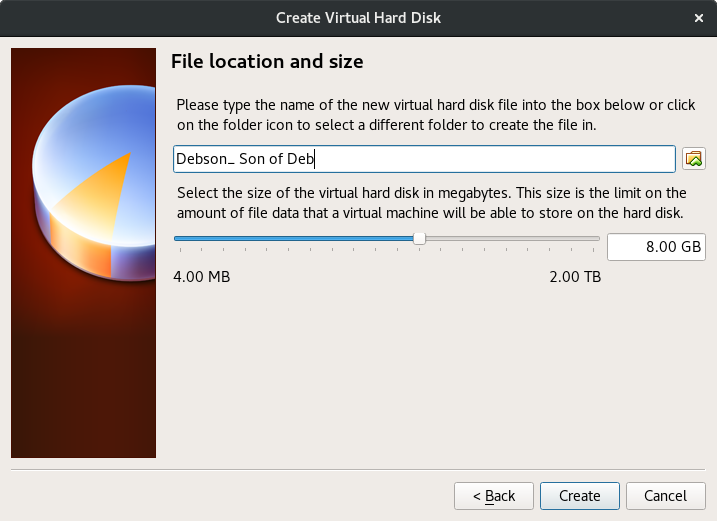
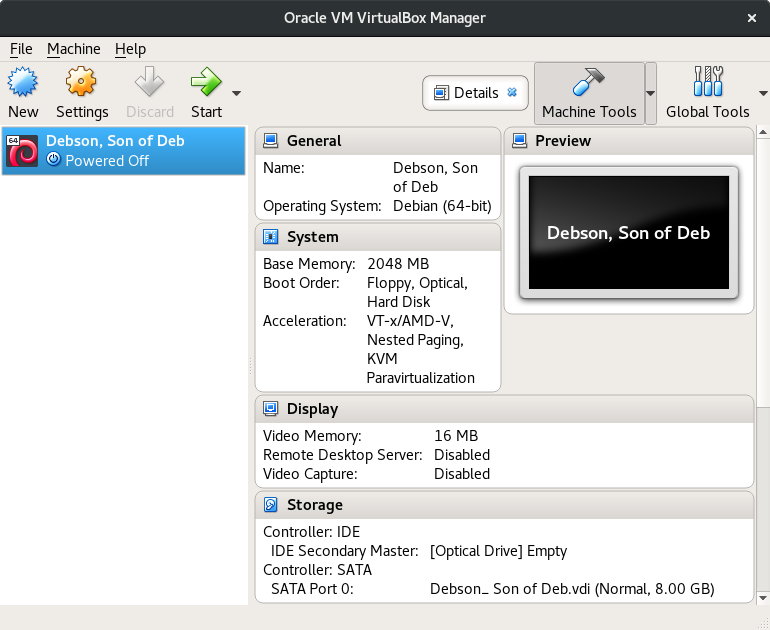
And here I’ll add a little tutorial for setting up your first Virtual Machine (notes in the captions):

Now that you’ve decided whether to perform the installation in a real or virtual environment, we can move on to obtaining the the Debian OS.
Downloading Debian
32-bit or 64-bit?
Debian can be downloaded directly from their website, then installed over the media of your choice. For the purpose of this guide, we will use a network installation image downloaded onto a USB stick.
This will require an internet connection during the installation process.
Most commonly your modern computer will be running on a 64-bit architecture, and so you would want to download the amd64 image.
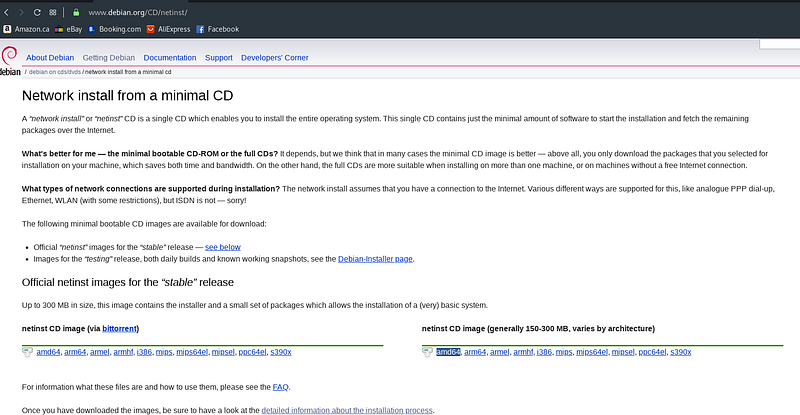
For computers manufactured after 2009, it is most probable to have a 64-bit system architecture.
But in case you own an older system and want to be sure, here is a reliable guide to find out whether you are running on 32-bit or 64-bit:
If you happen to be running on a 32-bit machine, then opt for the disk image named i386.
The download page also provides you with additional guides and documentation if you would like to explore further options. But if this is all new to you, then I would recommend for now to stick to this tutorial.
Setting Up Your Installation Disk Image
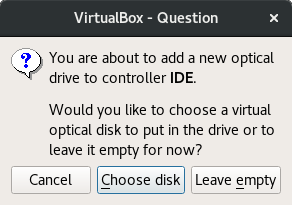
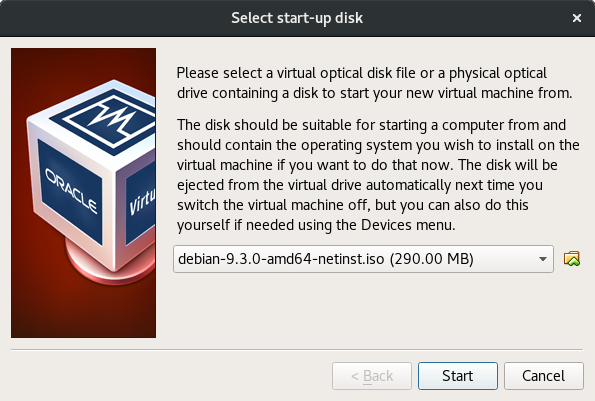
For a virtual installation, VirtualBox allows for the installation image to be applied directly to the Virtual Machine, no USB needed:


You could burn the installer image to a blank CD, but chances are your modern device is without a disk drive, and so you would need a USB.
Fortunately, there are good programs for creating bootable USBs.
You’ll need to reboot the PC with the USB plugged in, and let the USB take over for the currently installed OS.
A proper (cross-platform) program for this purpose is UNetbootin. The following button will give you everything you need to turn your USB into a bootable drive containing your new OS.
Also, make sure your USB stick has enough space to support the entire installation image.
Being 2021, this isn’t likely to be an issue, as the amd64 network installation images fall under half of 1Gb, and today most drives are released with a minimum of 8Gb.
Installing Debian With Full Disk Encryption
Alright! We have everything set up so all there is left to do is install Debian with full disk encryption, more properly referred to as Debian with Encrypted LVM.
This isn’t vital information, but the “LVM” stands for “Logical Volume Manager”, and it symbolizes the layer between the hard disk and the soft partitions of the drive. It creates a locked portion which will contain your OS and all your data.
I reproduced this installation within a Virtual Machine, but the following steps equally apply to a regular installation. Now let us begin!
From the main VirtualBox window, with your new VM selected, click on the ‘Start’ button with the green arrow, and we get this following window pop up:
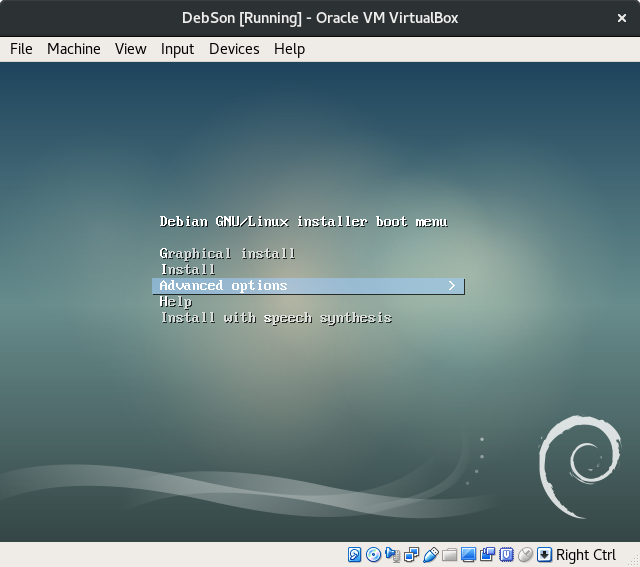
We’re going to perform an advanced installation. We’ll be using the arrow keys, the space bar and Enter key throughout this process.
Select ‘Advanced options’.
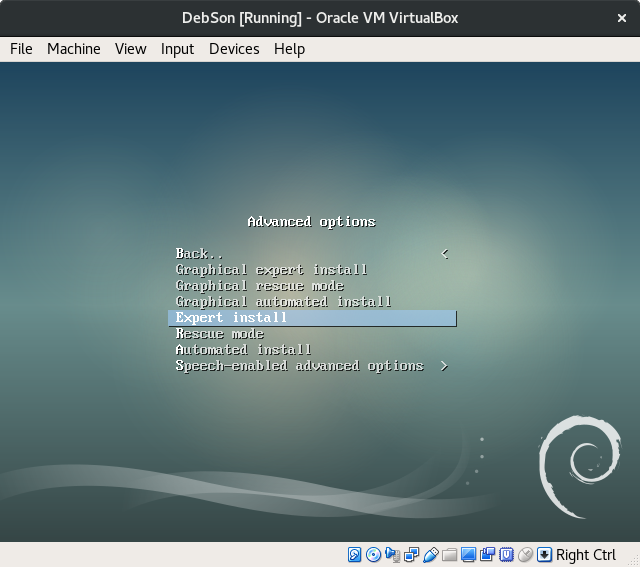
“Graphical expert install” was a new option with the latest update at the time I created this tutorial, but for now I decided to stick to what I know works.
Click on ‘Expert install’.
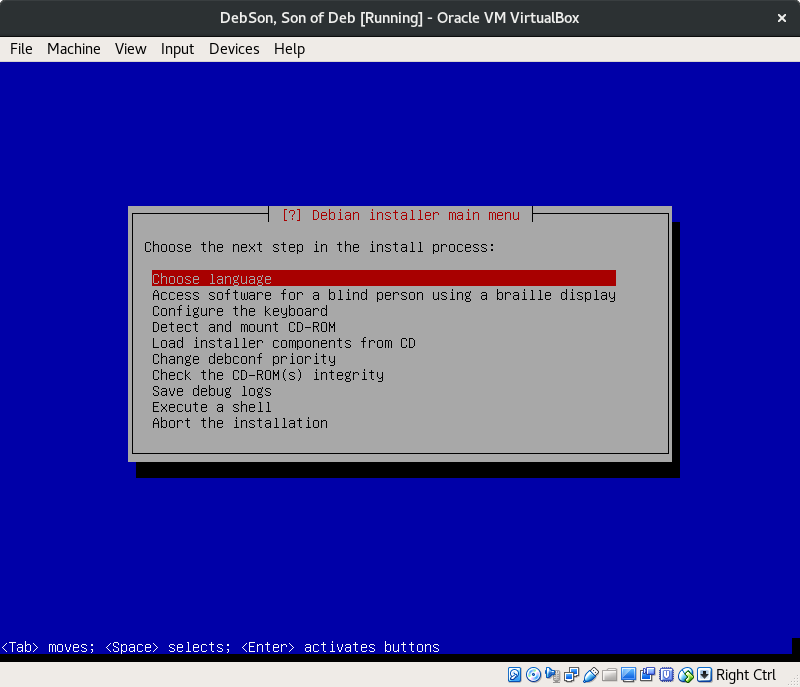
From this point forward, this will become a familiar screen.
To be clear, not all Debian or Linux installations are so much work! But we have a specific aim, and we aim to do it right.
Choose language.
‘Enter’.
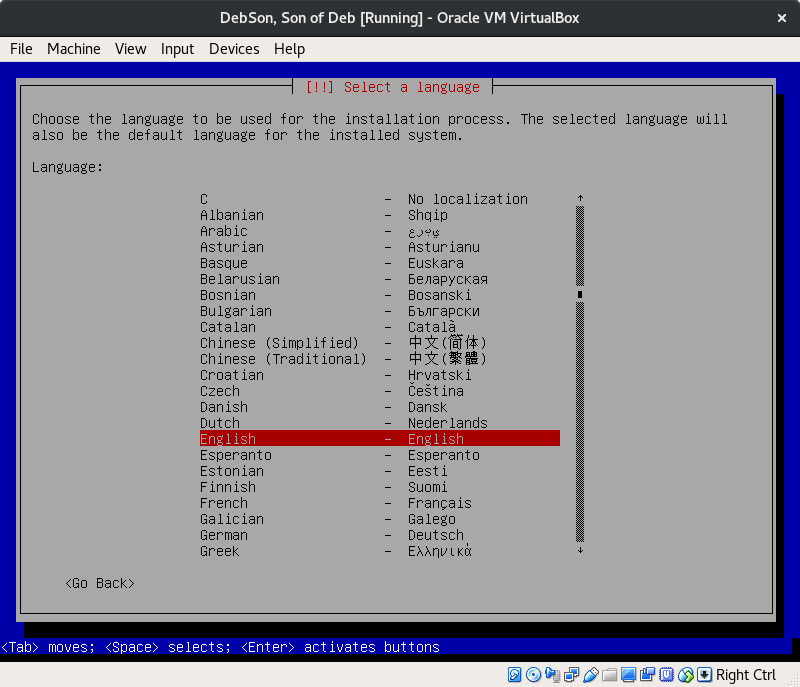
Choose your language.
‘Enter’.
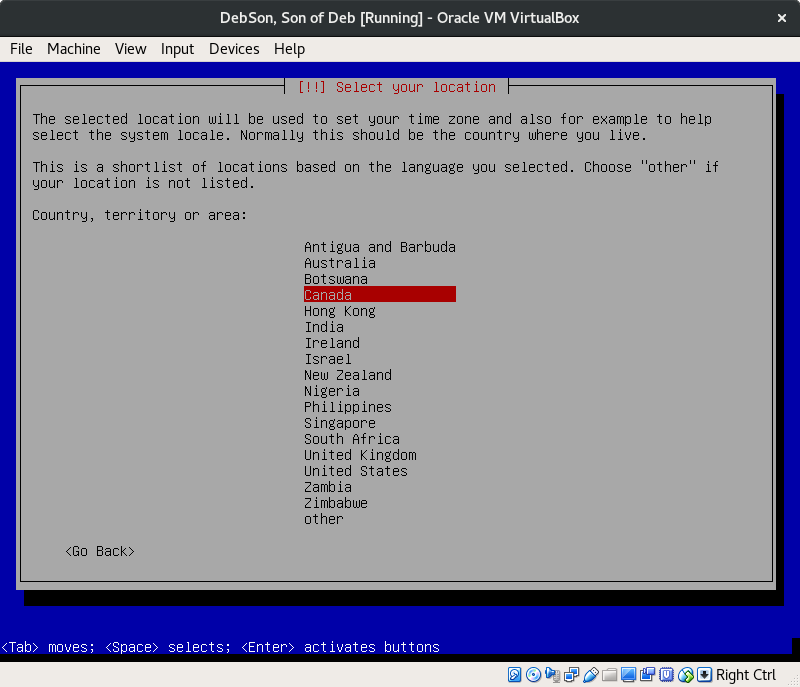
Choose your country.
‘Enter’.
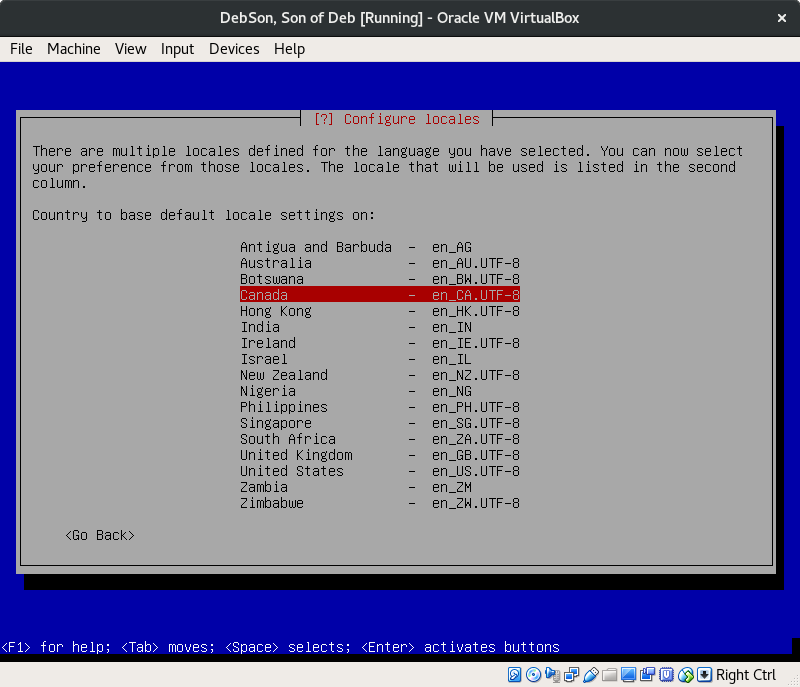
Choose once more your country.
‘Enter’.
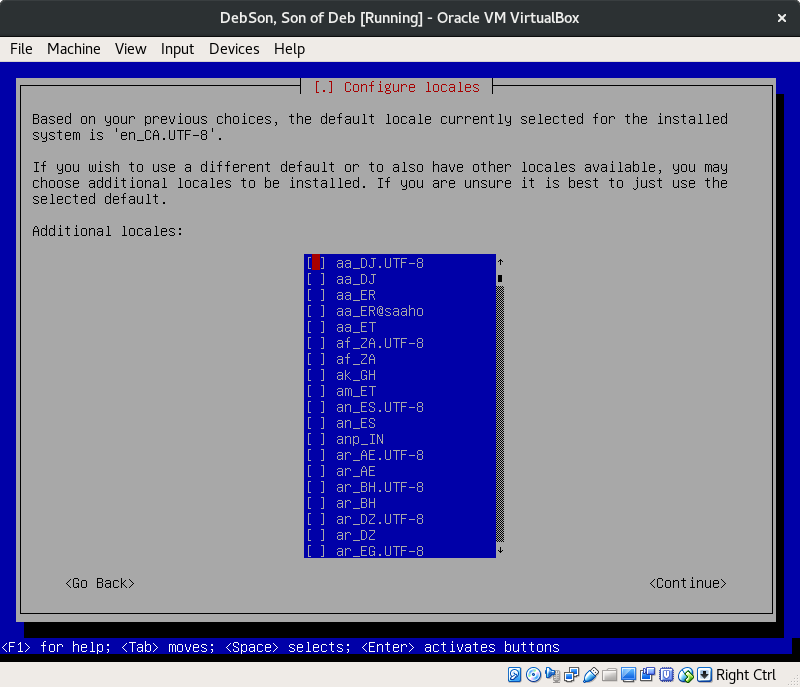
This page will give you the chance to choose additional options, but keep the default setting.
And continue.
‘Enter’.
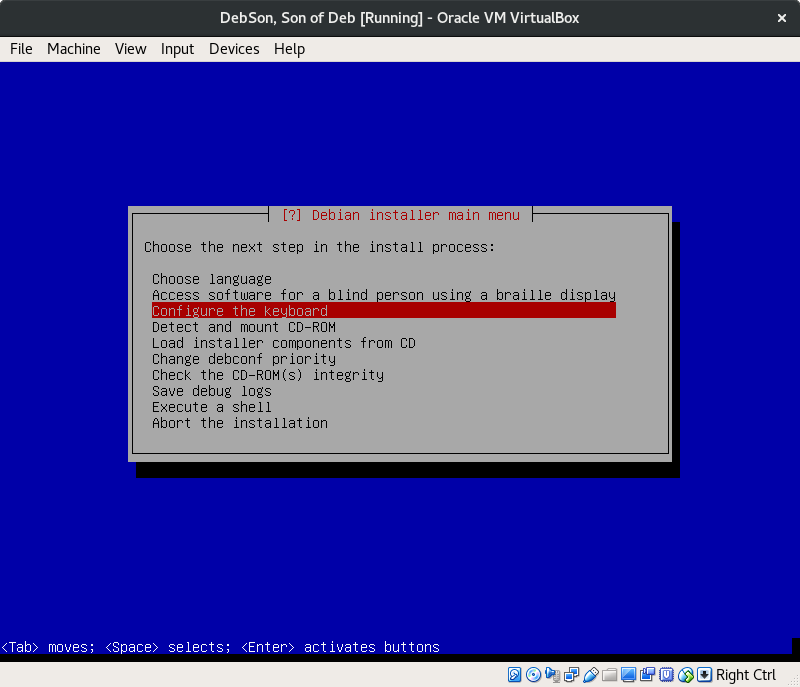
‘Enter’.
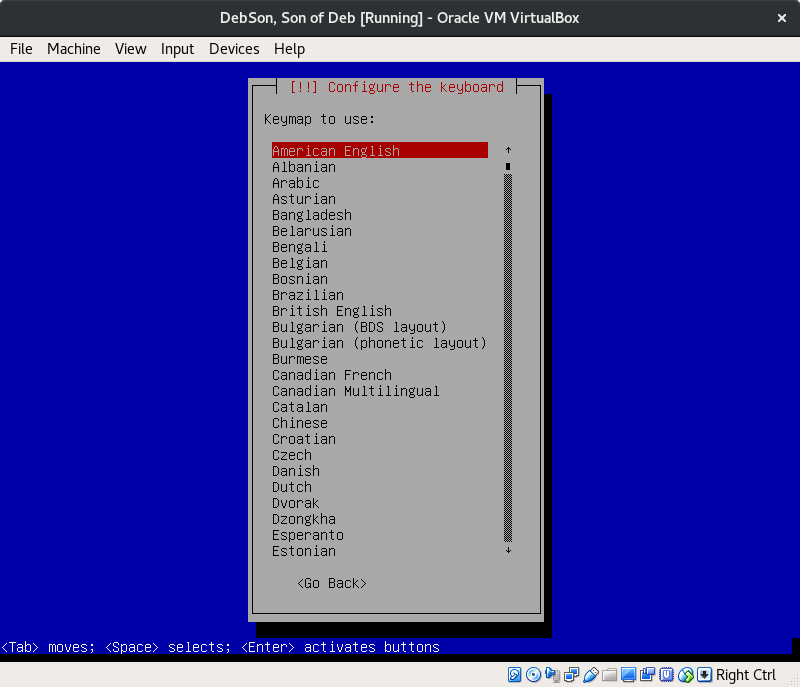
Choose your keymap.
‘Enter’.
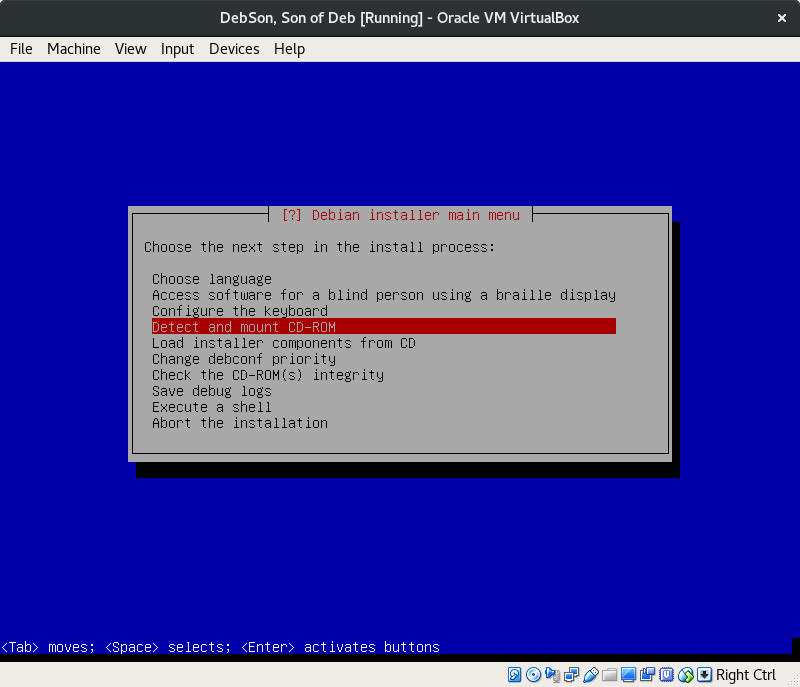
This step doesn’t necessarily look for a CD-ROM, but for whichever media is being used for the installation.
‘Enter’.
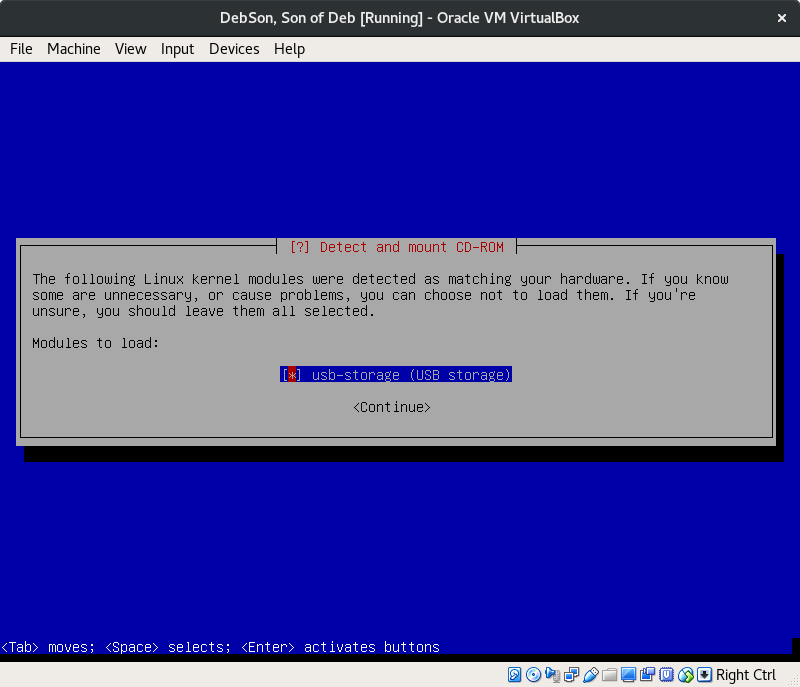
Keep the default as is. Continue.
‘Enter.’
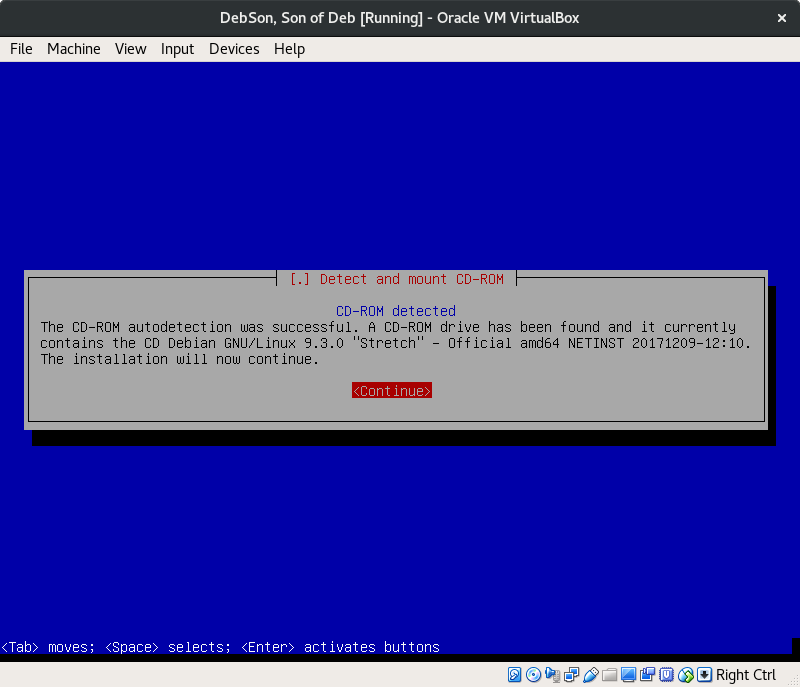
Continue.
‘Enter’.
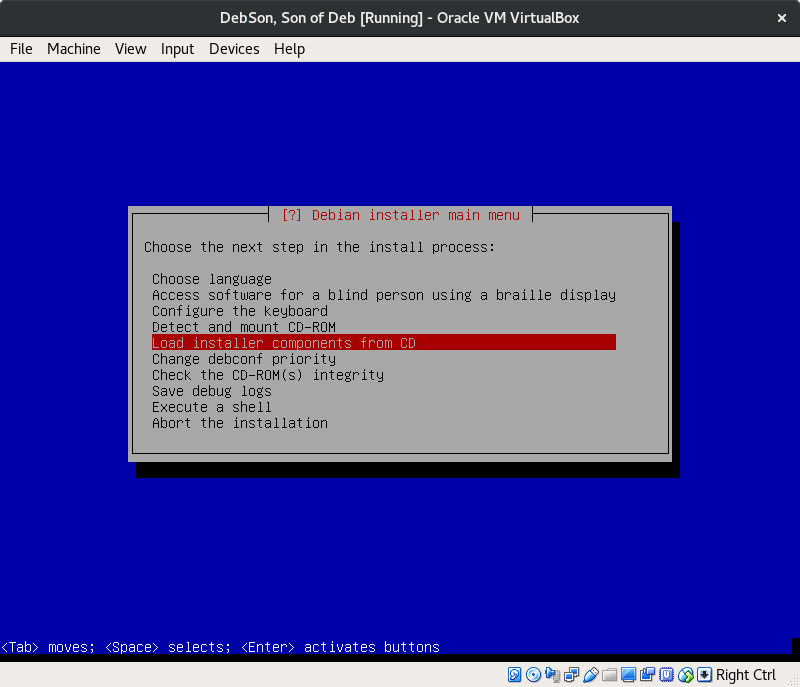
This is going to extract all the fundamental data needed to continue this installation.
‘Enter’.
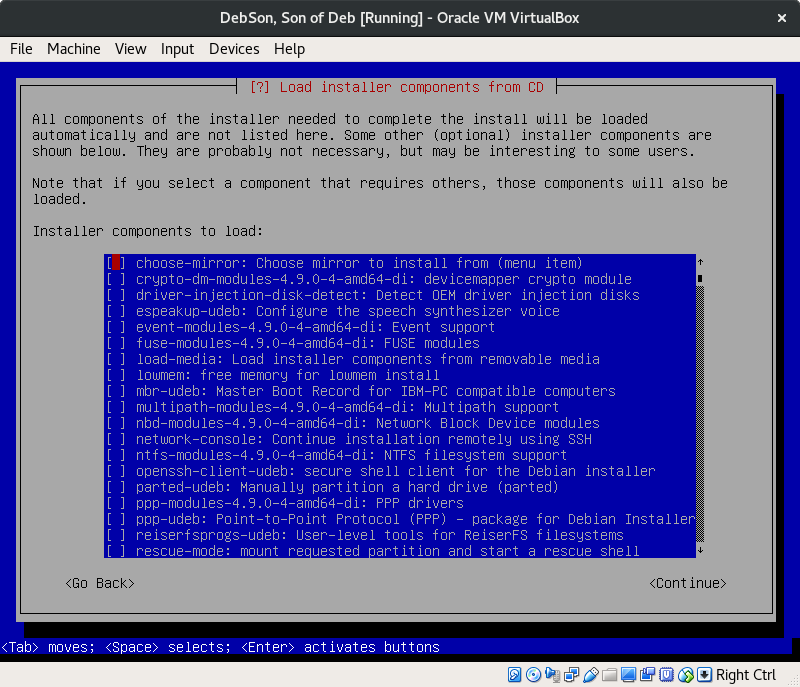
Nothing to do here, just keep it moving! Continue.
‘Enter’.
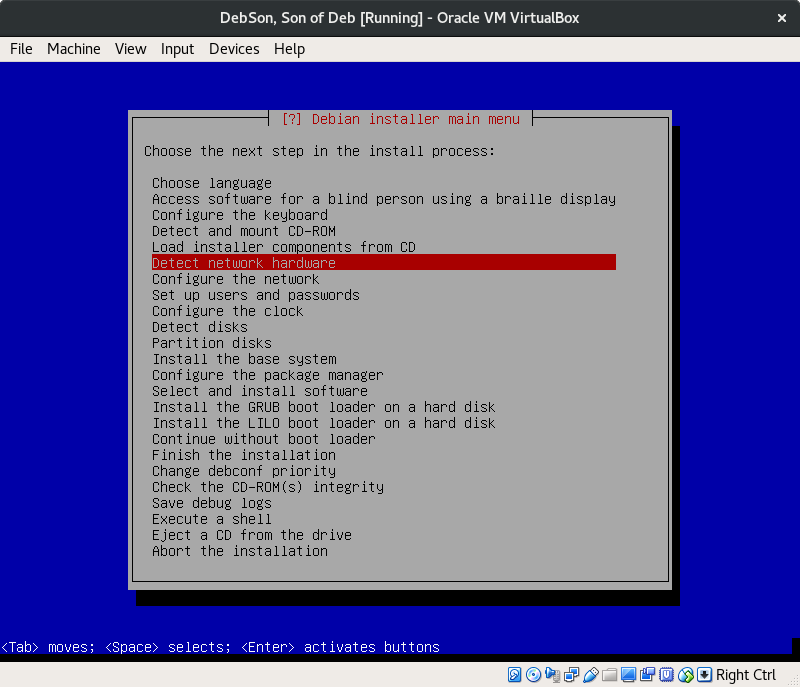
Don’t worry about the new options that just popped up. Let’s detect the network.
‘Enter’.
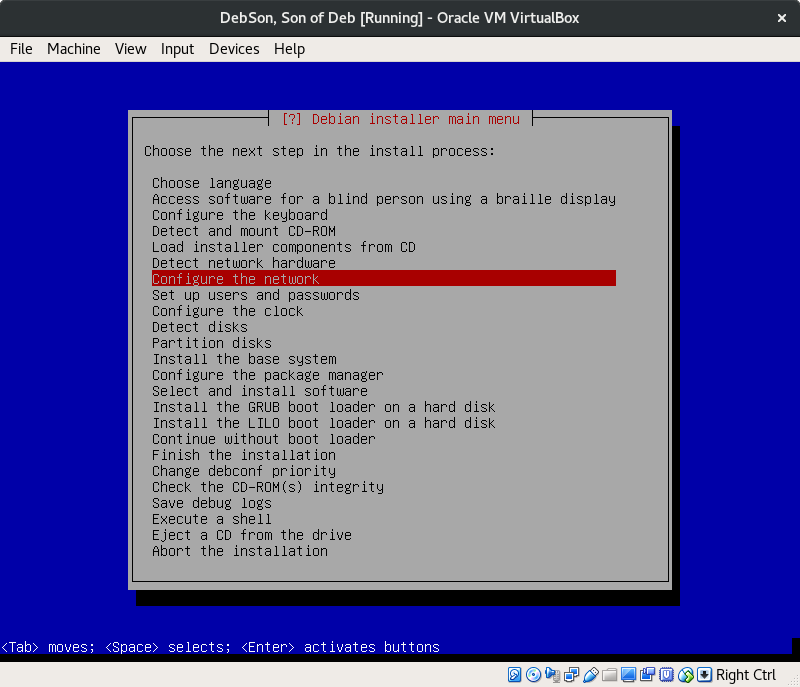
Configure the network.
‘Enter’.
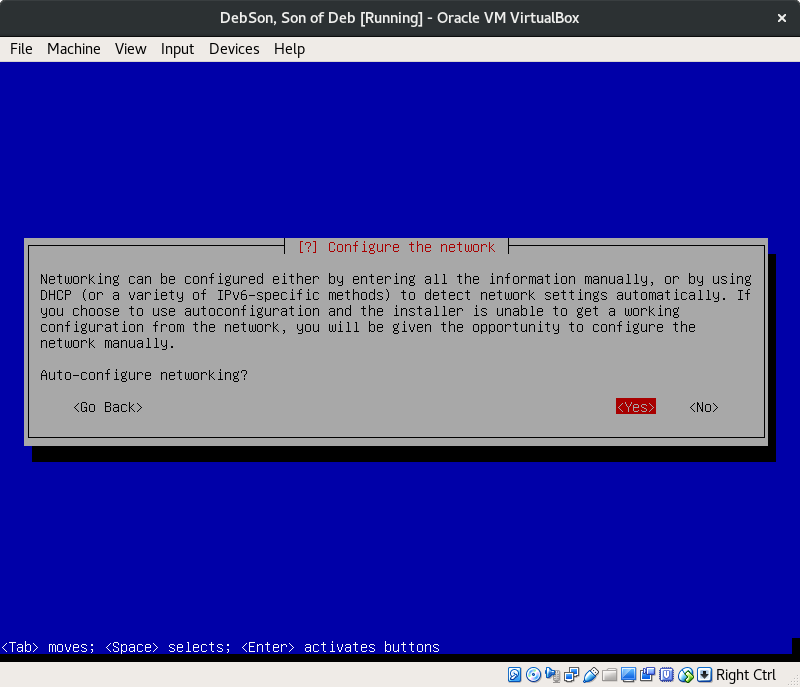
You could enter in your network details manually. But it shouldn’t be an issue. Autoconfigure is fine.
‘Yes’.
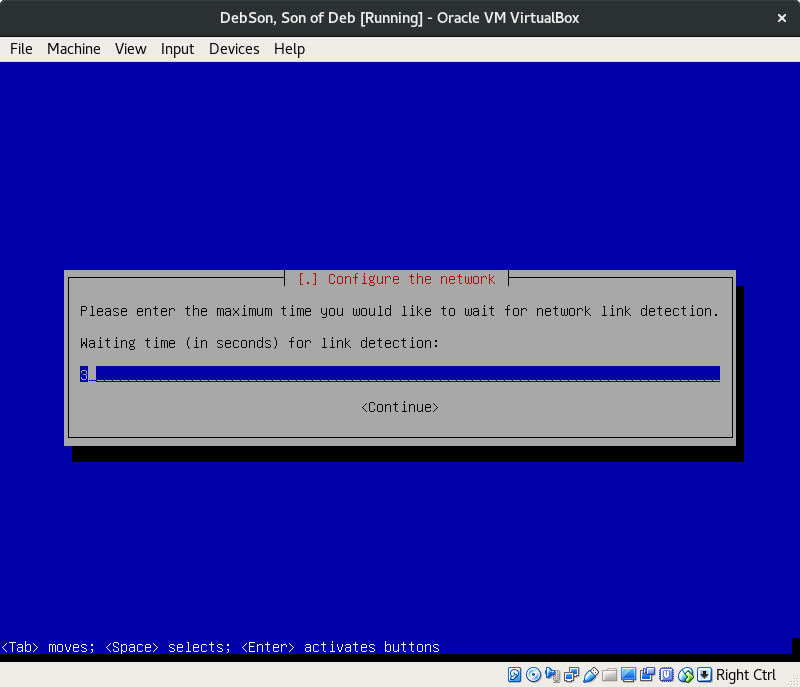
‘Continue’.
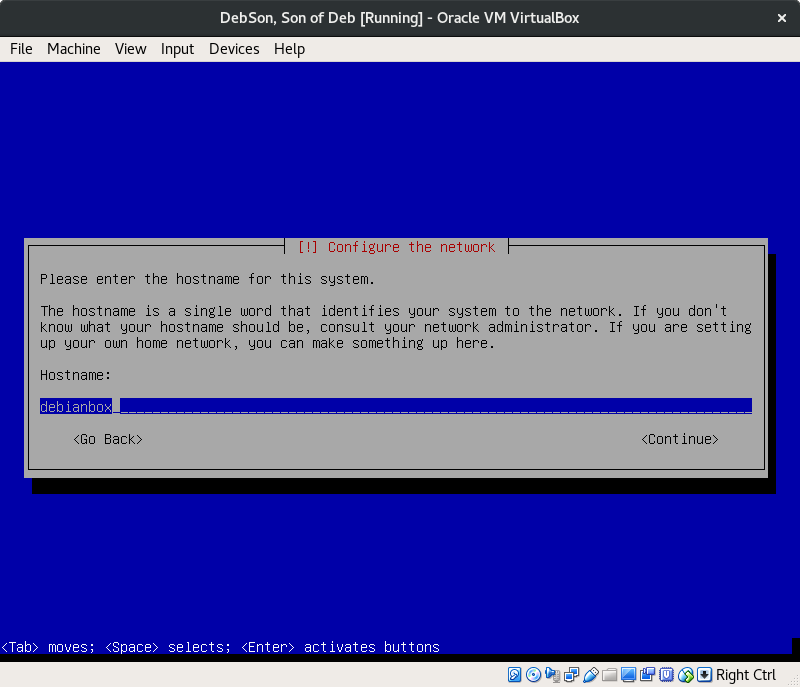
I’d say avoid using your own name. This is how your device shows up on the network. Continue.
‘Enter’.
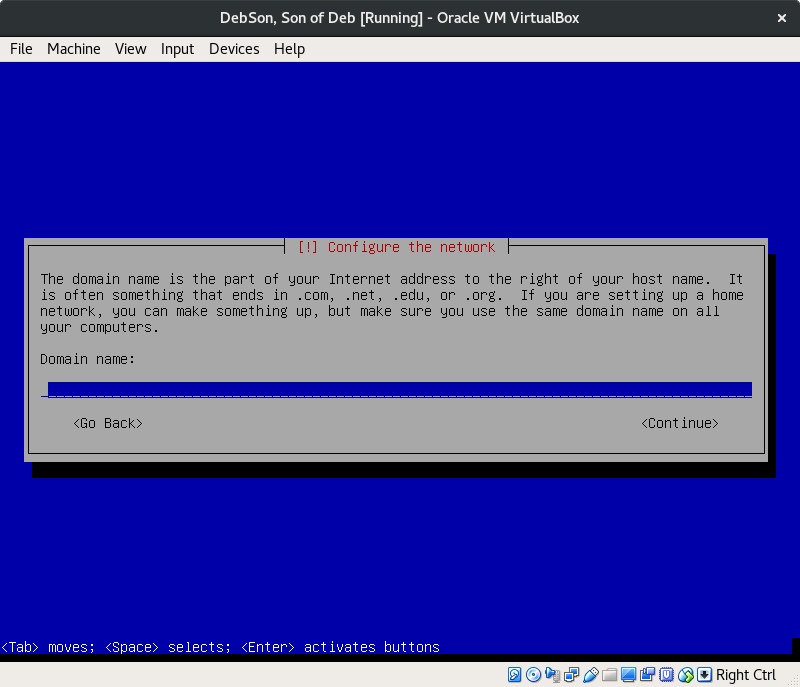
You’re most likely following this process on a home computer, anything goes.
‘Continue’.
‘Enter’.
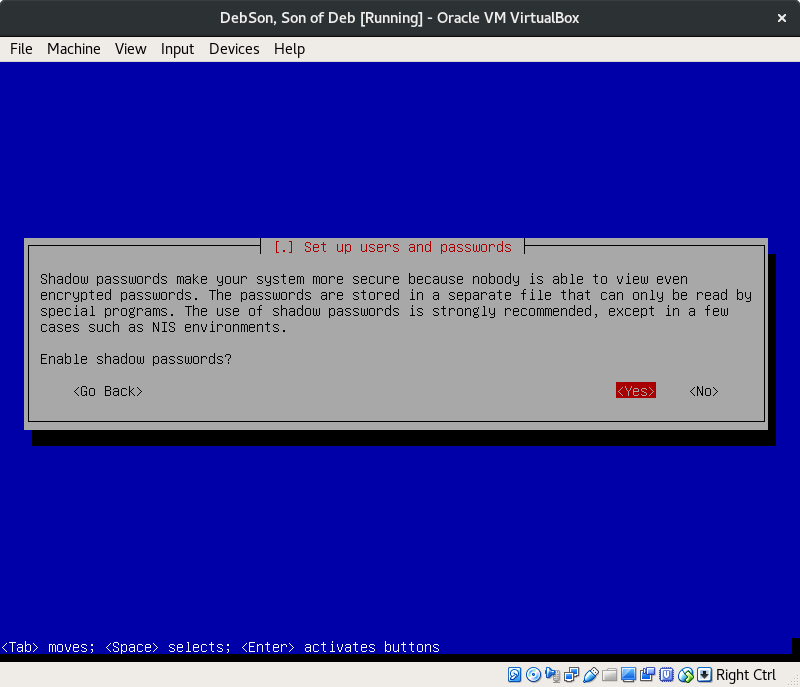
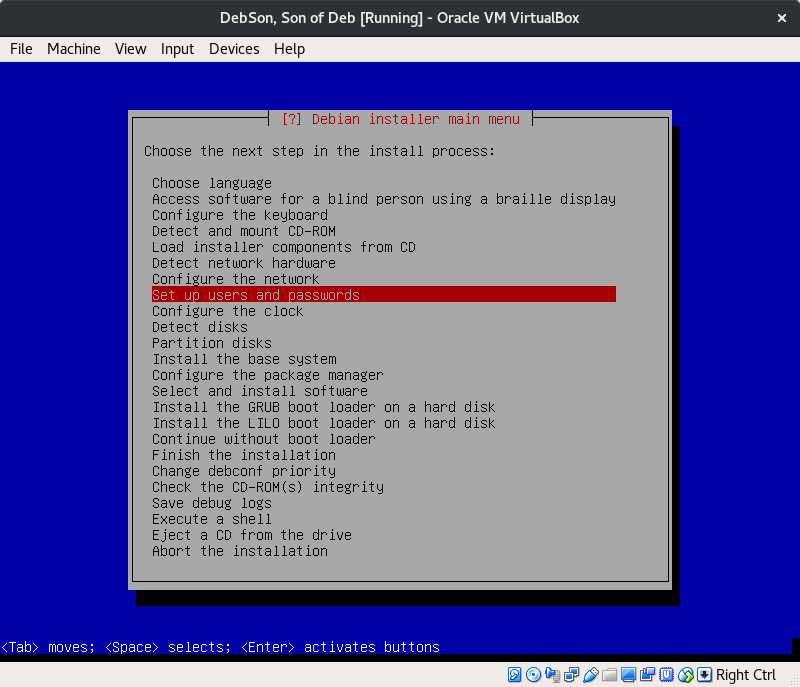
Do enable shadow passwords for greater security.
‘Yes’.
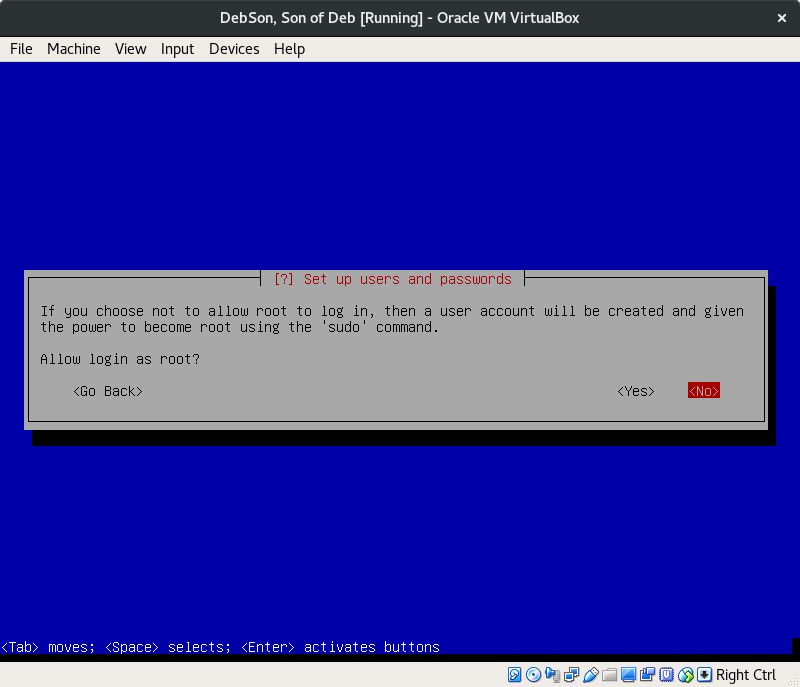
Logging in as root can be dangerous business. Don’t do it!
‘No’.
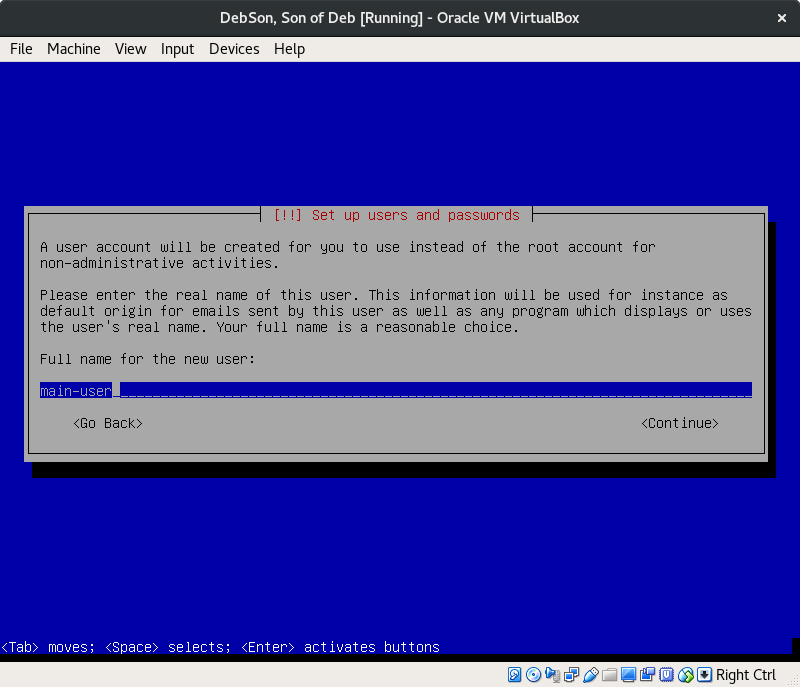
I recommend you make it up.
‘Continue’.
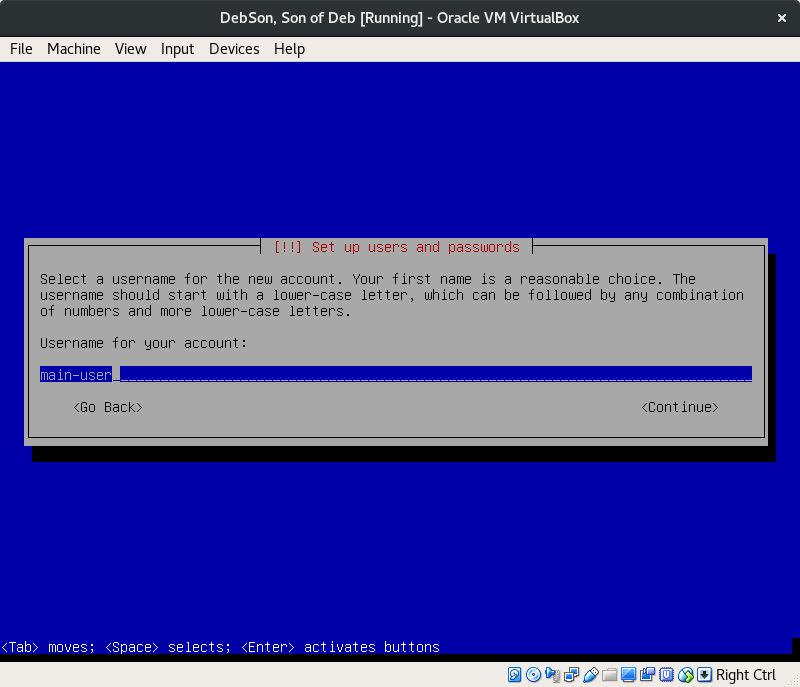
Your username for login purposes.
‘Continue’.
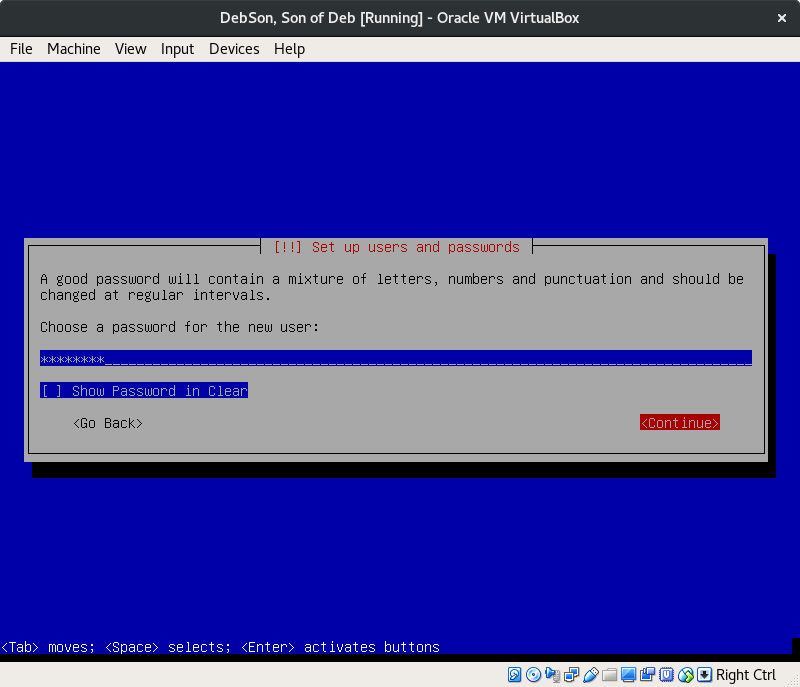
For something both memorable and hard to crack, I recommend a passphrase.
Letters of lower and upper case, numbers, and symbols are accepted. Nothing under 12 characters.
‘Continue’.
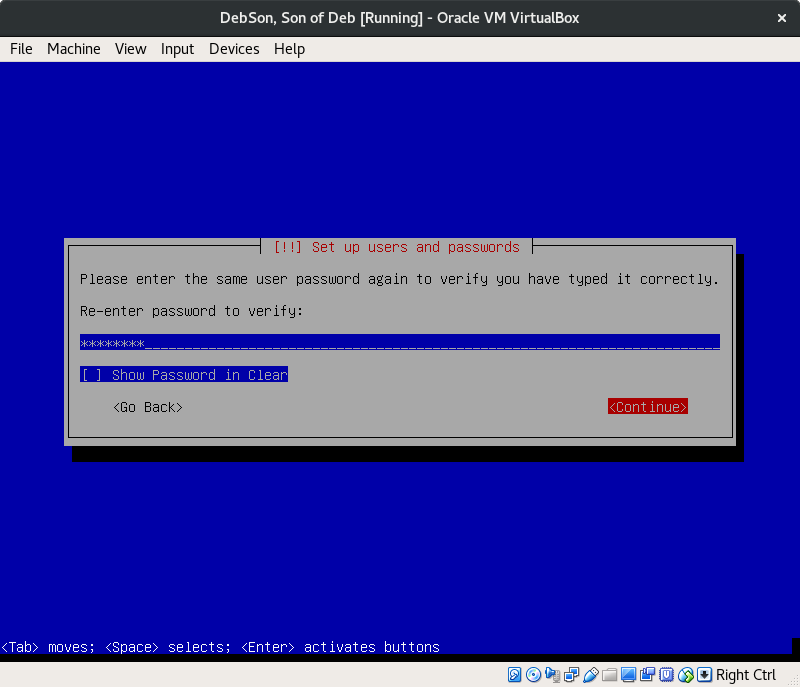
And ‘Continue’.
‘Enter’.
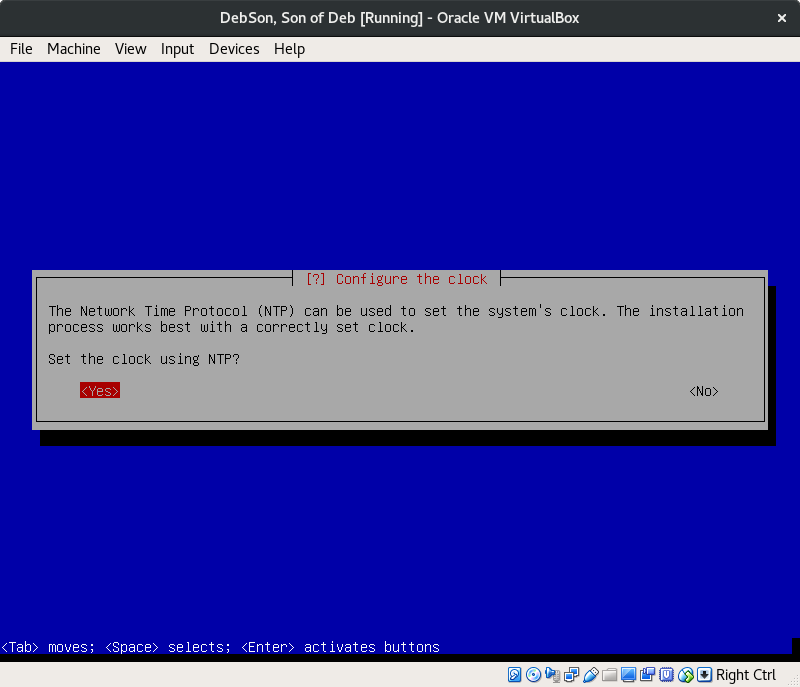
Do it, unless you have a reason to set your own time. You can also fix the time in Settings later.
‘Yes’.
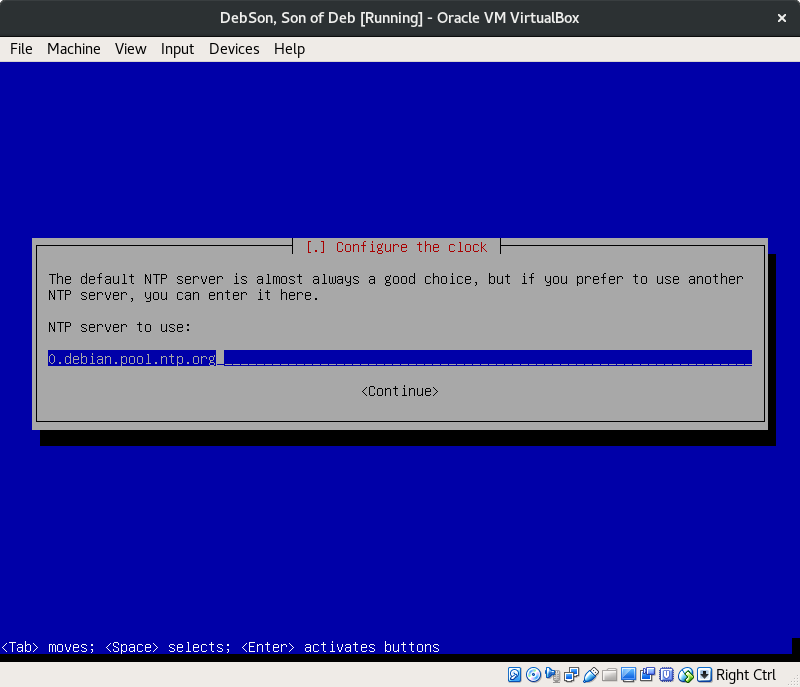
The default works great.
‘Continue’.
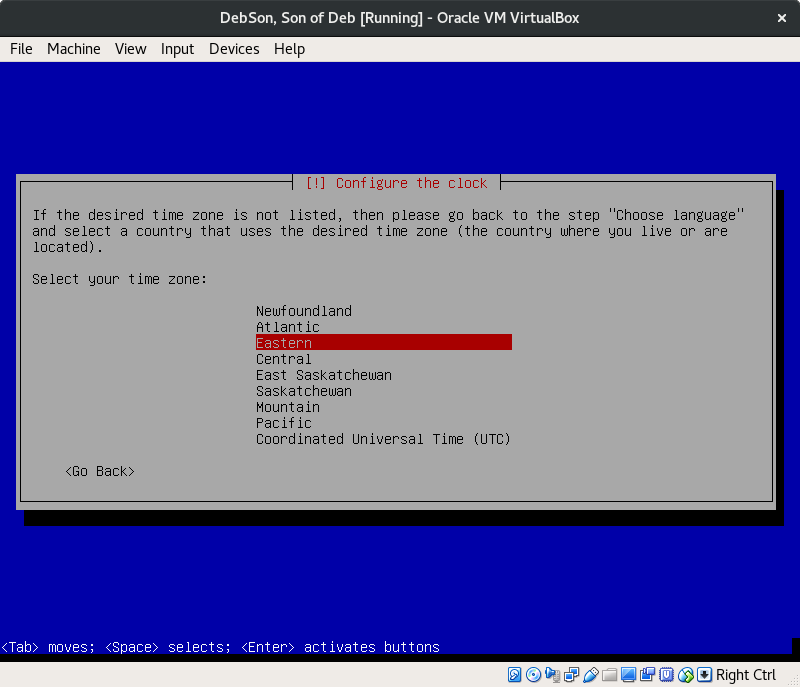
If unsure what is your time zone, you can always ask Google from another device, or ask someone you know.
‘Enter’.
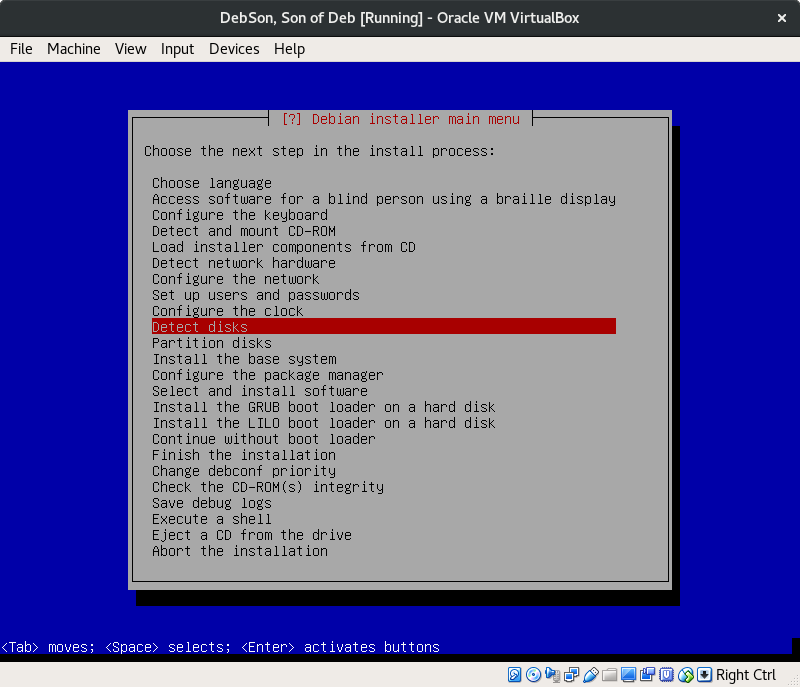
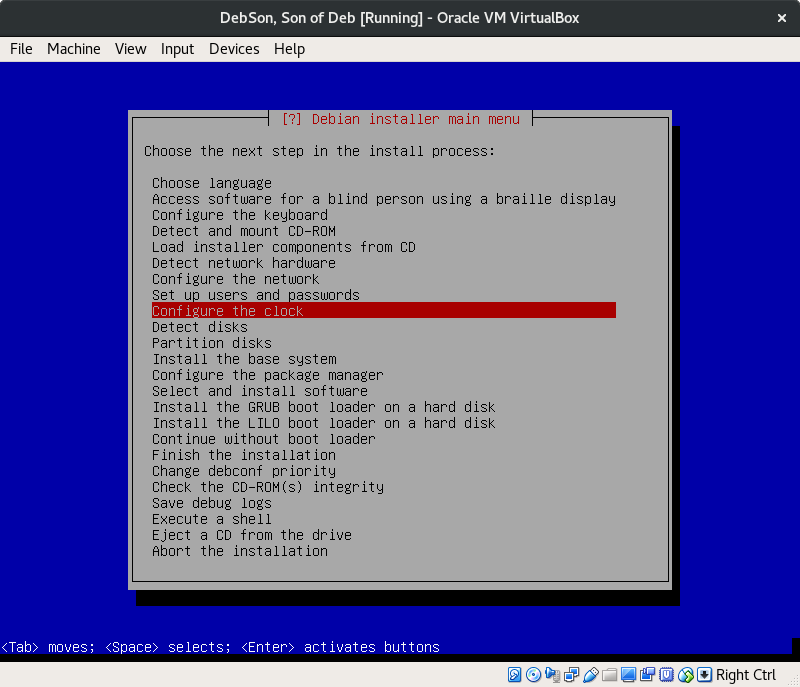
With the next few steps, here is where the real magic is going to happen, the partitioning and encrypting of the drives.
‘Enter’.
No error popups should appear here, meaning our hard disk is ready to go.
‘Enter’.
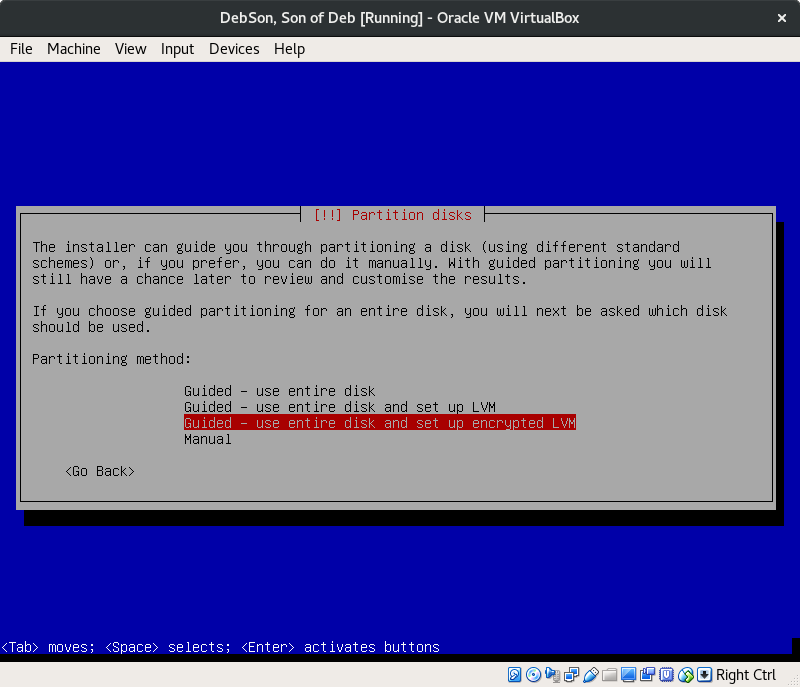
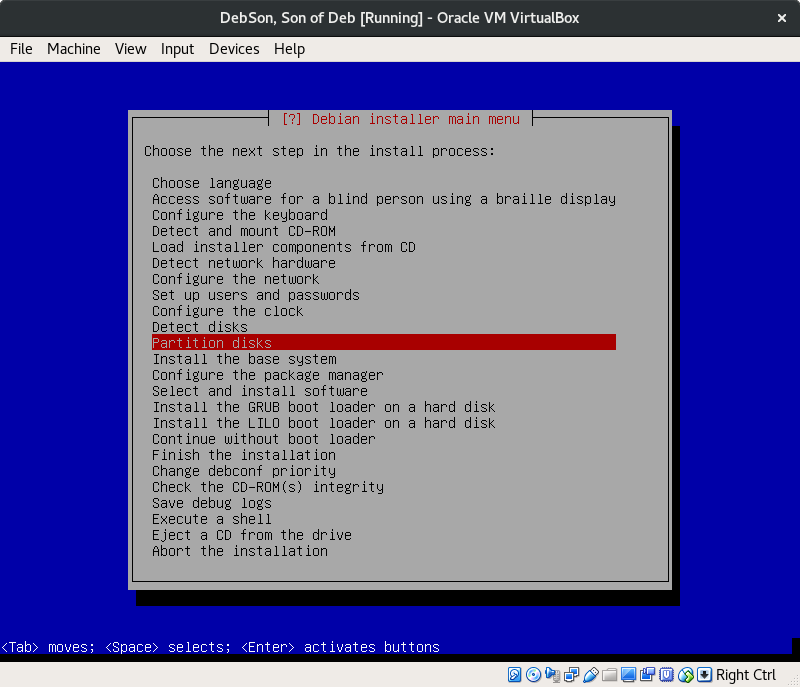
This is an important step. Select ‘Guided — use entire disk and set up encrypted LVM’.
‘Enter’.
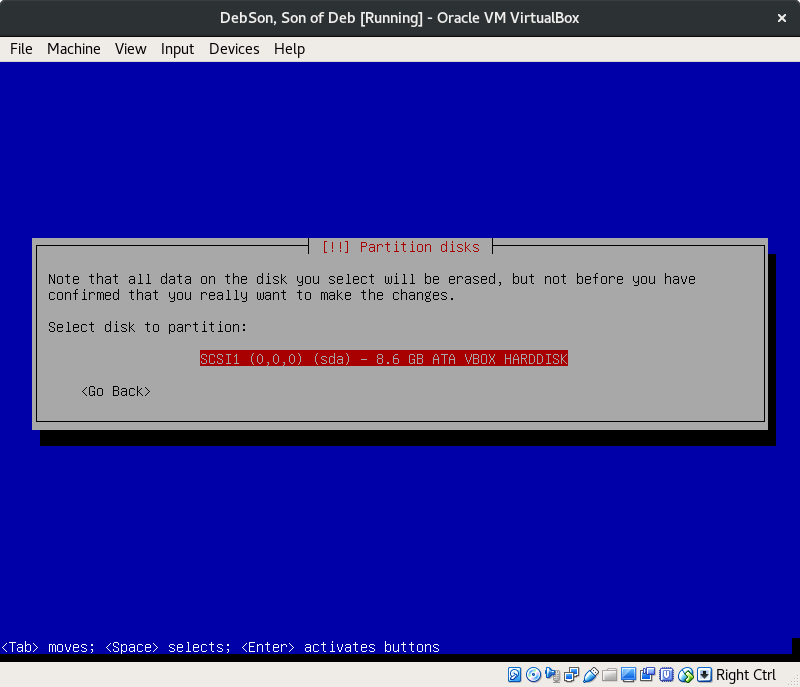
In this step you must choose the correct drive on which to install Debian with encrypted LVM. All data on the selected drive will be erased before continuing.
‘Enter’.
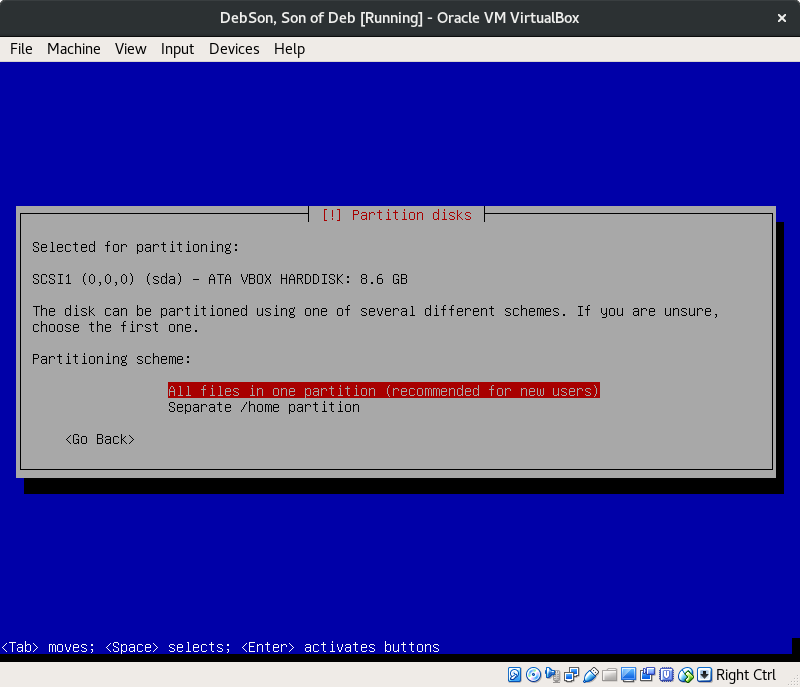
Let’s keep things safe and simple, and use one partition for all files.
‘Enter’.
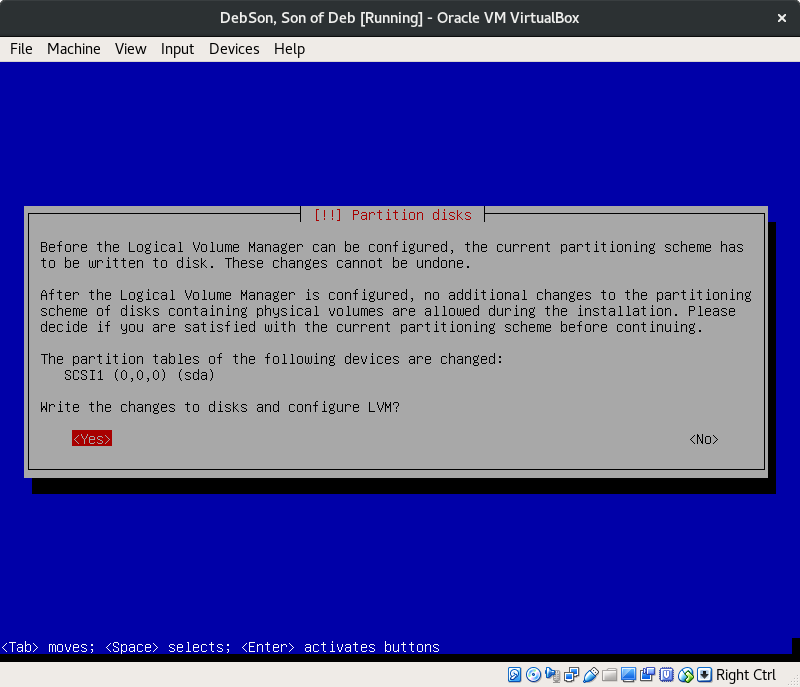
Here we get to double check that we selected the correct option for our configuration.
‘Yes’.
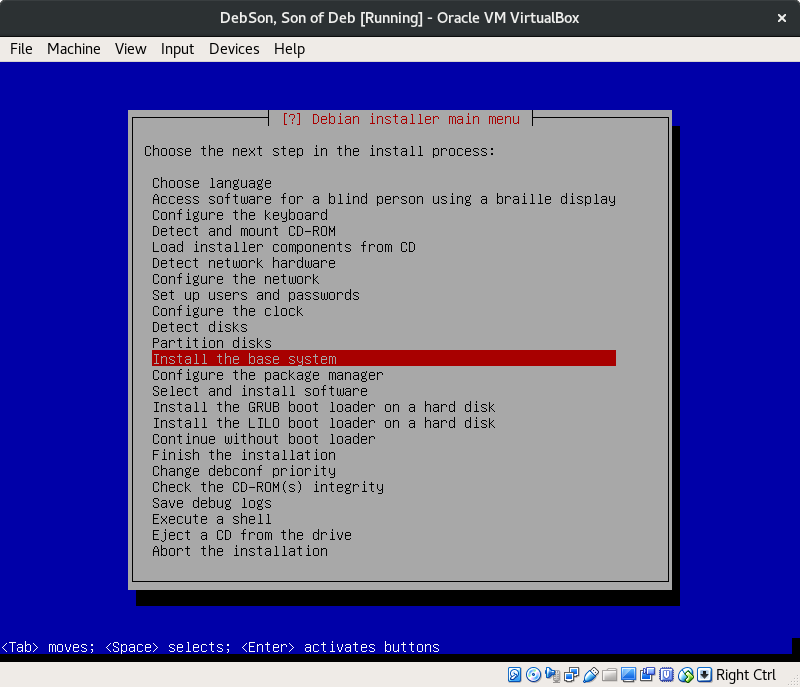
If you made it this far, then we’re almost done! Just need to install the base system, configure our app manager, then install a boot loader.
‘Enter’.
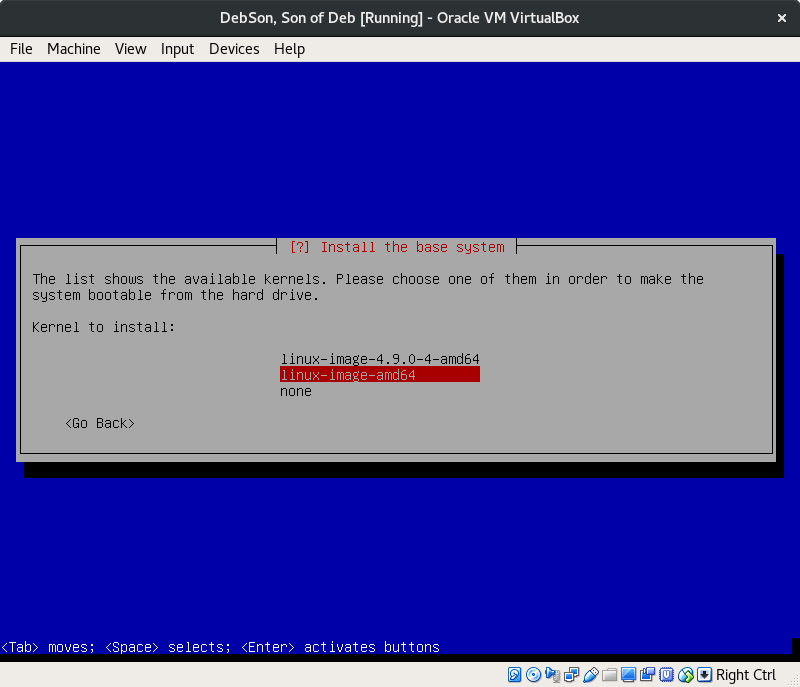
Alright, after having waited through the first wait of the loading screen, this will pop up asking about a kernel to install.
The second option will get the latest kernel available online, select it.
‘Enter’.
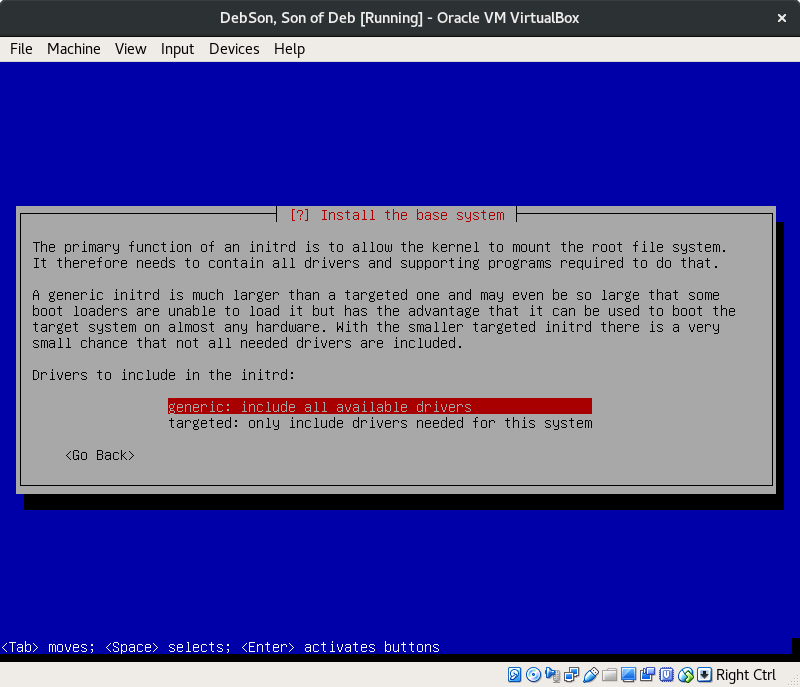
This warning was designed for older systems with tighter limitations. Install the generic drivers.
‘Enter’.
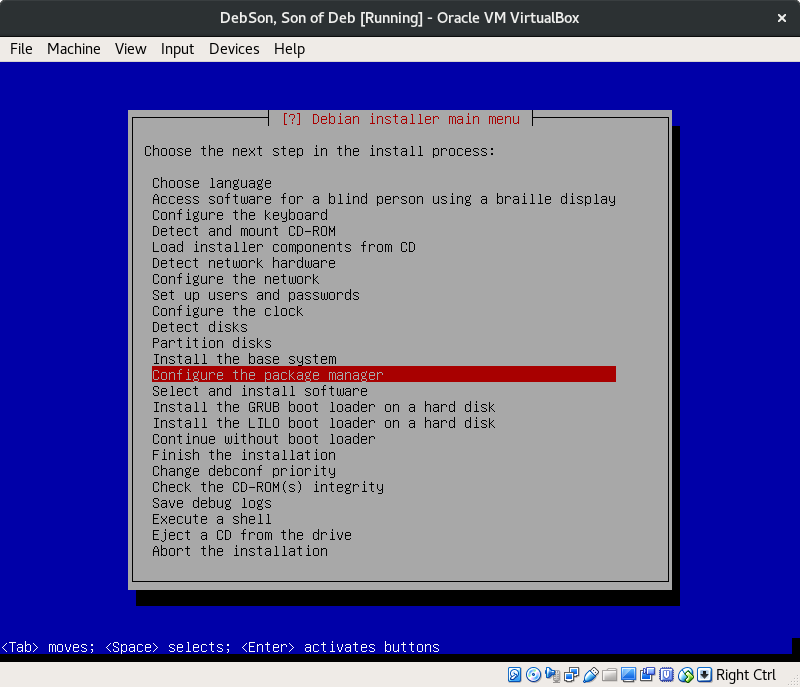
Sweet! We can now configure the package manager.
‘Enter’.
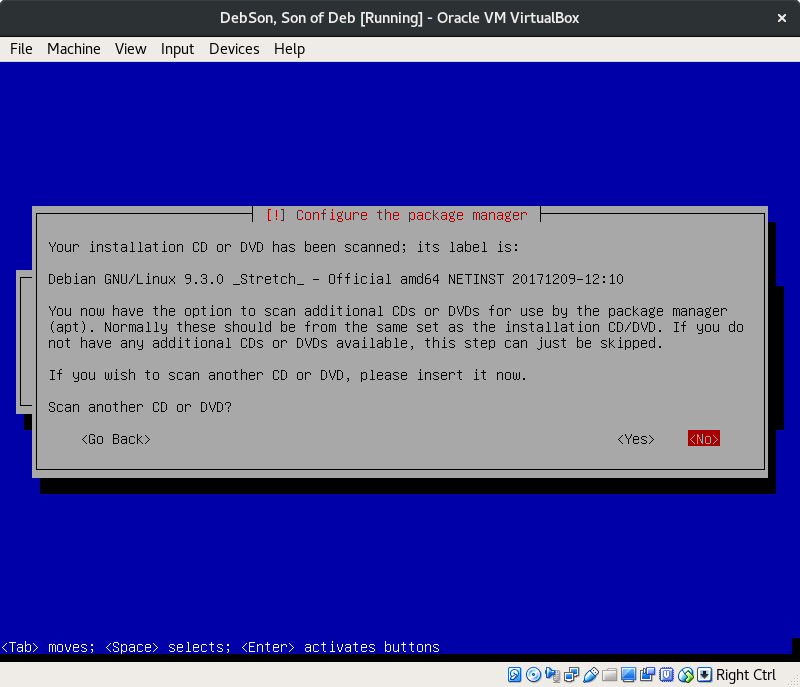
‘No’.
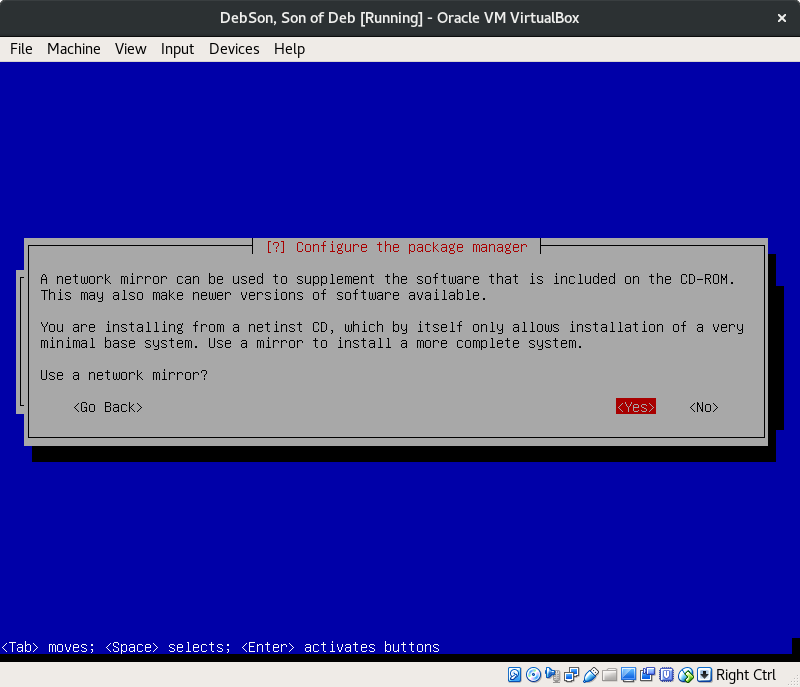
Here we’re given the option to use the network to get additional and newer software, which we absolutely want.
‘Yes’.
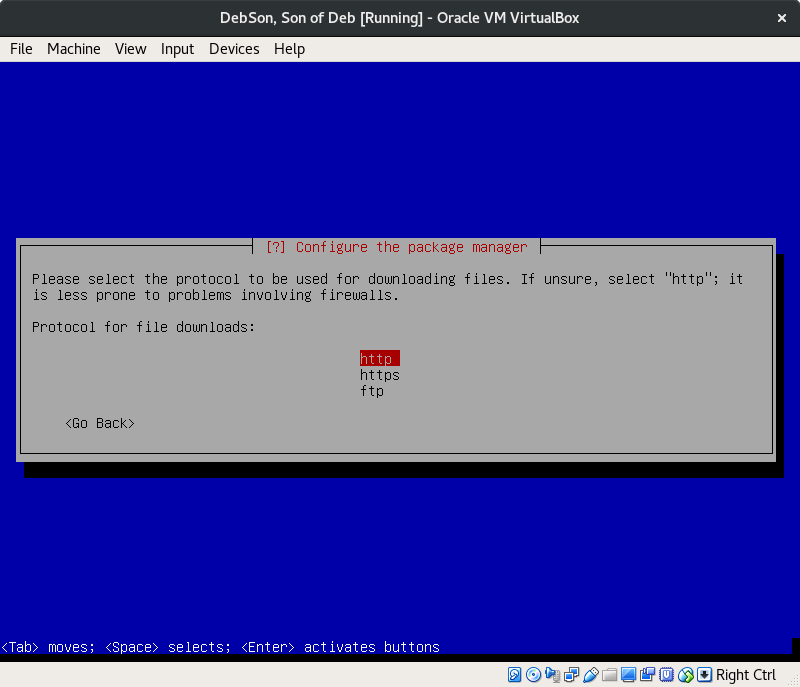
The general home network shouldn’t run into any issues selecting “https”, which is also more secure.
Select and ‘Enter’.
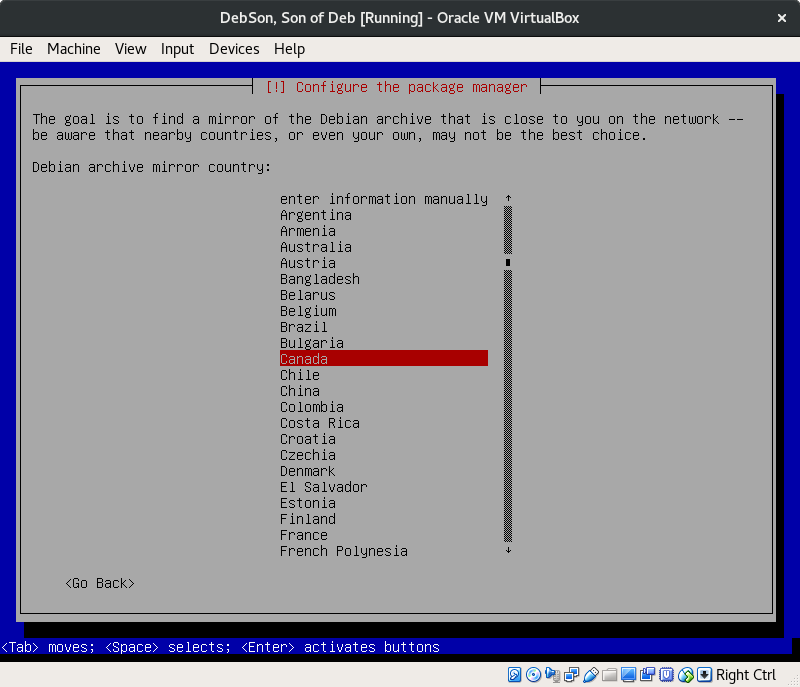
The mirror you select will probably not have an immense hit on your speed, but I would still recommend to pick your home location.
‘Enter’.
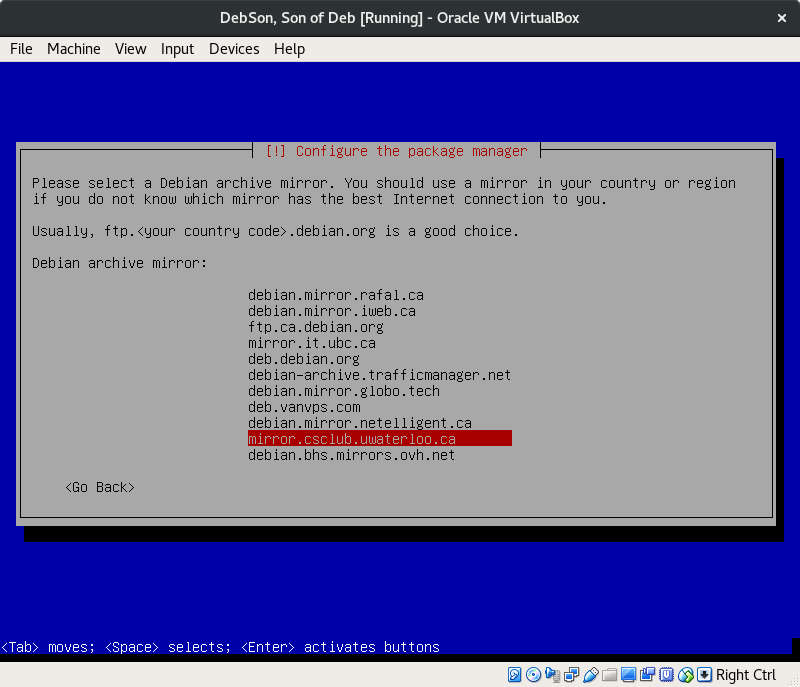
There are several mirrors you can use in your area, they should all work equally.
‘Enter’.
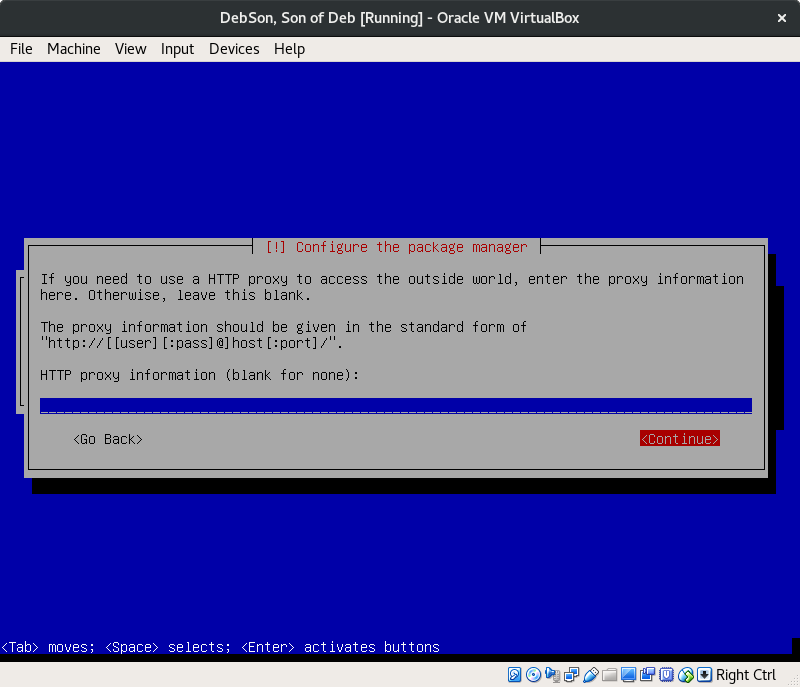
Since this guide is based on a home installation, there shouldn’t be any need for proxies. Leave it blank.
‘Continue’.
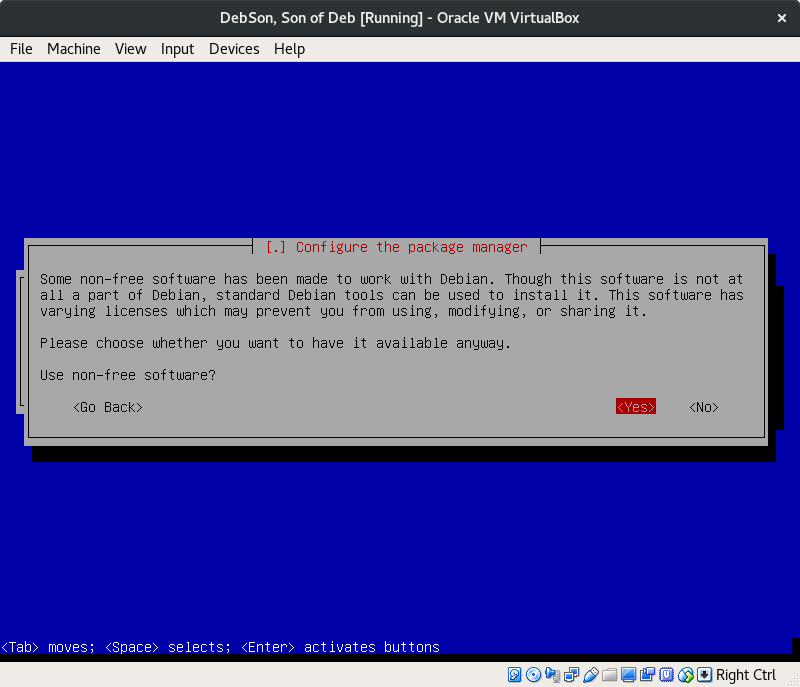
The concept of ‘free’ here implies software which is costless and open-sourced. It’s a bit of a phylosophical debate whether to use the non-free software, but if you’re new to Linux and are looking for an experience with which you’re more familiar, then I’d say go for it.
‘Yes’.
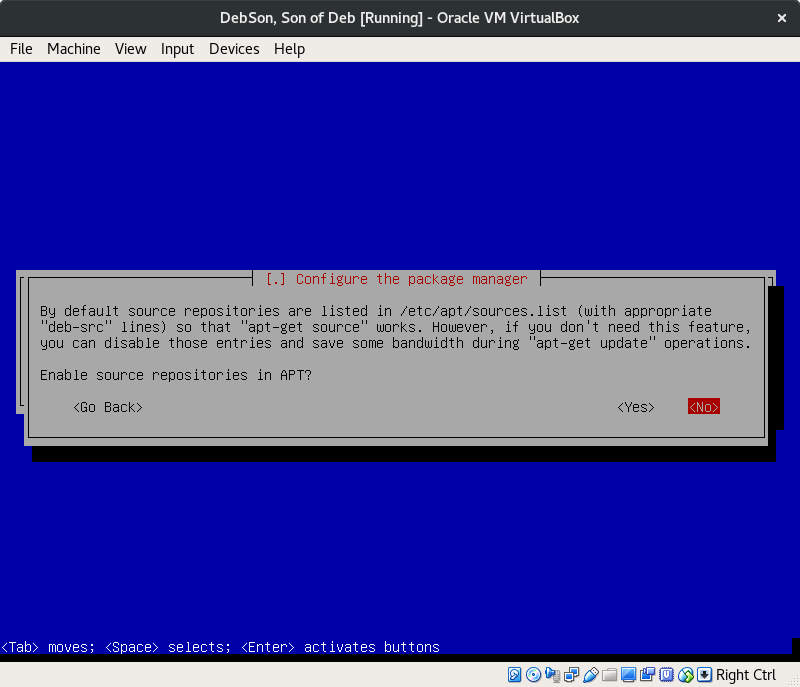
Chances are highly that you don’t intend to develop Linux apps at this time. Let us save some time and bandwidth.
‘No’.

The safest and smartest way to play this is to use the services for security and release updates. Use ‘space’ to select each one of the two.
‘Continue’.
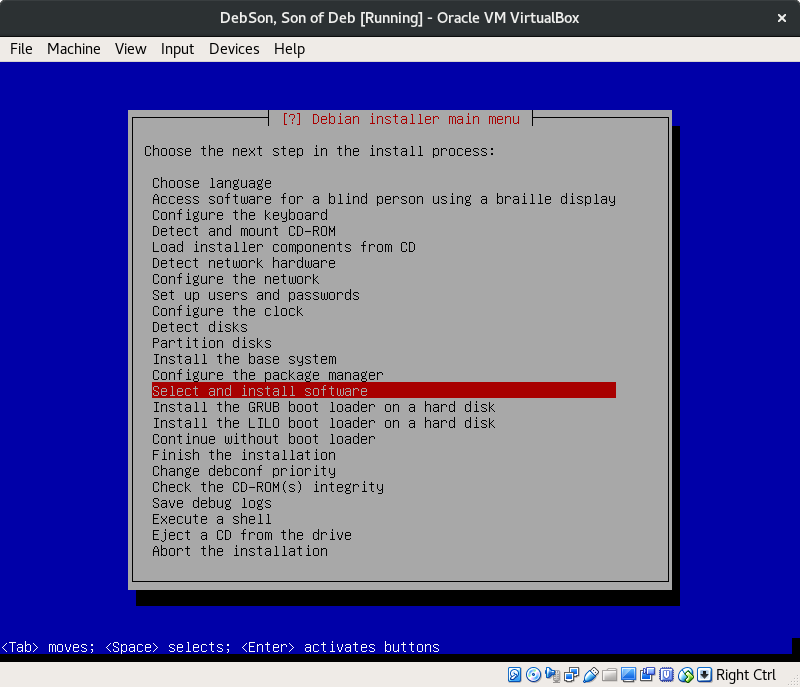
It’s now time to install some additional packages.
‘Select and install software’. ‘Enter’.
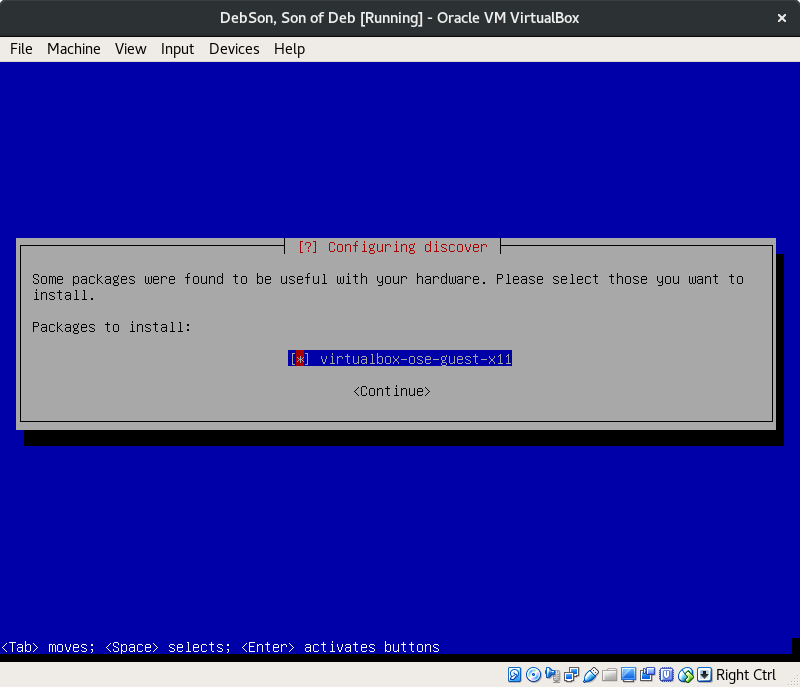
If you’re installing Debian from within a virtual machine, then the Virtualbox guest features will come in handy. Select it.
‘Continue’.
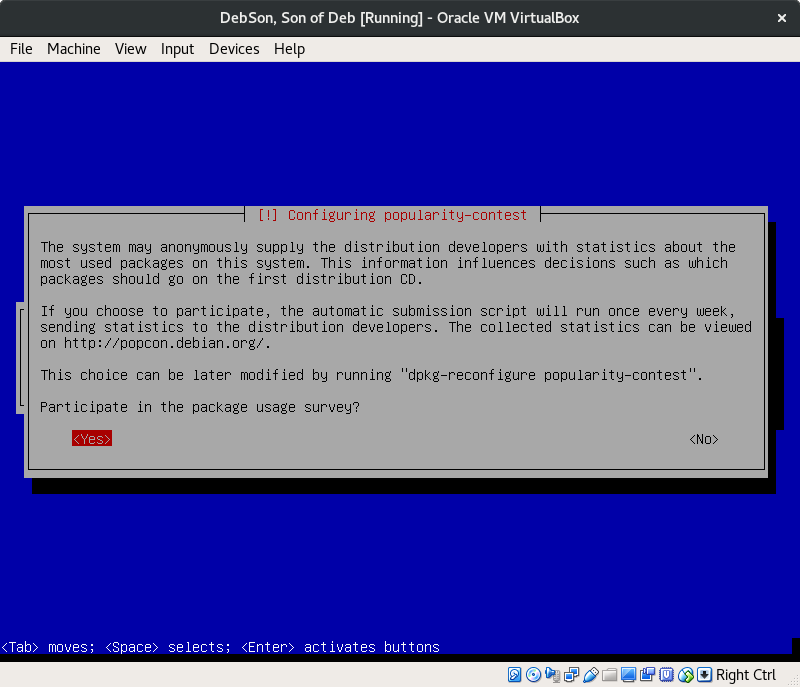
No personal information is passed along if you say yes, and no one will yell at you if you say no. This one is all to you.
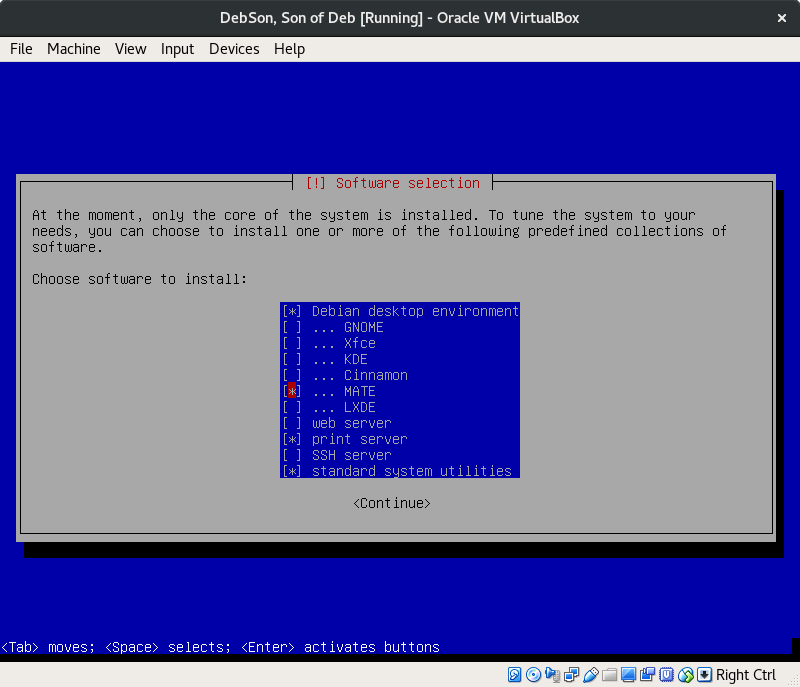
You might want to consider a print server and the standard system utilities.
You definitely want to pick a desktop environment.
GNOME is the de facto environment for Debian, and it’s the one you saw near the beginning of this guide.
There are numerous pages online discussing and comparing the different desktop options, if you feel so inclined to explore.
I peresonally recommend GNOME, especially since version 3 was released, it looks and feels great as an alternative to the usual Windows. It also sticks out from Mac OS.
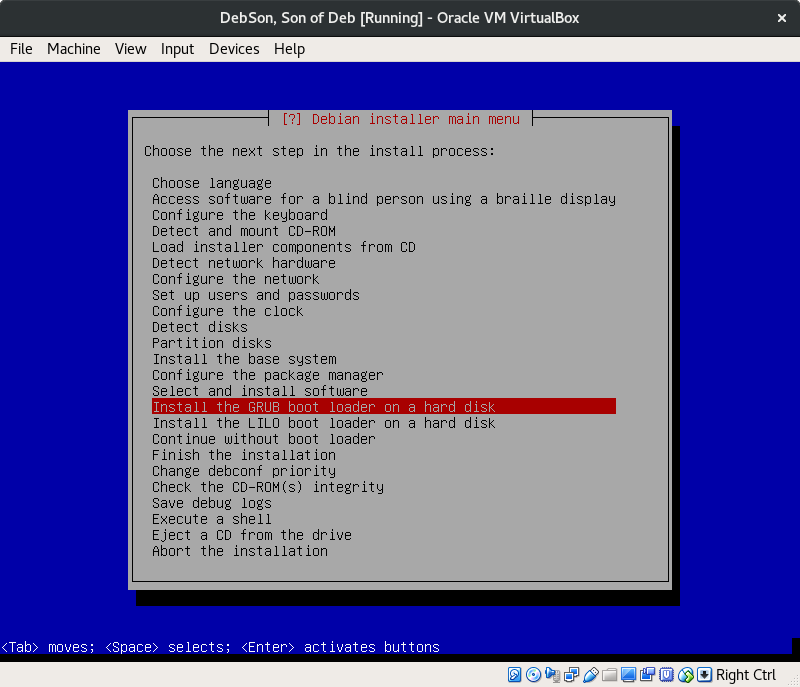
Here are the option to choose a bootloader, either GRUB or LILO. You want to choose GRUB. For our purposes, definitely don’t skip the bootloader.
Install the GRUB bootloader.
‘Enter’.
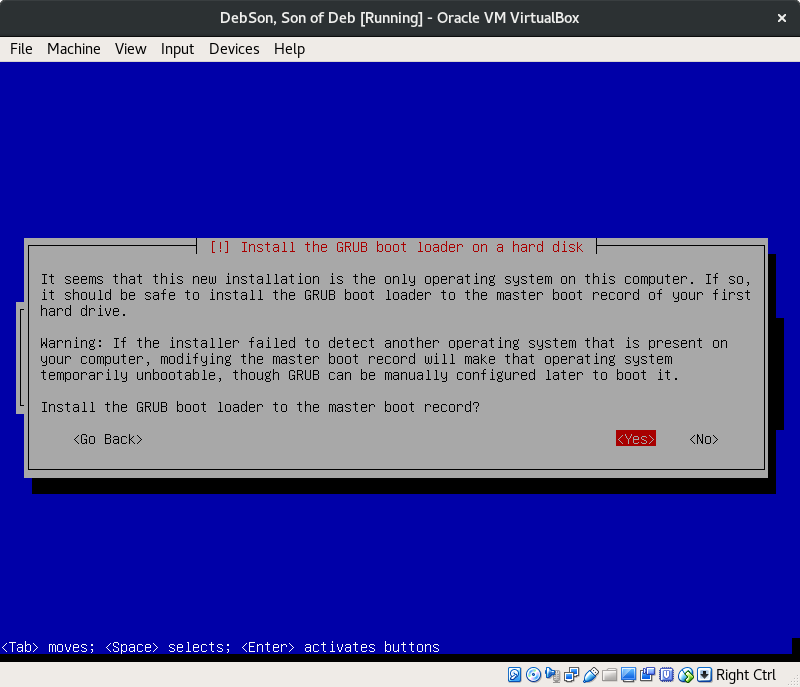
This is just making sure there is no other OS on this system. For our purposes, there shouldn’t be another OS on this system.
‘Yes’.
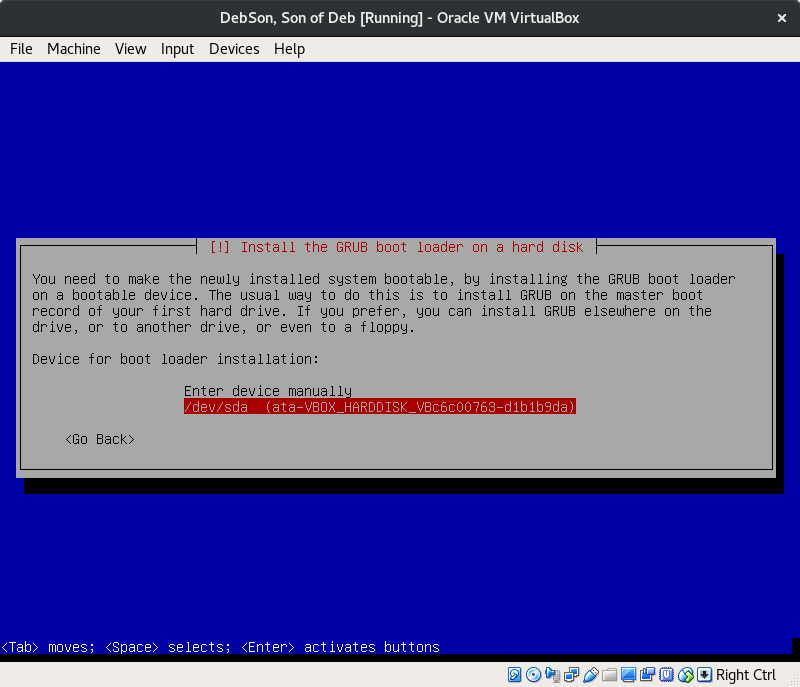
Remember our big main partition containing all the data? Select it.
‘Enter’.
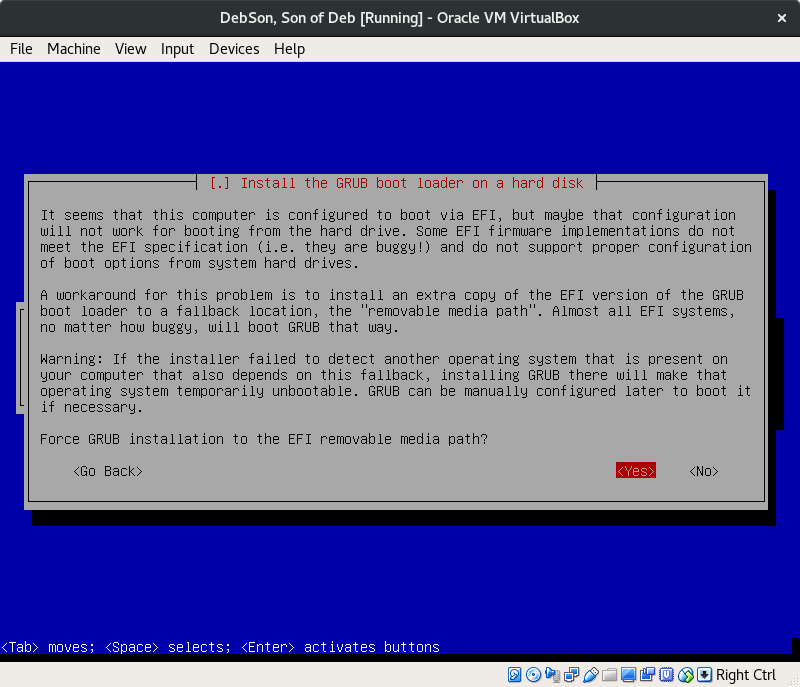
This long message may or may not appear on your system, but if so then it’s safe to pick
‘Yes’.
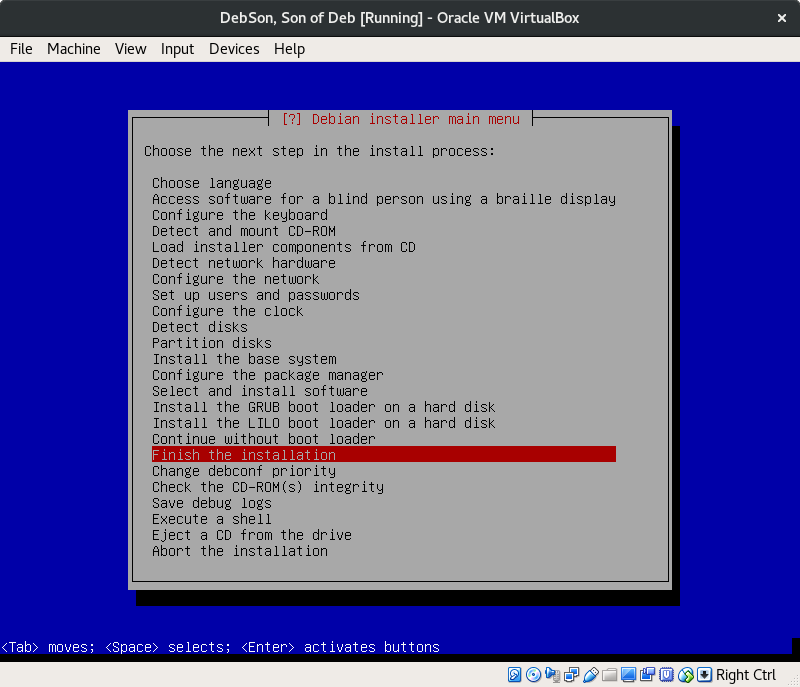
This is the moment we’ve been waiting for.
‘Finish the installation’.
‘Enter’.
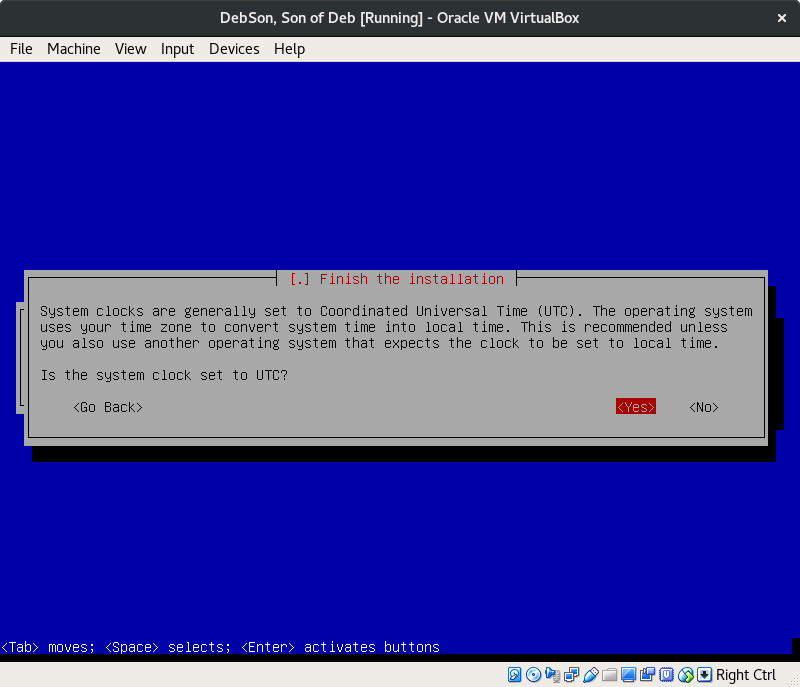
‘Yes’.
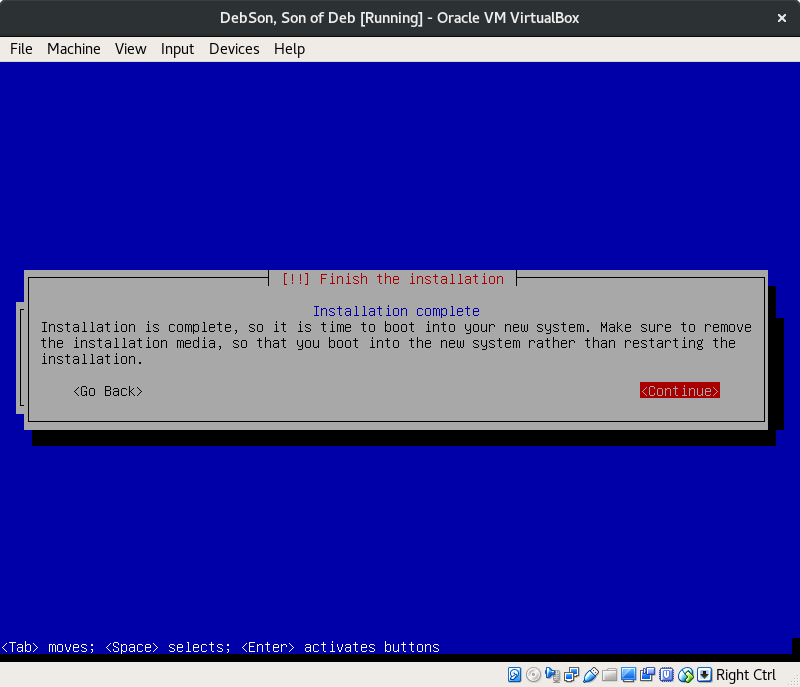
‘Continue’.
Remove the USB or CD if you installed the OS directly onto a computer.
Virtualbox removes it automatically.
This is what you should get upon reboot:
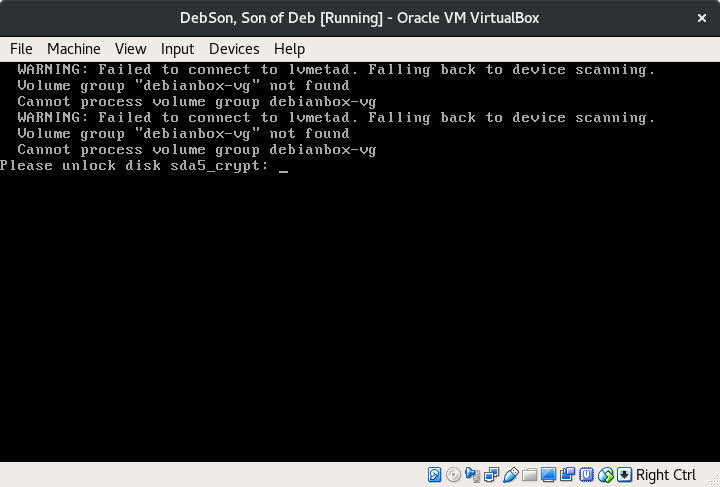
And upon entering your masterful passphrase, this text should begin to appear:
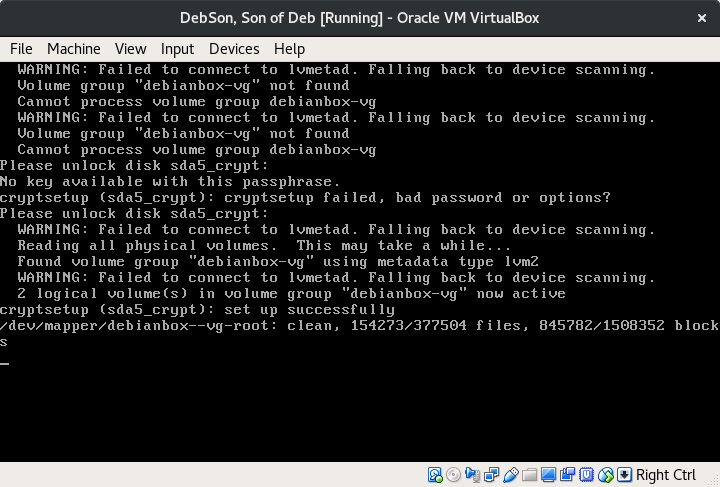
And there you go! Your data has become more secure than it was.
But admittedly, it isn’t everything.
I will release more content on the topics of privacy and data protection, but for now I encourage you to do your own research on the topic.
Perhaps check out the top VPNs for encrypting your online traffic, or Veracrypt for encrypting specific files and folders on your system while it’s turned on.
Thank you for following this guide, and take care of yourself.

About the Author:
🔍 ㅤGustave Deresse Is a Truthful & Theatrical Métis-Canadian Writer, Editor, Wanderer, Cook, and Musical Artist Who Enjoys Exploring Themes as Spirituality, Logic, Life, Philosophy, Nature, Neurocognitive Psychology, Creativity, Writing, Humour, Inspiration, Music, Wellbeing — and the Weird.
P.S. Sooner or later, I tend to edit my pieces. Subscribe to my stories by email for the best chance to catch my original works!
ㅤ⬇️⬇️
My Introduction Page —
And HERE You Can Purchase Me Several Dry Bags of Tea to Unlock Yet More Content. Then, Send Me a Message to Receive a “Free” Private Poem!
I appreciate you, take care.
Sincerely, — G


