
Day 9: Disk Management and Filesystem Handling
Hey Guys! Welcome back to our DevOps in 90 Days series, In this post we will explore Disk management and Filesystem Handling on Linux.
When managing Linux systems, disk management, and filesystem handling are some of the most essential tasks, often overlooked until you get that “No space left on device” message. At that moment, you realize disk management is not just a luxury but a necessity. But don’t worry! We’re here to make sure that doesn’t happen (again), with some advanced tips and a sprinkle of humor to keep things light.
Objectives:
- Advanced Disk Partitioning with
parted - fdisk & lsblk
- Filesystem Creation with
mkfs - Mounting and Automating with
/etc/fstab - Filesystem Checks and Maintenance with fsck
- Optimizing Disk Performance
- Managing LVM (Logical Volume Management)
- Working with ZFS (Zettabyte File System)
- Working with Btrfs (B-tree Filesystem)
- Handling Disk Quotas
- Advanced Filesystem Encryption with LUKS
- Monitoring and Troubleshooting Disks
- Managing Swap Space
Introduction
The world of disk management is vast, ranging from partitioning, formatting, and mounting, to checking disk usage, handling filesystems, and optimizing performance. These skills are invaluable whether you’re running an enterprise-grade server or your local Linux box. And just like the laundry, if you don’t keep track of things, the mess will pile up quickly.
Let’s dive into some of the more advanced methods for handling disks and filesystems. But first, a quick reminder:
“Managing disks is a lot like managing your fridge. You only realize it’s full when you’ve got nowhere to put that new snack.”
Advanced Disk Partitioning with parted
fdisk is the old faithful, but when you need to manage GPT partition tables (which support disks larger than 2TB), parted becomes your best friend.
Example: Creating a Partition
sudo parted /dev/sda

(parted) mklabel gpt
(parted) mkpart primary ext4 0% 100%
(parted) quit
In this example, we created a GPT partition on /dev/sda and used 100% of the disk. The mkpart command handles the partitioning and filesystem creation all in one go.
Tip: GPT tables are a must when you’re dealing with modern systems or disks over 2TB. Also, unlike MBR, it supports more than four primary partitions, which can be a lifesaver when dealing with complex setups.
lsblk view the all disks & Partitions:
lsblk
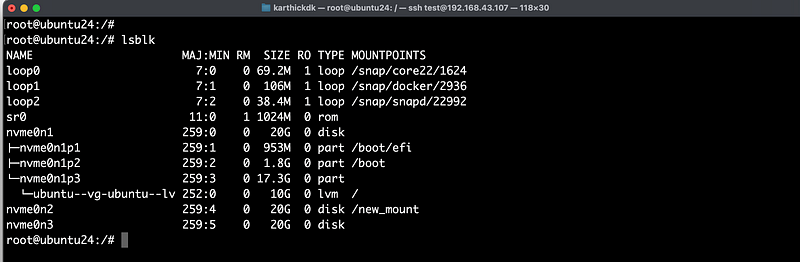
- nvme0n1: Main disk with boot partitions (
/boot/efi,/boot) and the root filesystem is managed via LVM. - nvme0n2: Secondary disk mounted at
/new_mount. - nvme0n3: Another disk that is currently not in use.
- loop devices: Used for mounting snap packages.
- sr0: CD-ROM device without a disk inserted.
Here nvme0n3 is an unmounted disk (If mountpoints is empty mean , not mounted disk.
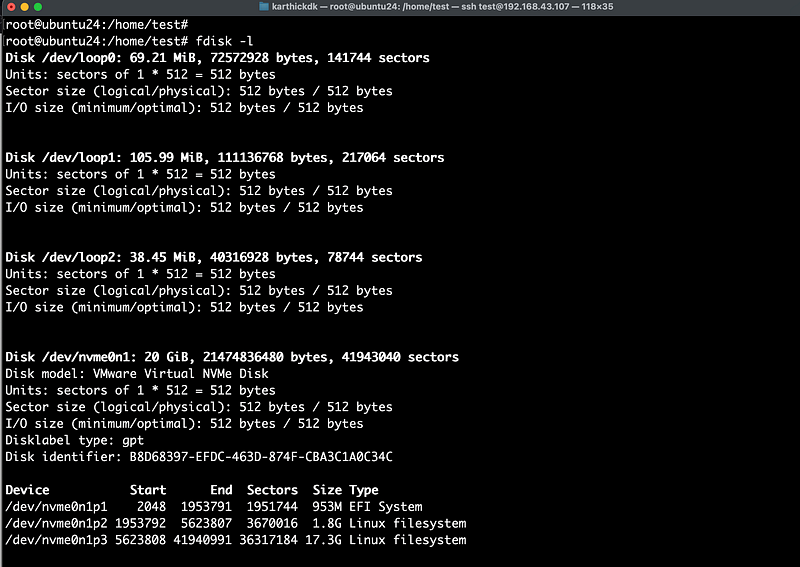
fdisk view the partitions more in details
sudo fdisk -l
Filesystem Creation with mkfs
Once you’ve got your partition in place, it’s time to add a filesystem to it. For most Linux environments, you’ll use ext4, but there are advanced filesystems like btrfs or xfs that come in handy for specific use cases.
sudo mkfs.ext4 /dev/sda1
But what if you want to harness the power of Btrfs (for those wanting a futuristic filesystem with features like snapshots, compression, and multi-device spanning)?
sudo mkfs.btrfs /dev/sda1
Advanced Tip: Btrfs supports built-in RAID configurations, snapshots, and compression. To create a RAID setup with Btrfs:
sudo mkfs.btrfs -d raid1 /dev/sda1 /dev/sdb1
Here, we create a RAID 1 array using two partitions. Btrfs can handle RAID levels 0, 1, and 10 with ease.
Joke break: Why did the filesystem break up with the hard drive? Because it couldn’t handle the partition.
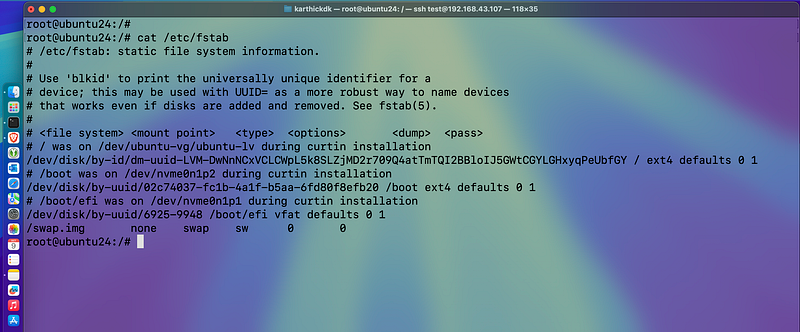
Mounting and Automating with /etc/fstab
Mounting a filesystem is one thing, but automating it so it survives a reboot is another. The /etc/fstab file is the place to ensure your filesystems are mounted every time the system boots.
Example:
/dev/sda1 /mnt/data ext4 defaults 0 2
This line automatically mounts the /dev/sda1 partition to /mnt/data at boot using the ext4 filesystem. The 0 2 means we’re not dumping the disk for backup, but we do want the system to check it on boot.
Advanced Tip: If you are dealing with UUIDs (which are unique and less prone to change), use blkid to find your partition’s UUID and add that to your /etc/fstab:
UUID=abcd-1234 /mnt/data ext4 defaults 0 2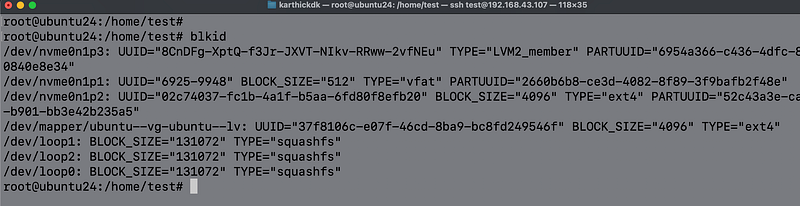
Pro tip: Always keep a backup of your
/etc/fstab. A misconfiguration can lead to an unbootable system—nothing says “Monday morning” like a server that won’t start.
Checking Disk Usage with du and df
It’s not just about creating partitions. Monitoring and checking disk usage ensures that things don’t get out of hand. Here are the advanced ways to do this:
df - Disk Space Monitoring
df is great for checking overall disk usage:
df -h /mnt/data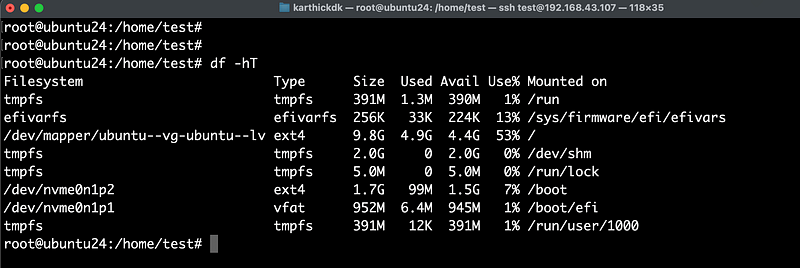
But sometimes, you need to know which directories are eating up space. Enter the du command.
du - Disk Usage
du -sh /var/logThis will give you a summary of how much space /var/log is using.
Advanced Tip: Use du and df in tandem to write scripts that alert you when your disk is running low on space. Or better yet, you can use tools like ncdu, which gives a much more user-friendly view of your disk usage.
Joke break: Why did the system administrator go broke? Because he couldn’t find any free space!
Filesystem Checks and Maintenance with fsck
Even the best-kept filesystems need checking from time to time. fsck is your go-to tool for this. It scans and fixes filesystem issues, but it’s a good idea to run it with caution on a mounted filesystem.
Example:
sudo fsck /dev/sda1
Advanced Tip: Schedule regular fsck checks for critical filesystems using cron, but ensure you either unmount the filesystem or schedule the check during downtime to avoid conflicts.
Pro Tip: Btrfs and ZFS handle disk consistency checks more automatically than
ext4. If you’re running an enterprise system, investing time in these newer filesystems might pay off in the long run
Optimizing Disk Performance
Once you’ve got the disks and filesystems up and running, optimizing them for performance can help ensure smooth sailing.
Example: Tuning ext4 for Speed
sudo tune2fs -o journal_data_writeback /dev/sda1
This command optimizes how journaling is done, potentially speeding up performance at the cost of slightly increased risk if the system crashes. But if you’re running a well-managed server, this can help significantly.
Advanced Tip: Use iostat to monitor disk I/O performance and identify bottlenecks. Tools like iotop this can give you a live view of which processes are hammering the disk.
Managing LVM (Logical Volume Management)
LVM allows you to create flexible volumes that can grow and shrink on the fly, making it an invaluable tool for system admins dealing with dynamic storage requirements.
Create a Physical Volume, Volume Group, and Logical Volume
# Create a physical volume
sudo pvcreate /dev/sda1

# Create a volume group
sudo vgcreate vg_data /dev/sda1

# Create a logical volume
sudo lvcreate -L 10G -n lv_storage vg_data
Here, we created a physical volume on /dev/sda1, created a volume group called vg_data, and allocated 10GB for a logical volume named lv_storage.
Resize a Logical Volume
sudo lvresize -L +5G /dev/vg_data/lv_storage
This command increases the size of the logical volume by 5GB. To shrink a logical volume, you can simply replace the + with a -.
Advanced Tip: Always unmount the logical volume or reduce filesystem size before shrinking, as shrinking an active volume without resizing the filesystem could result in data loss.
Convert an Existing Partition to LVM
If you have a non-LVM partition and want to convert it to LVM without data loss, pvmove is the tool for the job:
sudo pvmove /dev/sda1 /dev/sdb1
This command migrates the data from one physical volume to another, allowing for seamless disk upgrades.
Working with ZFS (Zettabyte File System)
ZFS is an advanced filesystem that provides RAID-like functionality, built-in compression, snapshots, and more. It’s extremely powerful for handling large amounts of data and comes with many advanced features.
Installing and Creating a ZFS Pool
# install
sudo apt install zfsutils-linux

# Usage
sudo zpool create mypool /dev/sda1
This command creates a ZFS pool named mypool on the /dev/sda1 device.
Adding Redundancy with ZFS
You can create a ZFS pool with redundancy to protect against drive failures. For example, to create a RAID-Z pool:
sudo zpool create mypool raidz /dev/sda1 /dev/sdb1 /dev/sdc1
ZFS Snapshots and Rollbacks
ZFS allows you to create instantaneous snapshots and revert to them if needed. This is extremely helpful in production environments for backups and disaster recovery.
# Create a snapshot
sudo zfs snapshot mypool@backup
# Rollback to the snapshot
sudo zfs rollback mypool@backup
Advanced Tip: ZFS also supports deduplication, which can save space when storing duplicate data. But beware — deduplication is resource-intensive, so use it sparingly.
Working with Btrfs (B-tree Filesystem)
While we’ve touched on Btrfs earlier, there are more advanced techniques you can utilize.
Multi-device Btrfs Filesystems
You can create a multi-device Btrfs filesystem with built-in RAID capabilities, allowing you to stripe or mirror data across multiple drives.
sudo mkfs.btrfs -d raid1 /dev/sda1 /dev/sdb1
This creates a RAID 1 (mirrored) array, ensuring data redundancy.
Btrfs Subvolumes
Btrfs allows you to create subvolumes, which act like independent filesystems within the main Btrfs filesystem. These are great for managing data snapshots, backups, and storage allocation.
sudo btrfs subvolume create /mnt/myvolume/subvol1
You can also snapshot individual subvolumes:
sudo btrfs subvolume snapshot /mnt/myvolume/subvol1 /mnt/myvolume/subvol1_snapshot
This allows for granular control over storage and recovery operations.
Handling Disk Quotas
In multi-user environments, managing disk usage is essential to prevent a single user from filling up all available storage. Disk quotas allow you to limit the space or number of inodes a user or group can consume.
Enable Quotas on an Ext4 Filesystem
First, enable quotas in /etc/fstab:
/dev/sda1 / ext4 defaults,usrquota,grpquota 0 1
Remount the filesystem:
sudo mount -o remount /dev/sda1
Initialize the quota system:
sudo quotacheck -cum /
sudo quotaon /
You can then assign quotas to users:
sudo setquota -u user1 500M 600M 0 0 /This command sets a 500MB soft limit and a 600MB hard limit for user1.
Advanced Filesystem Encryption with LUKS
Encrypting entire disks or partitions with LUKS (Linux Unified Key Setup) is essential for security-conscious environments.
Encrypting a Partition with LUKS
sudo cryptsetup luksFormat /dev/sda1
Open the encrypted partition:
sudo cryptsetup luksOpen /dev/sda1 encrypted_disk
You can then format and mount the encrypted partition as usual:
sudo mkfs.ext4 /dev/mapper/encrypted_disk
sudo mount /dev/mapper/encrypted_disk /mnt/secure
Advanced Tip: Use LVM on top of LUKS for even more flexibility, allowing you to resize encrypted volumes dynamically.
Monitoring and Troubleshooting Disks
Advanced disk management isn’t just about setting things up; it’s about monitoring and troubleshooting as well.
Monitoring I/O with iostat
sudo iostat -x 2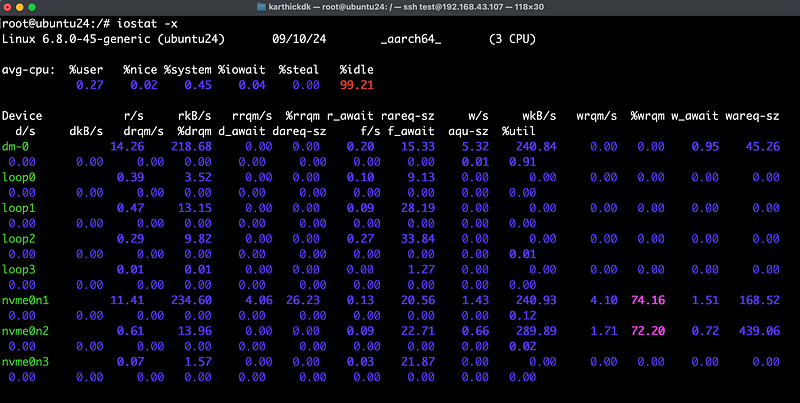
This gives a detailed breakdown of I/O operations, including disk utilization, which helps in identifying bottlenecks.
Identifying Disk Failures with smartctl
The smartctl command allows you to query the SMART status of a disk, which can help you predict hardware failures.
# install
sudo apt install smartctl

# usage
sudo smartctl -a /dev/sda
Live Disk I/O Monitoring with iotop
If you want a live view of disk usage, similar to top for CPU, use iotop:
# install
sudo apt install iotop

# Usage
sudo iotop
This tool is indispensable for identifying processes that are causing heavy I/O and slowing down your system.
Managing Swap Space
Swap is essential for memory management on Linux systems, but it needs to be managed properly.
Add a Swap File
sudo fallocate -l 4G /swapfile
sudo chmod 600 /swapfile
sudo mkswap /swapfile
sudo swapon /swapfile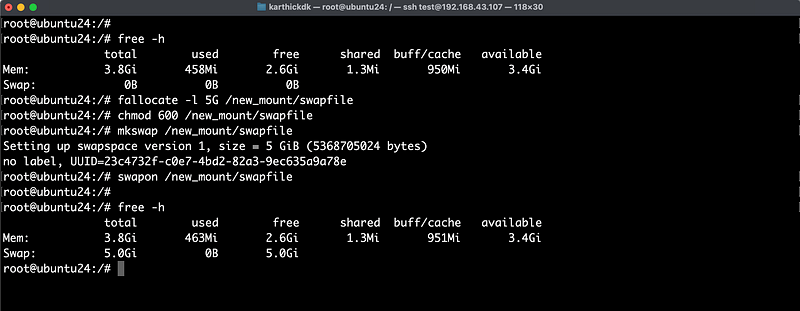
To make the swap file persistent, add it to /etc/fstab:
/swapfile none swap sw 0 0
You can also tune swappiness to control how aggressively the system uses swap:
sudo sysctl vm.swappiness=10A low swappiness value (e.g., 10) tells the system to use swap less frequently, improving performance on systems with plenty of RAM.
Conclusion
Disk management is a lot like managing your sock drawer — you need to organize things now or face the chaos later. Whether you’re dealing with complex RAID setups, monitoring disk space, or optimizing filesystems for better performance, mastering these tools will help you stay ahead of the game.
And remember, if all else fails, there’s always more disk space to buy!
Final Joke: Why don’t disks ever gossip? Because they’re always partitioned!
✅✅feel free to connect with us.
LinkedIn: https://www.linkedin.com/in/karthick-dkk/
Follow my Medium Account (To get valuable information)
For more updates: subscribe to this medium account.
Follow for more: ✌️

