
DataOps: Using LakeFS for Data Version Control
If Git is for code version control, can we use LakeFS for data version control?

Git is a game changer in the code versioning terrain, and every developer agreed to this. Multiple developers are able to work on projects with ease, and every team members are able to work on a different part of a project till a completed product is released. With the help of Git, developers are able to work on new features and seamlessly bring the new feature into the production environment. This is exactly the solution that LakeFS brings into the data world.
The question is can we have a system that monitors and track the changes in the data that goes into production? Can we roll back to the previous data that works well, before a team member mistakenly brought in dirty data that disrupt the production environment? The answer is yes we can. We needed to push out the bad data and roll back to the cleaner data, and we can achieve this easily with the help of LakeFS with a single command.
What problems do LakeFS helps to solve?
These are some of the problems we encounter daily as Data Engineers, and these are some of the problems that LakeFS helps to solve. Some of the problems solved by LakeFS include seamless recovery from data errors, data reprocessing and backfills, troubleshooting production problems, cross-collection consistency, and establishing data quality.
For example, if you have your Spark code like the one below:
df = spark.read.parquet(“s3a://my-bucket/collections/foo/”)Then you can plug in your application to read directly from the LakeFS branch using the command below:
df = spark.read.parquet(“s3a://my-repo/main-branch/collections/foo/”)This allows you to test and validate your data in development before you take your data into production. I know at this point everything still looks shady, but do not worry you will know how this works in a bit.
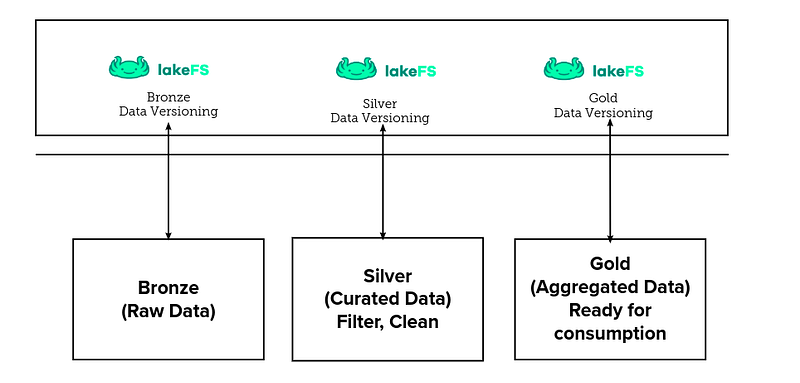
In this blog post, we are going to set up LakeFS: a data versioning system that communicates with the AWS S3 bucket, and tracks changes in the data. This method can be adapted to Azure blob storage or Google Cloud storage as opposed to using the AWS S3 bucket as well, but the focus will be the AWS S3 bucket. If you are keen to learn how to set this up, then follow me.
The data used in this post is the open-sourced sample Superstore dataset provided by Kaggle. In this post, we will create an AWS S3 bucket and upload our data into the S3 bucket, design a dedicated AWS IAM role before LakeFS can communicate with our S3 bucket. We are also going to create an AWS bucket policy for our bucket, install and configure the AWS CLI locally, and then set up LakeFS using Docker Compose file.
We will also install, and configure LakeFS CLI (lakectl) locally, and we are going to employ LakeFS CLI to create a data repository from the Terminal. The most interesting part follows, we are going to upload new data to the main branch using lakectl. Then, we will create a new branch and upload data with a missing column using lakectl command to simulate how to handle an outage in production using LakeFS, then in the end we will roll back to the previous data with the completed column.
Let’s get straight at it without wasting much time and set up LakeFS locally. You can as well set it up on the cloud and add different contributors to your environment in your company. For the purpose of this post, you will need an AWS account and you will need to create an AWS S3 bucket along the line. You can use MinIO instead of the S3 bucket as well, its API is compatible with that of the AWS S3 bucket, but we are going to be using an AWS S3 bucket for my object storage. With that, you are good to go.
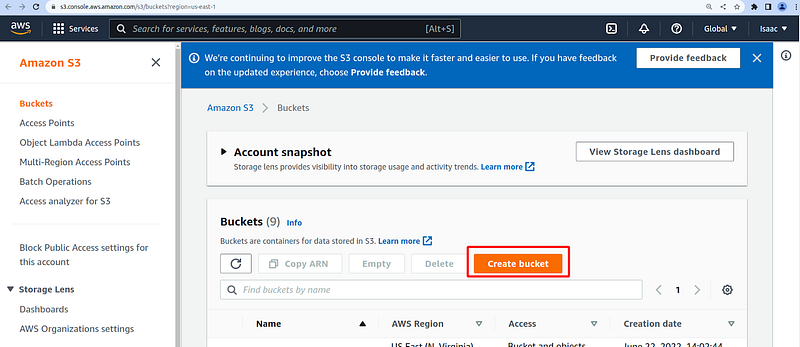
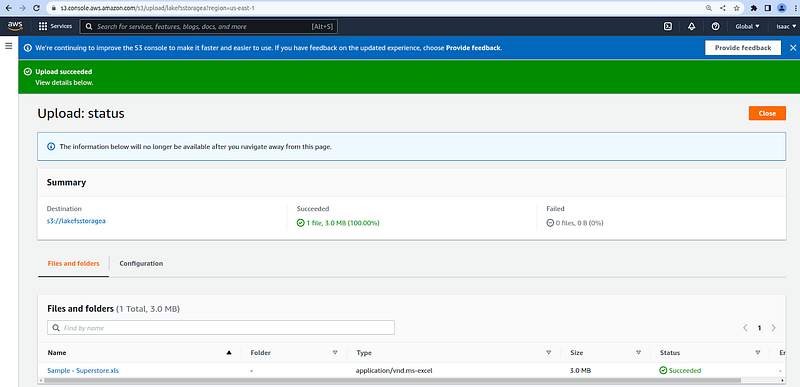
#1 Create an AWS S3 bucket and upload your data into the S3 bucket
From the AWS console, navigate to the AWS S3 bucket console and click on the Create bucket, then enter your bucket name, leaving other options as default. Download the data set and upload the file into the bucket.
#2 Create a dedicated AWS IAM role for your bucket
Navigate to the AWS IAM role console and create an IAM role and policy for your bucket. You might be in a situation where you want to provide strict rules for your AWS resources, in this case, please take this very seriously, you do not want to expose a loophole when it comes to infrastructure security. In our case, this is what our IAM policy looks like below:
#3 Create an AWS bucket policy for your S3 bucket
After we have been able to create our IAM role policy on the AWS console, it's now time for us to create the bucket policy. The bucket policy looks like the following:
#4 Get and configure the AWS CLI locally
For us to communicate with the AWS S3 bucket from the LakeFS environment we must set up the AWS CLI and configure the CLI adequately, with this we would be able to perform different operations like injecting data into our repository from the AWS S3 bucket, connecting and creating an S3 bucket from the LakeFS CLI etc. To implement this we are going to do the following:
- Get the AWS CLI package and install it by using the commands below in your Terminal:
# Get the AWS CLI package
curl "https://awscli.amazonaws.com/awscli-exe-linux-x86_64.zip" -o "awscliv2.zip"
# Unzip the file
unzip awscliv2.zip# Install the AWS CLI package and move the installation to the bin folder
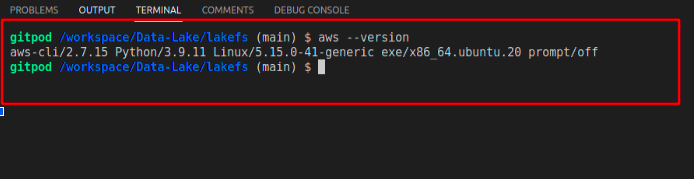
./aws/install -i /usr/local/aws-cli -b /usr/local/bin# Check the version of AWS installed to confirm that the CLI is installed
aws --versionIf you have done things the right way, then you would see a screenshot that looks like the following:
- Configure the AWS CLI
Since we see that our AWS CLI has successfully been installed, we are going to configure the CLI. We will need AWS IAM user credentials, we only need our access key, the secret access key, the default region is us-east-1 and the default output format is json.
aws configure
# Result will look like the below
# AWS Access Key ID [None]: AKIATExample
# AWS Secret Access Key [None]: HSIIYDJKejkjsiExample
# Default region name [None]: us-east-1
# Default output format [None]: json
To confirm that our configuration is working as expected, let’s list all the AWS S3 buckets in our account. A screenshot of the result is also provided down below:
aws s3 ls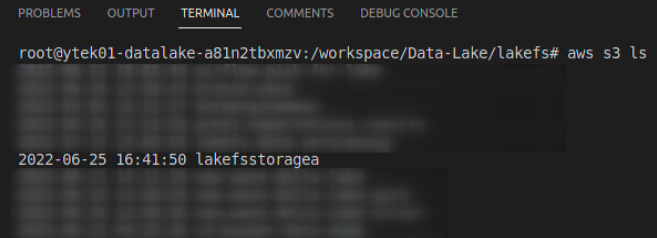
#5 Set up LakeFS using Docker Compose file
With AWS CLI up, we are going to move forward with setting up LakeFS, and the Postgres database using Docker containers. The Postgres database is needed for storing and retrieving the metadata of LakeFS operations. Here are the steps to follow to achieve this. You can pull directly from the LakeFS GitHub repository which is available here. You can as well get your LakeFS image from the offical LakeFS Docker hub. But do not worry I have included a copy of this Docker Compose file in my GitHub repository, clone the repository and use it freely:
git clone https://github.com/yTek01/data-versioning-using-lakefs.gitStart the Docker containers:
docker-compose -f docker-compose.LakeFS.yaml up -dVery importantly, by the time you are reading this blog post, there might have been an important update to the Docker image, be sure to update it. With the containers up and running, go to http://localhost:8000 from your browser and if everything looks good, you will see something like the screenshot below:
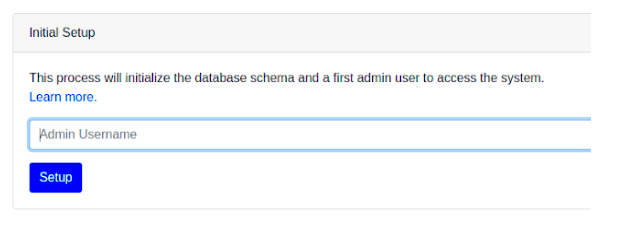
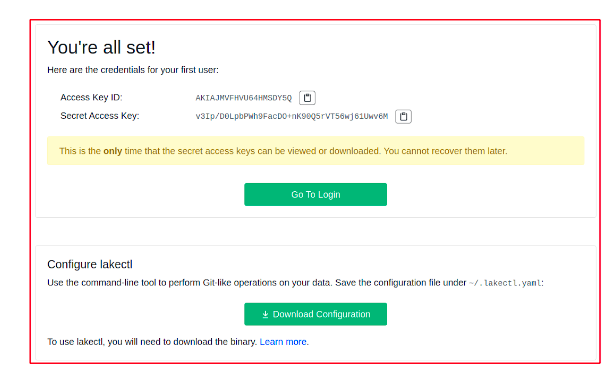
Enter your administrator information and move to the next page. On the next page, you will see the credentials needed to access the LakeFS UI console. Now make sure you download the lakectl.yaml file. This will be the last time you will see the credentials, so make sure to download them. It contains the credential that is shown to you on the initialization page. Enter the Access Key ID and the Secret Access Key you downloaded on the previous page and use the credentials to log in.
You should see the repository window shown to you like the one in the following screenshot:

#6 Get and configure LakeFS CLI locally (lakectl)
With the LakeFS up and running we are going to set up the LakeFS CLI following the steps below. The LakeFS CLI (lakectl) is the aspect of LakeFS that allows us to manage LakeFS resources from the command line interface.
Use the commands below to set this up:
# Get the LakeFS CLI set up file with the command below:
wget   https://github.com/treeverse/lakeFS/releases/download/v0.68.0/lakeFS_0.68.0_Linux_x86_64.tar.gz
# Extract the lakectl file using the command below:
tar -xf lakeFS_0.68.0_Linux_x86_64.tar.gzMove the extracted file to the bin location so that we can use lakectl from anywhere in our instance:
mv lakectl /usr/local/binConfigure the LakeFS CLI to communicate so that we can communicate with AWS S3 and with the LakeFS instance. Your Access Key Id and the Secret Access Key are the ones you downloaded from the LakeFS UI and not AWS user IAM credentials. Your server endpoint URL is http://127.0.0.1:8000 for local deployment.
lakectl config
# My result looks like this.
# Config file /root/.lakectl.yaml will be used
# ✔ Access key ID: AKIAJVYVYBRAExample█
# ✔ Secret access key: ****************************************█
# Server endpoint URL: http://127.0.0.1:8000
#7 Use the LakeFS CLI (lakectl) to create a repository
Now we can start creating our repository from the UI or the CLI. Make sure your LakeFS container can communicate with AWS S3. If you are getting an error related to “failed to create a repository: failed to access storage”, both on the UI, and on the LakeFS CLI, then know that there is a problem with the AWS credentials. LakeFS does not have access to your AWS credentials. If you are trying to communicate with LakeFS from the CLI, make sure you have the right permission, without that you are going to get an “error authenticating request”.
We are going to create a LakeFS repository using the LakeFS CLI, the command is as follows:
lakectl repo create lakefs://stagingtable s3://lakefsstoragea -d main#8 Ingest data into the main branch using lakectl command
We can decide to ingest data through different options into our LakeFS environment, we can upload (upload a local file to the specified URI), we can decide to use the ingestion method (loading objects from an external source into a LakeFS branch without actually copying them). In our case, we are going to ingest the data we uploaded into the S3 bucket into the main branch using the command below:
lakectl ingest --from s3://lakefs.data.versioning/Sample_Superstore.xlsx --to lakefs://stagingtable/main/store/Sample_Superstore.xlsxThe result is shown on the Terminal in the screenshot below.

#9 Create a new branch and upload data with a missing column using LakeFS CLI
At this point, we are going to create a new branch, and upload incomplete data into the branch, we are going to do this intentionally to see how we can handle this type of outrage in production and roll back the previous version of our working data. The process is as follows.
Create a new branch to house the incomplete data to showcase an outrage:
lakectl branch create lakefs://stagingtable/removed-a-column-from-data --source lakefs://stagingtable/main# The Terminal response after executing the command looks like the below:
Source ref: lakefs://stagingtable/main
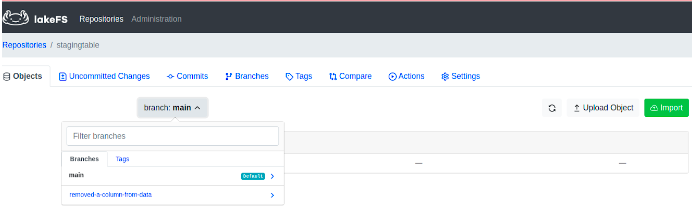
created branch ‘removed-a-column-from-data’ 451e738f1cf290df0cc52eb339c0c4a7788fb59e8dff3ecdf7ef640fdff74f11The screenshot below shows the list of branches that are now available in the LakeFS UI.
Upload data into the new branch called ‘removed-a-column-from-data’:
lakectl fs upload -s Sample_Superstore.xlsx lakefs://stagingtable/removed-a-column-from-data/store/Sample_Superstore.xlsx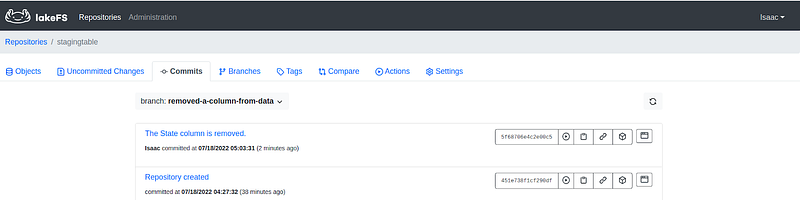
Merge the new branch and the main branch
With the above, our new data is in the feature branch, we are going to merge the branch into the main branch. The command below helps us to achieve this:
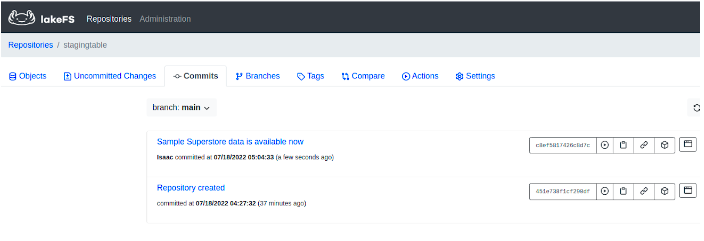
lakectl merge lakefs://stagingtable/removed-a-column-from-data lakefs://stagingtable/mainThe result of the data after we have merged the two branches is shown below:

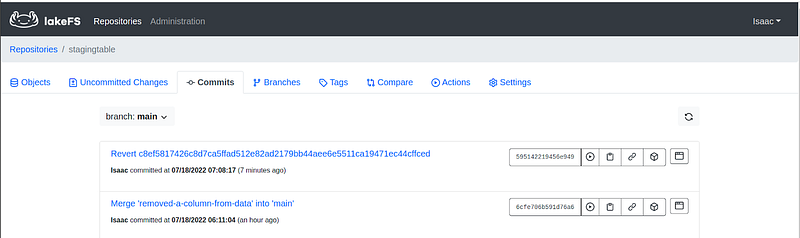
#10 Roll back to the previous data with the completed column
With the unwanted data in our repository, we must roll back the changes that have been caused. In our case, a very important column is missing, the State column must be included in our sample Superstore data. We are going to revert all changes made during the last merge operation back to the latest commit that is error-free. The command below helps us to achieve this:
lakectl branch revert lakefs://stagingtable/main <commit_id> --yes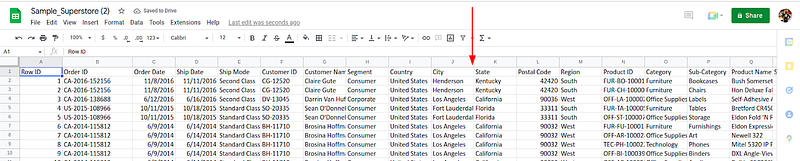
Conclusion
In this post, we have been able to show how easy it is to manage our data operations with the help of LakeFS. LakeFS help us to manage our data in a process that is very close to how Git works for code versioning. Interestingly, LakeFS provides you with an S3 compatibility API that allows us to use the LakeFS feature branch link in a data pipeline directly to confirm that things are working as expected before we move our data workloads into production. In fact, you can automate data quality validation and abstract away manual work.
Recommended Readings
[2] LakeFS Github Page — Treeverse
[3] Data Versioning: All you need to know — Bex T.
Thank you for reading. I would be happy to answer any questions and hear any comments.


