Databricks Notifications in Microsoft Teams

Tired of Databricks Job notifications disappearing in a random mailbox to be never seen again? There is a different way. With a little bit of webhook-magic we can send notifications to a Teams channel. This is great when you want to share the outcomes of Databricks jobs with your team and/or stakeholders.
Webhook Incoming!
First we need to set up the ‘Incoming Webhook’ app in Teams. Let’s do this in five simple steps:
- Open the Teams channel in which you want to add the webhook and select ••• from the upper-right corner.
- Then select ‘Connectors’ from the drop down.

3. Search for ‘Incoming Webhook’ and select ‘Add’.
Sidenote: Your Teams administrator must have enabled the use of the ‘Incoming Webhook’ app in the Teams Admin Portal.
4. Select ‘Configure’, then provide a fitting name. You can also upload an image if you so desire.

5. Make sure to save the unique webhook URL. This is the bit of webhook magic which lets you send messages to the channel. Click ‘Done’ after saving the URL.
Now that we have our webhook URL we can set up some job notifications in Databricks.

Getting your notifications set up in Databricks is fast and easy. The only prerequisite is that that you have admin access, or access to an admin. Simply find the job (or task) you want notifications for and proceed with the following steps:
- Locate the job or task you want to set up a notification for and click on ‘Edit notifications’.

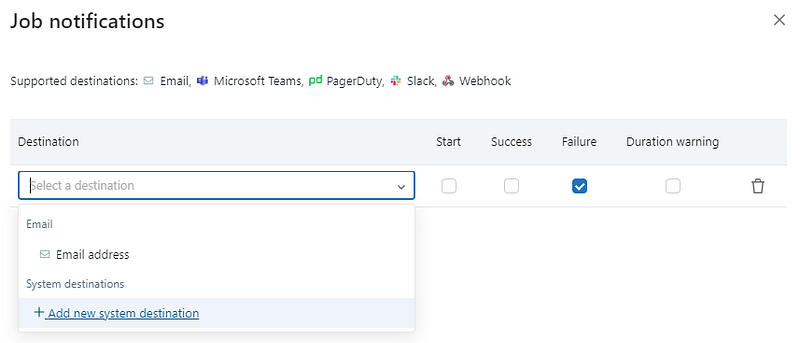
2. In the pop-up, click on ‘Add notification’.

3. Here click ‘Add new system destination’. A new tab will open where you can add a destination.
4. Select ‘Microsoft Teams’ as the destination type. Think of a name for your destination and add the previously generated webhook url.

5. Go back and redo steps 1 & 2. This time you will be able to select your teams webhook destination.

6. Choose when you want a notification to be sent, and click ‘Save’. All done!
The Notification
After the condition for the notification is met, an interactive card like the one below will be posted in the channel. Pretty neat!


