
Databricks — AutoML & Model Serving
In our previous blog, we talked about different MLflow components and concentrated on tracking, managing models & deploying into model registry. In this blog, we’ll talk about Databricks AutoML feature and MLflow model serving.
AutoML
Databricks AutoML helps you automatically apply machine learning to a dataset. It prepares the dataset for model training and then performs and records a set of trials, creating, tuning, and evaluating multiple models. It displays the results and provides a Python notebook with the source code for each trial run so you can review, reproduce, and modify the code. AutoML also calculates summary statistics on your dataset and saves this information in a notebook that you can review later.
To start with, let’s first prepare the dataset (I have taken a sample dataset from sklearn) to train the model and save this as a Delta table.
%python
import sklearn
input_pdf = sklearn.datasets.fetch_california_housing(as_frame=True)
chDf = spark.createDataFrame(input_pdf)
chDf.write\
.format("delta")\
.save("/mnt/delta/california_housing")
spark.sql ("CREATE TABLE default.california_housing USING DELTA LOCATION '/mnt/delta/california_housing'")Once we prepare the training dataset we can use Databricks AutoML experience to train multiple models and present to us.
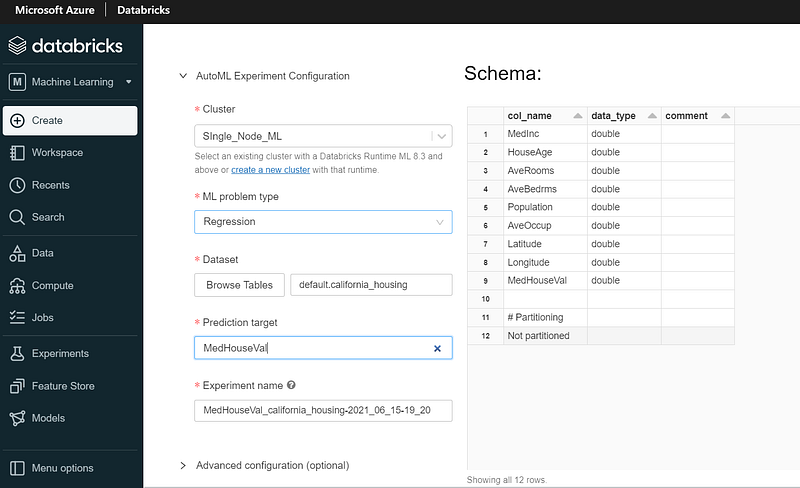
We’ll select a cluster (I’m using Azure Databricks Runtime for Machine Learning 8.3 ML Beta). As this is a regression problem we’re trying to solve, we’ll select ML problem type as Regression (other option available is Classification).
Next, we’ll browse and select the training dataset i.e. the Delta table we’ve created and the prediction target column.
Once the right configuration is set, AutoML will start training. The training process will last for 60 minutes. We can stop the process if required.
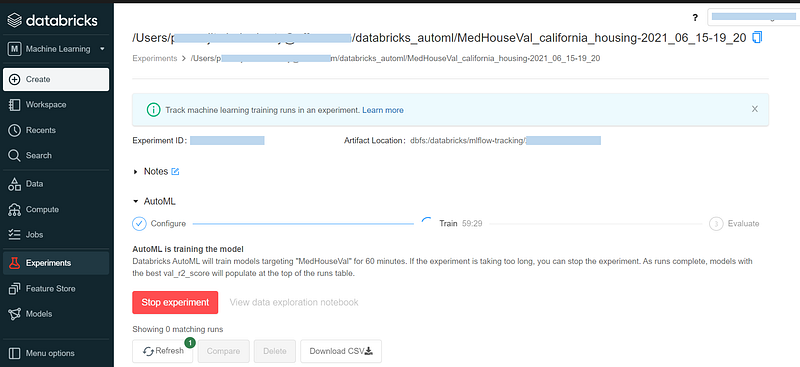
After an hour, the training will be completed and AutoML will identify the best model based on r2 score.
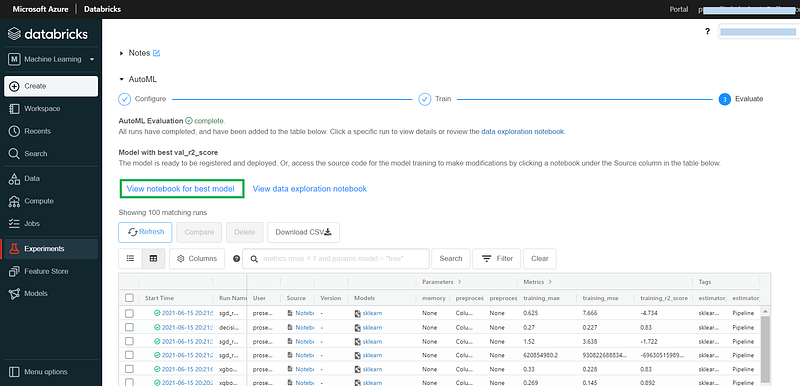
We can select View notebook for best model to open the auto generated code.
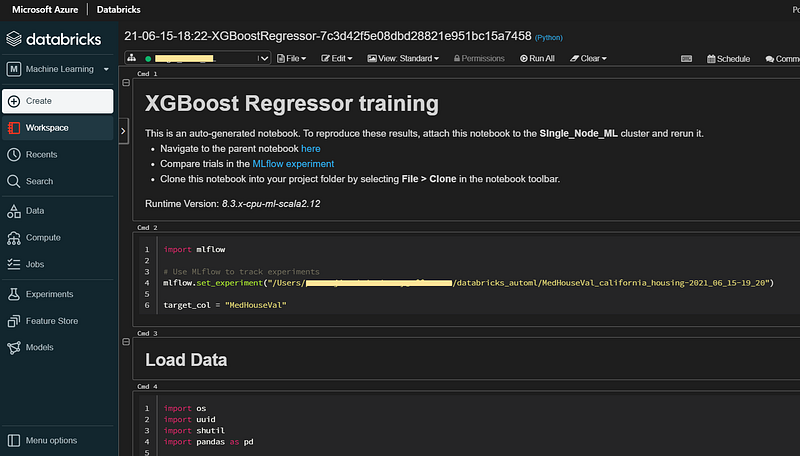
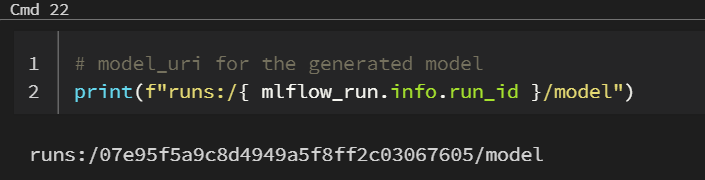
At the end of the notebook, we’ll find the model URI.
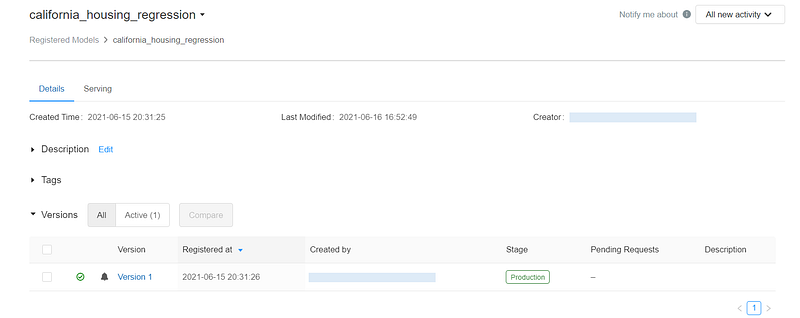
Register the final model into Model Registry
If we’re happy with this model, we can register it into the Model Registry.
%python
import time
import mlflow
model_name = "california_housing_regression"
model_uri = "runs:/07e95f5a9c8d4949a5f8ff2c03067605/model"
new_model_version = mlflow.register_model(model_uri, model_name)
# Registering the model takes a few seconds,
# so add a delay before continuing with the next cell
time.sleep(5)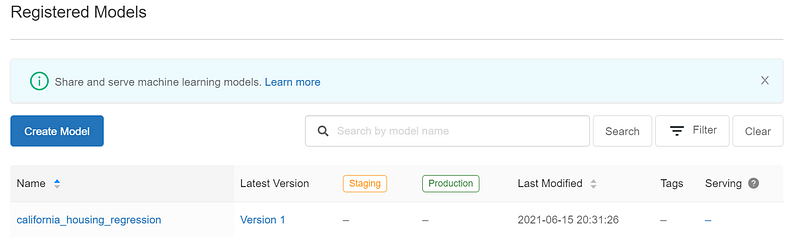
Once our model is registered, we can promote it to a higher stage (refer my previous blog for lifecycle management).
Model Serving
In this section, we’ll see how to deploy the registered model for on-line serving.
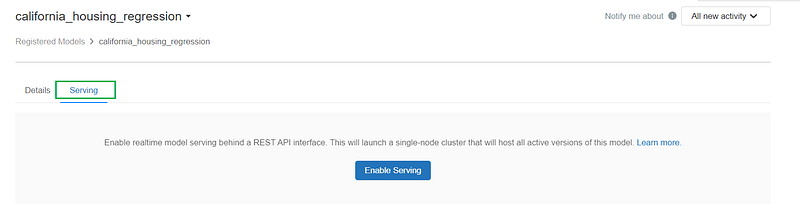
This will start a job cluster, install required libraries and our chosen model.
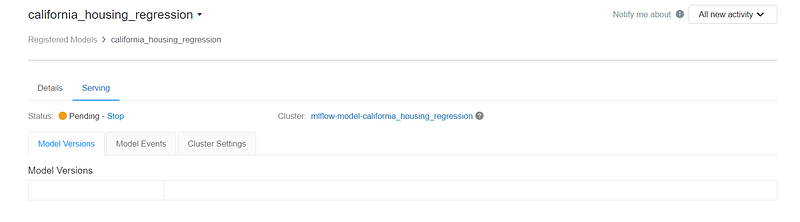
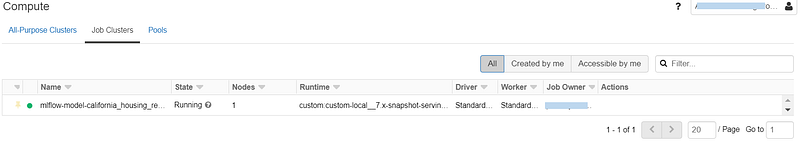
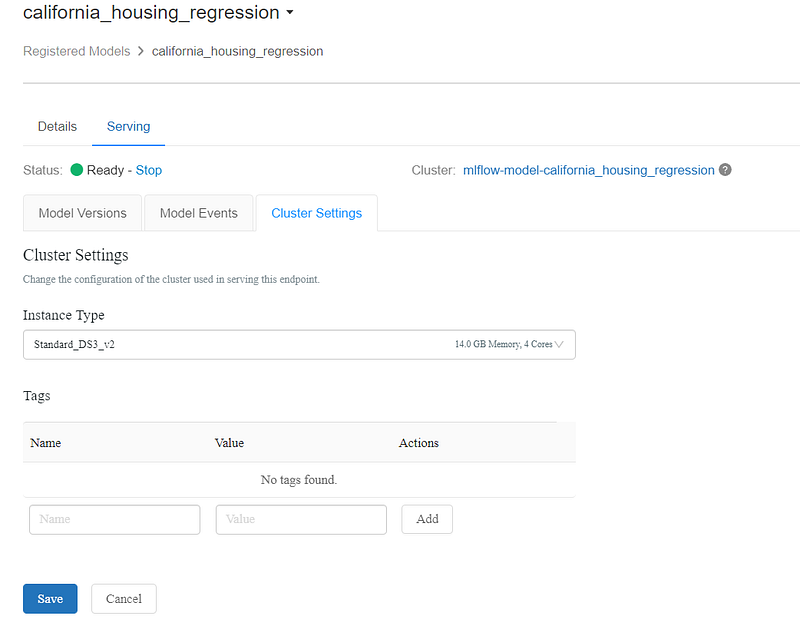
We can amend the cluster settings or select a different instance type based on our need.
Once the cluster is in running state and the model is deployed, we can find multiple model URLs —
- using the version number, we can call any particular model version: https://<databricks instance>/model/<model name>/<version number>/invocations
- or, we can call the latest version of each stage: https://<databricks instance>/model/<model name>/<stage>/invocations
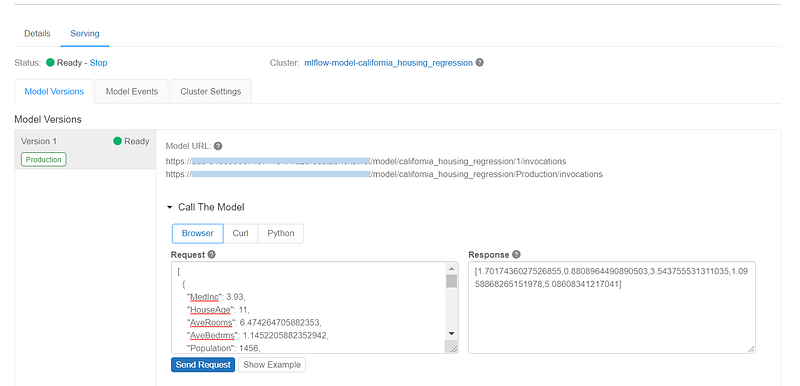
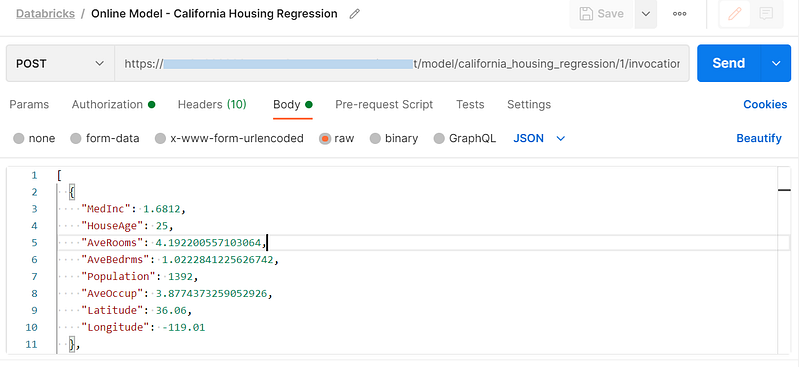
Now, we can test the service by sending a REST request and getting the desired response.
Test the on-line model
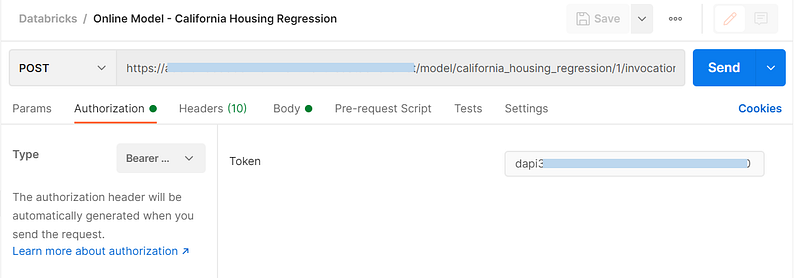
We need a Databricks access token to access the REST endpoint of the deployed model.

I’ve used Postman to access the REST API. We’ll use the model URL from earlier screen, select authorization type as Bearer Token and input Databricks access token.

If we want to publish the online model for production use, we should use Azure API Management platform for managing our APIs.
References
Thanks for reading!! If you have enjoyed, Clap & Share it!! To see similar posts, follow me on Medium, Blogger & LinkedIn.


