
How To Setup Auto-GPT: The Autonomous GPT-4 AI

The dizzying pace of AI development has rapidly accelerated our approach toward artificial general intelligence (or AGI) with the release of an open-source Python application called Auto-GPT.
What is Auto-GPT?
Auto-GPT is an experimental open-source application that is an early instance of a fully autonomous GPT-4 implementation.
Think of it as an assistant that makes decisions on its own to achieve a goal instead of you specifying what to do next.
Auto-GPT is equipped with these features:
- 🌐 Can access the internet for information gathering
- 💾 Can store information
- 🧠 Can spawn GPT-4 instances for text generation
- 🔗 Can access popular websites and platforms
- 🗃️ Summarization with GPT-3.5
In this article, I’m going to show you a step-by-step guide on how to install and run Auto-GPT on your local machine.
What you need
- Git install (You can use GitHub for desktop also)
- Python 3.7 or later
- OpenAI API key
- PineCone API key
How to get the OpenAI and PineCone API key
- Create an OpenAI account here.
- Go to your Accounts page and under the API keys tab, click on “Create a new secret key”.
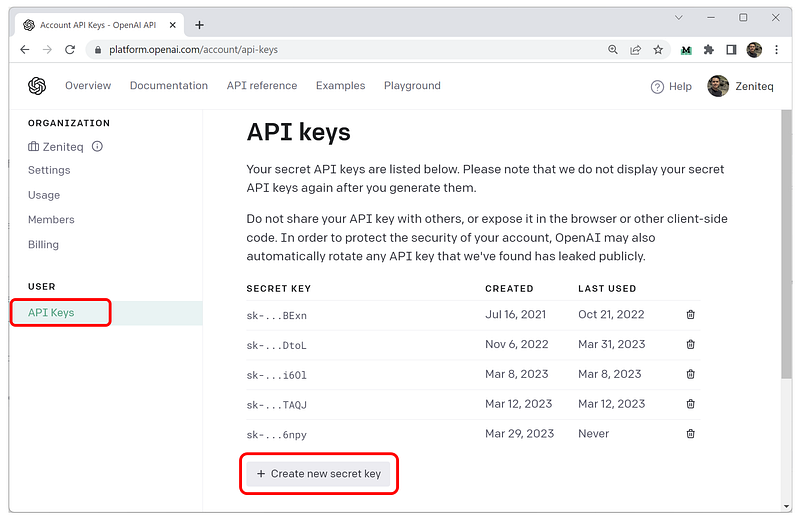
Note: Keep a copy of this key because you can’t retrieve it from the web interface.
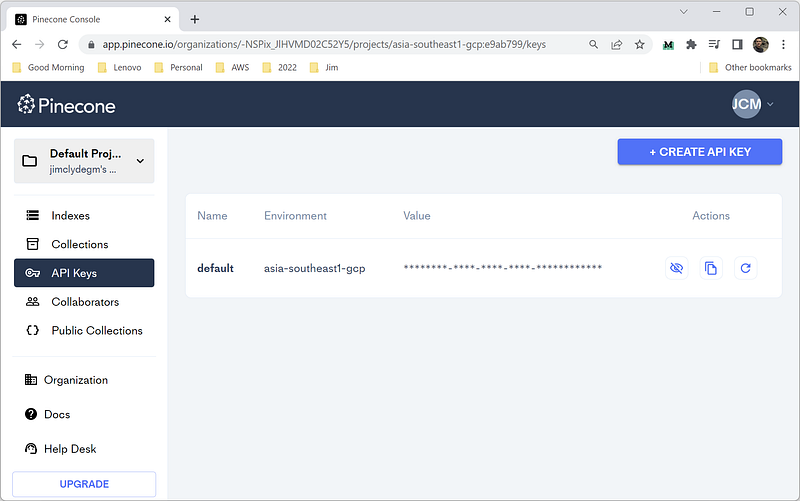
Next, go to PineCone and create an account. Under the API keys tab, copy the value and the environment and save them somewhere.
Okay, now that all the dependencies are set. Let’s start setting up Auto-GPT.
How to Setup Auto-GPT
Step 1: Clone the Auto-GPT repository
Open Git Bash and execute the command below to clone the project.
git clone https://github.com/Torantulino/Auto-GPT.git
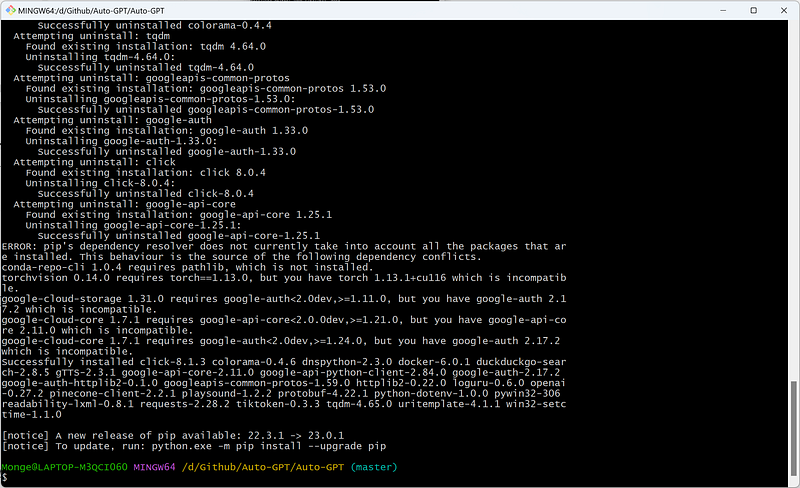
Step 2: Download the dependencies
Navigate to the Auto-GPT project folder.
$ cd 'Auto-GPT'Then install the dependencies.
pip install -r requirements.txt
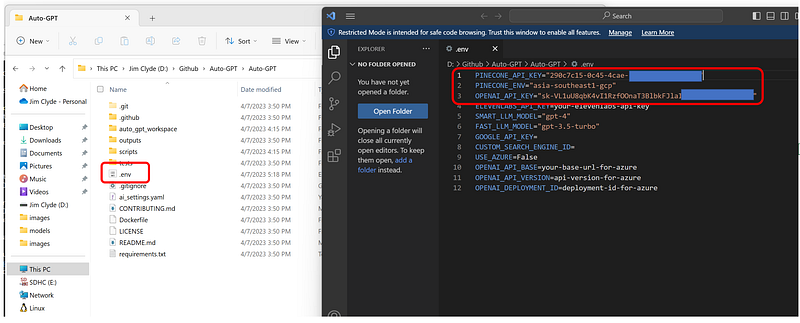
Next, Rename .env.template to .env and fill in your OPENAI_API_KEY and the PINECONE_API_KEY and PINECONE_ENV
Step 3: Test run
Open a terminal and run the main.py Python script. You should see this screen after executing the command below:
python scripts/main.py
Note: If you do not have access to the GPT-4 API, add — gpt3only at the end of the command.
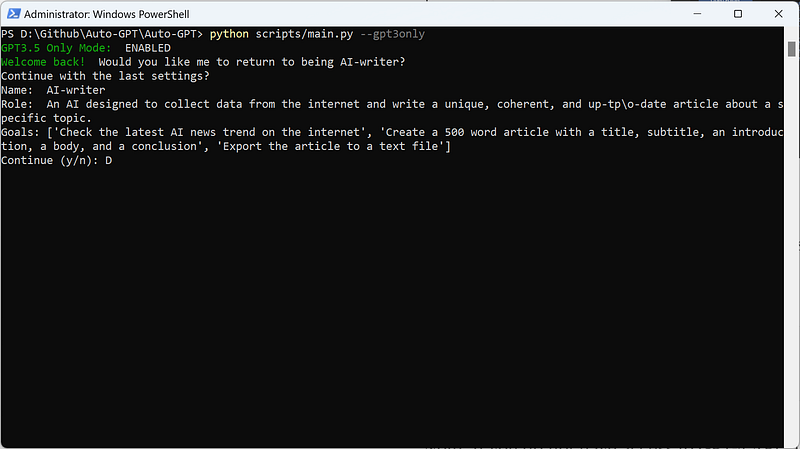
Now let’s call it "AI-writer,” because I will ask it to write an article. I also added a little description of what its role is.
An AI designed to collect data from the internet and write a unique, coherent, and up-to-date article about a specific topic.
Next, we need to specify the steps for what we want to achieve. Here are the three goals of our AI writer as an example:
- Goal 1: Search the internet for the news about the release of ChatGPT Plugins
- Goal 2: Create a 600-word article on why it is revolutionary with an introduction, body, and a conclusion
- Goal 3: Summarize the article into 300 word
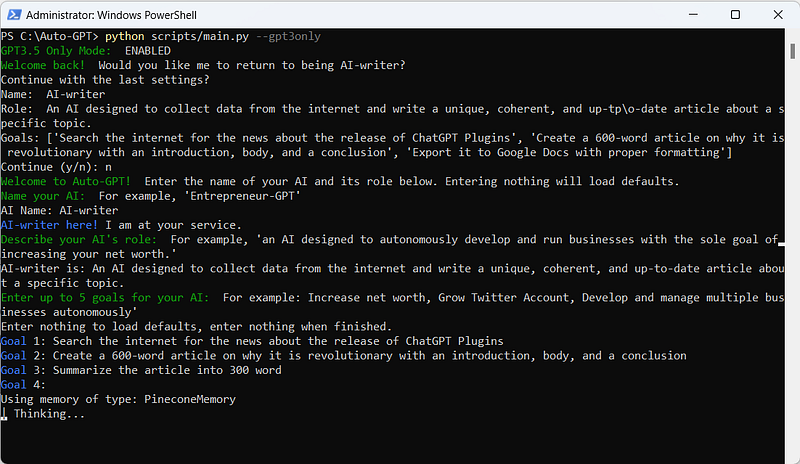
Press the enter key, and this is the response:
Note: Without enabling “continuous mode," you might need to authorize the AI to continue generating responses manually.
After a few iterations, you should get both the 500-word article and the 300-word summary.

Final Thoughts
In conclusion, Auto-GPT is a huge step forward in the field of autonomous AI. It not only makes complicated tasks easier, but it also lets people use the power of AI with little input.
This new trend of “auto-prompting” is interesting. It allows GPT-4 to generate prompts that lead to new prompts, and so on.
Stay updated with the latest news and updates in the creative AI space — follow the Generative AI publication.
Please support my work on Medium and get unlimited access by becoming a member using my referral link here. Have a nice day!