
Custom Bottom Navigation Bar Like Pinterest in Kotlin
In this post, you will learn how to design a Bottom Navigation Bar Like Pinterest on Android.
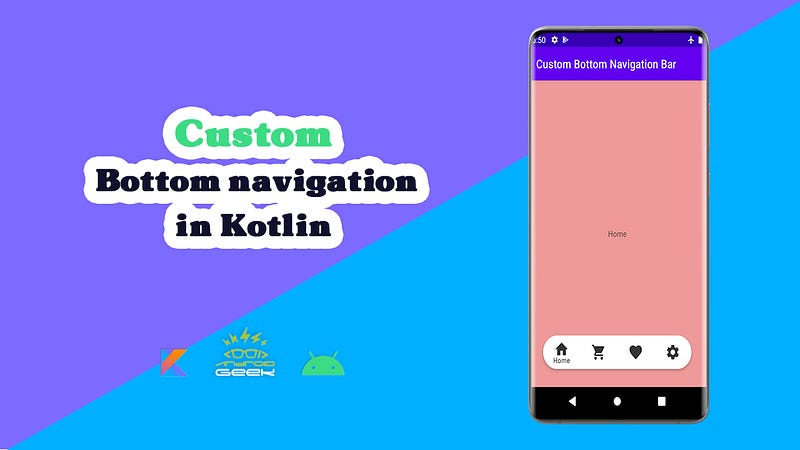
The bottom navigation bars let you easily navigate between top-level views. By tapping on a bottom navigation icon, you can quickly navigate to the associated view or refresh the current view.
in the previous article about the bottom navigation bar, I showed you how we can implement this component in our app:
<< This article >>
let’s Start 👩🏻💻
Step by Step Implementation
Step 1 — Adding the required dependency
implementation 'androidx.navigation:navigation-fragment-ktx:2.4.2'
implementation 'androidx.navigation:navigation-ui-ktx:2.4.2'
Step 2- Creating your fragments
Make as many fragments as you want :), In this sample, I have created 4 fragments.
Step 3- Creating a navigation graph
To add a navigation graph to your project, do the following:
- In the Project window, right-click on the
resdirectory and select New > Android Resource File. The New Resource File dialog appears. - Type a name in the File name field, such as “nav_graph” or “nav_main” or everything you want :)
- Select Navigation from the Resource type drop-down list, and then click OK.
<?xml version="1.0" encoding="utf-8"?>
<navigation xmlns:android="http://schemas.android.com/apk/res/android"
    xmlns:app="http://schemas.android.com/apk/res-auto"
    xmlns:tools="http://schemas.android.com/tools"
    android:id="@+id/nav_main"
    app:startDestination="@id/homeFragment">

    <fragment
        android:id="@+id/homeFragment"
        android:name="com.ezatpanah.custombottomnavigationbar.fragments.HomeFragment"
        android:label="fragment_home"
        tools:layout="@layout/fragment_home" />
    <fragment
        android:id="@+id/shopFragment"
        android:name="com.ezatpanah.custombottomnavigationbar.fragments.ShopFragment"
        android:label="fragment_shop"
        tools:layout="@layout/fragment_shop" />

    <fragment
        android:id="@+id/favoritesFragment"
        android:name="com.ezatpanah.custombottomnavigationbar.fragments.FavoritesFragment"
        android:label="fragment_favorites"
        tools:layout="@layout/fragment_favorites" />

    <fragment
        android:id="@+id/settingsFragment"
        android:name="com.ezatpanah.custombottomnavigationbar.fragments.SettingsFragment"
        android:label="fragment_settings"
        tools:layout="@layout/fragment_settings" />

</navigation>
Step 4- Creating a menu for the Bottom Navigation Bar
The Navigation Bar needs to have some items which will create using Menu. To create a Menu, first, create a Menu Directory by clicking on the app -> res(right-click) -> New -> Android Resource Directory and select Menu in the Resource Type.
then, To create a Menu Resource File , click on the app -> res -> menu(right-click) -> New -> Menu Resource File and name it menu_bottom.xml.
<?xml version="1.0" encoding="utf-8"?>
<menu xmlns:android="http://schemas.android.com/apk/res/android">
    <item
        android:id="@+id/homeFragment"
        android:icon="@drawable/ic_baseline_home_24"
        android:title="Home"/>
    <item
        android:id="@+id/shopFragment"
        android:icon="@drawable/ic_baseline_shopping_cart_24"
        android:title="Shop"/>
    <item
        android:id="@+id/favoritesFragment"
        android:icon="@drawable/ic_baseline_favorite_24"
        android:title="Favorites"/>
    <item
        android:id="@+id/settingsFragment"
        android:icon="@drawable/ic_baseline_settings_24"
        android:title="Settings"/>
</menu>
we also need to create an icon for each of these items. To create an icon, click on the app -> res -> drawable(right-click) -> New -> Vector Asset.
Step 5- create custom background
for creating a custom background for out bottom navigation bar , first go to this path : app -> res -> drawable(right-click) -> New -> drawable Resource File
file name : bg_rounded.xml
in the Root element , please put : shape
<?xml version="1.0" encoding="utf-8"?>
<shape xmlns:android="http://schemas.android.com/apk/res/android"
    android:shape="rectangle">
    <solid android:color="@color/white" />
    <corners android:radius="100dp" />
</shape>
Step 6-Add a NavHost and Bottom Navigation to an activity
Next, define a host fragment in the main layout (main_activity.xml). A nav host fragment is an empty container where destinations are swapped in and out as a user navigates through your app. We will also add the BottomNavigationView to the main layout, as shown below.
<?xml version="1.0" encoding="utf-8"?>
<androidx.constraintlayout.widget.ConstraintLayout xmlns:android="http://schemas.android.com/apk/res/android"
    xmlns:app="http://schemas.android.com/apk/res-auto"
    xmlns:tools="http://schemas.android.com/tools"
    android:layout_width="match_parent"
    android:layout_height="match_parent"
    tools:context=".MainActivity">

    <fragment
        android:id="@+id/activity_main_nav_host_fragment"
        android:name="androidx.navigation.fragment.NavHostFragment"
        android:layout_width="match_parent"
        android:layout_height="0dp"
        app:defaultNavHost="true"
        app:layout_constraintBottom_toBottomOf="parent"
        app:layout_constraintLeft_toLeftOf="parent"
        app:layout_constraintRight_toRightOf="parent"
        app:layout_constraintTop_toTopOf="parent"
        app:navGraph="@navigation/nav_main" />


    <com.google.android.material.bottomnavigation.BottomNavigationView
        android:id="@+id/bottomNavigationView"
        android:layout_width="match_parent"
        android:layout_height="wrap_content"
        android:layout_gravity="bottom"
        android:layout_margin="30dp"
        android:background="@drawable/bg_rounded"
        app:elevation="4dp"
        app:itemIconSize="30dp"
        app:itemIconTint="#353535"
        app:itemTextColor="#353535"
        app:itemRippleColor="@android:color/darker_gray"
        app:labelVisibilityMode="selected"
        app:layout_constraintBottom_toBottomOf="parent"
        app:menu="@menu/menu_bottom" />

</androidx.constraintlayout.widget.ConstraintLayout>
Step 7-Add Nav Controller into MainActivity.kt
The last step is to add Nav Controller into MainActivity.kt .
The NavController is an object that manages app navigation within a NavHost. It coordinates the swapping of fragments as users move through your app. In the main activity class, call setupWithNavController() from your main activity's onCreate() method, as shown below.
class MainActivity : AppCompatActivity() {

    private lateinit var binding: ActivityMainBinding
    private lateinit var navController: NavController

    override fun onCreate(savedInstanceState: Bundle?) {
        super.onCreate(savedInstanceState)
        binding= ActivityMainBinding.inflate(layoutInflater)
        setContentView(binding.root)

        navController= Navigation.findNavController(this,R.id.activity_main_nav_host_fragment)
        setupWithNavController(binding.bottomNavigationView,navController)

    }
}
it’s Done 😊
Github Source :
Also, you can check my video about this article in android on Youtube :
Thank you for reading and Happy Coding!👩🏻💻
Don’t forget 👏


