
PHOTOSHOP
Creating Patterns Out of Your Images
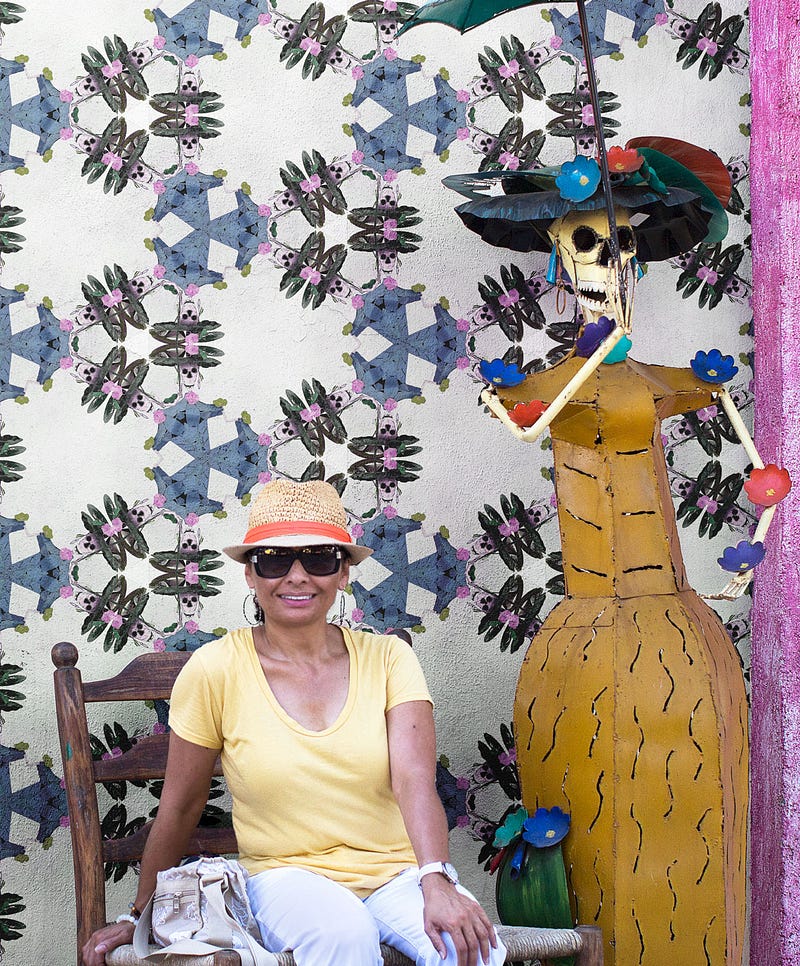
Creating patterns and changing the background in Photoshop is a fun way to modify your pictures.
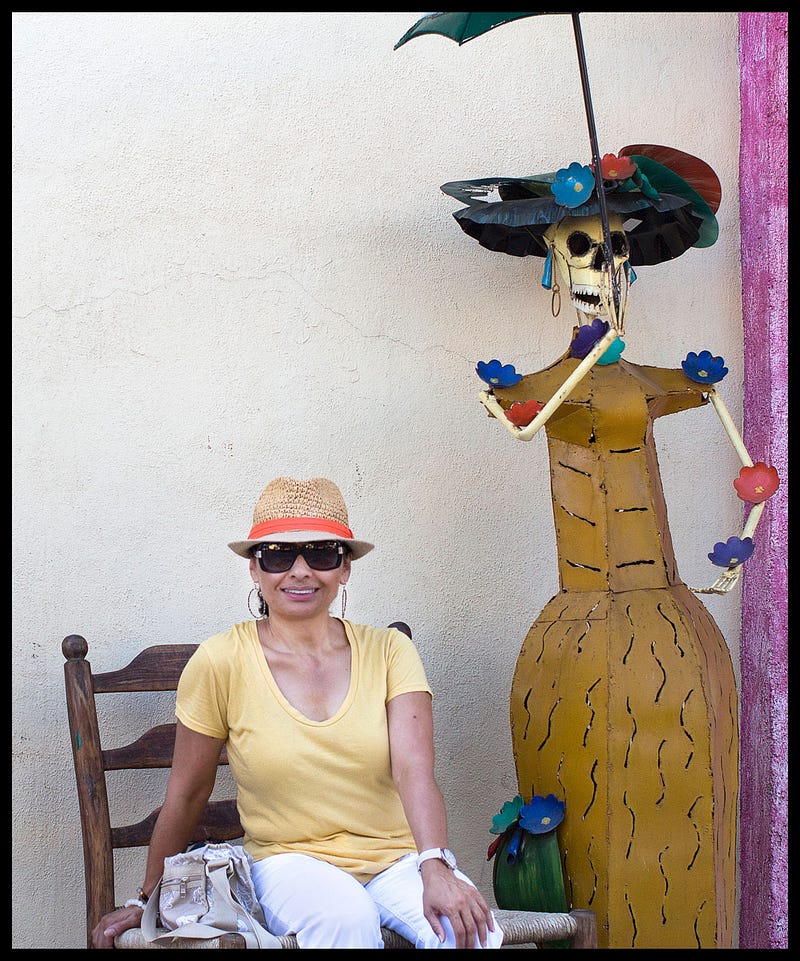
Here are the following steps for creating patterns, aka assets.
- Select picture
- Open Libraries
If your library palette is not open, go to the menu bar and window, and scroll down to libraries.
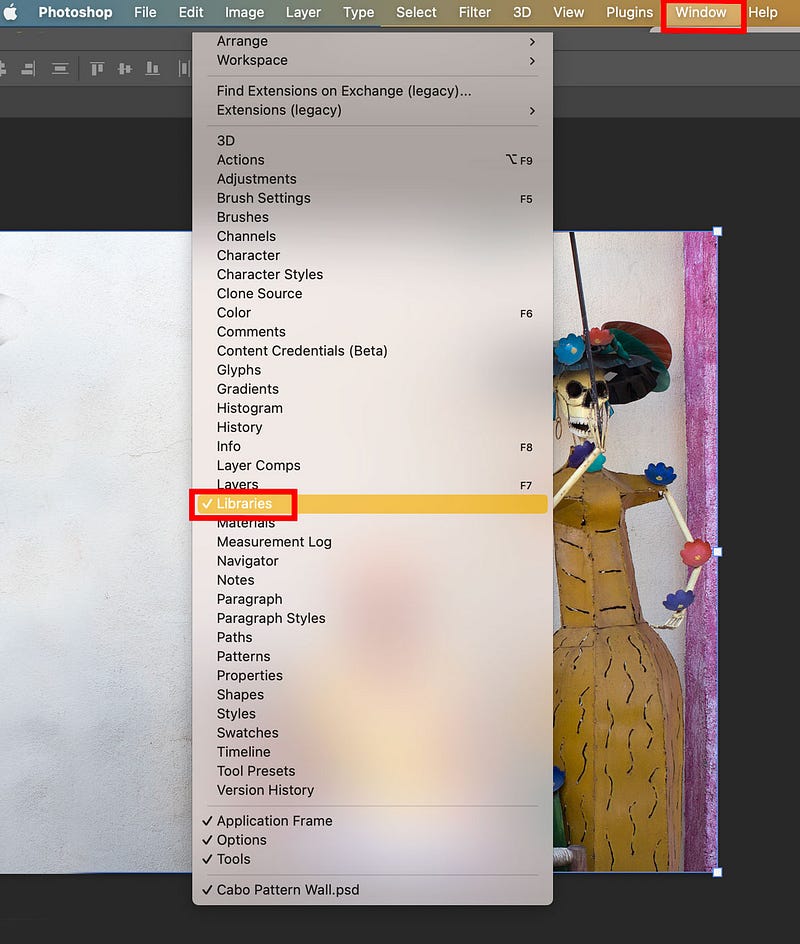
Now that your library's palette is open follow these three steps.
- Click on the libraries' palettes.
- Click the plus(+) button on the palette bar. That opens another menu.
- Click on Ca Create from Image.
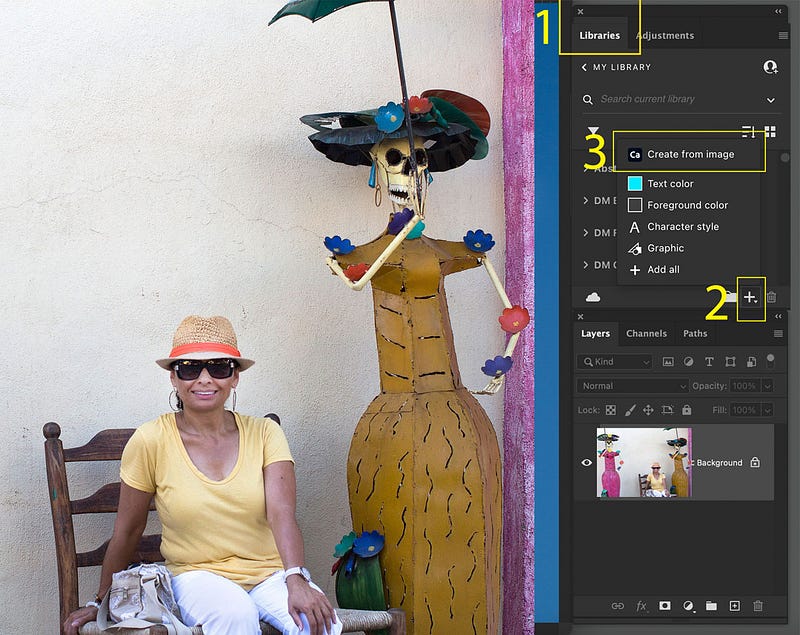
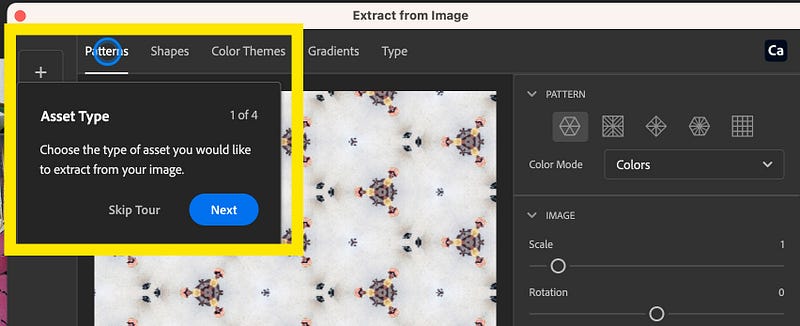
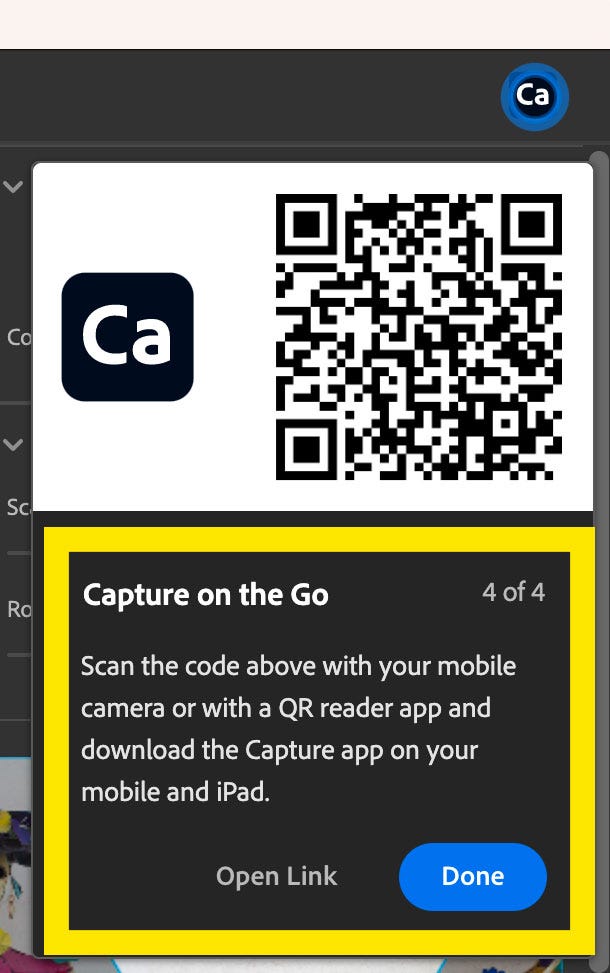
A new menu window opens, showing these four Photoshop instructions.
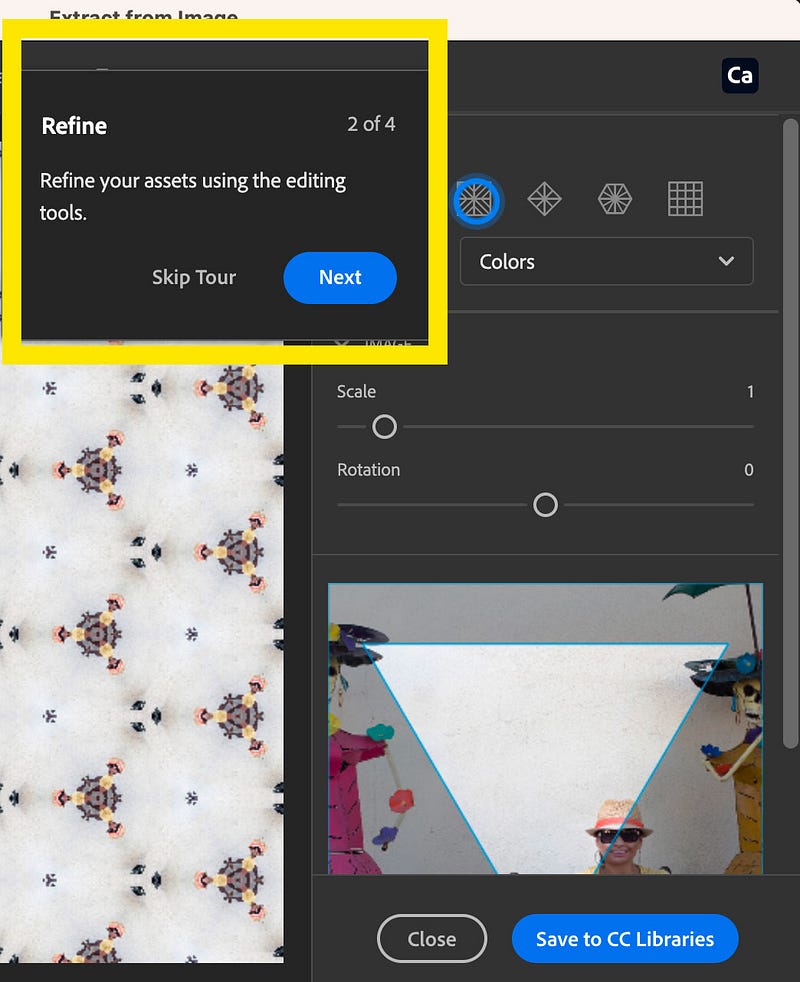
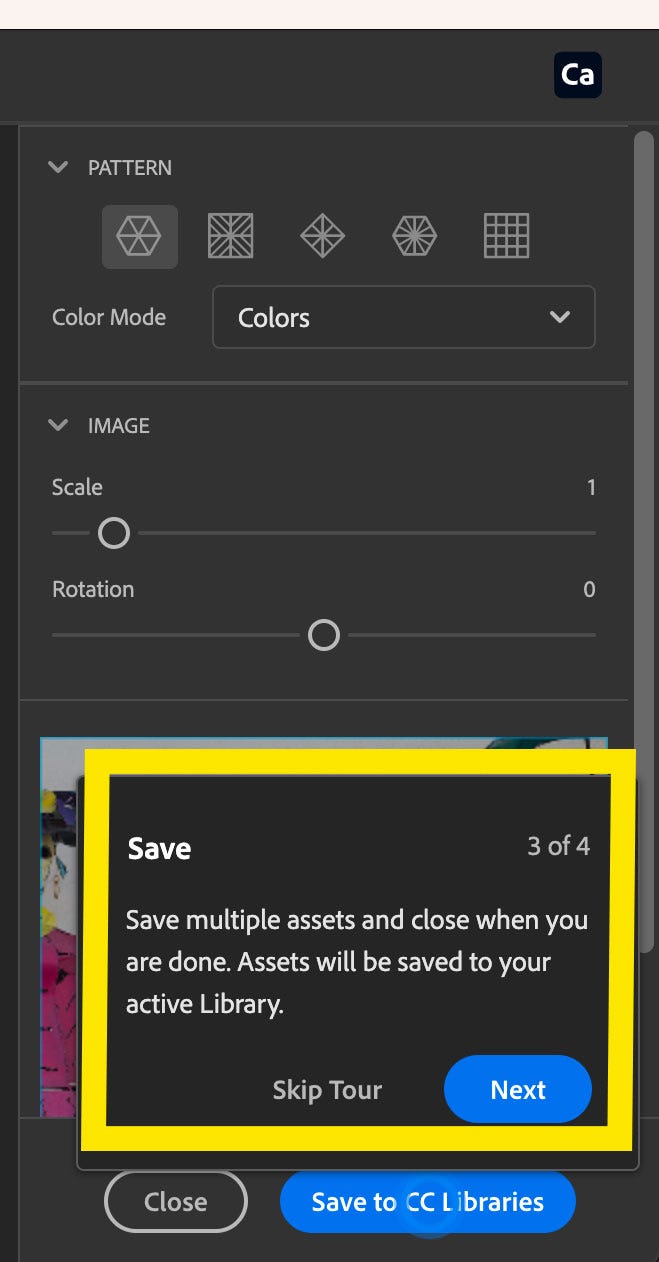
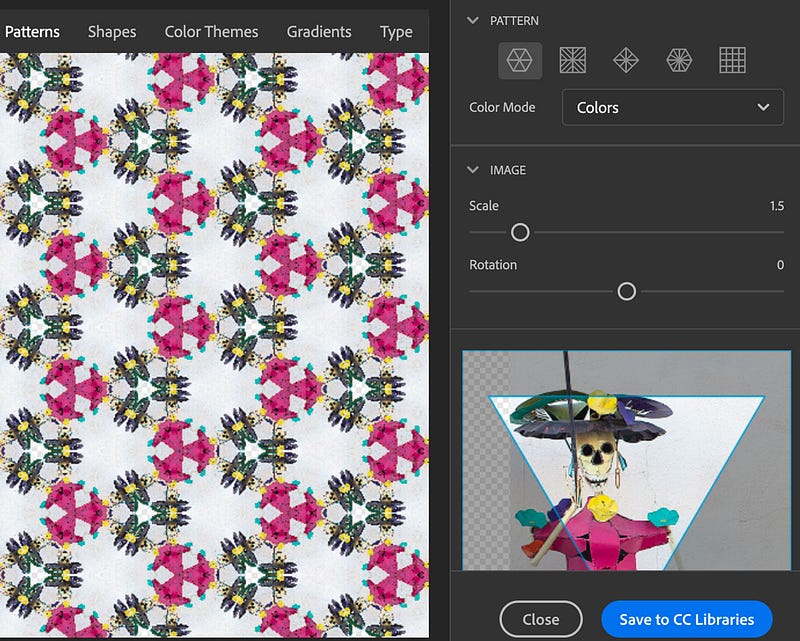
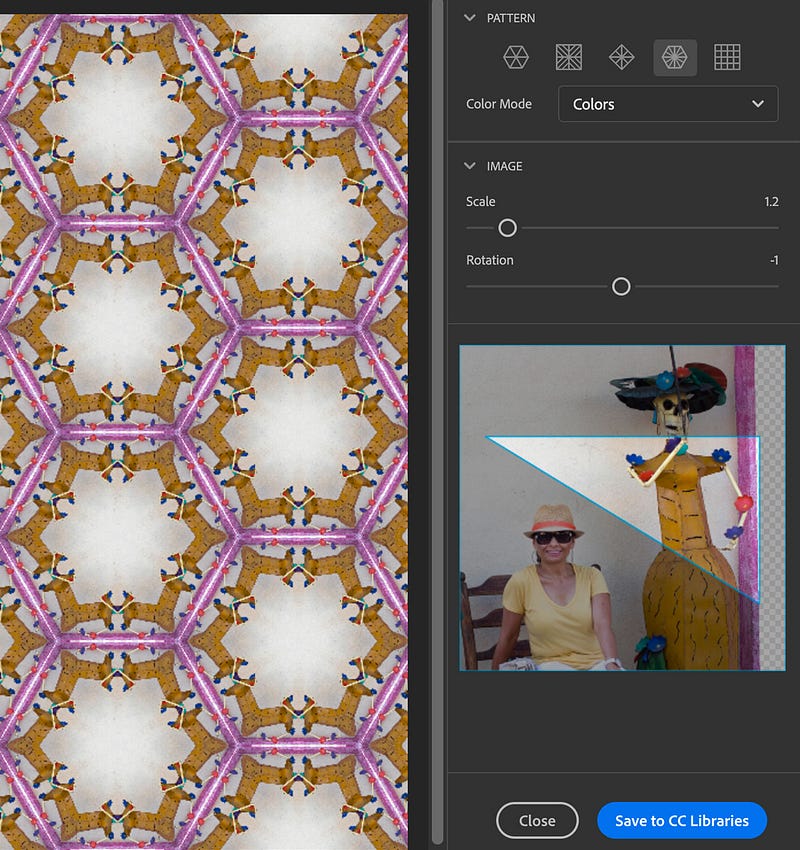
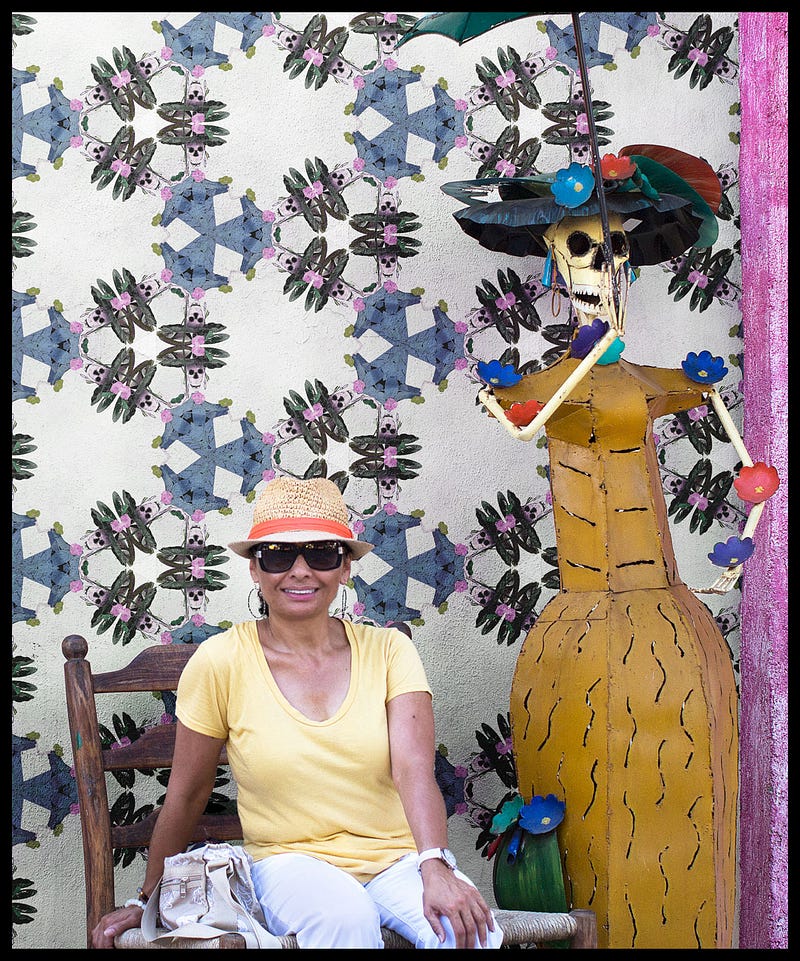
You can also place the highlighted triangle in any area of your photograph to change the design. Once you're satisfied with your pattern or asset, press save. That will keep your new pattern in your library.
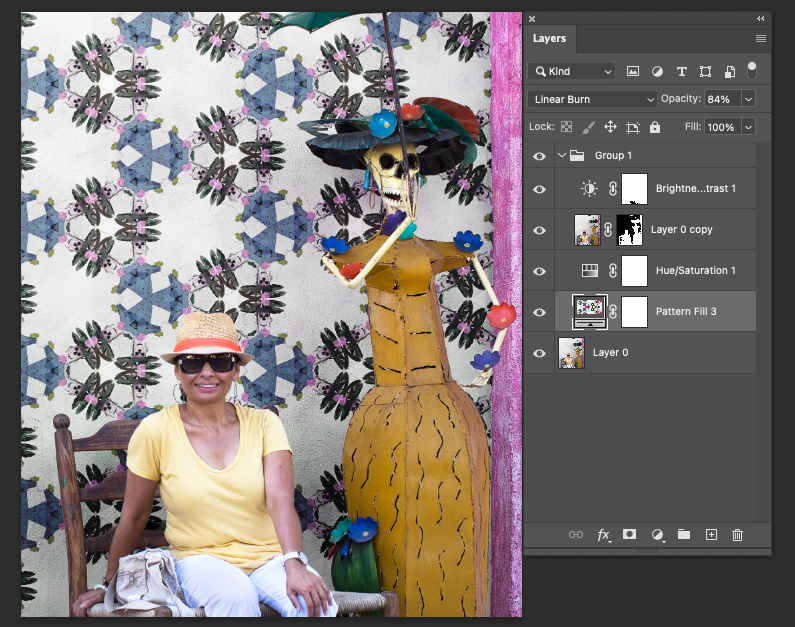
To insert the new pattern into the wall.
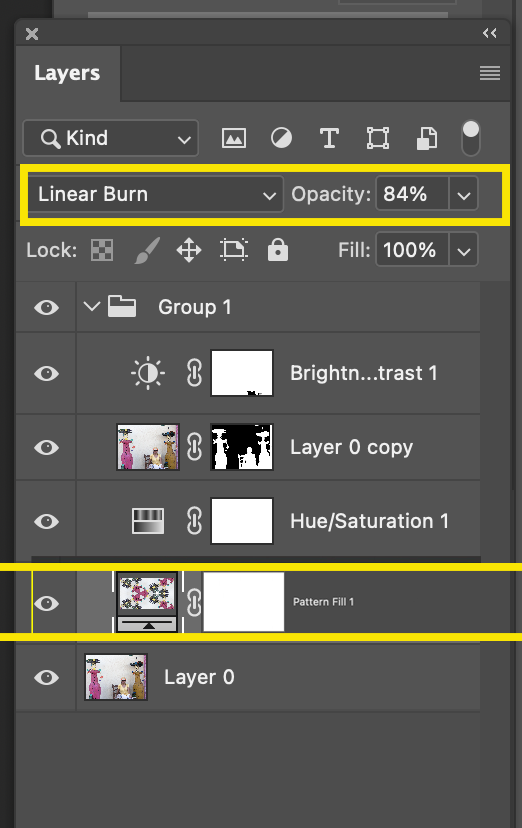
1. Open the libraries panel and click on your new pattern. It automatically creates a pattern fill adjustment layer with your new pattern over your working image. 2. Duplicate your working photo and place it above the pattern fill adjustment layer.
3. Create a layer mask on the duplicate image. That will separate your subjects from the background. Please note that I like to keep my original image active at the bottom of the layers panel so I can use the texture and the shadows of the wall.
4. I've added a little brightness and changed the hue of the pattern fill of just the wall.
For information on creating a layer mask, please refer to my article, A Photo Project.
All done!
In closing, there are multiple ways of accomplishing the same task in photoshop. This sample is one of many. Your possibilities are endless.
I hope these tips are helpful and inspirational. If you have any questions, please don't hesitate to ask me. I will answer your questions to the best of my knowledge.
Have fun creating patterns and applying your new designs to spice up your work.