Creating an EC2 instance on AWS cloud with a GPU card [part 2 of a series]
Assuming you have enough AWS service quota to create a G type EC2 instance [see previous post], then you can proceed with creation.

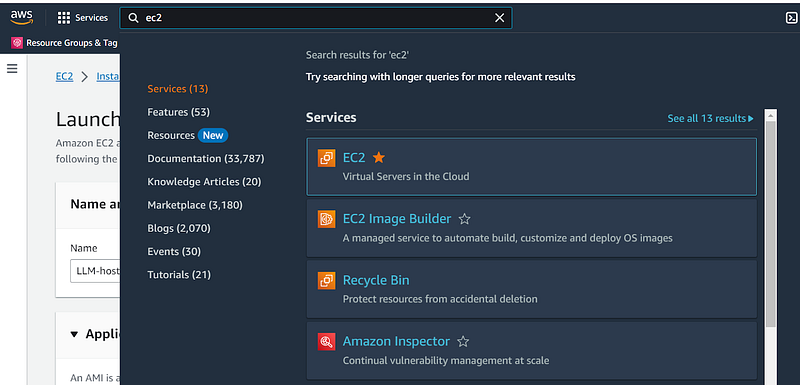
- In the search bar at the top, type EC2 (the Amazon virtual machine service) and click on the EC2 link
2. Click the orange Launch Instance button

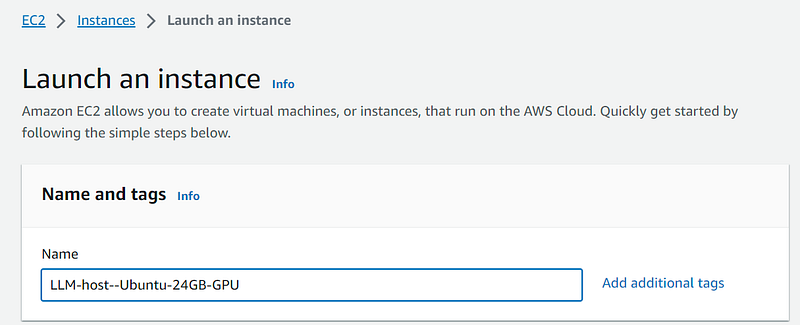
3. In the Name and tags section, enter a name to describe the EC2 virtual machine. It can be good to include relevant technical details such as OS and hardware. For example “LLM-host — Ubuntu-24GB-GPU”
4. Optionally, if you have a lot of AWS resources, you can add tags via the Add additional tags link.
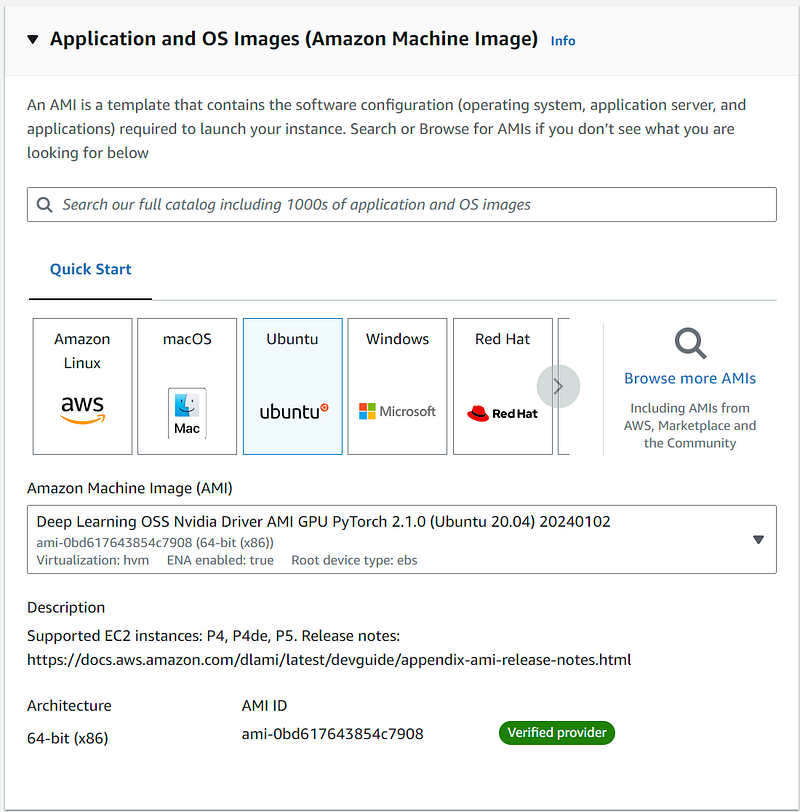
5. Under the Application and OS Images section, select Ubuntu. Try to select an AWS Deep Learning AMI with NVidia drivers and PyTorch. note: these images are larger and may incur some storage cost (larger temporary EBS volume).

Here, I have selected ami-0bd617643854c7908.
Otherwise, the default AMI (Amazon Machine Image) selection of LTS (free tier eligible) can be used, but you may have to do extra work to setup the GPU (CUDA libraries etc.)
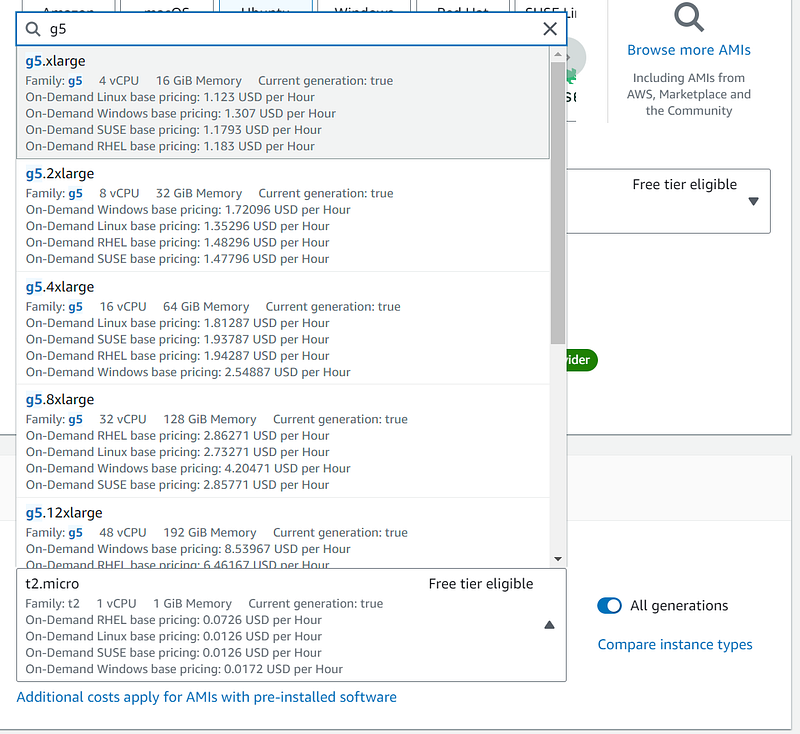
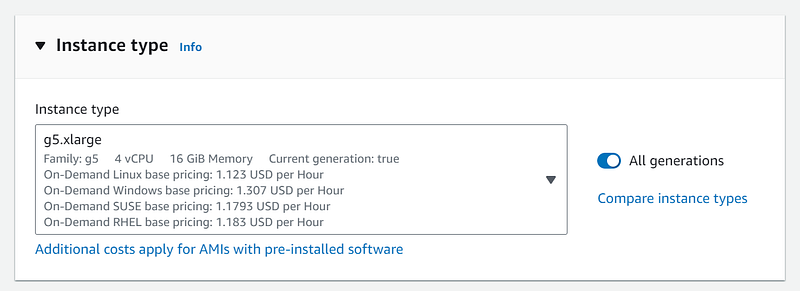
6. Under the Instance type section, click on the Instance type dropdown.
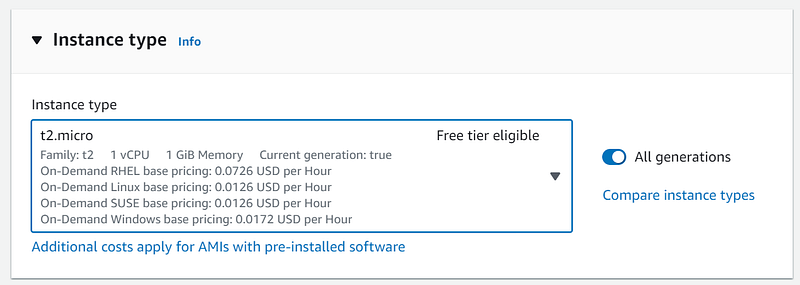
7. Type in g4 (slightly cheaper GPU machines). Check the figure for ‘GPU memory (GiB)’ — a g4.large machine provides only 8GB GPU which is probably not enough. A g4dn.xlarge machine provides 16GB of GPU memory.
If you need more GPU memory, type in g5 (more powerful boxes, 24GP GPU, but more expensive — see Instance Types and prices). Selecting g5.xlarge provides a good GPU (24GB) which greatly speeds up LLM inference and training times and good storage space (250GB). See also Amazon’s summary of GPU options. Also see this in depth guide to choosing the right GPU.
note: Another way to browse the available GPU instance types (including GPU memory size) is to use the AWS CLI — see this gist.
8. Under the Key pair section, select Create new key pair. Enter a suitable name, similar to the instance name.
9. Select Key pair type ED25519.
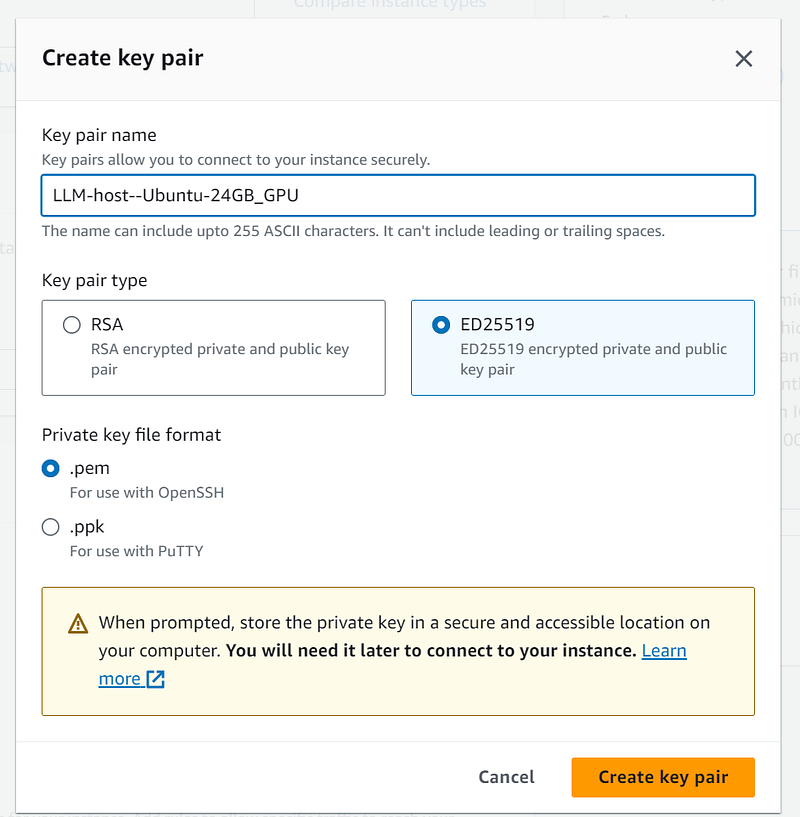
10. Select Create key pair. A pem keyfile will automatically download. You can use this later to connect to the EC2 box via a terminal, using an SSH connection.
11. Under Network settings, VPC — select the dropdown. If you do not already have a VPC, select create a new default VPC and follow the directions.
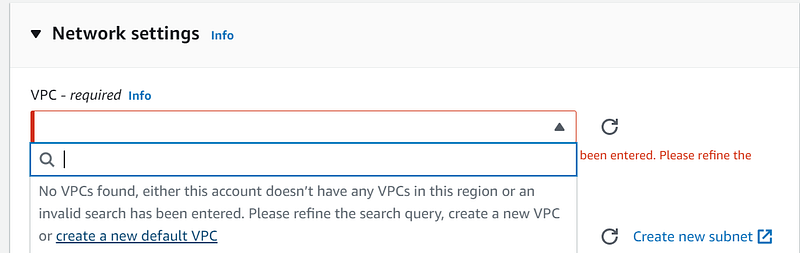
12. Back at the original Launch Instance page, you may need to select the little refresh icon at right to be able to select the VPC.
13. Click on Subnet and unless you have a specific network plan, select the first subnet.
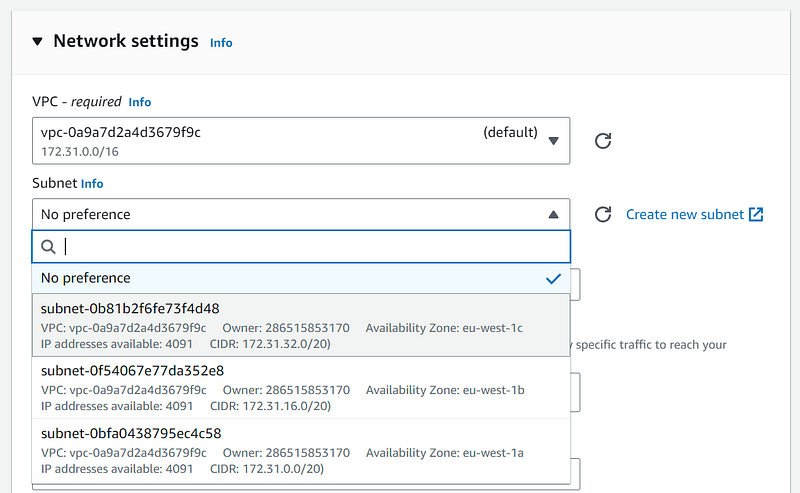
14. Select Create security group. Beside Allow SSH traffic from, select My IP.

15. In the Storage (volumes) section, enter 250 for the size (30GB is the max for the free tier) (120GB seems too small for LLMs). For Volume type, select gp3.
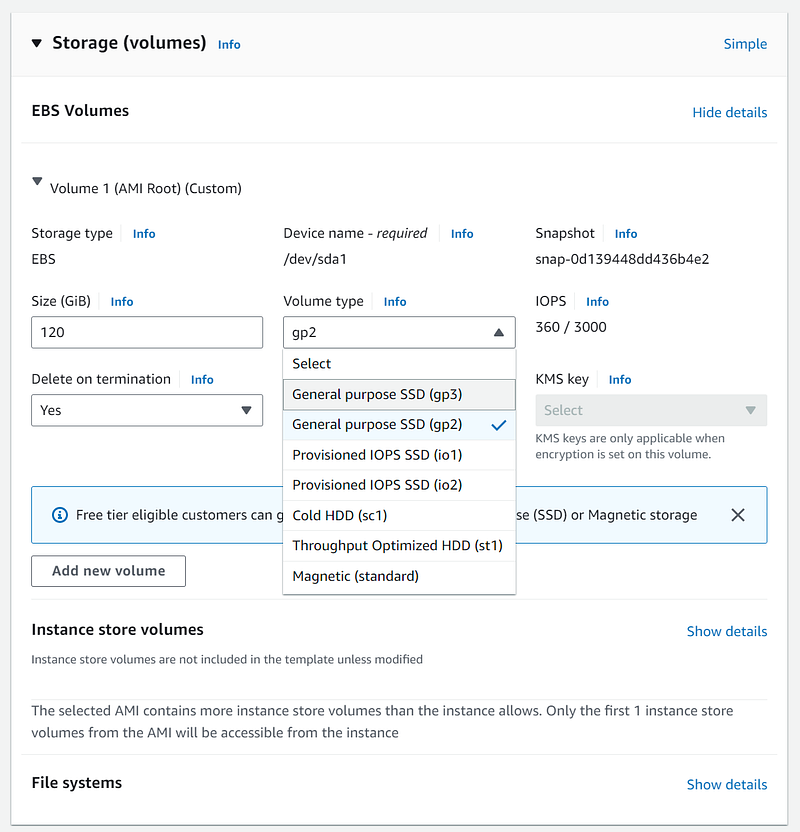
16. It is OK to leave Delete on termination set at Yes, since for persistent storage you can use EBS. For longer term storage via URL or API, you can use the cheaper S3 service.
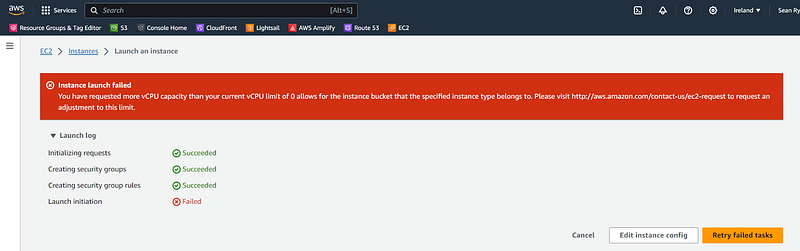
17. Review the settings. Select Launch instance.
18. If you see an error about vCPU capacity, similar to “more vCPU capacity than your current vCPU limit of 0 allows for the instance bucket” then you need to request to raise the limits. See the section at the start of this article.
Adding or editing allowed incoming IP addresses
A simple way to restrict access to an EC2 instance is by creating a whitelist of client IP addresses.
You also need to allow the text-generation-webui web server to accept incoming requests.
- Navigate to the EC2 service (via the search bar at top left)
- Ensure you are in the correct Region (via the dropdown at top right)
- Navigate to Instances
- Select the Security tab
- Expand the Inbound rules section
- Click on the link for the security group
- Select the Security group ID
- Select Edit inbound rules
- Select Add rule
- Select Type = All traffic. Enter your public IP address in the Source area. Add a suitable description. Tip: you can use Google to find out your public IP address.
- Select Add rule
- Select Type = Custom TCP
- In the Port range box, enter 7860
- In the Source column, enter your IP address followed by ‘/32’. You may be able to copy-paste this from an existing rule.
- Select Add rule
- Select Type = Custom TCP
- In the Port range box, enter 5000
- In the Source column, enter your IP address (see step 14).
- Select Save rules.
Disable accidental Termination
Tip: to avoid re-work, you may want to disable Termination of the instance.
This prevents accidental deletion of the instance, if you later try to set the instance state to Terminated.
- Select your EC2 Instance > Action > Instance Settings > Change termination protection
- Check or uncheck the box as needed
Connecting to an EC2 instance that has no static IP address
By default, an EC2 instance does not have a static IP address. You can of course assign a static IP address, but that has a running cost.
In case you only occasionally need to connect to the EC2 instance, see this post that provides a workaround.
The full series of articles “Using text-generation-webui to chat with the downloaded LLM model”:
To continue the series, please see the next article [part 3].


