
Creating a Simple CRUD Application with Spring Boot and MySQL — Part 1
In this article, I will guide you through creating a simple CRUD (Create, Read, Update, Delete) application using Spring Boot with a MySQL database. We will cover everything from setting up the development environment to configuring the database connection and running the application.

Requirements
Before we begin, you need to install the following tools:
· Java —You will need to have Java installed on your machine. For this tutorial, I am using Java 17, but you can use Java 8, 11, or any later version. You can download Java from the Oracle website.
· MySQL — We will use MySQL as our database. I am using MySQL Workbench for database management, but you can also use other tools like HeidiSQL. You can download MySQL Workbench from here.
· IDE — For the Integrated Development Environment (IDE), I am using IntelliJ IDEA Ultimate Edition. IntelliJ IDEA provides robust support for Spring Boot projects. You can download it from JetBrains.
What is Spring Boot?
Spring Boot is a powerful framework for building Java applications. It is an extension of the Spring framework, which simplifies the setup and development of new Spring applications. Spring Boot makes it easier to configure and deploy applications by providing various features such as:
- Auto-configuration: Automatically configures your application based on the dependencies you have added.
- Embedded servers: Comes with embedded servers like Tomcat and Jetty, eliminating the need for deploying WAR files.
- Production-ready features: Includes metrics, health checks, and externalized configuration to make your application ready for production.
Evolution of Java Frameworks
To understand Spring Boot, it’s essential to know about its predecessors:
- Java SE (Standard Edition): The core Java platform that provides basic libraries and features for Java development.
- Java EE (Enterprise Edition): Builds on Java SE with additional libraries and APIs for building large-scale enterprise applications.
- Spring Framework: A lightweight framework that simplifies Java EE development by providing comprehensive infrastructure support.
- Spring Boot: A further extension of the Spring framework designed to simplify the creation of stand-alone, production-grade Spring-based applications.
You can learn more about Spring Boot from the official Spring website.
Creating the Application
Step 1: Create the Project
- Open IntelliJ IDEA. After successfully installing IntelliJ IDEA, launch the application.
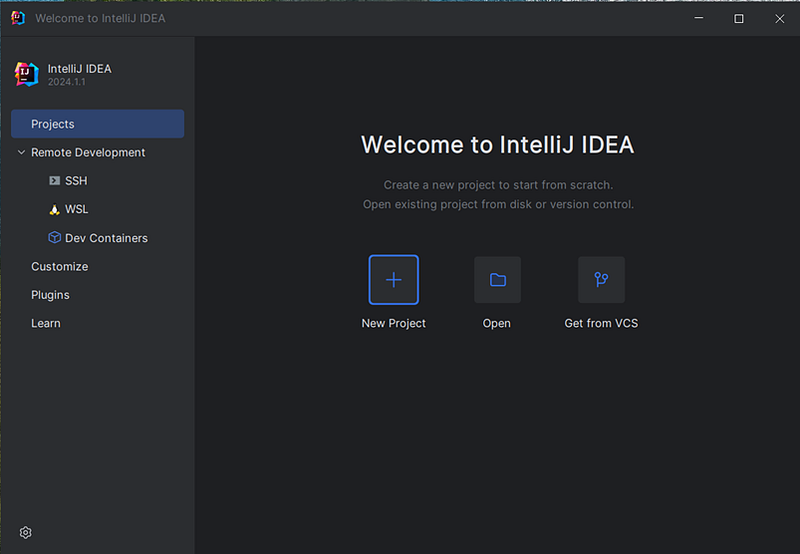
2. Create a New Project.
3. Click on New Project.
4. Select Spring Initializr.
5. Configure the project settings:
- Language: Java
- Project SDK: Select the JDK version installed on your machine.
- Project Metadata: Provide a name for your project (e.g.,
demo). - Packaging: Jar
- Java Version: Choose the version of Java you are using (e.g., 17).
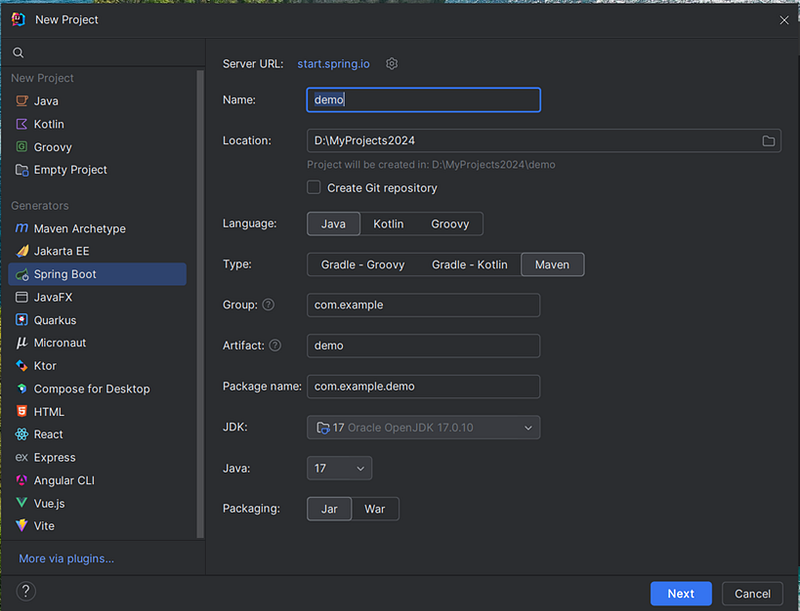
6. Add Dependencies. Click Next and add the following dependencies:
- Spring Web: Provides core web functionalities for building web applications.
- Spring Data JPA: Simplifies data access and manipulation using Java Persistence API (JPA).
- MySQL Driver: Allows the application to connect to a MySQL database.
- Lombok: Reduces boilerplate code by generating getters, setters, and other utility methods.
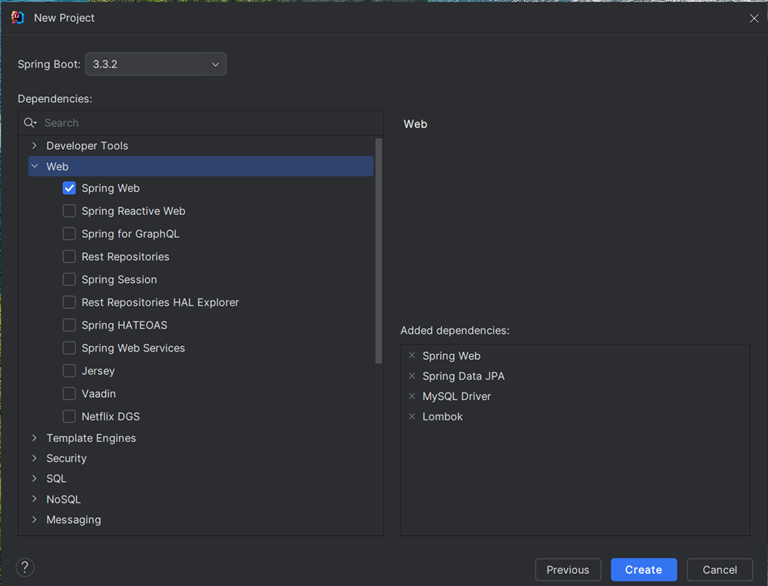
7. Finish Creating the Project.
- Click Finish to create the project. IntelliJ IDEA will generate the project structure and download the necessary dependencies.
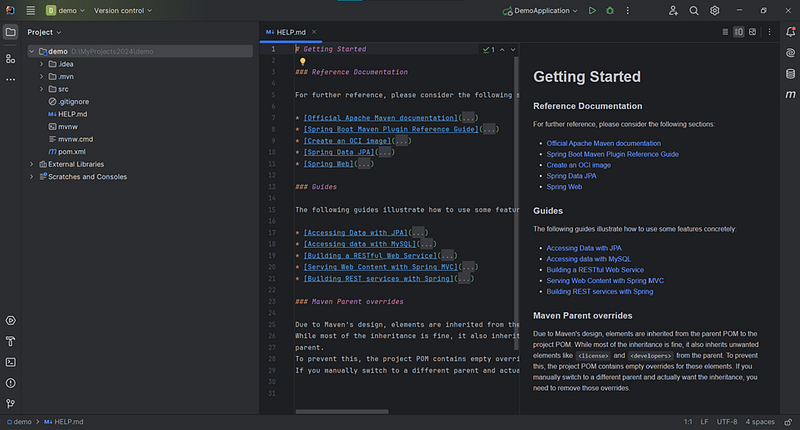
Step 2: Configure the Database Connection
Once the project is created, configure the database connection by updating the application.properties file. This file is located in the src/main/resources directory. Add the following configurations:
spring.application.name=demo
spring.jpa.hibernate.ddl-auto=update
spring.datasource.url=jdbc:mysql://localhost:3306/mydb?createDatabaseIfNotExist=true
spring.datasource.username=root
spring.datasource.password=password
spring.datasource.driver-class-name=com.mysql.cj.jdbc.Driver
spring.jpa.show-sql=truespring.datasource.url: The JDBC URL of your MySQL database. Replacemydbwith the name of your database.spring.datasource.username: Your MySQL username (default isroot).spring.datasource.password: Your MySQL password.spring.jpa.hibernate.ddl-auto: This setting automatically creates and updates your database schema based on your JPA entities. For production environments, use more restrictive settings.
Step 3: Run the Project
To verify that the project is set up correctly:
- Run the Main Application Class.
- Navigate to the main class (annotated with
@SpringBootApplication) in thesrc/main/javadirectory. - Right-click on the main class and select Run.
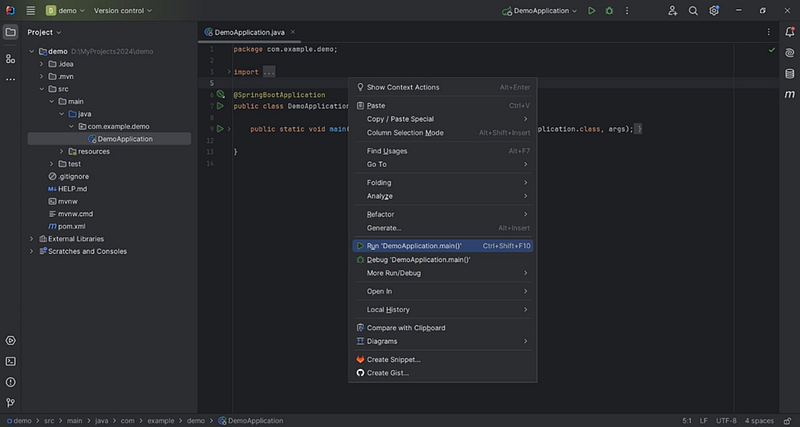
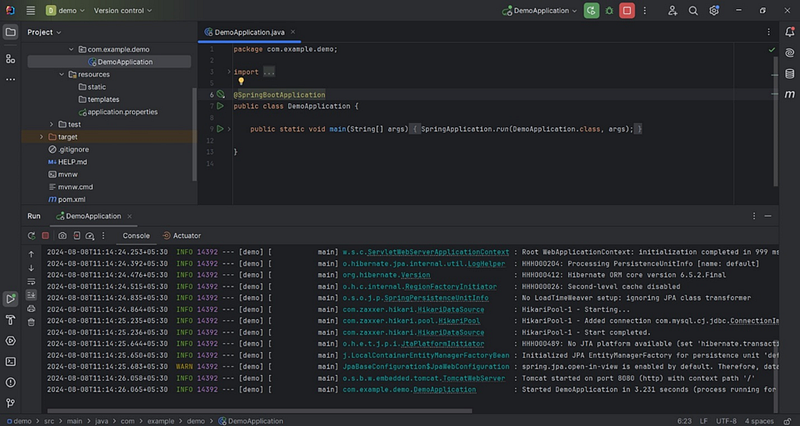
2. Check the Console Output.
- The console should display logs indicating that the application is running and the embedded Tomcat server has started.
ok. now all things are ready to go. !!!!!
In this tutorial, we covered how to set up a Spring Boot project and connect it to a MySQL database using IntelliJ IDEA. This foundational setup is essential for developing more complex CRUD operations, which we will explore in the next article.
Thank you for following along. I hope you found this guide helpful and learned something new. Stay tuned for the next part where we will implement CRUD operations in our Spring Boot application.
See you in the next article. 👋


