
Creating a Modern TypeScript/JavaScript Library With tsup
tsup is powered by esbuild

It’s a great time to be a developer, especially for JavaScript. The JavaScript ecosystem is both huge and exciting, and open source projects are constantly evolving with innovative tools one after the other. We have libraries like react for developing complex user interfaces, frameworks like next for building server-side rendered applications, gatsby for static web apps, lerna as well as turborepo for monorepos, etc.
Submitting pull requests for bug fixes or proposing new ideas is generally a developer’s first intuition for contributing to exciting open source projects. We also have the option to start our own open source project. If you’re planning to start your own open source JavaScript library, then this article is for you.
For those who are curious but haven’t heard of tsup, we will be going over this modern, robust JavaScript tool (a newer bundling tool that is an alternative to the popular rollup) to create a JavaScript library ourselves, and then submit it to the npm registry for others to npm install into their own projects. Our code examples will focus on TypeScript, which is a superset of JavaScript.
tsup is powered by esbuild, an extremely fast modern JavaScript bundler with extreme speed without needing a cache. It’s a tool that bundles your TypeScript library with no config needed. It can bundle any file that is internally supported by the node.js platform, including .js, .json, .mjs, .ts, .tsx, with experimental support for .css at the time of this writing.
To start, start up a terminal and create a new directory (it can be named anything you want). Enter the directory in the terminal afterward by entering cd in the terminal. For this article, we will call it my-typescript-library:
We’re going to need a package.json so go ahead and enter npm init -y in the terminal:
This will immediately create a package.json file with the default settings.
Create a directly called src, and then create a new file inside that directory called index.ts. This file is the entry point to our library.
Since we’ll be using tsup, we need to install it as a dev dependency:
Since the file we created at src/index.ts will be our library's entry point, we need to instruct tsup to consume these files and output them somewhere (we will set the output directory to ./dist).
Go ahead and modify package.json and add the build as well as the start lines under the scripts property:
Now, when we run npm run build, the tsup compiler will consume src/index.ts and automatically compile the files to the ./dist directory:
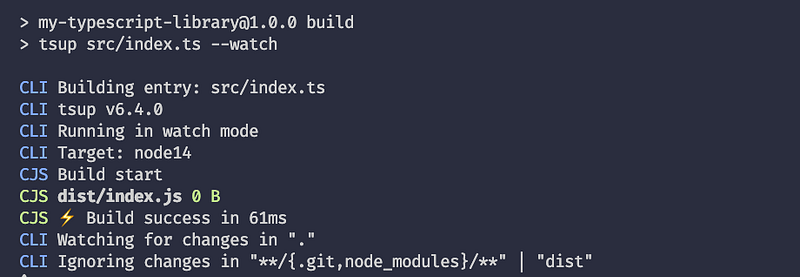

By default, tsup sends output files to ./dist, but we can configure that with a config file which we will be going over shortly.
If we look at the generated file at ./dist/index.js, we will be looking at empty content. That's because we didn't write any code for our library yet.
Let’s go ahead and enter some basic code so that we can analyze the output in more detail:
src/index.ts
Run npm run build again and notice how tsup has transpiled our code to ES5:

Let’s test our library out by creating a file called client.js with the following code:
Run the file by entering in node client.js in the terminal. You should see this:

Great! Our library is working flawlessly.
There is a lot more we can do with tsup and it all starts with a config file that tsup will automatically consume when running. Create a tsup.config.ts file with the following content:
With this config file, we can instruct the tsup compiler to do different things.
For example, we can instruct it to generate TypeScript declaration files by setting dts to true:
For this setting, we need to install typescript into our project, or else we will receive an error:
When we run npm run build again it will generate an additional file which is the file with the declaration types:

We can also generate source maps to help generate more accurate stack traces in debugging:

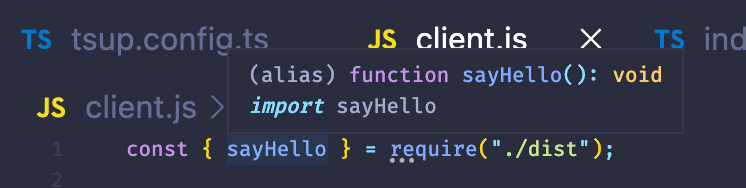
The client code will now be able to benefit more from our library by getting TypeScript hints in their IDE (such as VS Code):
One problem that library authors encounter is being able to support different formats for clients to consume. There are a few common formats:
| Format | Description | | — — — | — — — — — — — — — — — — — — — — — — — — — — — — — — — | | iife | Immediately invoked function expression (for browsers) | | cjs | CommonJS | | esm | ECMAScript Module |
We can easily configure tsup to generate all three of these formats with a simple one-line update to the config:
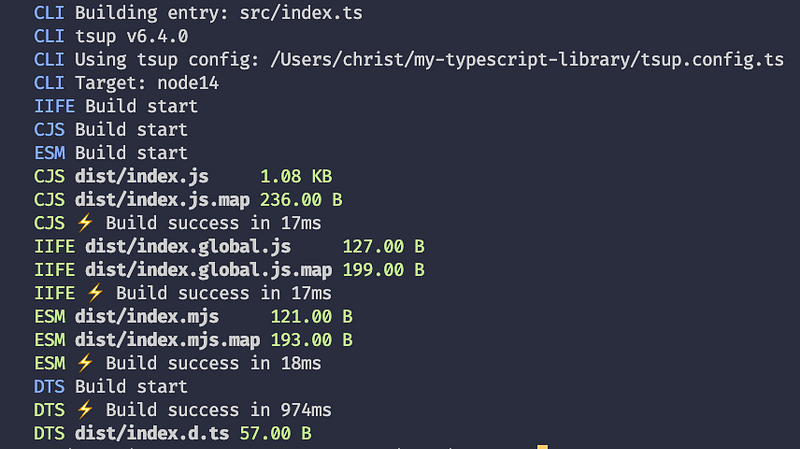

In our client.js file, we can consume our library with no problems so far. However, for consumers to import the file that corresponds to the format their project is using, we need to edit our package.json to point to the correct file(s) for certain formats:
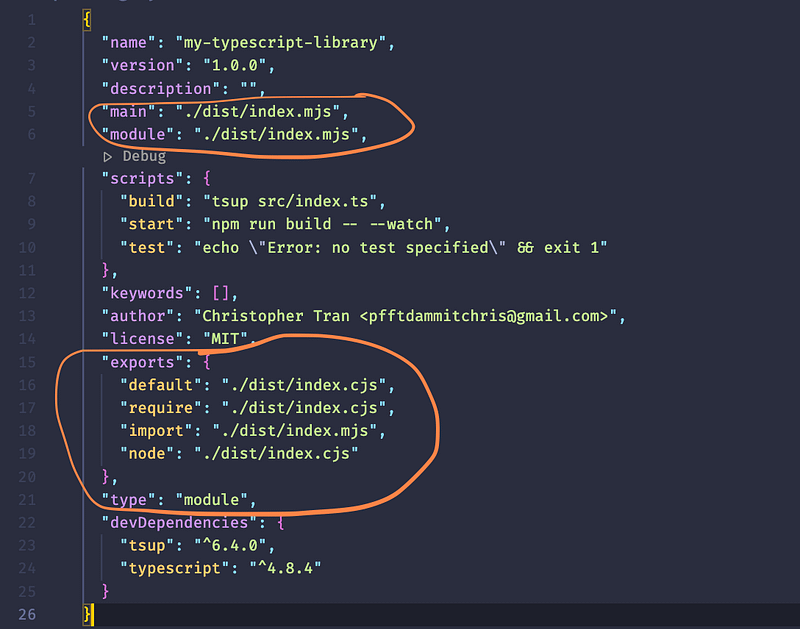
To read more about how exports works, you can click here to go to the official nodejs documentation since that is out of the scope of this article.
We have now covered the recommended requirements for creating a minimal modern JavaScript/TypeScript library! The only thing we need to do next is to publish our package to the npm registry so that users can npm install our package.
To do this, add a publishConfig key to the package.json and inside it set access to "public" as shown below:
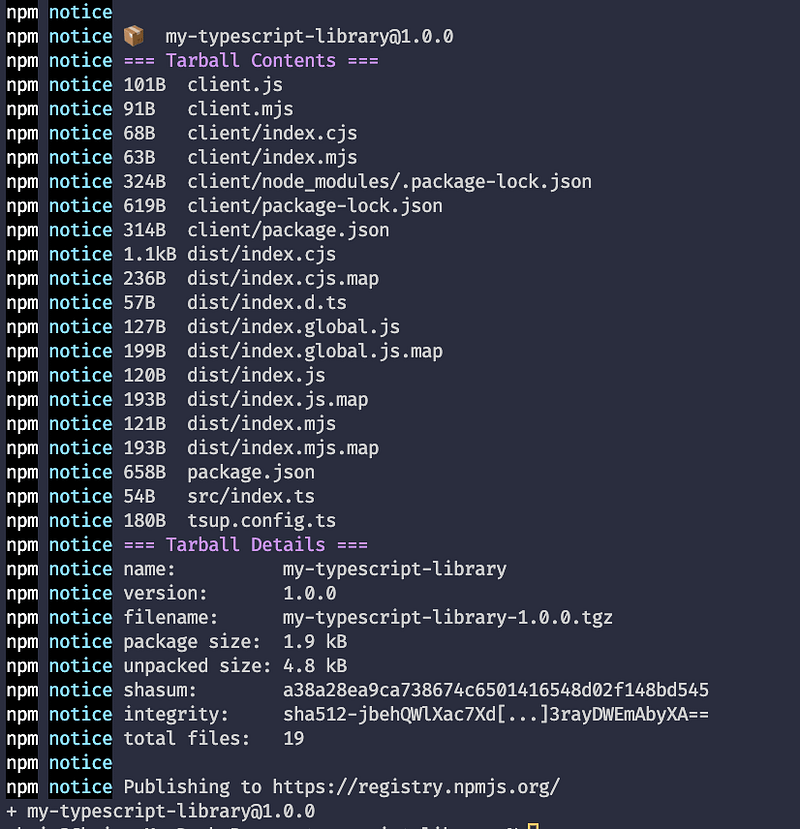
Enter in npm publish in the terminal, and you should see something similar to this (substitute my-typescript-library with your package name):
That’s it!
To access the source code from this post, click here
Conclusion
I hope you found this valuable, and look out for more in the future!


