
Create your First Blazor WebAssembly App in Net 5 using Visual Studio 2019

Browser + Razor = Blazor
Introduction
Blazor WebAssembly is a Microsoft UI framework for building Single Page Application (SPA) using C# rather than JavasScript. Microsoft provides productivity tools to scaffold the Blazor WebAssembly App via the dotnet command line and Visual Studio (VS) template. This tutorial will focus on using VS 2019 template to create the Blazor app.
Tutorial Content
In this tutorial, you will learn to set up your development environment and build your first Blazor web app with Visual Studio 2019.
Part 1: Configure your local environment for Blazor development with Visual Studio 2019.
Part 2: Create a Blazor WebAssembly App using Visual Studio 2019.
Prerequisites
- Basic knowledge of web app concepts
- C# .NET experience at a beginner level
- Local installations of the .NET Core SDK and Visual Studio
Part 1 — Configure your local environment for Blazor development with Visual Studio 2019
Part 1 is divided into two tasks:
- Install .NET 5 SDK
- Update the Visual Studio (if needed) to support Blazor WebAssembly development
Task 1.1 — Install the latest .NET 5.0 SDK version (version 5.0.100 or greater).
.NET is made up of the runtime and the SDK. The runtime is used to run a .NET app and may or may not be included with the app. The SDK is used in development to create .NET apps and libraries. To install the SDK:
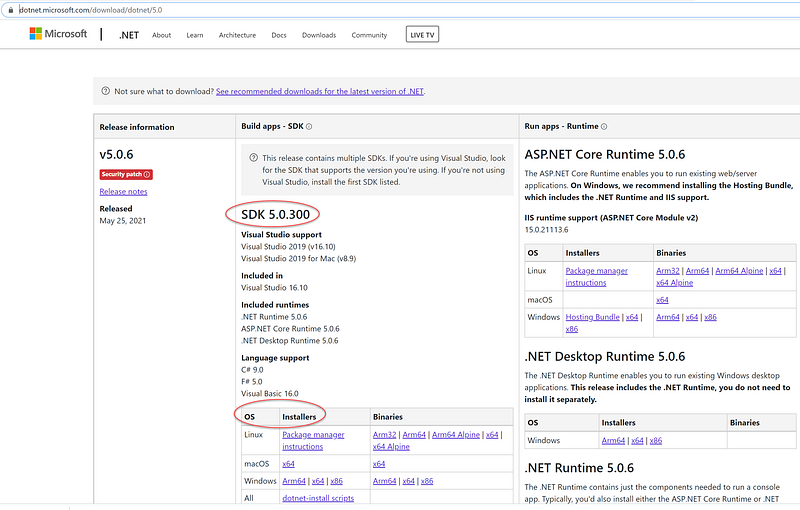
- Visit the .NET 5.0 SDK site.
- Select an installer with the OS matching your workstation. See Figure 1 for visual aids.
Task 1.2 — Update Visual Studio 2019 to Version 16.8.2 or Greater
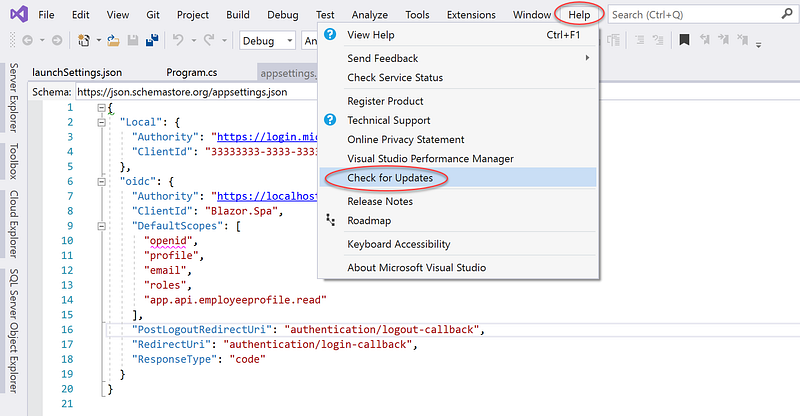
At the time of this write-up, the Visual Studio is at version 16.10.0. To update Visual Studio to the most recent release,
- While in Visual Studio, click on Help menu
- Choose Check for Updates. See Figure 2 for visual aids.
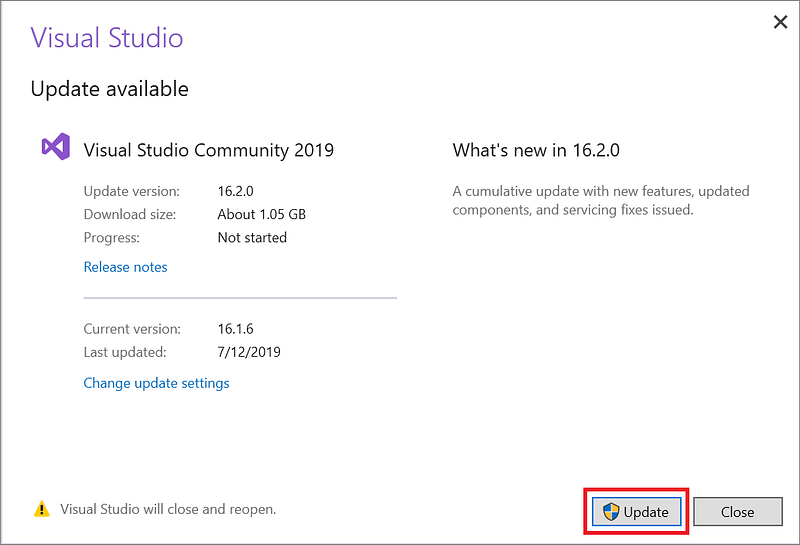
- In the Update available dialog box, choose Update. See Figure 3 for visual aids.
Part 2 — Create Blazor App using Visual Studio 2019
The easiest way to create a new project is to start from a project template for a particular type of application or website. A project template consists of a basic set of pre-generated code files, config files, assets, and settings.
When you first open Visual Studio, the start window appears, and from there, you can choose to create a new project.
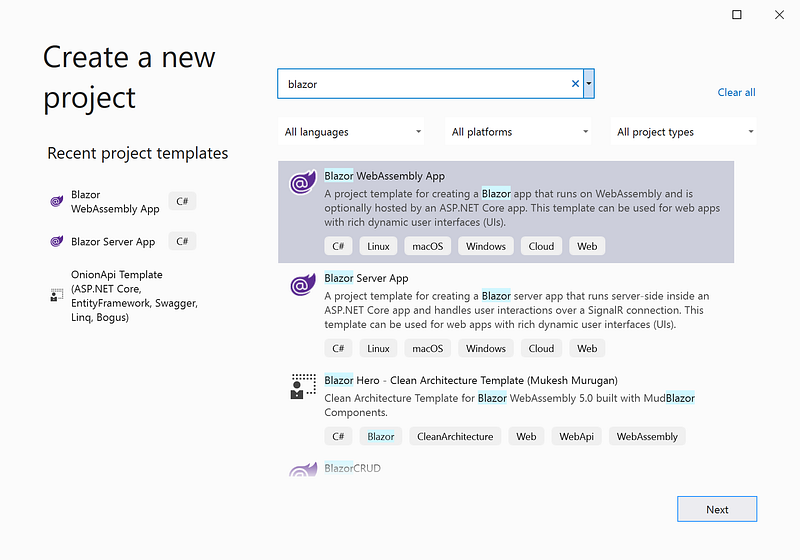
To create new Blazor Web Assembly App (see Figure 4 for visual aids)
- Open Visual Studio 2019
- Select Create a New Project
- Search for Blazor and select Blazor WebAssembly App
- Click Next
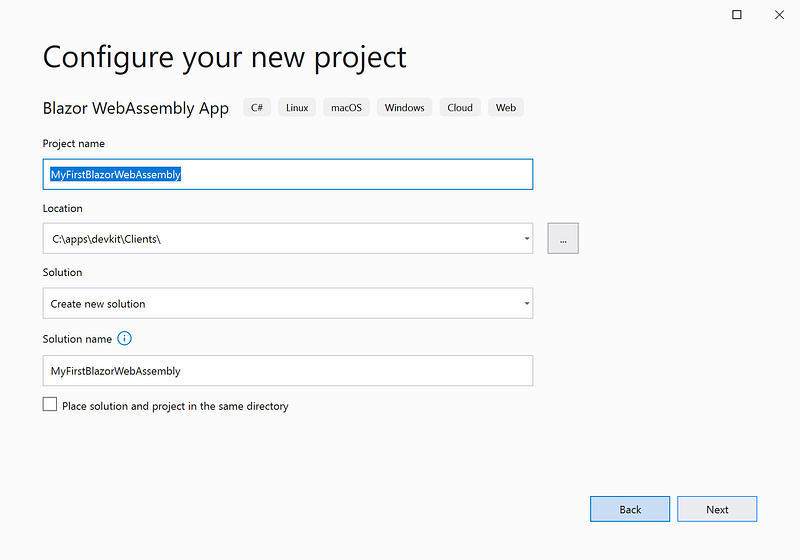
On Create your new project screen (see Figure 5 for visual aids)
- Enter project name MyFirstBlazorWebAssembly
- Enter location C:\apps\devkit\Clients
- Accept all the default values in the Solution and Solution name fields
- Click on Next
On the Additional information screen (see Figure 6 for visual aids)
- Select .NET 5.0 in the Target Framework
- Select Individual Accounts for the Authentication Type. This will enable authentication code (ex. Log in link to the menu bar)
- Optionally — If you want to create the app to behave like a desktop app, select the Progressive Web Application checkbox
- Optionally — If you want to create the app for deployment with a backend app to serve its files, select the ASP.NET Core hosted checkbox
- Click on Create

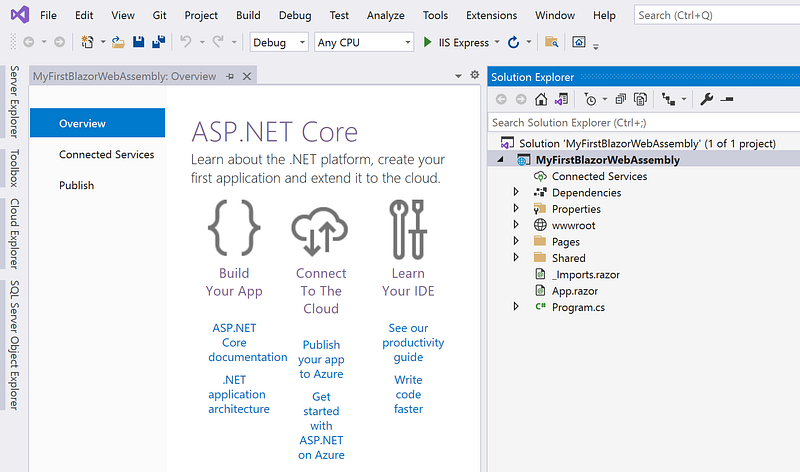
The new Blazor WebAssembly app is created and open in Visual Studio. See Figure 7 for visual aids.
To run the Blazor app, Hit F5. It opens the Blazor App in the web browser. See Figure 8 for visual aids.
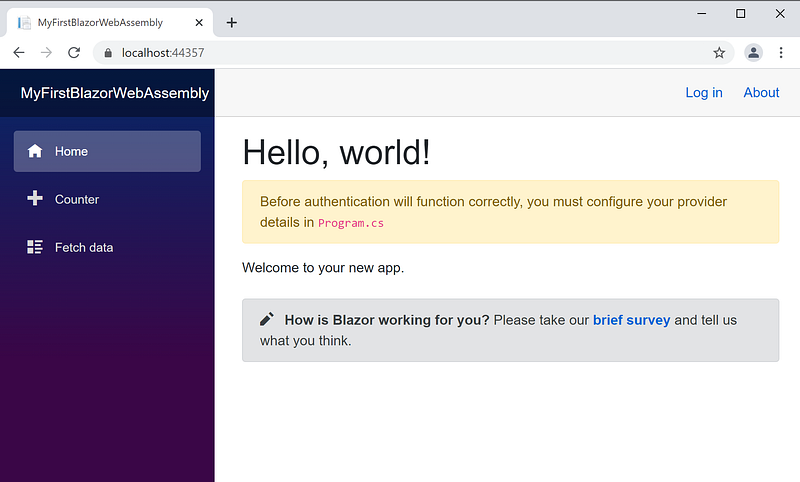
Congratulation!!! You have successfully created your first Blazor WebAssembly App.
Summary
In this tutorial, you learned how to create Blazor WebAssembly App. The source code in this tutorial is available on GitHub.
What can you learn next? When selecting the option Individual Accounts for Authentication Type (see Figure 6), the generated code includes the Log in option in the upper right corner of the app header (see Figure 8). However, when clicking on the link, it does not work. My next tutorial will address authentication and authorization.


