Create New .Net Core 7.0 API Project in Visual Studio 2022
In this post, I will walk you through the step-by-step process of creating a new .Net Core Web API project using .Net Core 7.0
Install Prerequisites
Before we begin, make sure you have the following prerequisites installed on your machine:
If you have installed all the above prerequisites, let’s start creating a new project
Creating a new .Net Core Web API project
Open the Visual Studio 2022 on your machine and from the get start section click on Create a New Project. Then you will see a screen as below.
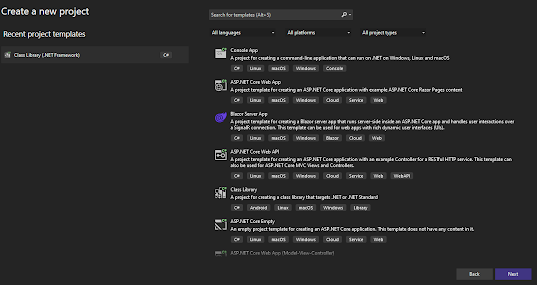
Create a New Project
From Search for templates type ASP.NET Core Web API select the template and click on Next

Select Project Template
From the next screen give the project name, select the project path, and give the solution name then click on the Next
In the next screen, you need to select the Framework. So select the framework as .Net Core 7.0 and click on the Create button.
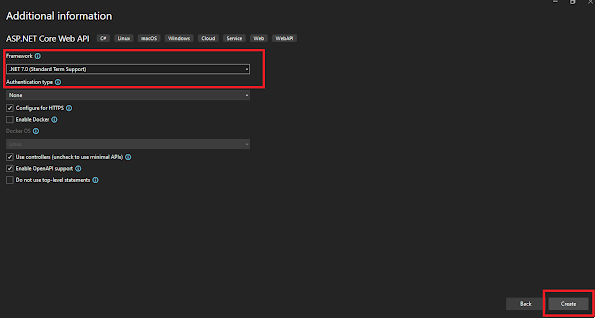
Additional Information
In the above screen make sure the Enable OpenAPI support is checked. That will enable the swagger api document support.
Now you have the .Net core Web API project as follows
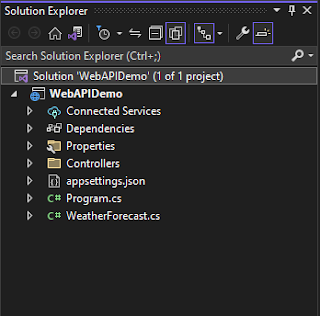
Basic Project Structure
You will see that Swashbuckle.AspNetCore package has been installed and swagger configuration has been added to the Program.cs by default
Before running the application will have a basic understanding of the files/folder in the project
Program.cs
The Program.cs file is a crucial part of the project structure. It serves as the entry point for the application and contains the Main method, which is the starting point for execution.
Entry Point:
The Program.cs file is where the application starts executing. When you run your Web API project, the Main method in Program.cs is the first code that gets executed. It sets up the environment and initializes the web host.
Web Host Configuration:
Within the Main method, you’ll typically find code that configures the web host for your application. The web host is responsible for managing the HTTP server, handling requests, and routing them to the appropriate controllers. It sets up the necessary services and middleware required to run the Web API project.
Appsettings.json
The appsettings.json file is a configuration file that stores various settings and configurations for the application. It provides a centralized location to manage and modify application-specific settings without modifying the code. It contains key-value pairs that represent different configuration settings for your Web API project. These settings can include database connection strings, logging configuration, third-party API keys, feature flags, and more. You can define and organize settings based on your application’s needs.
launchSettings.json
This file is used to configure how the application should be launched and debugged in different environments. It provides settings for various launch profiles, such as the development server, IIS Express, or custom external servers, and allows you to specify command-line arguments, environment variables, and other configuration options.
Controllers
In this folder, we can have the controllers that we need to create the API methods. You can see there is one controller as WeatherForeCastController.cs and also there is one API method as GetWeatherForecast
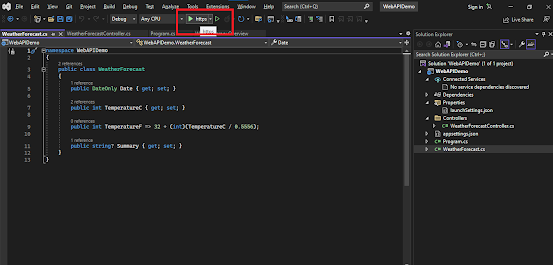
WeatherForecast.cs
This is a Model which is used in WeatherForeCastController.cs
Running the Project
Now let’s run the project.
You can click on the start icon as below screen or click the (ctrl+F5), then the swagger API document will open in the browser. Now you can try the default API using Swagger, CURL, or any other tool like Postman.
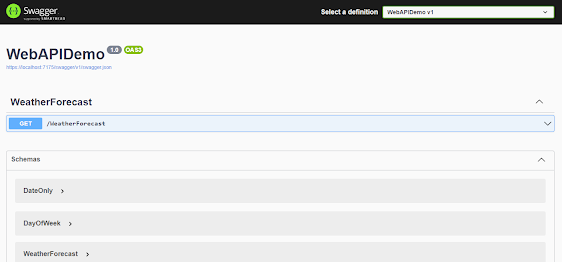
Swagger
Now we have successfully created a new .NET Core Web API project. In this blog post, we covered the essential steps, from installing the prerequisites to configuring the project. Now you can start building powerful and scalable APIs using the .NET Core framework. We will look into how to create new API endpoints in future posts. Happy coding!


